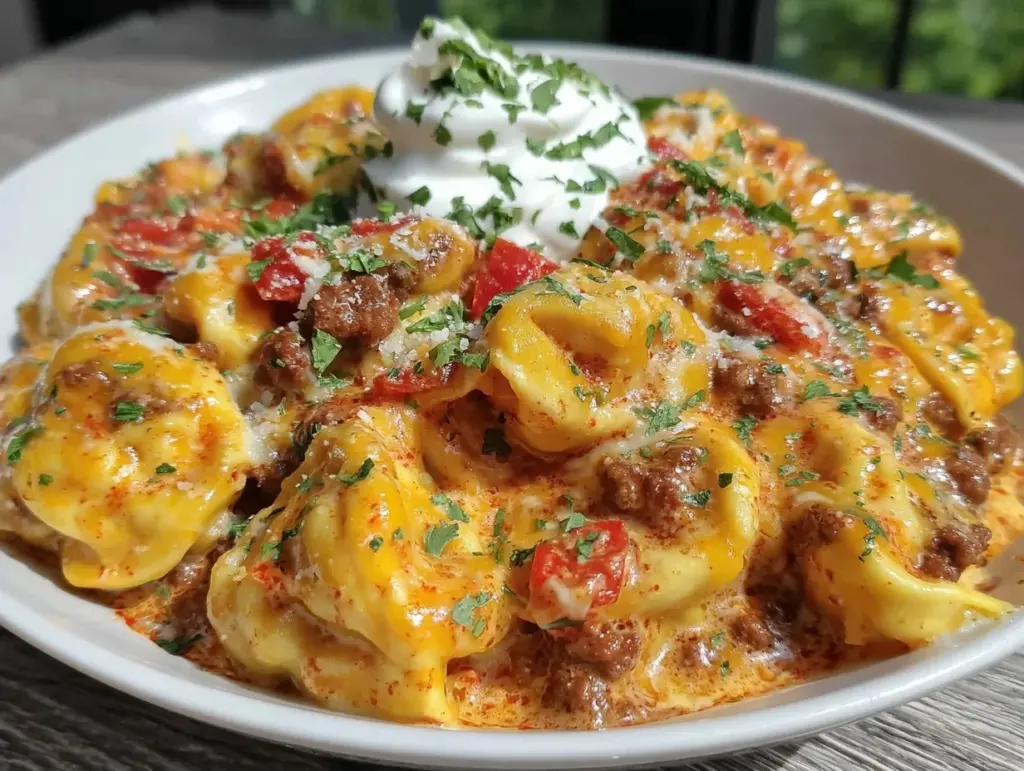
Picture this: you walk into the kitchen after a long day, and the air is instantly filled with the warm, spicy aroma of taco seasoning mingling with bubbling cheese. There’s a sizzle, a creamy richness that you can almost taste before your fork even hits the plate. That’s the magic of this Creamy Taco Tortellini Skillet—it’s the kind of meal that makes your whole house smell like a Tex-Mex restaurant (in the best possible way) and brings the family running before you even call them.
The first time I made this recipe, I was honestly just trying to clean out my fridge. You know those nights when you look at a pack of tortellini, a block of cheddar, and some leftover ground beef and think, “Let’s see what happens?” Well, what happened was a skillet of pure, cheesy comfort. I took one taste right out of the pan—couldn’t wait for a plate—and I just stood there in the kitchen, spoon in hand, eyes closed, grinning like a kid at the fair. It was the kind of moment where you pause, take a deep breath, and just smile because you know you’re onto something truly special.
Growing up, taco night was sacred. But somewhere along the way, I started craving the same flavors in new, fun ways. This Creamy Taco Tortellini Skillet is a little bit of nostalgia mixed with grown-up “let’s get dinner on the table fast” energy. My family couldn’t stop sneaking bites as it cooled—my youngest asked if we could have it again tomorrow (and the next day). Even my “I’m not a pasta person” spouse caved after one cheesy forkful. Honestly, I wish I’d figured this out years ago!
This one-pan wonder is a star at potlucks, a cozy weeknight dinner, or when you just need a little something extra to brighten up your dinner routine. It’s dangerously easy, endlessly customizable, and has become a staple for family gatherings, meal trains, and those nights when you want to impress with zero stress. Trust me—bookmark this Creamy Taco Tortellini Skillet recipe, because after one bite, you’ll be hooked too.
Why You’ll Love This Creamy Taco Tortellini Skillet Recipe
Let’s face it—everyone’s looking for that magical recipe that checks all the boxes: quick, simple, crowd-pleasing, and just a little bit addictive. After years of testing dinner ideas (and, let’s be honest, a few flops), this Creamy Taco Tortellini Skillet stands out as my top pick for a cheesy, one-pan dinner that never disappoints. Here’s why it’s a hit, every single time:
- Quick & Easy: Comes together in just about 30 minutes (yes, really!), so you’re not stuck at the stove all night.
- Simple Ingredients: Most of what you need is probably already in your fridge or pantry—no last-minute grocery runs or weird specialty items.
- Perfect for Busy Nights: Whether it’s a school night, a last-minute dinner with friends, or you just want to avoid washing a mountain of dishes—this one-pan wonder has you covered.
- Crowd-Pleaser: The creamy, cheesy sauce and bold taco flavors mean even picky eaters go back for seconds (and thirds, if they can sneak a forkful before you catch them).
- Unbelievably Delicious: The way the cheese melts into the sauce, coating every piece of pillowy tortellini, is pure comfort food magic. It’s the kind of flavor combo that makes you wonder why you didn’t try this sooner.
What makes this Creamy Taco Tortellini Skillet different from the rest? For starters, it’s not just taco pasta—it’s taco pasta with a luscious, creamy base that gets its silkiness from a blend of cream cheese and melty cheddar. I use a little trick: adding the tortellini directly to the skillet to soak up every drop of that taco-spiced sauce. No flavor wasted!
Whether you’re feeding a houseful of hungry teens or just want leftovers that actually taste better the next day, this dish fits the bill. You can swap out the protein, adjust the spice, or load on the toppings to make it your own. It’s comfort food, but just a little more fun—and way less work than making tacos from scratch. Honestly, it’s the kind of meal that makes you close your eyes and sigh after that first bite. It’s become my go-to for easy weeknights, potlucks, and those “what’s for dinner?” emergencies. If you love creamy, cheesy, taco-inspired anything, you’re going to fall hard for this skillet dinner.
What Ingredients You Will Need for Creamy Taco Tortellini Skillet
This recipe uses simple, wholesome ingredients to deliver bold taco flavor and creamy, cheesy goodness without fuss. Most of these are pantry staples, and there’s plenty of room for swaps if you’re missing something. Here’s what you’ll need:
- For the Skillet Base:
- 1 pound (450g) ground beef (or ground turkey or chicken for a lighter option)
- 1 small yellow onion, diced (about 1 cup)
- 2 cloves garlic, minced
- 1 packet (about 1 oz/28g) taco seasoning (I love the Trader Joe’s or Old El Paso brand, but homemade works too)
- 1 (10 oz/284g) can diced tomatoes with green chilies (Rotel works perfectly)
- 1/2 cup (120ml) beef or chicken broth (low sodium recommended)
- For the Creamy Sauce:
- 1 (8 oz/226g) block cream cheese, softened (full fat for best texture, but light is fine)
- 1 cup (120g) shredded cheddar cheese (or a Mexican blend for extra flavor)
- 1/2 cup (120ml) sour cream (Greek yogurt is a good swap for extra protein)
- For the Pasta:
- 1 (20 oz/565g) package refrigerated cheese tortellini (Barilla or Buitoni are my favorites; frozen works too, just add a couple extra minutes cook time)
- For Toppings (Optional but Highly Recommended):
- Chopped fresh cilantro
- Sliced green onions
- Diced tomatoes
- Sliced jalapeños (for a kick!)
- Extra shredded cheese
- Crushed tortilla chips (for crunch)
Ingredient Tips & Swaps:
- Swap the ground beef for ground turkey or even plant-based crumbles for a vegetarian twist.
- Don’t have tortellini? Small cheese ravioli or even rotini pasta will work (just cook separately and add at the end).
- Spice level is up to you: use hot taco seasoning or mild, and add extra jalapeños if you like it fiery.
- Gluten-free? Use gluten-free pasta and a taco seasoning without fillers.
- Dairy-free? Swap cream cheese and cheddar for your favorite dairy-free brands, and use coconut yogurt in place of sour cream.
Honestly, nothing here is set in stone—this Creamy Taco Tortellini Skillet is as flexible as you need it to be for your pantry, your tastebuds, and your family.
Equipment Needed for Creamy Taco Tortellini Skillet
This is one of those “no-fuss” recipes that doesn’t require fancy gadgets or specialty tools. Here’s what you’ll need:
- Large skillet (12-inch, preferably nonstick or cast iron): Key for fitting everything in one pan and making cleanup a breeze. I use my trusty Lodge cast iron—totally worth the investment and lasts forever.
- Wooden spoon or spatula: For browning the meat and stirring the sauce. Silicone spatulas are great for scraping up every cheesy bit.
- Chef’s knife and cutting board: For chopping onions, garlic, and toppings. Any sharp knife will do the trick.
- Measuring cups and spoons: Helpful for getting the right balance of broth and dairy.
- Colander (optional): Only if you need to drain excess fat from the beef or rinse pasta if you swap in something besides tortellini.
If you don’t have a big skillet, use a Dutch oven or a deep sauté pan. I’ve even made this in an electric skillet at a cabin getaway! For budget-friendly options, check thrift stores for cast iron pans or use a heavy-bottomed nonstick pan—just avoid anything too shallow, as this dish gets bubbly and creamy fast.
How to Make Creamy Taco Tortellini Skillet
-
Brown the Meat and Aromatics (5 minutes):
Heat your large skillet over medium-high heat. Add 1 pound (450g) ground beef and cook, breaking it up with a spoon, until just browned (about 3 minutes). If there’s excess grease, drain it off.
Add 1 small diced onion and 2 minced garlic cloves to the pan. Sauté until the onion is soft and fragrant, about 2 more minutes. You want the onions translucent, not browned. -
Spice It Up (1 minute):
Sprinkle in 1 packet taco seasoning. Stir well so all the beef and onions are coated. Let the spices toast for 30-60 seconds—this brings out the flavor. (Pro tip: Don’t skip this step! It makes the whole dish pop.) -
Add Tomatoes and Broth (2 minutes):
Pour in 1 can diced tomatoes with green chilies (juice and all) plus 1/2 cup (120ml) broth. Scrape up any browned bits from the bottom—this is where the flavor hides! Bring to a gentle simmer. -
Add Tortellini and Simmer (7-8 minutes):
Stir in 1 package (20 oz/565g) refrigerated cheese tortellini. Reduce heat to medium, cover, and cook for 7-8 minutes, stirring once halfway. Tortellini should be tender and cooked through, and the liquid mostly absorbed. (If using frozen tortellini, add 2 extra minutes and check for doneness.) -
Make It Creamy (2 minutes):
Lower the heat to low. Cube 1 block (8 oz/226g) cream cheese and add it to the skillet. Stir until melted and smooth. If you see little white flecks, keep stirring—they’ll blend in as the sauce thickens. -
Add Cheese and Sour Cream (1 minute):
Sprinkle in 1 cup (120g) shredded cheddar and 1/2 cup (120ml) sour cream. Gently stir until everything is creamy and combined. (Don’t boil or the sauce might split—just warm and melt.) -
Taste and Adjust (1 minute):
Give it a taste! Add salt, pepper, or more taco seasoning if your crew likes things extra bold. If the sauce is too thick, add a splash of broth. -
Top and Serve (immediate):
Sprinkle with all your favorite toppings—cilantro, green onions, jalapeños, extra cheese, or crushed chips. Serve straight from the skillet for that “family-style” comfort. (Let it cool for 3-5 minutes before digging in—the cheese will set up a bit and won’t burn your tongue.)
Troubleshooting Tips:
- If the sauce looks curdled, lower the heat and add a splash of milk—keep stirring, it’ll come back together.
- If your skillet is too full, stir gently so nothing spills. A deep pan is your friend here.
- If using dried tortellini, cook it separately and stir in with the cheese and cream cheese.
My best advice? Prep your toppings while the tortellini simmers—makes dinner feel extra special (and saves a scramble at the end!).
Cooking Tips & Techniques for the Best Creamy Taco Tortellini Skillet
After making this recipe more times than I can count (and burning my tongue more than once out of impatience), I’ve picked up a few tricks that guarantee a perfect skillet every time:
- Don’t Rush the Browning: Let your meat get a little golden before adding onions—it’s those browned bits that bring real depth of flavor.
- Toast Your Spices: Stirring in the taco seasoning before adding liquids brings out the oils and intensifies the aroma. It’s worth the extra 60 seconds, trust me.
- Control Your Heat: Once you add the dairy (cream cheese, cheddar, and sour cream), keep the heat low. High heat can make the sauce separate and look grainy. If you see this happening, just take it off the burner and stir like crazy (it usually smooths out!).
- Use Fresh Tortellini When Possible: It cooks up faster and has the best texture. If you’re using frozen, thaw a few minutes or add extra simmer time.
- Don’t Overcook the Tortellini: You want pillowy, tender pasta—not mush. Start testing at the 7-minute mark and go from there.
- Customize Texture: Like it saucier? Add an extra splash of broth before serving. Prefer a thicker, stick-to-your-ribs skillet? Let it sit for 5 minutes off heat; the sauce will thicken as it cools.
- Toppings Matter: The fresh bite of green onions or the crunch of crushed chips really makes this feel like taco night. Don’t skip them if you can help it!
- Double for a Crowd: This recipe can easily be doubled—just use a Dutch oven or the biggest skillet you own.
I’ve learned (the hard way) not to crank the heat at the end, and that a little patience pays off for velvety cheese sauce. And hey, if something goes wrong, cover it with more cheese—no one will complain!
Variations & Adaptations for Creamy Taco Tortellini Skillet
This recipe is like a blank canvas—feel free to make it your own! Here are my favorite spins on the classic:
- Low-Carb/Keto: Swap tortellini for cauliflower florets or zucchini noodles (just par-cook and add at the end). Use full-fat cream cheese and cheddar for the sauce.
- Vegetarian: Ditch the meat and add a can of drained black beans or lentils for protein. Use vegetable broth instead of beef/chicken broth.
- Spicy Southwest: Add a drained can of corn, a handful of black olives, or a chopped chipotle pepper for smoky heat. Top with pepper jack cheese.
- Chicken Fiesta: Use cooked, shredded chicken instead of ground beef (rotisserie works great!).
- Allergy-Friendly: For dairy-free, use your favorite vegan cheeses and coconut yogurt. For gluten-free, make sure to choose gluten-free pasta and taco seasoning.
Personally, I love making this with roasted poblano peppers and swapping half the cheddar for Monterey Jack cheese. You can also use whatever protein you have—ground pork, leftover steak, or even crumbled tofu for a meatless Monday. Don’t be afraid to mix in extra veggies or use up what’s in your fridge—it’s hard to mess this up!
Serving & Storage Suggestions
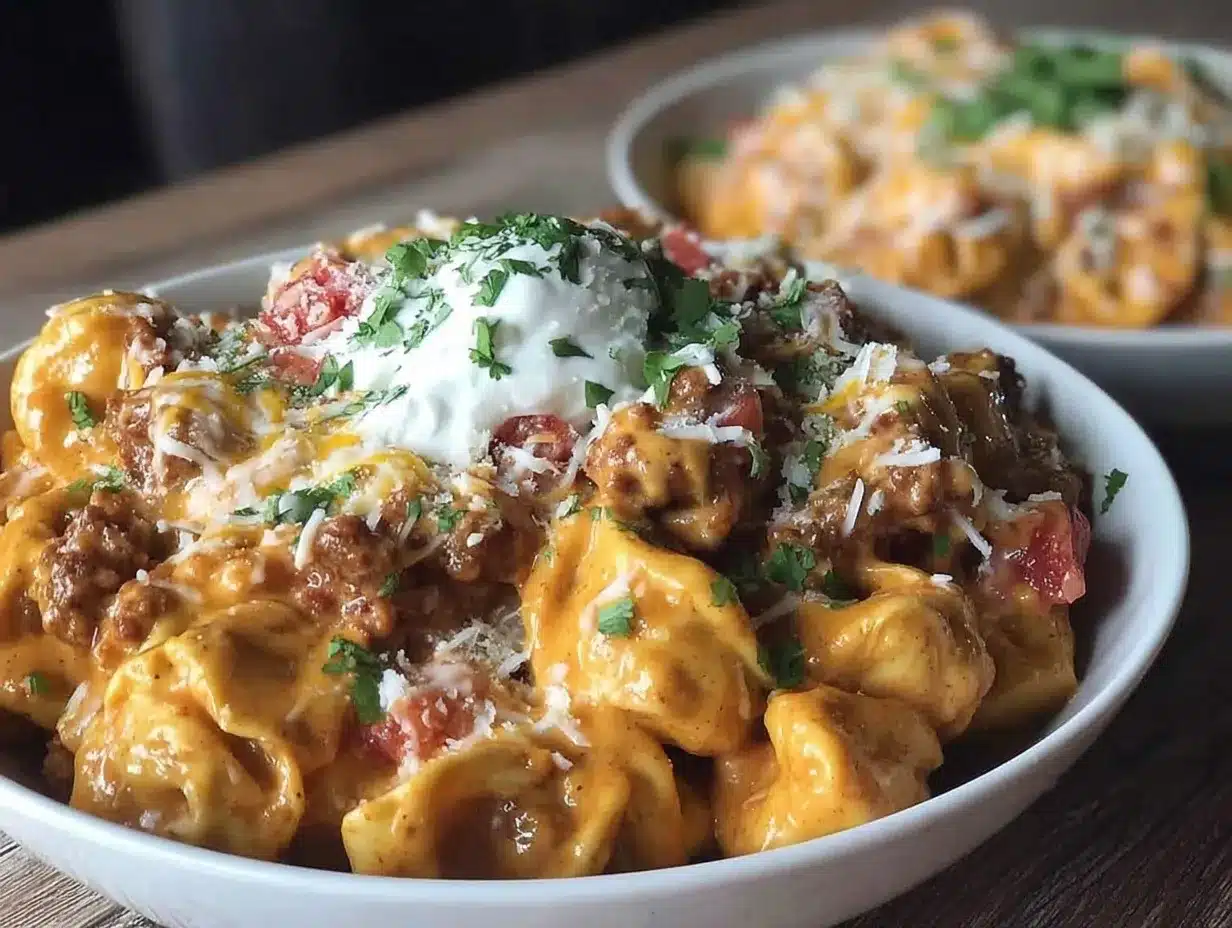
You’ll want to serve this Creamy Taco Tortellini Skillet piping hot, straight from the pan. I usually let it cool for 5 minutes so the sauce sets up a bit (and so nobody burns their mouth in their excitement!).
For presentation, sprinkle with lots of fresh cilantro, green onions, and a scattering of diced tomatoes or jalapeños. If you’re feeling festive, serve it with lime wedges, a dollop of sour cream, or a handful of tortilla chips for crunch.
This skillet is hearty enough to stand alone, but it pairs beautifully with a simple side salad, Mexican street corn, or a cold glass of iced tea. My kids love it with a side of guacamole or salsa for dipping.
Storage: Leftovers keep well! Store in an airtight container in the fridge for up to 3 days. The sauce thickens as it sits—just add a splash of broth or milk when reheating to loosen it up. Reheat gently on the stove or in the microwave (cover loosely to avoid splatters!).
While this dish is best fresh, you can freeze leftovers for up to 2 months. Just know that the texture of the pasta might get a little softer after thawing, but the flavor is still all there. It makes a fantastic lunch the next day—if there’s any left!
Nutritional Information & Benefits
Here’s a rough estimate per serving (assuming 6 servings):
- Calories: 550
- Protein: 28g
- Carbs: 48g
- Fat: 28g
- Fiber: 5g
This Creamy Taco Tortellini Skillet packs a solid protein punch thanks to the ground beef and cheese tortellini. The cheese and cream cheese lend calcium and a satisfying richness—perfect for busy nights when you need energy. If you use low-fat dairy or swap in Greek yogurt, you’ll trim some calories and add extra protein.
For those watching carbs, try the cauliflower variation. Gluten-free eaters can sub in their favorite GF pasta. Allergens to watch for: dairy, gluten, and eggs (in tortellini). My personal take? It’s a cozy, balanced meal when enjoyed with a side salad or steamed veggies. And sometimes, you just need that cheesy, creamy satisfaction!
Conclusion
So, why should you make this Creamy Taco Tortellini Skillet? Because it’s everything a one-pan dinner should be: fast, cheesy, packed with taco flavor, and totally irresistible. It’s the kind of meal that makes dinner feel special, even on a Tuesday night.
Don’t be afraid to tweak it—make it spicy, swap the protein, or add all your favorite taco toppings. The beauty of this skillet is how forgiving and fun it is.
Honestly, it’s become a family favorite (and the most requested meal when friends come over). If you try it, let me know how you make it your own! Drop a comment, share your twists, or tag me if you post it on Pinterest. Here’s to more cheesy, comforting dinners and happy bellies all around!
Frequently Asked Questions – Creamy Taco Tortellini Skillet
Can I use frozen tortellini instead of refrigerated?
Yes, you can! Just add about 2 extra minutes to the simmering time and check for doneness. The sauce may need a splash more broth if it thickens too much.
What can I use instead of ground beef?
Ground turkey, chicken, or even plant-based crumbles work great. Shredded rotisserie chicken is also a tasty shortcut if you have leftovers.
How can I make this dish spicier?
Use hot taco seasoning, add extra diced jalapeños, or stir in a spoonful of chipotle peppers in adobo sauce. You can also use pepper jack cheese for more kick.
Is this recipe gluten-free?
Not by default, since most tortellini contains wheat. To make it gluten-free, use gluten-free pasta and check your taco seasoning for hidden gluten ingredients.
Can I freeze leftovers?
Yes—just know the pasta may get a little softer after thawing. Store in an airtight container for up to 2 months and reheat with a splash of broth or milk for best results.
Pin This Recipe!

Creamy Taco Tortellini Skillet

This Creamy Taco Tortellini Skillet is a cheesy, one-pan Tex-Mex inspired dinner that comes together in about 30 minutes. It’s loaded with bold taco flavors, creamy sauce, and tender cheese tortellini for a comforting meal the whole family will love.
- Prep Time: 10 minutes
- Cook Time: 20 minutes
- Total Time: 30 minutes
- Yield: 6 servings 1x
- Category: Main Course
- Cuisine: Tex-Mex
Ingredients
- 1 pound ground beef (or ground turkey or chicken)
- 1 small yellow onion, diced (about 1 cup)
- 2 cloves garlic, minced
- 1 packet (about 1 oz) taco seasoning
- 1 (10 oz) can diced tomatoes with green chilies (such as Rotel)
- 1/2 cup beef or chicken broth (low sodium recommended)
- 1 (8 oz) block cream cheese, softened
- 1 cup shredded cheddar cheese (or Mexican blend)
- 1/2 cup sour cream (or Greek yogurt)
- 1 (20 oz) package refrigerated cheese tortellini (or frozen, add extra cook time)
- Optional toppings: chopped fresh cilantro, sliced green onions, diced tomatoes, sliced jalapeños, extra shredded cheese, crushed tortilla chips
Instructions
- Heat a large skillet over medium-high heat. Add ground beef and cook, breaking it up, until just browned (about 3 minutes). Drain excess grease if needed.
- Add diced onion and minced garlic. Sauté until onion is soft and translucent, about 2 more minutes.
- Sprinkle in taco seasoning and stir to coat the beef and onions. Toast spices for 30-60 seconds.
- Pour in diced tomatoes with green chilies (with juice) and broth. Scrape up any browned bits from the bottom and bring to a gentle simmer.
- Stir in cheese tortellini. Reduce heat to medium, cover, and cook for 7-8 minutes (9-10 minutes if using frozen), stirring once halfway, until tortellini is tender and liquid mostly absorbed.
- Lower heat to low. Add cubed cream cheese and stir until melted and smooth.
- Add shredded cheddar cheese and sour cream. Stir gently until creamy and combined. Do not boil.
- Taste and adjust seasoning with salt, pepper, or more taco seasoning if desired. Add a splash of broth if sauce is too thick.
- Top with desired toppings such as cilantro, green onions, jalapeños, extra cheese, or crushed chips. Serve straight from the skillet after cooling for 3-5 minutes.
Notes
For a vegetarian version, use plant-based crumbles or black beans and vegetable broth. For gluten-free, use GF pasta and taco seasoning. Use low-fat dairy or Greek yogurt for a lighter option. Customize with your favorite toppings and adjust spice level as desired. Leftovers keep well for 3 days in the fridge; add a splash of broth or milk when reheating.
Nutrition
- Serving Size: About 1/6 of recipe
- Calories: 550
- Sugar: 6
- Sodium: 1100
- Fat: 28
- Saturated Fat: 14
- Carbohydrates: 48
- Fiber: 5
- Protein: 28
Keywords: taco tortellini, creamy skillet, one-pan dinner, cheesy pasta, Tex-Mex, weeknight meal, ground beef, comfort food


