
Let me tell you, the moment the caramelized sugar crackled under my torch’s flame and I lifted the spoon to taste that first bite of this Crispy Crème Brûlée Torch Crack Dessert, I was hooked. Honestly, it’s that magical sound and the way the sugar shards shimmer in the light that instantly transport you to a cozy Parisian café. The first time I whipped up this treat, I was knee-high to a grasshopper in the kitchen, trying to recreate a fancy dessert I’d enjoyed on a rainy weekend. The kind of moment where you pause, take a deep breath, and just smile because you know you’re onto something truly special.
This recipe isn’t just about the crispy topping; it’s a pure, nostalgic comfort wrapped up in creamy custard and a delicate sugar crust that shatters with the slightest touch. My family couldn’t stop sneaking pieces off the cooling rack (and I can’t really blame them). It’s dangerously easy to make, too, which means it’s perfect for those last-minute sweet cravings or impressing guests without breaking a sweat. Whether you’re looking for a sweet treat to brighten up your Pinterest cookie board or a show-stopper for potlucks, this Crispy Crème Brûlée Torch Crack Dessert fits the bill.
I’ve tested this recipe multiple times (in the name of research, of course), and it’s become a staple for family gatherings, gifting, and those quiet evenings when you want comfort on a plate. You’re going to want to bookmark this one—it feels like a warm hug in every bite.
Why You’ll Love This Crispy Crème Brûlée Torch Crack Dessert Recipe
From my experience as a home baker who’s stumbled through many a burnt batch and underwhelming custard, I can tell you this recipe hits all the right notes. Here’s why it stands out:
- Quick & Easy: Comes together in under 40 minutes, perfect for busy weeknights or spontaneous dessert needs.
- Simple Ingredients: No fancy grocery trips; you likely already have eggs, cream, sugar, and vanilla in your pantry.
- Perfect for Entertaining: Great for dinner parties, holidays, or impressing that special someone with minimal fuss.
- Crowd-Pleaser: Kids and adults alike rave about the crunchy sugar topping paired with silky custard underneath.
- Unbelievably Delicious: The contrast of textures—a smooth, rich custard and a crackling sugar crust—is pure comfort food magic.
What makes this Crispy Crème Brûlée Torch Crack Dessert different from the rest? It’s all in the torching technique and the perfectly balanced custard. I blend the cream and vanilla just right to avoid any bitterness, and I swear by using a butane torch for that even, golden crackle that’s not too thick or fragile. This isn’t just another custard dessert; it’s the one you’ll close your eyes for after the first bite, savoring that perfect combination of sweet, creamy, and crispy.
Whether you’re aiming to impress guests without stress or just want a soul-soothing dessert for yourself, this recipe delivers every time.
What Ingredients You Will Need for This Crispy Crème Brûlée Torch Crack Dessert
This recipe uses simple, wholesome ingredients to deliver bold flavor and satisfying texture without the fuss. Most are pantry staples, making it easy to whip up whenever the craving strikes.
- Heavy cream (2 cups / 475 ml) – The rich base for that silky custard texture.
- Vanilla bean paste (1 tsp) – Offers a deep, natural vanilla flavor; you can substitute with 1 tsp vanilla extract if needed.
- Large egg yolks (6, room temperature) – Key for thickening the custard and adding richness.
- Granulated sugar (½ cup / 100 g) – Divided between custard sweetness and the torch crack topping.
- Sea salt (a pinch) – Just a touch to balance sweetness and enhance flavor.
Optional:
- Orange zest (½ tsp) – For a subtle citrus twist if you want to add a seasonal flair.
- Almond extract (few drops) – For those who love a nutty undertone.
I recommend using a trusted brand like Organic Valley for cream to get a fuller mouthfeel, and if you can find small-curd vanilla bean paste, it really amps up the flavor. If dairy is a concern, swap heavy cream for full-fat coconut milk, but the texture will be a bit different—still delicious, though!
Equipment Needed
- Ramekins (4 to 6, depending on size) – Classic for individual servings; I like 6 oz (180 ml) size for perfect portions.
- Kitchen torch – A butane torch is your best bet for even caramelization; cheap options work fine but avoid cheap lighters.
- Mixing bowls – For whisking eggs and cream separately.
- Whisk and spatula – Whisk for blending, spatula for folding ingredients gently.
- Fine mesh sieve – To strain custard for smoothness, trust me, it makes a difference.
- Baking dish or roasting pan – For water bath during baking.
- Measuring cups and spoons – Precision is key for custard consistency.
If you don’t have ramekins, small oven-safe glass jars or ceramic bowls can work. When torching, do keep a fireproof surface handy and maintain a steady hand to avoid uneven caramel spots. I learned the hard way that rushing the torching step results in burnt sugar shards that taste bitter—patience pays off here!
Preparation Method
- Preheat your oven to 325°F (160°C). Place a kettle of water to boil for the water bath while you prepare the custard.
- Warm the cream and vanilla. In a small saucepan, gently heat the heavy cream and vanilla bean paste over medium heat until just simmering—not boiling. You should see steam rising and tiny bubbles around the edge (about 5 minutes). Remove from heat.
- Whisk the egg yolks and sugar. In a mixing bowl, whisk together the egg yolks, half of the sugar (¼ cup / 50 g), and a pinch of sea salt until the mixture is pale and slightly thickened (about 2-3 minutes). This step is crucial to avoid curdling later.
- Temper the eggs. Slowly pour the warm cream into the egg mixture while whisking constantly. This prevents the eggs from scrambling by gradually raising their temperature.
- Strain the custard. Pour the mixture through a fine mesh sieve into a clean bowl to catch any cooked egg bits. This guarantees a smooth texture.
- Fill ramekins. Divide the custard evenly among your ramekins (about 6 oz / 180 ml each). Place ramekins in your baking dish.
- Prepare the water bath. Carefully pour boiling water into the baking dish until it reaches halfway up the sides of the ramekins. This gentle, moist heat cooks the custard evenly.
- Bake. Place the pan in the oven and bake for 35-40 minutes until the custard is set but still slightly jiggly in the center. You can test by gently shaking the pan.
- Cool and chill. Remove ramekins from water bath, cool to room temperature, then refrigerate for at least 2 hours or overnight. This resting time is essential for the custard to firm up and flavors to meld.
- Caramelize the sugar topping. Just before serving, sprinkle the remaining sugar (¼ cup / 50 g) evenly over each custard. Using your kitchen torch, carefully melt and caramelize the sugar until it forms a crisp, golden crust. Let it cool for a minute until it hardens into that signature crack.
Pro tip: When torching, hold the flame about 2 inches above the sugar and move it in slow circles to prevent burning. You’ll know it’s perfect when the sugar bubbles and turns a rich amber color.
Cooking Tips & Techniques
Getting that perfect crack on your Crème Brûlée can be tricky, but here’s what I’ve learned from countless attempts:
- Use room temperature eggs. Cold eggs can cause uneven cooking and curdling.
- Don’t rush the water bath. The hot water ensures gentle, even heat, preventing overcooked edges and undercooked centers.
- Strain your custard. It’s worth the extra step for silky smoothness—no one wants lumpy custard!
- Chill thoroughly. The custard needs to be cold before torching; otherwise, the sugar won’t crack properly.
- Practice your torch technique. Too close and the sugar burns; too far and it won’t caramelize evenly. Slow, steady movements win every time.
One time, I got overconfident and blasted the sugar too long, ending up with bitter burnt spots. Learned my lesson! Another tip: use a spoon to gently press the caramelized sugar if some parts don’t crack on the first try. It’s oddly satisfying.
Variations & Adaptations
This Crispy Crème Brûlée Torch Crack Dessert is wonderfully adaptable:
- Flavor twists: Try infusing your cream with lavender, cinnamon sticks, or coffee beans for a unique spin. Just strain before mixing with eggs.
- Dietary swaps: Use coconut cream and aquafaba for a dairy-free, vegan version. The texture shifts a bit but stays delightful.
- Seasonal toppings: Add a sprinkle of crushed pistachios or freeze-dried raspberries on top before torching for extra crunch and color.
- Cooking methods: If you don’t have a torch, try broiling the sugar topping for 1-2 minutes, watching carefully to prevent burning.
I once added a layer of crushed shortbread cookies at the bottom before pouring the custard. It was an unexpected texture surprise that my family loved! Feel free to mix and match to suit your taste buds.
Serving & Storage Suggestions
This dessert is best served chilled with that crisp sugar topping freshly torched. I love presenting it with a sprig of fresh mint or a few fresh berries to brighten up the plate. It pairs beautifully with a cup of strong espresso or a glass of dessert wine for a little indulgence.
Store any leftovers covered in the fridge for up to 3 days. The sugar crust may soften slightly over time, but you can simply torch it again before serving. Avoid freezing, as the custard texture changes unfavorably.
Flavors actually deepen after a night in the fridge, so if you can wait, overnight chilling rewards you with richer taste and creamier texture.
Nutritional Information & Benefits
Each serving of this Crispy Crème Brûlée Torch Crack Dessert offers approximately:
| Calories | Fat | Carbohydrates | Protein |
|---|---|---|---|
| 350 kcal | 28 g | 22 g | 6 g |
Thanks to the heavy cream and egg yolks, this dessert is rich in healthy fats and protein, providing sustained energy. Vanilla bean paste adds antioxidants, while the custard’s moderate sugar content keeps it a treat rather than a sugar bomb. This recipe is naturally gluten-free, making it a great option for those avoiding wheat.
If you’re watching carbs, consider reducing sugar slightly or trying a natural sweetener alternative, though results may vary.
Conclusion
This Crispy Crème Brûlée Torch Crack Dessert is a treasure that’s easy to make and impossible to resist. It’s the kind of recipe that turns simple ingredients into a memorable, soul-soothing experience. Honestly, I love how it brings people together—whether it’s a family gathering or a quiet night in.
Feel free to customize it with your favorite flavors or toppings. Don’t be shy to experiment—you might just find your signature crack dessert variation!
If you make this recipe, I’d love to hear how it turned out for you. Share your thoughts, adaptations, or any tips you picked up along the way. Now, go ahead and treat yourself to this crispy, creamy delight—you deserve it!
Frequently Asked Questions about Crispy Crème Brûlée Torch Crack Dessert
Q1: Can I make the custard ahead of time?
Absolutely! The custard can be baked and refrigerated up to 2 days in advance. Just torch the sugar topping right before serving for the best crack.
Q2: What if I don’t have a kitchen torch?
You can use your oven’s broiler to caramelize the sugar. Place the ramekins under the broiler for 1-2 minutes, watching carefully to avoid burning.
Q3: Why did my sugar topping not crack?
Make sure your custard is well chilled and use an even layer of sugar. Also, keep the torch about 2 inches away and move slowly to caramelize without burning.
Q4: Can I use milk instead of heavy cream?
Heavy cream is key for that rich texture. Milk will make the custard thinner and less creamy, so it’s not recommended.
Q5: Is this dessert gluten-free?
Yes, this recipe is naturally gluten-free as it uses no flour or gluten-containing ingredients.
Pin This Recipe!

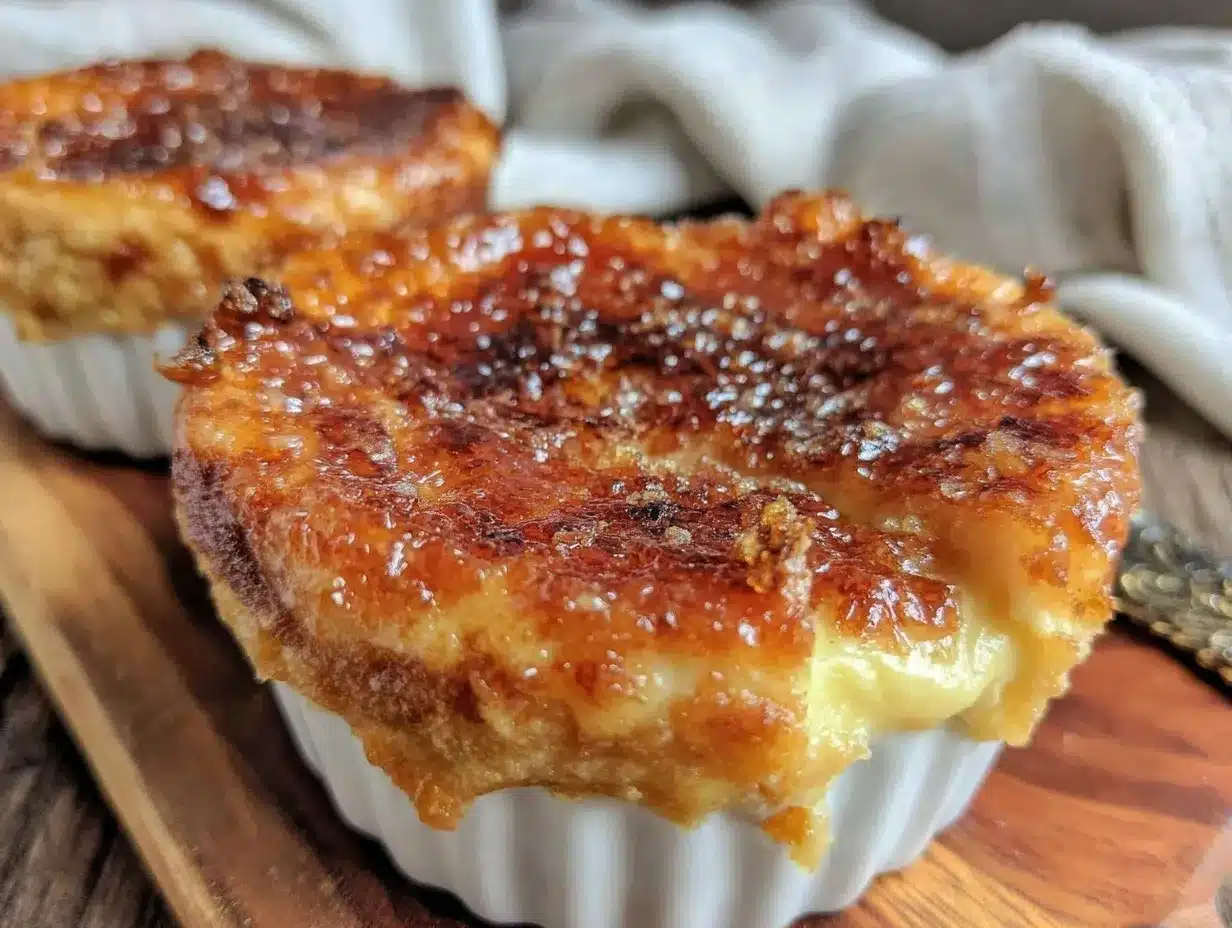
Crispy Crème Brûlée Torch Crack Dessert

A nostalgic comfort dessert featuring a silky custard base topped with a delicate, crackling caramelized sugar crust, perfect for impressing guests or satisfying sweet cravings.
- Prep Time: 15 minutes
- Cook Time: 40 minutes
- Total Time: 2 hours 55 minutes
- Yield: 4 to 6 servings 1x
- Category: Dessert
- Cuisine: French
Ingredients
- 2 cups (475 ml) heavy cream
- 1 tsp vanilla bean paste (or 1 tsp vanilla extract)
- 6 large egg yolks, room temperature
- ½ cup (100 g) granulated sugar, divided
- Pinch of sea salt
- Optional: ½ tsp orange zest
- Optional: few drops almond extract
Instructions
- Preheat your oven to 325°F (160°C). Place a kettle of water to boil for the water bath.
- Warm the cream and vanilla bean paste in a small saucepan over medium heat until just simmering (about 5 minutes). Remove from heat.
- Whisk the egg yolks, half of the sugar (¼ cup / 50 g), and a pinch of sea salt in a mixing bowl until pale and slightly thickened (2-3 minutes).
- Slowly pour the warm cream into the egg mixture while whisking constantly to temper the eggs.
- Strain the custard through a fine mesh sieve into a clean bowl.
- Divide the custard evenly among 4 to 6 ramekins (about 6 oz / 180 ml each) and place them in a baking dish.
- Pour boiling water into the baking dish until it reaches halfway up the sides of the ramekins.
- Bake for 35-40 minutes until custard is set but slightly jiggly in the center.
- Remove ramekins from water bath, cool to room temperature, then refrigerate for at least 2 hours or overnight.
- Before serving, sprinkle the remaining sugar (¼ cup / 50 g) evenly over each custard.
- Use a kitchen torch held about 2 inches above the sugar to caramelize it in slow circles until a crisp, golden crust forms.
- Let the sugar crust cool and harden for a minute before serving.
Notes
Use room temperature eggs to avoid curdling. Chill custard thoroughly before torching for best crack. Hold torch about 2 inches above sugar and move slowly to prevent burning. If no torch, use oven broiler carefully for 1-2 minutes. Straining custard ensures smooth texture.
Nutrition
- Serving Size: About 6 oz (180 ml)
- Calories: 350
- Fat: 28
- Carbohydrates: 22
- Protein: 6
Keywords: Crème Brûlée, dessert, custard, caramelized sugar, torch, easy recipe, homemade dessert, creamy, crispy topping, French dessert


