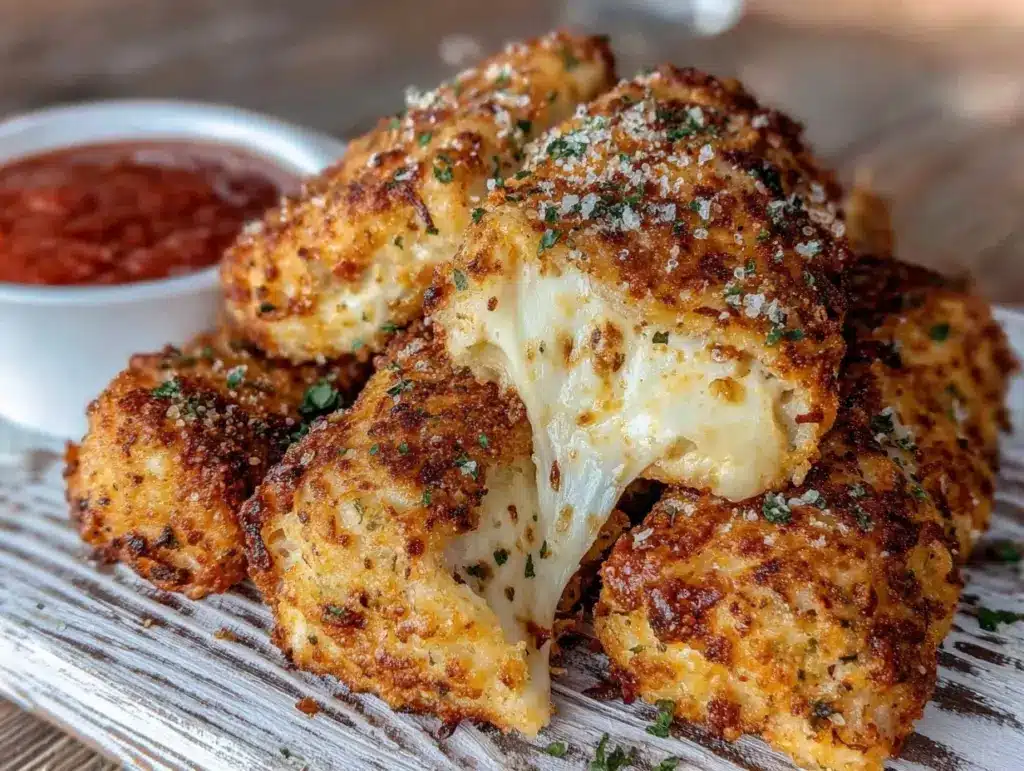
The sharp aroma of freshly fried breadcrumbs and gooey mozzarella wafting through my kitchen is one of those instant mood-lifters—honestly, it’s almost unfair how good it smells. Imagine biting into a golden, crispy shell, only to have stretchy, melty cheese dance across your taste buds. The crunch! The pull! (Every time I make these, I end up grinning like a fool.)
The first time I whipped up Crispy Cupid’s Arrow Cheese Sticks with Stretchy Mozzarella, it was on a chilly February evening. I wanted something fun for my kids—something that felt festive for Valentine’s Day but didn’t require rolling out sugar cookies or piping frosting for hours. I remember pausing after my first bite, cheese trailing down like a cartoon, and thinking: “Why did I wait so long to try this?!” It was the kind of moment where you pause, take a deep breath, and just smile because you know you’re onto something truly special.
There’s a family legend about mozzarella sticks disappearing faster than socks in the laundry. I can’t count the times I’ve caught my husband sneaking “just one more” from the cooling rack (he’s got a talent for stealth snacking, I’ll give him that). My kids, meanwhile, love dunking them in marinara—if the cheese stretch is long enough to play tug-of-war, that’s a bonus. These cheese sticks are dangerously easy to make and have become our go-to for parties, movie nights, and, let’s face it, boredom-busting snacks. They brighten up a Pinterest board with their golden crunch and ribbon-like cheese pulls. I’ve tested this recipe more times than I’d admit “in the name of research, of course,” and now it’s a staple for family gatherings and gifting to friends.
If you’re craving pure, nostalgic comfort in a snack that feels like a warm hug, Crispy Cupid’s Arrow Cheese Sticks with Stretchy Mozzarella are your ticket. You’re going to want to bookmark this one—trust me.
Why You’ll Love This Recipe
I’ve made these cheese sticks so many times, I could probably do it blindfolded. Years of trial and error (and a few cheese explosions) mean this recipe is dialed in for real-life kitchens. Here’s why it’s a keeper:
- Quick & Easy: Ready in under 30 minutes—perfect for those last-minute snack attacks or when unexpected guests drop by.
- Simple Ingredients: No wild goose chases at the grocery store; you probably have most of what you need already. Pantry staples keep things practical.
- Perfect for Any Occasion: Great for Valentine’s Day (hello, Cupid’s Arrow!), birthday parties, after-school snacks, or cozy movie nights.
- Crowd-Pleaser: Kids love the cheese stretch, adults love the crunch. My family always fights over the last stick (honestly, I just make double batches now).
- Unbelievably Delicious: The combo of crispy exterior and soft, gooey mozzarella is next-level comfort food. With each bite, you get a flavor that’s both familiar and exciting.
This isn’t just another cheese stick recipe. The secret? Double-breading for extra crunch and freezing the sticks before frying (it keeps the cheese inside, where it belongs!). Plus, shaping them like “arrows” gives a playful twist for festive occasions. The seasoning is spot-on—just enough garlic and Italian herbs to make you swoon, but not so much that it overpowers the star: stretchy mozzarella.
This recipe is the kind that makes you close your eyes after the first bite. It’s comfort food made a little cuter, a little crunchier, and a whole lot faster. Perfect for impressing guests without breaking a sweat, or just turning an ordinary snack into something memorable. You’ll want to keep this on standby for when the craving hits.
What Ingredients You Will Need
This recipe uses simple, wholesome ingredients to deliver bold flavor and satisfying texture without the fuss. Most are things you’d find in any kitchen, and there’s plenty of room to tweak based on what you have.
- For the Cheese Sticks:
- 16 oz (450 g) block of low-moisture mozzarella cheese, cut into 3/4-inch thick sticks (about 4 inches long)
- 1 cup (120 g) all-purpose flour (for dredging)
- 2 large eggs, lightly beaten
- 2 tbsp (30 ml) milk (to help thin the eggs)
- 2 cups (120 g) seasoned breadcrumbs (Italian-style preferred for extra flavor)
- 1/2 cup (50 g) grated Parmesan cheese (adds richness and extra crunch)
- 1 tsp garlic powder (for savory depth)
- 1 tsp dried Italian herbs (oregano, basil, thyme—use what you have)
- 1/2 tsp salt
- 1/2 tsp black pepper
- Vegetable oil, for frying (canola or sunflower work great)
- For the Arrow “Hearts” (Optional, for Valentine’s flair):
- Small red bell peppers, cut into heart shapes (for garnish)
- Fresh parsley or basil (for a pop of green)
- For Dipping:
- 1 cup (240 ml) marinara sauce (store-bought or homemade)
- Ranch dressing (if you prefer a creamy dip)
Ingredient Tips: For best results, use low-moisture mozzarella—it stretches better and doesn’t leak as much during frying. If you’re gluten-free, swap the flour and breadcrumbs for gluten-free versions (I’ve had good luck with Schär for breadcrumbs). Parmesan can be swapped for nutritional yeast if you need a dairy-free kick. And if you want to add a spicy note, a pinch of cayenne does wonders!
Substitutions: Dairy-free mozzarella works fine (I like Violife for stretchiness). You can skip the Parmesan for a lighter bite, or swap in panko for extra crunch. In summer, try adding a sprinkle of lemon zest to the breadcrumb mix for a fresh twist.
Trusted Brands: I reach for Galbani or Belgioioso for mozzarella because they melt so consistently. For breadcrumbs, Progresso’s Italian Style is my go-to.
Equipment Needed
You don’t need a fancy kitchen to make Crispy Cupid’s Arrow Cheese Sticks with Stretchy Mozzarella, promise. Here’s what I use every time:
- Heavy-bottomed pot or deep fryer: For frying the cheese sticks. A Dutch oven works wonders for even heat.
- Slotted spoon or spider strainer: To safely retrieve sticks from hot oil.
- Baking sheet and parchment paper: For chilling and prepping the sticks before frying. (Prevents sticking, trust me!)
- Three shallow bowls: For flour, egg wash, and breadcrumb dredging.
- Sharp knife: For cutting cheese sticks evenly.
- Paper towels: For draining excess oil.
- Kitchen thermometer: Optional, but helpful to keep oil at 350°F (175°C).
- Small cutters: If making arrow “hearts” from bell peppers.
No deep fryer? A heavy skillet with 1 inch of oil works fine. I’ve used everything from old soup pots to air fryers (with tweaks). Clean-up tip: Let oil cool, strain out crumbs, and store for reuse if you want to be thrifty. Budget hack: Check thrift shops for spider strainers—they’re underrated!
Preparation Method

- Prep the Mozzarella: Cut the mozzarella block into sticks about 3/4-inch (2 cm) thick and 4 inches (10 cm) long. You should get roughly 16 sticks. Pat dry with paper towels (removes extra moisture—this keeps cheese from bursting out during frying!).
- Prepare the Dredging Stations: Set out three shallow bowls. In the first, place 1 cup (120 g) flour. In the second, whisk together 2 eggs and 2 tbsp (30 ml) milk. In the third, combine 2 cups (120 g) breadcrumbs, 1/2 cup (50 g) Parmesan, 1 tsp garlic powder, 1 tsp Italian herbs, 1/2 tsp salt, and 1/2 tsp pepper.
- Coat the Cheese Sticks: Roll each mozzarella stick in flour, tapping off excess. Dip into egg wash, then coat generously in breadcrumb mixture. For extra crunch, repeat the egg wash and breadcrumb steps (double breading!).
- Chill the Sticks: Arrange coated sticks on a baking sheet lined with parchment. Freeze for at least 30 minutes. (Don’t skip this step—frozen sticks hold their shape and keep cheese from leaking.)
- Heat the Oil: Pour vegetable oil into a heavy-bottomed pot to a depth of about 1 inch (2.5 cm). Heat to 350°F (175°C). If you don’t have a thermometer, drop a breadcrumb in—if it sizzles and browns quickly, you’re good.
- Fry the Cheese Sticks: Working in batches, carefully lower 3-4 sticks into hot oil. Fry for 1–2 minutes, turning with a slotted spoon, until deep golden brown. (If cheese starts to ooze, remove right away.)
- Drain and Cool: Transfer fried sticks to paper towels. Let cool for a minute—this helps the cheese set a bit, but they’ll still be perfectly stretchy inside.
- Make Arrow “Hearts” (Optional): Slice red bell peppers into small heart shapes. Skewer each cheese stick with a pepper heart and a sprig of parsley or basil for that Cupid’s Arrow look.
- Serve: Arrange sticks on a platter with marinara sauce (or ranch dressing) for dipping. Enjoy immediately—cheese stretch is best fresh!
Prep Notes: If you’re making a big batch, keep fried sticks warm in a 250°F (120°C) oven. Watch the oil temp—too hot and the outside burns before the cheese melts, too cool and the sticks get soggy. If your breadcrumbs clump, toss with a fork to loosen before dredging. Efficiency tip: Set up a “breading station” assembly line; it’s a lifesaver.
Troubleshooting: Cheese leaking out? Try freezing longer. Breadcrumbs falling off? Make sure each stick is dry and egged well. Oil bubbling too much? Lower the heat a notch.
Cooking Tips & Techniques
Let’s face it, cheese sticks can be finicky. Here’s my bag of tricks for getting that perfect crunch and stretch:
- Freeze Before Frying: This is the golden rule. If you skip it, expect a cheese volcano in your oil!
- Double Breading: For extra crunch, dip in egg and breadcrumb mix twice. You know what? It’s worth the extra minute.
- Don’t Overcrowd: Fry in small batches so the temperature stays steady. Too many sticks = soggy results.
- Breadcrumb Mixture: Mix in Parmesan for flavor and crispiness. If your mixture gets clumpy, fluff with a fork.
- Watch the Oil Temp: 350°F (175°C) is the sweet spot. Too hot, and the outside burns before the mozzarella melts.
- Turn Carefully: Use a spider strainer or slotted spoon to flip sticks gently. (I’ve lost a few to rough handling—nothing sadder than a broken cheese stick.)
- Don’t Wait Too Long to Serve: Cheese sticks are best fresh. If you must hold them, a low oven keeps them stretchy.
I’ve had my share of fails—like the time I rushed the freezing step, and ended up with empty shells and cheesy puddles. Lesson learned! Multitasking tip: Set up your breading station while the oil heats, so you’re not scrambling at the last second. For consistent results, use sticks of similar size—uneven pieces cook unevenly.
And if you ever wonder why restaurant cheese sticks taste so good, it’s usually the double breading and that magical freeze before frying. Now you know!
Variations & Adaptations
One of my favorite things about Crispy Cupid’s Arrow Cheese Sticks with Stretchy Mozzarella is how easily you can tweak them. Here are a few tried-and-true adaptations:
- Gluten-Free: Use gluten-free flour and breadcrumbs (I swear by Schär or Aleia’s). Still crispy, still stretchy.
- Spicy Kick: Add 1/2 tsp cayenne or smoked paprika to the breadcrumb mix. Or, stir chopped jalapeños into the cheese before breading.
- Air Fryer Method: Lay frozen, breaded sticks on a greased air fryer basket. Spray lightly with oil and cook at 400°F (205°C) for 6–8 minutes, flipping halfway. They’re slightly less golden but way less mess.
- Seasonal Twists: In summer, add lemon zest to the breadcrumbs, or serve with pesto instead of marinara. For holidays, swap bell pepper hearts for thin apple slices or even beet hearts for extra color.
- Dairy-Free: Use a plant-based mozzarella (Violife works well). Skip Parmesan, or replace with nutritional yeast for cheesy flavor.
- My Go-To Variation: I sometimes mix a little smoked gouda with mozzarella for deeper flavor. The stretch isn’t quite as dramatic, but the taste is off the charts.
You can also experiment with different herbs and spices, or swap in panko for a lighter crunch. If allergies are a concern, use egg replacers and dairy-free cheese—just keep an eye on melting times, as vegan cheeses can behave differently.
Serving & Storage Suggestions
Crispy Cupid’s Arrow Cheese Sticks are best served hot and fresh, when the cheese is at peak stretchiness. Here’s how I like to present them:
- Serving: Pile onto a platter with marinara in the center for dipping. If you’ve made the arrow “hearts,” skewer each stick for extra flair—kids love this!
- Temperature: Serve straight from the fryer, or keep warm in a 250°F (120°C) oven for up to 30 minutes. If you let them cool, the cheese firms up but they’re still tasty.
- Pairings: Goes great with a crisp salad, sparkling lemonade, or a big bowl of tomato soup. For grown-ups, a chilled glass of rosé or pilsner is just right.
- Storage: Leftovers (if you have any!) can be refrigerated in an airtight container for up to 3 days. Reheat in the oven at 350°F (175°C) for 8–10 minutes—skip the microwave, or you’ll get rubbery cheese.
- Freezing: Freeze uncooked, breaded sticks on a tray, then transfer to a freezer bag. Fry straight from frozen—add an extra minute to cooking time.
- Flavor Notes: The herbs deepen overnight, and the crunch softens a tad, but they’re still delicious. Marinara flavors meld beautifully after a chill.
Nutritional Information & Benefits
Each serving (about 2 cheese sticks) delivers roughly:
- Calories: 210
- Protein: 11g
- Fat: 13g
- Carbohydrates: 14g
- Calcium: 20% DV
Key Benefits: Mozzarella provides a good source of protein and calcium, supporting bone health and muscle function. Using low-moisture cheese keeps saturated fat lower than its full-fat cousins. Breadcrumbs add energy and fiber (especially if you use whole wheat or gluten-free versions).
Dietary Notes: This recipe can be adapted for gluten-free and dairy-free diets. Be aware of allergens: dairy, wheat, and eggs are all present in the classic version. From my perspective, these cheese sticks are a satisfying snack that feels indulgent but can fit into a balanced diet when enjoyed in moderation.
Conclusion
If you’re searching for a snack that’s fun, comforting, and just a little bit playful, Crispy Cupid’s Arrow Cheese Sticks with Stretchy Mozzarella are a must-try. They’re easy enough for busy weeknights, cute enough for parties, and always a hit with anyone who loves cheese (and let’s be honest, who doesn’t?). This recipe has earned a permanent spot in my kitchen—and my heart—because the joy on my family’s faces is worth every crispy, stretchy bite.
Feel free to make it your own—swap ingredients, play with flavors, and don’t worry about perfection. The best cheese sticks are the ones made with love (and maybe a little extra cheese). Let me know your twists in the comments, or tag me with your creations. Sharing food is sharing happiness, so go ahead and spread the cheesy joy!
Wishing you lots of crunch, stretch, and smiles—happy snacking!
Frequently Asked Questions
Can I make Crispy Cupid’s Arrow Cheese Sticks ahead of time?
Yes, you can bread and freeze the sticks up to a week in advance. Fry straight from frozen for best results.
What is the best cheese to use for stretchy mozzarella sticks?
Low-moisture mozzarella is ideal—it melts smoothly and gives the perfect cheese pull without leaking.
Can I bake these instead of frying?
Absolutely! Arrange breaded sticks on a parchment-lined tray, spray with oil, and bake at 425°F (220°C) for 10–12 minutes, flipping halfway.
How do I prevent the cheese from leaking out?
Freezing the breaded sticks before cooking and double breading helps keep the cheese inside. Also, don’t overcook—remove when golden.
Are these cheese sticks suitable for vegetarians?
Yes! Just check that your mozzarella is vegetarian-friendly (some brands use animal rennet). For vegan, use dairy-free cheese and egg replacer.
Pin This Recipe!
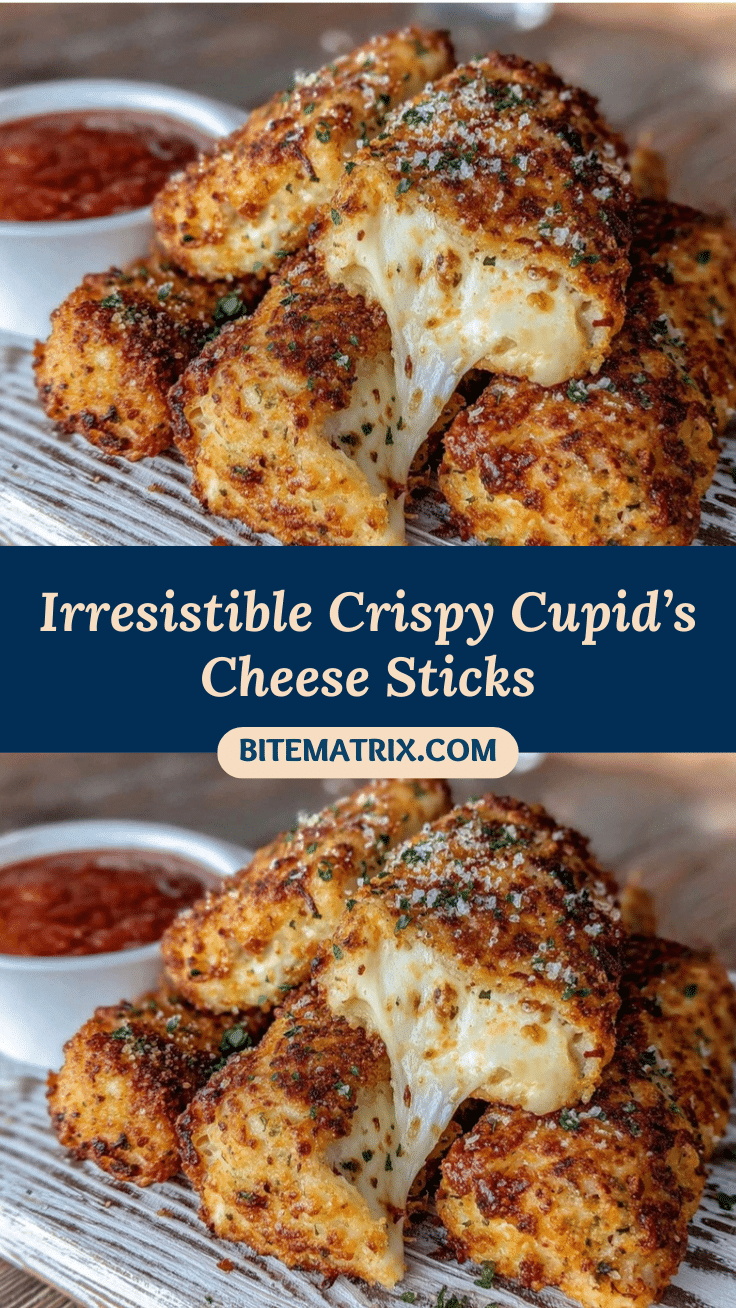
Crispy Cupid’s Arrow Cheese Sticks with Stretchy Mozzarella

These cheese sticks feature a golden, crispy breadcrumb shell and a gooey, stretchy mozzarella center. Perfect for parties, movie nights, or festive occasions, they’re quick to make and irresistibly delicious.
- Prep Time: 15 minutes
- Cook Time: 10 minutes
- Total Time: 25 minutes (plus 30 minutes freezing)
- Yield: 16 cheese sticks (about 8 servings) 1x
- Category: Appetizer
- Cuisine: American
Ingredients
- 16 oz block low-moisture mozzarella cheese, cut into 3/4-inch thick sticks (about 4 inches long)
- 1 cup all-purpose flour
- 2 large eggs, lightly beaten
- 2 tbsp milk
- 2 cups seasoned Italian-style breadcrumbs
- 1/2 cup grated Parmesan cheese
- 1 tsp garlic powder
- 1 tsp dried Italian herbs (oregano, basil, thyme)
- 1/2 tsp salt
- 1/2 tsp black pepper
- Vegetable oil, for frying (canola or sunflower)
- Small red bell peppers, cut into heart shapes (optional, for garnish)
- Fresh parsley or basil (optional, for garnish)
- 1 cup marinara sauce (for dipping)
- Ranch dressing (optional, for dipping)
Instructions
- Cut mozzarella block into sticks about 3/4-inch thick and 4 inches long (about 16 sticks). Pat dry with paper towels.
- Set out three shallow bowls: one with flour, one with whisked eggs and milk, and one with breadcrumbs, Parmesan, garlic powder, Italian herbs, salt, and pepper.
- Roll each mozzarella stick in flour, tap off excess. Dip in egg wash, then coat in breadcrumb mixture. Repeat egg wash and breadcrumb steps for double breading.
- Arrange coated sticks on a parchment-lined baking sheet. Freeze for at least 30 minutes.
- Pour vegetable oil into a heavy-bottomed pot to about 1 inch depth. Heat to 350°F.
- Fry 3–4 sticks at a time for 1–2 minutes, turning until deep golden brown. Remove if cheese starts to ooze.
- Transfer fried sticks to paper towels to drain and cool for 1 minute.
- Optional: Slice red bell peppers into heart shapes. Skewer each cheese stick with a pepper heart and parsley or basil for Cupid’s Arrow look.
- Serve immediately with marinara or ranch dressing for dipping.
Notes
Freeze breaded sticks before frying to prevent cheese leakage. Double breading gives extra crunch. For gluten-free, use GF flour and breadcrumbs. Air fryer or oven baking are alternative methods. Serve hot for best cheese stretch. Store leftovers in airtight container up to 3 days; reheat in oven for best texture.
Nutrition
- Serving Size: 2 cheese sticks
- Calories: 210
- Sugar: 1
- Sodium: 350
- Fat: 13
- Saturated Fat: 6
- Carbohydrates: 14
- Fiber: 1
- Protein: 11
Keywords: mozzarella sticks, cheese sticks, crispy snack, party appetizer, Valentine’s Day, kid-friendly, easy recipe, fried cheese, comfort food, stretchy cheese


