Introduction
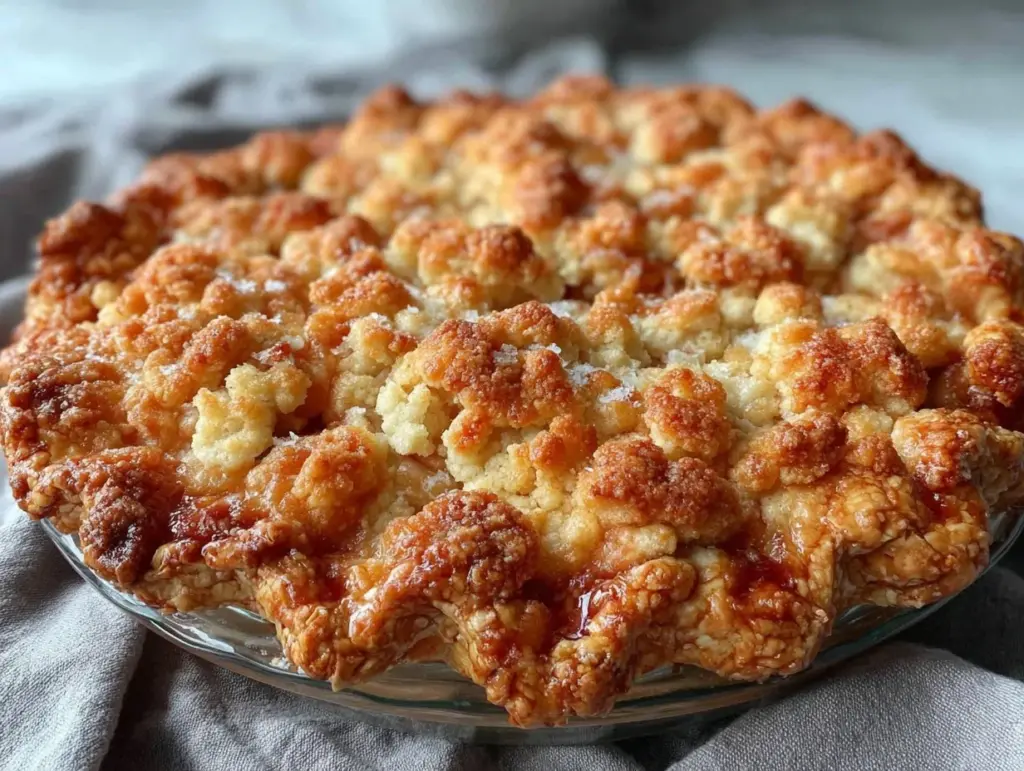
Picture this: you walk into the kitchen and a wave of buttery, spiced apples and warm cinnamon hits you right in the nose—the kind of smell that could tempt even the most disciplined eater. The first time I pulled this crispy Dutch apple pie out of the oven, I genuinely had to stop myself from digging in before it cooled (the bubbling apple filling and that golden crumb topping are just too much!). Honestly, watching the crumb topping turn a perfect shade of golden brown was almost hypnotic. You know, it’s one of those moments where you pause, take a deep breath, and realize you’ve stumbled onto something truly special.
When I was knee-high to a grasshopper, my grandma used to make apple pies every fall—her kitchen was a hub of flour clouds and laughter. But she never made a Dutch apple pie, and I wish I’d discovered this recipe years ago! I first tasted a Dutch apple pie at a local church bake sale (the kind where ladies compete for the best crust), and I was instantly hooked by the crunchy topping. Now, it’s become a staple in my kitchen, especially on rainy weekends when a little old-fashioned comfort hits the spot.
My family can’t help themselves—slices start disappearing from the cooling rack before I’ve even finished taking pictures for Pinterest. (I can’t really blame them; the sweet aroma sneaks up on you.) This pie is dangerously easy to make, providing pure, nostalgic comfort with every bite. Whether you’re looking to brighten up your holiday dessert table, want a sweet treat for your kids, or just need something special for your next potluck, this crispy Dutch apple pie fits the bill. Honestly, I tested it at least five times “in the name of research,” and every batch disappeared faster than you’d expect. It’s the kind of recipe that feels like a warm hug—trust me, you’re going to want to bookmark this one.
Why You’ll Love This Crispy Dutch Apple Pie Recipe
I’ve baked a lot of pies in my day (too many to count, honestly), but this crispy Dutch apple pie with its golden crumb topping always steals the show. Here’s why you’ll love it—straight from my kitchen to yours:
- Quick & Easy: Comes together in under 30 minutes of prep, so you don’t have to spend your whole day in the kitchen. Perfect for busy weeknights or those last-minute dessert cravings.
- Simple Ingredients: No fancy grocery trips required—you likely have everything you need in your pantry already. Apples, flour, sugar, butter… nothing wild here!
- Perfect for Any Occasion: I’ve served this pie at brunch, holiday dinners, and potlucks. It always gets rave reviews, whether it’s summer or the holidays. Plus, it’s beautiful enough to show off on your Pinterest board.
- Crowd-Pleaser: Both kids and adults sneak seconds (or thirds). My neighbor said it reminded her of her childhood summers in Michigan, which, honestly, made my week.
- Unbelievably Delicious: The combination of tender apples, warm spices, and that crispy, golden crumb topping is next-level comfort food. The textures are unreal—the filling is juicy, but the top stays perfectly crunchy.
What sets this recipe apart? It’s all about the topping. I use a blend of brown sugar, cold butter, and just the right amount of cinnamon to create big, chunky crumbs that crisp up beautifully in the oven. Unlike some Dutch pies, this one doesn’t get soggy (the crust stays firm, even after a day). You know, I’ve fiddled with the ratios for years, and this version is my best—every crumb is golden and every bite is just right.
This is more than just good pie—it’s the kind you close your eyes and savor after the first bite. It’s comfort food, made a little healthier and a lot faster, but with the same soul-soothing satisfaction. Whether you’re trying to impress guests or just treat yourself, this recipe turns any meal (or random Tuesday) into something memorable.
What Ingredients You Will Need
This recipe uses simple, wholesome ingredients to deliver bold flavor and a satisfying texture—no fuss, just goodness. Most of these are pantry staples, and you can easily swap or substitute if needed.
- For the pie filling:
- 6–7 medium apples (about 2 1/2 lbs / 1.1 kg), peeled, cored, and thinly sliced (Granny Smith for tartness, or Honeycrisp for sweetness)
- 2/3 cup (135 g) granulated sugar
- 2 tbsp (15 g) all-purpose flour (helps thicken the juices)
- 1 tsp ground cinnamon
- 1/4 tsp ground nutmeg (optional, adds warmth)
- 2 tbsp (30 ml) lemon juice (keeps apples from browning, adds brightness)
- 1/4 tsp salt
- For the crumb topping:
- 1 cup (125 g) all-purpose flour
- 2/3 cup (140 g) packed light brown sugar
- 1/2 cup (115 g) unsalted butter, cold and cubed
- 1/2 tsp ground cinnamon
- 1/4 tsp salt
- For the pie crust:
- 1 unbaked 9-inch (23 cm) pie crust (store-bought for convenience, or homemade if you’re feeling fancy—I use Pillsbury for reliable results)
Ingredient tips: For the apples, I recommend a mix of tart and sweet varieties for balance. If you want a gluten-free option, swap the all-purpose flour for almond flour (the crumb topping will still crisp up nicely). You can use vegan butter for a dairy-free twist—Earth Balance works well. In summer, swap in fresh peaches or berries for the apples (the topping is versatile!).
If you’re watching sugar, reduce the brown sugar in the topping by a third, or use coconut sugar for a deeper flavor. For the pie crust, you can use a gluten-free brand like Wholly Wholesome or make your own with almond flour and coconut oil. The lemon juice is key—don’t skip it, it keeps everything lively.
Honestly, you don’t need anything fancy here—just quality apples and cold butter. I’ve tried a dozen brands, and Kerrygold butter gives the richest flavor. If you like nuts, toss in a handful of chopped walnuts to the crumb topping for extra crunch.
Equipment Needed
- 9-inch (23 cm) pie plate (glass or ceramic works best for even browning)
- Large mixing bowl (for tossing the apples)
- Medium bowl (for mixing the crumb topping)
- Pastry cutter or fork (for cutting butter into the topping—if you don’t have one, clean hands work just fine!)
- Peeler and corer (for prepping apples)
- Cutting board and sharp knife
- Baking sheet (to catch any drips—trust me, you’ll thank yourself later)
- Measuring cups and spoons
If you don’t have a pastry cutter, two butter knives can do the trick for cutting butter into flour. If you’re making a homemade crust, a rolling pin helps, but a wine bottle can substitute in a pinch (done it more than once myself). Glass pie plates make the bottom crust crispier, but metal works if that’s what you have.
For maintenance, keep your pastry cutter clean by rinsing immediately after use—dried bits are a pain to scrub off. Budget-friendly pie plates from Pyrex get the job done just as well as fancier brands.
Preparation Method
- Prep the oven and crust: Preheat your oven to 375°F (190°C). If using a store-bought crust, roll it out and gently fit it into your 9-inch pie plate. Crimp the edges. Place the pie plate on a baking sheet for stability.
- Prepare the apples: Peel, core, and thinly slice 6–7 medium apples (about 2 1/2 lbs / 1.1 kg). Toss the slices in a large bowl with 2 tbsp (15 g) flour, 2/3 cup (135 g) sugar, 1 tsp cinnamon, 1/4 tsp nutmeg (optional), 2 tbsp (30 ml) lemon juice, and 1/4 tsp salt. Mix well until all slices are coated. The mixture should smell sweet and spicy, with a slight tart note from the lemon.
- Fill the crust: Pour the apple mixture evenly into the pie crust, mounding slightly in the center. Don’t worry if the filling seems high—it will settle as it bakes.
- Make the crumb topping: In a medium bowl, combine 1 cup (125 g) flour, 2/3 cup (140 g) brown sugar, 1/2 tsp cinnamon, and 1/4 tsp salt. Add 1/2 cup (115 g) cold, cubed butter. Using a pastry cutter, fork, or your fingers, work the butter into the dry ingredients until large, chunky crumbs form (they should stick together when pressed and look pebbly).
- Top the pie: Sprinkle the crumb mixture evenly over the apples, covering all the fruit. Press gently so it sticks but don’t compact it too much—the air pockets help it crisp up.
- Bake: Bake on the middle rack for 45–55 minutes, until the topping is golden brown and the filling is bubbling at the edges. If the topping browns too quickly, loosely tent with foil for the last 10 minutes. The aroma filling your kitchen will be your cue it’s almost done!
- Cool: Remove from oven and let cool for at least 1 hour before slicing. This helps the filling set. (I know it’s tough—my family rarely waits!)
- Serve: Slice and serve warm or at room temperature. For clean slices, wipe your knife between cuts.
Preparation notes: If your apples are extra juicy, sprinkle an extra tablespoon of flour over the filling before adding the topping. For extra crunch, add a handful of chopped nuts to the crumb. If the bottom crust isn’t browning, move the pie to the lower oven rack for the last 10 minutes. For efficiency, prep the crumb topping while the apples are marinating in sugar and spices.
Cooking Tips & Techniques
Here’s the real talk from my years of pie baking—some lessons learned the hard way, but all in the name of better pie!
- Keep the butter cold: For the crumb topping, cold butter is a must. If it softens, the crumbs melt rather than crisp. I’ve even tossed my butter in the freezer for 10 minutes beforehand.
- Don’t overmix the topping: The best crumbs are chunky and uneven. If you mix too much, you’ll get a sandy texture (been there—not as tasty!).
- Layer apples evenly: Mound them in the center for a classic look, but don’t pack them too tight or the filling won’t bake evenly. Trust your eye—the apples shrink as they cook.
- Prevent soggy crust: Bake on the lowest oven rack if your pie plate is glass. Sometimes I pre-bake the crust for 8 minutes if using homemade dough—totally optional but helps.
- Tent with foil: If the crumb topping starts browning before the apples are done, cover loosely with foil. This keeps things crisp, not burnt.
- Multitasking: While your pie bakes, whip up some homemade whipped cream or prep coffee—makes serving feel extra special (and gives you something to do while the house fills with pie aroma).
- Consistency tip: Use the same apple variety each time for predictable results, or mix for a more complex flavor. I’ve had pies turn out bland when I grabbed whatever apples were left in the fridge—stick with your favorites for best results.
I’ve ruined a pie or two by rushing the cooling step (the filling spills everywhere!). Patience pays off—let it cool at least an hour, even if you’re tempted. And always use a baking sheet underneath—clean-up is way easier if it bubbles over.
Variations & Adaptations
This crispy Dutch apple pie is endlessly customizable. Here are a few ways to make it your own:
- Gluten-Free: Swap all-purpose flour with almond flour or your favorite gluten-free blend. The crumb topping will still crisp up beautifully!
- Dairy-Free: Use vegan butter for the topping and a plant-based crust (Earth Balance and Wholly Wholesome are my go-tos). Tastes just as rich.
- Seasonal Fruit: Substitute apples with pears, peaches, or mixed berries in summer. The crumb topping works no matter what fruit you use.
- Nutty Crunch: Add 1/2 cup chopped walnuts or pecans to the topping for extra texture and flavor.
- Spice It Up: Try adding ground ginger or cardamom to the filling for a unique twist. My kids love the ginger version!
- Low-Sugar: Reduce sugar in both filling and topping, or swap with coconut sugar for a more caramel flavor.
For different cooking methods, you can bake in a cast iron skillet for a rustic look or use mini pie tins for individual servings. I’ve made this recipe with peaches in July and it was a hit—definitely worth trying! If allergies are a concern, skip the nuts and double-check your pie crust ingredients.
Serving & Storage Suggestions
Serve your crispy Dutch apple pie warm, with a scoop of vanilla ice cream or whipped cream for maximum comfort. Room temperature works too—great for lunchboxes or casual snacking.
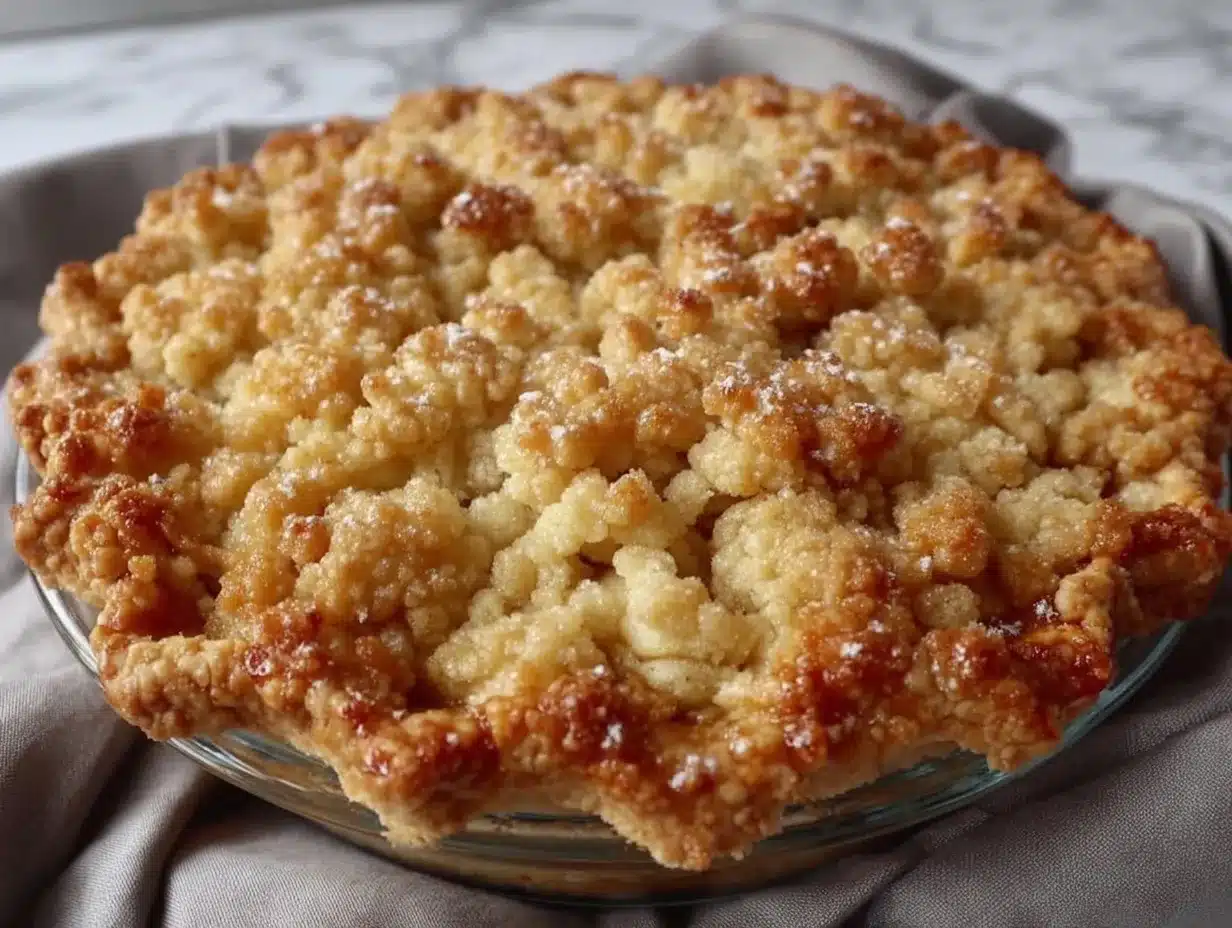
Presentation tip: Dust with powdered sugar before serving for a bakery-style finish. Pair with coffee or spiced tea to complement the cinnamon notes. For a crowd, slice into smaller wedges and arrange on a pretty platter (Pinterest-worthy, honestly!).
Storage is simple: cover leftovers with foil or plastic wrap and keep in the fridge for up to 4 days. To freeze, wrap slices tightly in plastic and then foil—good for up to 2 months. Reheat in a 350°F (175°C) oven for 10–15 minutes to crisp up the topping (microwaving works, but you lose some crunch).
The flavors deepen after a day—sometimes I think it tastes even better on day two. If you’re prepping ahead, you can assemble the pie and refrigerate unbaked for up to 24 hours, then bake fresh before serving.
Nutritional Information & Benefits
Each slice (1/8 of the pie) is about 320 calories, 16g fat, 45g carbs, and 3g protein. Apples add fiber and vitamin C, while cinnamon offers antioxidants and anti-inflammatory properties.
This recipe can be made gluten-free and dairy-free with simple swaps (see above). Potential allergens include wheat (flour), dairy (butter), and possibly nuts if added—always check your crust ingredients.
I love that you get a big serving of fruit in every slice—honestly, it feels a little less guilty than most desserts. If you’re watching sugar, reduce the sweetener and opt for a whole wheat crust for extra fiber. It’s comfort food, but with a wholesome twist!
Conclusion
This crispy Dutch apple pie with its golden crumb topping is worth every bite. The aromas, the flavors, and the simple steps make it a go-to recipe you’ll want to make again and again. It’s easy enough for beginners but special enough for celebrations.
Customize it to suit your family—swap in your favorite fruit, adjust the sugar, or toss in some nuts. I love this pie because it’s adaptable, crowd-pleasing, and always brings a smile. Honestly, it feels like a warm hug every time I bake it.
Ready to give it a try? Leave a comment below if you bake it, share your own variations, or pin it to your Pinterest board for later. Happy baking—and don’t forget to sneak a slice for yourself!
Frequently Asked Questions
How do I keep the crumb topping crispy?
Use cold butter and don’t overmix the topping. If the topping starts to brown too fast, tent the pie with foil during baking.
Can I make this pie ahead of time?
Yes! Assemble and refrigerate unbaked for up to 24 hours, then bake fresh. Or, bake ahead and reheat slices in the oven before serving.
What type of apples work best?
Granny Smith for tartness, Honeycrisp for sweetness, or a mix of both. Avoid apples that get mushy, like Red Delicious.
How do I make this Dutch apple pie gluten-free?
Swap the flour in both the filling and topping for a gluten-free blend or almond flour. Use a gluten-free pie crust.
Can I freeze leftover pie?
Absolutely. Wrap slices tightly in plastic wrap and foil, then freeze for up to 2 months. Reheat in the oven to keep the topping crisp.
Pin This Recipe!

Crispy Dutch Apple Pie Recipe – Best Homemade Golden Crumb Topping

This crispy Dutch apple pie features a juicy spiced apple filling and a golden, buttery crumb topping. It’s easy to make, crowd-pleasing, and perfect for holidays, potlucks, or cozy weekends.
- Prep Time: 25 minutes
- Cook Time: 50 minutes
- Total Time: 1 hour 15 minutes
- Yield: 8 servings 1x
- Category: Dessert
- Cuisine: American
Ingredients
- 6–7 medium apples (about 2 1/2 lbs), peeled, cored, and thinly sliced (Granny Smith or Honeycrisp recommended)
- 2/3 cup granulated sugar
- 2 tbsp all-purpose flour
- 1 tsp ground cinnamon
- 1/4 tsp ground nutmeg (optional)
- 2 tbsp lemon juice
- 1/4 tsp salt
- 1 cup all-purpose flour (for topping)
- 2/3 cup packed light brown sugar
- 1/2 cup unsalted butter, cold and cubed
- 1/2 tsp ground cinnamon (for topping)
- 1/4 tsp salt (for topping)
- 1 unbaked 9-inch pie crust (store-bought or homemade)
Instructions
- Preheat oven to 375°F (190°C). Roll out pie crust and fit into a 9-inch pie plate. Crimp edges and place pie plate on a baking sheet.
- Peel, core, and thinly slice apples. Toss slices in a large bowl with flour, granulated sugar, cinnamon, nutmeg (if using), lemon juice, and salt until well coated.
- Pour apple mixture evenly into the pie crust, mounding slightly in the center.
- In a medium bowl, combine flour, brown sugar, cinnamon, and salt for the crumb topping. Add cold, cubed butter and cut in using a pastry cutter, fork, or fingers until large, chunky crumbs form.
- Sprinkle crumb topping evenly over apples, pressing gently so it sticks but not compacting too much.
- Bake on the middle rack for 45–55 minutes, until topping is golden brown and filling is bubbling at the edges. Tent with foil if topping browns too quickly.
- Remove from oven and let cool for at least 1 hour before slicing.
- Slice and serve warm or at room temperature. Wipe knife between cuts for clean slices.
Notes
Keep butter cold for a crispy topping. For extra crunch, add chopped walnuts or pecans to the crumb. If apples are very juicy, sprinkle an extra tablespoon of flour over the filling. Tent with foil if topping browns too quickly. Let pie cool for at least an hour before slicing for best results.
Nutrition
- Serving Size: 1 slice (1/8 of pie)
- Calories: 320
- Sugar: 28
- Sodium: 220
- Fat: 16
- Saturated Fat: 10
- Carbohydrates: 45
- Fiber: 4
- Protein: 3
Keywords: Dutch apple pie, crumb topping, apple dessert, homemade pie, fall baking, comfort food, easy pie recipe, holiday dessert


