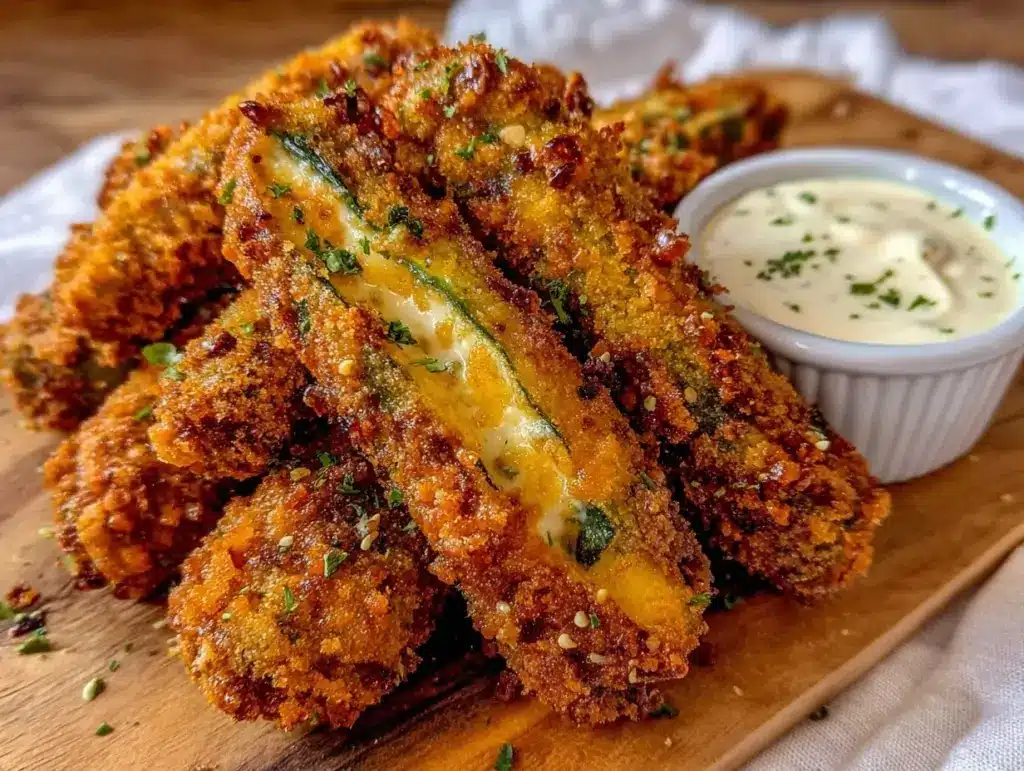
Let’s be honest—there’s just nothing quite like the mouthwatering aroma of crispy fried pickle spears wafting from your kitchen. That tangy bite, wrapped up in a shatteringly crunchy golden crust, paired with cool ranch dipping sauce? It’s the sound of laughter, the clatter of game day plates, and the kind of snack that makes you stop mid-chew and beam a little (because, wow, this is good). The first time I tried making fried pickle spears, I wasn’t expecting much—just a fun twist for a family movie night. But, you know what? I was instantly hooked. The crispy exterior, the juicy tang inside… it was the kind of moment where you pause, take a deep breath, and just smile because you know you’ve stumbled onto something truly special.
There’s a nostalgic comfort tucked into every bite—reminds me of those backyard cookouts when I was knee-high to a grasshopper, sneaking pickles from the jar while grandma pretended not to notice. Years later, I found myself trying to recreate that same snack magic for my own kids. Fried pickles were a hit at a local fair, and after some “in the name of research” taste testing, I decided to make them a staple at our weekend get-togethers. My family couldn’t stop sneaking them off the cooling rack (and, honestly, neither could I). They’re dangerously easy to make and ridiculously satisfying—pure, nostalgic comfort with a modern crunch.
Whether you’re looking to brighten up your Pinterest snack board, serve up a crowd-pleaser for your next game day, or just surprise your crew with something new, these crispy fried pickle spears with ranch dipping sauce check every box. I’ve tested the recipe more times than I’d care to admit, fine-tuning the breading and playing around with dipping sauces (for science, of course). It’s become our go-to for family gatherings, gifting, and those lazy afternoons when only a salty, crunchy snack will do. Trust me—you’re going to want to bookmark this one!
Why You’ll Love This Crispy Fried Pickle Spears Recipe
Here’s the thing: not all fried pickles are created equal. After plenty of trial and error (and more taste tests than I’d like to confess), I can tell you this recipe has all the right stuff. Let me break down exactly why you’ll be craving these pickle spears again and again:
- Quick & Easy: Comes together in under 30 minutes, perfect for spontaneous cravings or last-minute guests.
- Simple Ingredients: Just pantry staples—no special shopping required. You probably have everything you need right now.
- Perfect for Any Occasion: Ideal for game day, potlucks, movie nights, or even midweek snacking. They disappear fast at parties!
- Crowd-Pleaser: Both kids and adults ask for seconds. Seriously, even “pickle skeptics” get won over.
- Unbelievably Delicious: The combination of tangy pickles and crunchy coating is next-level comfort food. The ranch sauce brings it all together.
What sets this fried pickle spears recipe apart? I use a double-dip method for the breading—first in flour, then in an egg-milk bath, and again in seasoned breadcrumbs. This means you get a super crispy crust that holds up, even after dipping. Plus, I like to add a pinch of smoked paprika to the breading for a subtle smoky kick. If you’ve ever had soggy fried pickles, you know the disappointment—these stay crisp for ages. The ranch dipping sauce? It’s homemade, with fresh herbs and a hint of garlic, making every bite irresistible.
This snack isn’t just tasty—it’s the kind that makes you close your eyes and savor every bite. Comfort food, but with a fun twist that’s surprisingly light and not greasy. It’s also a secret weapon for impressing friends without breaking a sweat. Whether you’re making them for a crowd or just for yourself (no judgment), you’ll love how simple, satisfying, and addictive they are!
What Ingredients You Will Need
This recipe uses simple, wholesome ingredients to deliver bold flavor and a satisfying crunch—no fuss, no fancy grocery runs. Most of these are pantry staples, and there’s plenty of room to swap things out if you need to.
- Dill pickle spears (about 1 pound/450g; look for firm, crunchy spears; I love Claussen or Grillo’s for that fresh snap)
- All-purpose flour (1 cup/120g; helps the breading stick)
- Eggs (2 large; beaten; brings everything together in the coating)
- Milk (1/2 cup/120ml; whole or 2%—or use unsweetened non-dairy milk for a vegan version)
- Panko breadcrumbs (1 1/2 cups/90g; gives a lighter, crunchier texture than regular breadcrumbs)
- Seasoned breadcrumbs (1/2 cup/30g; for extra flavor)
- Smoked paprika (1/2 tsp; adds a subtle smoky flavor that makes the breading pop)
- Garlic powder (1/2 tsp; for a savory kick)
- Black pepper (1/4 tsp; freshly ground is best)
- Salt (1/2 tsp; adjust to taste)
- Vegetable oil (for frying; peanut or canola works well; enough to fill your skillet about 2 inches deep)
For the ranch dipping sauce:
- Mayonnaise (1/2 cup/120g; I recommend Hellmann’s for the creamiest texture)
- Sour cream (1/2 cup/120g; or use plain Greek yogurt for a lighter option)
- Fresh dill (1 tbsp, finely chopped; essential for that classic ranch flavor)
- Fresh chives (2 tsp, finely chopped; or substitute green onions)
- Fresh parsley (2 tsp, finely chopped)
- Garlic powder (1/4 tsp)
- Onion powder (1/4 tsp)
- Lemon juice (1 tsp; brightens up the flavor)
- Salt and pepper (to taste)
Ingredient swaps and tips:
- Use gluten-free flour and breadcrumbs for a gluten-free option.
- Swap dairy milk and sour cream for coconut or oat alternatives for a dairy-free snack.
- Try bread-and-butter pickles for a hint of sweetness if you’re feeling adventurous.
- Don’t skip the fresh herbs in the ranch—they really make a difference!
Equipment Needed
You don’t need a fancy kitchen to whip up these crispy fried pickle spears. Here’s what you’ll want to have ready:
- Large skillet or Dutch oven (for frying; cast iron works beautifully—holds heat and keeps the oil temperature steady)
- Slotted spoon or spider strainer (for scooping pickles out of the hot oil)
- Wire cooling rack (set over a baking sheet; keeps the pickles crispy while they cool)
- Three shallow bowls (for the dredging stations—flour, egg/milk, breadcrumbs)
- Paper towels (for draining excess oil)
- Sharp knife (if you need to slice whole pickles into spears)
- Mixing bowl and whisk (for the ranch dipping sauce)
If you don’t have a wire rack, a plate lined with paper towels works fine (though the rack keeps things crispier). For frying, I’ve used everything from budget skillets to heavy Dutch ovens—just keep an eye on the oil temperature. Pro tip: after frying, let the oil cool and strain it for reuse (saves money, less waste).
Preparation Method
- Prep the pickles: Drain the pickle spears thoroughly and pat them dry with paper towels. (Extra moisture will make the coating soggy, so don’t rush this step.) If your pickles are extra juicy, I sometimes let them air-dry on a rack for 10 minutes.
- Set up the dredging stations: In three shallow bowls, arrange the following:
– Bowl 1: Flour, garlic powder, smoked paprika, salt, and pepper (mix well).
– Bowl 2: Eggs and milk (whisk together until smooth).
– Bowl 3: Panko and seasoned breadcrumbs (combine for maximum crunch). - Heat the oil: Pour vegetable oil into your skillet or Dutch oven, about 2 inches deep. Heat to 350°F (175°C). Use a thermometer if possible—too hot and the coating burns, too cool and it gets greasy.
- Bread the pickle spears: Working with one spear at a time, coat it in the flour mixture, shaking off excess. Dip into the egg/milk bath, then roll in the breadcrumb mixture, pressing lightly so the coating sticks. Repeat for all spears. (Double-dipping is key for a thick, crispy crust!)
- Fry the spears: Carefully add pickles to the hot oil in batches, without overcrowding. Fry for 2–3 minutes per side, until golden brown and crisp. (They should sizzle as soon as they hit the oil.) Flip gently with tongs or a slotted spoon.
- Drain and cool: Transfer fried spears to a wire rack set over a baking sheet. Let them cool for a minute or two—this keeps them crispy. Sprinkle lightly with sea salt while hot, if desired.
- Make the ranch dipping sauce: In a mixing bowl, whisk together mayonnaise, sour cream, dill, chives, parsley, garlic powder, onion powder, lemon juice, salt, and pepper until smooth and creamy. Taste and adjust seasoning as needed. Chill until ready to serve.
- Serve: Arrange the crispy fried pickle spears on a platter with a bowl of ranch dipping sauce. Garnish with extra herbs if you like.
Troubleshooting notes:
- If breading isn’t sticking, make sure pickles are dry and press the crumbs in firmly.
- If oil foams or smokes, lower the heat and skim off loose crumbs.
- For extra crunch, let breaded spears rest for 10 minutes before frying.
Efficiency tip: Set up a dredging “assembly line” and get helpers involved (kids love dipping and breading!). I always fry in small batches for even browning—patience pays off with the crunch.
Cooking Tips & Techniques
I’ve made my fair share of fried pickle spears, and let’s just say I’ve learned a few things the hard way. Here’s how to nail it every time (and avoid rookie mistakes):
- Keep pickles dry: Excess moisture is your enemy—wet pickles make for soggy breading. Pat them down well and don’t skip the air-drying.
- Double-dip method: Flour first, then egg/milk, then breadcrumbs. This builds a sturdy, extra-crunchy shell that stays crisp even after cooling.
- Monitor oil temperature: Too hot, and the coating burns before the inside heats through. Too cool, and you’ll get greasy spears. 350°F (175°C) is the sweet spot.
- Small batches are best: Overcrowding drops the oil temp and makes everything soggy. Fry in batches, and reheat oil between rounds if needed.
- Breadcrumb choice matters: Panko breadcrumbs are lighter and crunchier than regular. Mixing with seasoned crumbs adds flavor and texture.
- Resting before frying: Let breaded spears sit for 10 minutes before frying—they crisp up better and the coating sticks more securely.
- Salt while hot: A light sprinkle of sea salt right after frying amps up the flavor (but don’t overdo it—pickles are already salty).
I’ve had my share of failed batches—soggy, bland, or greasy. Learned the hard way that letting the oil get too cool ruins everything. And don’t rush the breading, or you’ll get gaps and bare spots. Multitasking tip: While one batch fries, prep the next batch for breading. Set up everything ahead so you’re not scrambling at the last minute. Consistency comes from patience and a few simple habits—believe me, the crunch is worth the wait!
Variations & Adaptations
Fried pickle spears are endlessly customizable. Here are some fun ways to make them your own:
- Gluten-Free: Swap the flour and breadcrumbs for gluten-free versions—almond flour and gluten-free panko work great.
- Low-Carb: Use crushed pork rinds instead of breadcrumbs for a keto-friendly option (seriously crunchy, too!).
- Spicy: Add cayenne pepper to the breading or toss pickles in hot sauce before coating for a fiery twist.
- Vegan: Use plant-based milk and an egg replacer (like flaxseed meal mixed with water). Substitute vegan mayo and yogurt in the ranch.
- Flavor swap: Try bread-and-butter pickles or spicy garlic spears for a different taste profile.
If you’re baking instead of frying, arrange breaded spears on a wire rack over a baking sheet, spritz lightly with oil, and bake at 425°F (220°C) for 18–20 minutes, flipping halfway. They won’t be quite as crunchy, but still delicious! For air fryer fans, cook at 400°F (205°C) for 8–10 minutes—super crispy, less oil.
My personal favorite? Adding a little parmesan to the breadcrumb mix—gives a cheesy, umami boost that’s unexpectedly good. Don’t be afraid to play around; every batch feels like a new adventure!
Serving & Storage Suggestions
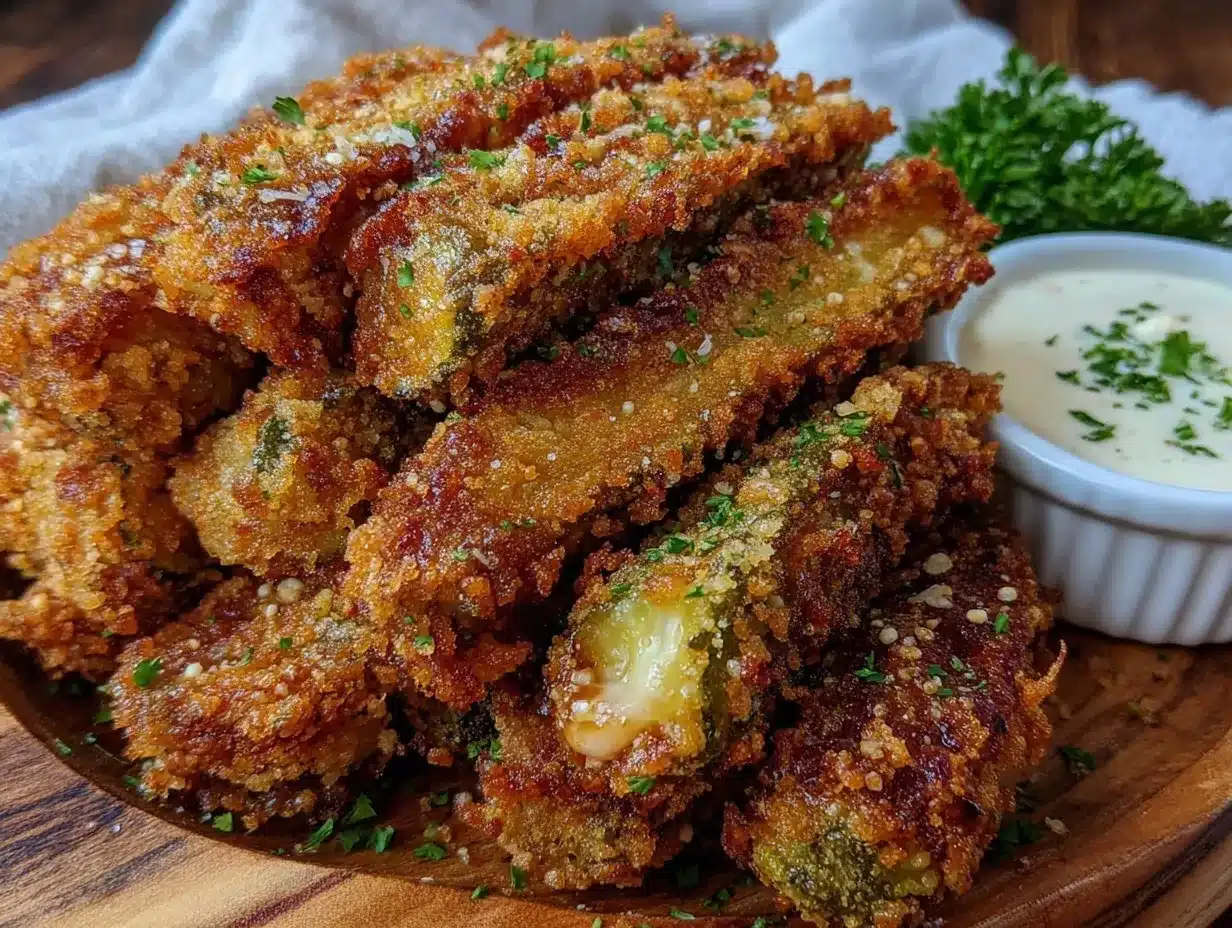
For best results, serve crispy fried pickle spears hot—right off the rack. The crunch is unbeatable, and the pickles are juicy inside. Arrange on a platter with plenty of ranch dipping sauce (garnish with extra herbs for a Pinterest-worthy look).
Pair with cold lemonade, beer, or iced tea for a classic game day snack. They’re perfect alongside burgers, sliders, or loaded nachos—great for sharing!
Leftovers? Store in an airtight container in the refrigerator for up to 3 days. To reheat, place on a wire rack in a 400°F (205°C) oven for 8–10 minutes, or air fry at 380°F (193°C) for 5–6 minutes—this revives the crunch. I don’t recommend microwaving (it makes them soggy). You can freeze breaded but uncooked spears—just fry straight from the freezer, adding 1–2 minutes to the frying time.
Honestly, the flavors get even better after a day in the fridge—the breading soaks up the pickle tang. It’s a snack that keeps on giving!
Nutritional Information & Benefits
Each serving (about 4–5 spears with ranch) clocks in at roughly:
- Calories: 320
- Protein: 4g
- Fat: 22g
- Carbohydrates: 24g
- Sodium: 680mg
Pickles themselves are low-calorie and provide a boost of vitamin K and probiotics (when using fresh, refrigerated brands). The ranch sauce adds calcium and healthy fats if you use Greek yogurt. For gluten-free or low-carb eaters, swap out the breading as needed. Just a heads up—these do contain egg, dairy, and wheat (unless you use substitutions). I love how they deliver flavor and crunch with minimal guilt, especially when paired with lighter dips and fresh veggies. Snack happy!
Conclusion
If you’re searching for the ultimate game day snack—crispy fried pickle spears with ranch dipping sauce are it. They’re easy, fast, and always vanish in minutes. Don’t hesitate to put your own spin on them; swap the pickles, try new breadings, or play with spicy dips. That’s half the fun.
Personally, I adore how they bring everyone together—kids, neighbors, even the pickle skeptics. There’s something magical about a simple, crunchy snack that never fails to impress. Go ahead, give them a try, and let me know how you make them your own! Drop a comment, share your favorite variation, or tag me in your Pinterest creations. Here’s to new traditions and plenty of crunchy bites—enjoy every single one!
FAQs About Crispy Fried Pickle Spears Recipe
Can I use whole pickles instead of spears?
Absolutely! Just slice them into spears or thick rounds. Spears hold up better for frying, but rounds work too.
Can I make fried pickle spears in an air fryer?
Yes—arrange breaded spears in the air fryer basket and cook at 400°F (205°C) for 8–10 minutes, flipping halfway for best crunch.
What’s the best oil for frying pickles?
Peanut oil or canola oil is ideal—they have high smoke points and neutral flavor. Avoid olive oil (it burns too quickly).
Can I make the ranch dipping sauce ahead of time?
You sure can! Prepare it up to 2 days ahead and store in the fridge—the flavors actually get better as it sits.
How do I keep the breading from falling off?
Make sure the pickles are dry, double-dip them in the coating, and let them rest before frying. Press the breadcrumbs on gently for a sturdy crust.
Pin This Recipe!
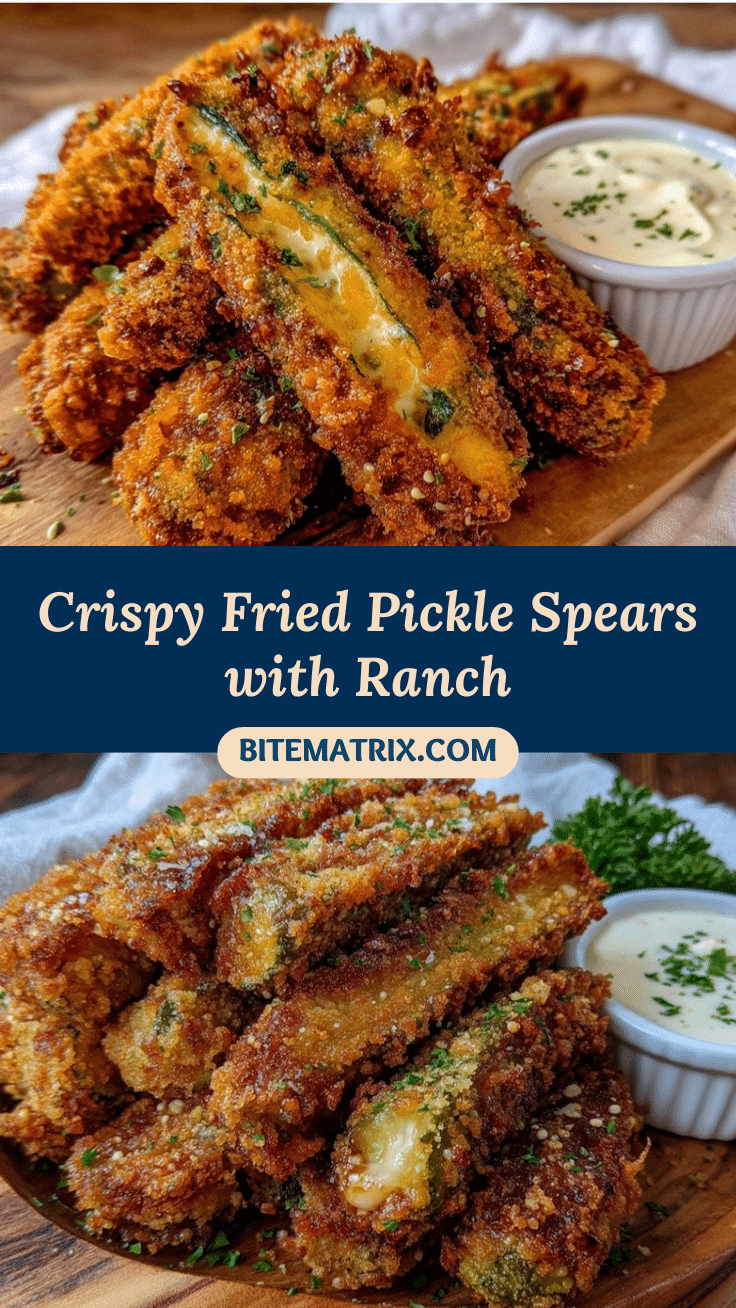
Crispy Fried Pickle Spears with Ranch

These crispy fried pickle spears are the ultimate game day snack, featuring tangy pickles wrapped in a crunchy golden crust and served with homemade ranch dipping sauce. Quick, easy, and crowd-pleasing, they’re perfect for parties, movie nights, or anytime you crave a salty, crunchy treat.
- Prep Time: 15 minutes
- Cook Time: 10 minutes
- Total Time: 25 minutes
- Yield: 4 servings 1x
- Category: Appetizer
- Cuisine: American
Ingredients
- 1 lb dill pickle spears (about 12–16 spears)
- 1 cup all-purpose flour
- 2 large eggs, beaten
- 1/2 cup milk (whole or 2%)
- 1 1/2 cups panko breadcrumbs
- 1/2 cup seasoned breadcrumbs
- 1/2 tsp smoked paprika
- 1/2 tsp garlic powder
- 1/4 tsp black pepper
- 1/2 tsp salt
- Vegetable oil (peanut or canola), for frying (enough for 2 inches deep in skillet)
- For the ranch dipping sauce:
- 1/2 cup mayonnaise
- 1/2 cup sour cream (or plain Greek yogurt)
- 1 tbsp fresh dill, finely chopped
- 2 tsp fresh chives, finely chopped
- 2 tsp fresh parsley, finely chopped
- 1/4 tsp garlic powder
- 1/4 tsp onion powder
- 1 tsp lemon juice
- Salt and pepper, to taste
Instructions
- Drain pickle spears thoroughly and pat dry with paper towels. Let air-dry on a rack for 10 minutes if extra juicy.
- Set up three shallow bowls: Bowl 1 with flour, garlic powder, smoked paprika, salt, and pepper (mix well); Bowl 2 with eggs and milk (whisk until smooth); Bowl 3 with panko and seasoned breadcrumbs (combine).
- Pour vegetable oil into a large skillet or Dutch oven to about 2 inches deep. Heat to 350°F (175°C).
- Working one spear at a time, coat in flour mixture, shake off excess, dip in egg/milk mixture, then roll in breadcrumb mixture, pressing lightly to adhere. Repeat for all spears.
- Fry pickles in batches, 2–3 minutes per side, until golden brown and crisp. Flip gently with tongs or slotted spoon.
- Transfer fried spears to a wire rack set over a baking sheet. Let cool for 1–2 minutes. Sprinkle lightly with sea salt while hot, if desired.
- For ranch sauce: In a mixing bowl, whisk together mayonnaise, sour cream, dill, chives, parsley, garlic powder, onion powder, lemon juice, salt, and pepper until smooth. Chill until serving.
- Serve fried pickle spears hot with ranch dipping sauce. Garnish with extra herbs if desired.
Notes
For gluten-free, use GF flour and breadcrumbs. For vegan, use plant-based milk, egg replacer, and vegan mayo/yogurt. Let breaded spears rest 10 minutes before frying for extra crunch. Fry in small batches to maintain oil temperature. Ranch sauce can be made ahead and stored up to 2 days. Reheat leftovers in oven or air fryer for best crunch.
Nutrition
- Serving Size: 4–5 spears with ranc
- Calories: 320
- Sugar: 2
- Sodium: 680
- Fat: 22
- Saturated Fat: 4
- Carbohydrates: 24
- Fiber: 2
- Protein: 4
Keywords: fried pickles, pickle spears, game day snack, ranch dipping sauce, crispy appetizer, party food, comfort food, easy snack, vegetarian option


