Introduction
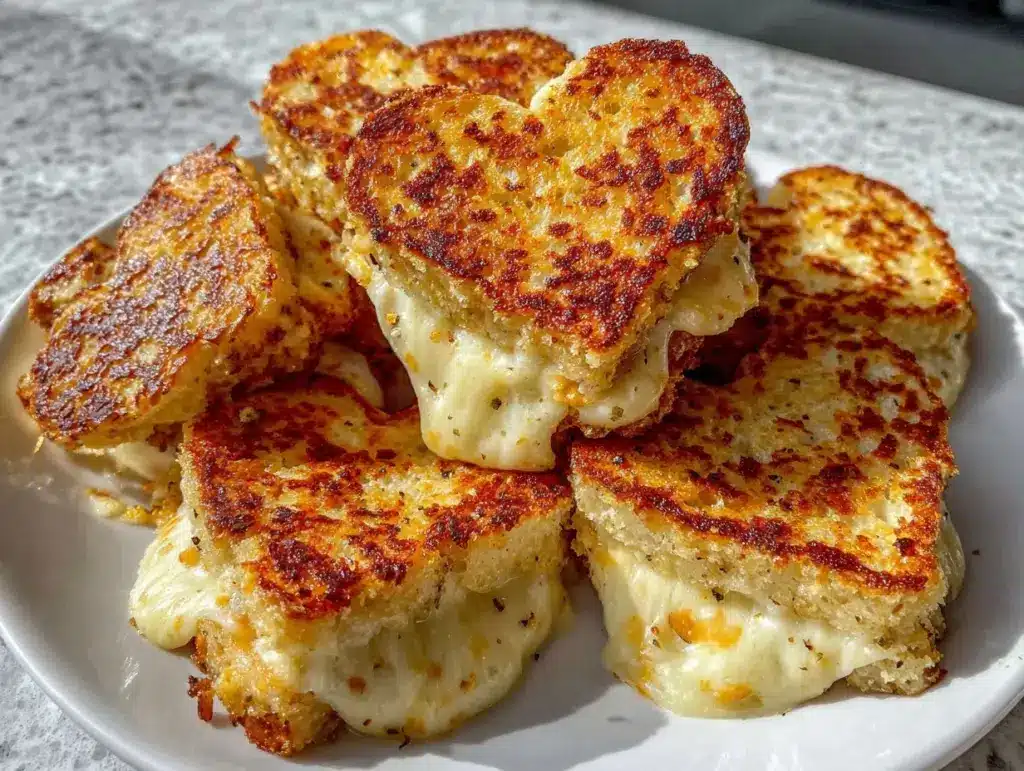
Let me tell you, the sizzle of butter hitting a hot skillet and the golden aroma of melting cheese—there’s nothing quite like it. The first time I pressed a heart-shaped cutter into buttery bread, I could practically feel the excitement bubble up inside me. It was a chilly afternoon, the kind when you just want something warm and nostalgic, and I decided to try something a little whimsical: crispy heart shaped grilled cheese sandwiches.
Honestly, biting into that crispy, cheesy heart was one of those moments where you pause, take a deep breath, and just smile because you know you’re onto something truly special. It reminded me of childhood lunches at Grandma’s house—she’d always cut our sandwiches into fun shapes, and you know what? My kids now beg for these at least once a week! It’s become our rainy day tradition, and even my husband sneaks one off the cooling rack before I can plate them up (I can’t blame him, really).
When I was knee-high to a grasshopper, I never thought grilled cheese could be this cute and comforting. These crispy heart shaped grilled cheese sandwiches aren’t just adorable—they deliver pure, nostalgic comfort with every bite. Perfect for cozy meals, after-school snacks, or even to brighten up your Pinterest board. I wish I’d discovered this trick years ago, because it instantly makes any meal feel more special and fun.
So, after a few rounds of “research”—taste testing, tweaking cheese blends, and finding the best way to get that perfect crunch—I can say these heart shaped grilled cheese sandwiches are now a staple for family gatherings and sweet lunchbox surprises. They feel like a warm hug, and you’re going to want to bookmark this one for all your cozy meal ideas!
Why You’ll Love This Recipe
There’s a reason these crispy heart shaped grilled cheese sandwiches are always in my back pocket when I want to wow my family or whip up something quick. If you love easy, cozy meal ideas, you’ll find these hit the spot every time—whether you’re feeding picky eaters or impressing brunch guests.
- Quick & Easy: Ready in under 20 minutes—perfect for busy weeknights or last-minute cravings.
- Simple Ingredients: No fancy cheese or bread required. You probably already have everything in your kitchen (score!).
- Perfect for Special Occasions: Great for Valentine’s Day, birthdays, or just because you want to share a little love over lunch.
- Crowd-Pleaser: I’ve never met a kid (or grown-up) who didn’t grin at these. They disappear fast!
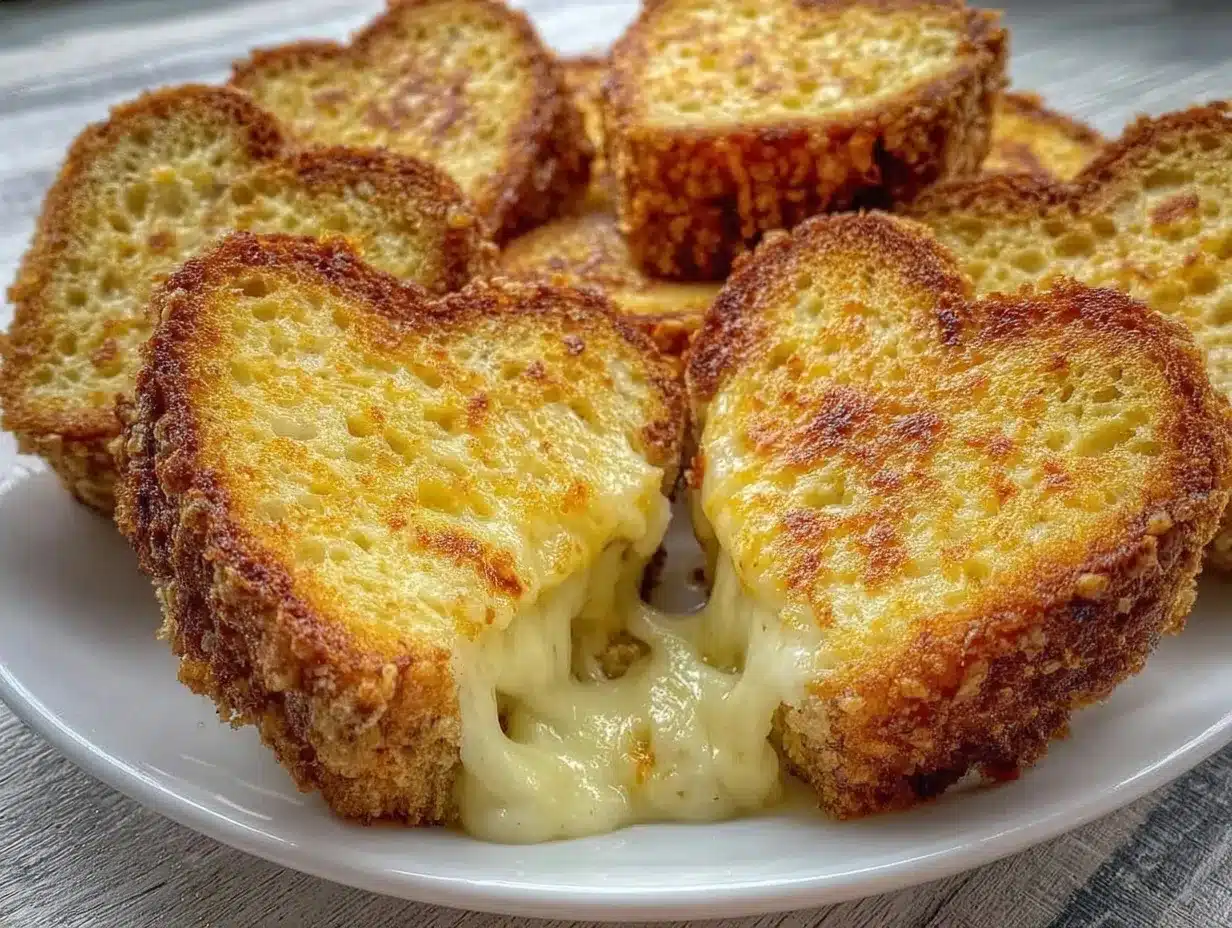
- Unbelievably Delicious: The crispy edges, gooey cheese, and buttery bread—it’s comfort food at its finest.
What makes my version stand out? I use a blend of cheeses for the perfect stretch and flavor. Plus, the heart shape isn’t just for looks—it creates extra crunchy edges (the best part, if you ask me!). I’ve tested different bread thicknesses, cheese combos, and even experimented with air frying. This isn’t just another grilled cheese—it’s my absolute favorite way to enjoy it.
Honestly, these sandwiches make you close your eyes after that first bite. It’s the kind of comfort food that brings everyone to the kitchen. Whether you need a simple meal or a fun way to celebrate, these crispy heart shaped grilled cheese sandwiches will bring a smile to your table, every single time.
What Ingredients You Will Need
This recipe uses simple, wholesome ingredients to deliver bold flavor and satisfying texture without the fuss. You won’t need anything fancy—just pantry staples and your favorite cheese. Here’s what you’ll need for these crispy heart shaped grilled cheese sandwiches:
- For the sandwiches:
- Sandwich bread (white, whole wheat, or sourdough—pick your favorite; I love Pepperidge Farm for its sturdy texture)
- Unsalted butter, softened (about 2 tablespoons per sandwich; Kerrygold is my go-to for extra flavor)
- Cheese slices (American, cheddar, and mozzarella blend works best—use 2-3 slices per sandwich)
- Optional: a pinch of garlic powder or Italian seasoning (for a flavor boost)
- For shaping:
- Heart-shaped cookie cutter (about 3-4 inches wide is perfect)
- For frying:
- Extra butter or neutral oil (for greasing the pan, if needed)
Ingredient notes and tips:
- Bread: Thicker slices hold up better and get crispier. Day-old bread is perfect (less soggy!).
- Cheese: Go for a melty cheese like American for nostalgia, but honestly, sharp cheddar and mozzarella together are magic. If you want to get fancy, try Havarti or Swiss. For dairy-free, swap in vegan cheese slices.
- Butter: Softened butter spreads easier and helps everything crisp up. If you’re out of butter, mayo works in a pinch (seriously—try it!).
- Seasonings: Garlic powder adds a savory kick. You can skip it or swap in smoked paprika or a sprinkle of chili flakes for something different.
Substitutions:
- Gluten-free bread for a gluten-free version
- Dairy-free cheese and butter for allergies
- Add a slice of ham or turkey between the cheese layers for protein
These ingredients are flexible, so use what you have and make it your own. I’ve tried all sorts of bread and cheese combos—just don’t skip the heart-shaped cutter if you want those adorable edges!
Equipment Needed
You don’t need a fancy kitchen to make crispy heart shaped grilled cheese sandwiches. Here’s what I use every time:
- Heart-shaped cookie cutter: This is essential for the cute shape. I’ve used metal and plastic cutters—metal tends to give cleaner edges.
- Nonstick skillet or griddle: For grilling the sandwiches. Cast iron gives the best crust, but any sturdy pan will do.
- Spatula: For flipping without squishing the shape.
- Butter knife or pastry brush: For spreading the butter evenly.
- Paper towels: For draining excess butter, if you like your sandwiches less greasy.
If you don’t have a heart-shaped cutter, you can use a sharp knife to cut out hearts freehand (a bit rustic, but still cute!). For the skillet, any heavy-bottomed pan works. Maintenance tip: keep your nonstick pans clean and avoid metal spatulas to keep them scratch-free. Budget-friendly options? Pick up a basic cutter at any craft store or online—they’re usually under $5. No need for fancy gadgets!
Preparation Method
Let’s get down to the fun part—making your crispy heart shaped grilled cheese sandwiches. I promise this is easy, but I’ll walk you through every step!
-
Prep the bread:
Lay out 2 slices of sandwich bread on a cutting board. Use a heart-shaped cutter (about 3-4 inches wide) to press out a heart from each slice. Save the crusts for snacking or homemade croutons. -
Butter the bread:
Spread about 1 tablespoon (14g) of softened unsalted butter evenly on one side of each heart-shaped slice. Make sure you reach all the edges—this is what gets you those crispy bits. (If your butter’s cold, microwave it for 10 seconds.) -
Layer the cheese:
Flip one slice so the buttered side is facing down. Add 2-3 slices (about 60g) of cheese—mix American, cheddar, and mozzarella for the best texture. If you’re adding seasonings, sprinkle a pinch of garlic powder or Italian herbs on top. -
Assemble the sandwich:
Place the second heart-shaped slice on top, buttered side up. Gently press together. -
Heat your skillet:
Place a nonstick skillet over medium heat. Add a dab of butter or a drizzle of neutral oil (about 1/2 tablespoon, 7g) to coat the pan. -
Cook the sandwiches:
Carefully lay the sandwich in the skillet. Cook for 2-3 minutes until the bottom is golden and crispy. Flip gently using a spatula and cook the other side for another 2-3 minutes. If the edges brown too fast, lower the heat a bit. -
Check for doneness:
You’ll know it’s ready when the cheese is melted and the bread is golden all over. If you like your grilled cheese extra crispy, press down lightly with the spatula during the last minute of cooking. -
Drain and serve:
Transfer to a paper towel-lined plate and let cool for 1 minute (trust me, the cheese is lava-hot at first!). Serve warm and enjoy!
Troubleshooting: If the bread browns before the cheese melts, cover the pan loosely with a lid for a minute. For extra crunch, use day-old bread. If your sandwich sticks, add a little more butter to the pan. Efficiency tip: prep all your heart shapes ahead of time for batch cooking. I’ve found that kids love helping with the cutter—just watch those little fingers!
Cooking Tips & Techniques
I’ve made these crispy heart shaped grilled cheese sandwiches more times than I can count, and let’s just say I’ve learned a few things along the way—sometimes the hard way!
- Low and slow is best: Cooking over medium heat gives you that perfect golden crunch without burning. I’ve rushed it before and ended up with burnt bread and cold cheese—never fun.
- Butter matters: Softened butter spreads evenly and helps everything crisp up. Don’t skimp on the edges—those bits get extra crunchy.
- Don’t overcrowd the pan: Give each sandwich some space. Overcrowding traps steam and makes the bread soggy.
- Cheese placement: Place cheese close to the edges so you get that oozy, melty effect in every bite. If you want a stretchier sandwich, add a little mozzarella.
- Cover for meltiness: If your cheese isn’t melting, cover the pan briefly. This traps heat and melts cheese without overcooking the bread.
- Flipping technique: Use a wide spatula and flip gently—heart shapes can be delicate. If you’re worried about sticking, use a bit more butter or oil.
- Batch cooking: Prepping all the hearts first saves time. You can even assemble and freeze them for later—just grill straight from frozen, adding a minute or two to the cooking time.
My biggest fail? Using too much cheese and having it ooze everywhere. Now, I keep the cheese just inside the heart’s edges for the best results. For consistent crispiness, wipe out the pan between batches if there’s leftover cheese or crumbs. And honestly, if you’re multitasking, set a timer—grilled cheese goes from perfect to burnt in seconds if you get distracted!
Variations & Adaptations
One of my favorite things about crispy heart shaped grilled cheese sandwiches is how easy they are to adapt. Here are a few variations for different tastes and needs:
- Dietary: Use gluten-free bread and dairy-free cheese for allergies. Earth Balance butter is great for dairy-free folks.
- Seasonal: In summer, add a slice of tomato or fresh basil for a Caprese twist. In winter, sprinkle a little cinnamon sugar on the outside for a sweet treat.
- Flavor: Try adding thinly sliced ham, turkey, or cooked bacon between the cheese layers. Jalapeño slices give a spicy kick!
- Cooking methods: Air-fryer version: Cook at 390°F (200°C) for 4-5 minutes, flipping halfway. Oven version: Bake at 400°F (205°C) for 6-8 minutes, flipping once.
- Taste customizations: Use rye or pumpernickel bread for a grown-up flavor. Swap cheddar for pepper jack if you like it spicy.
- Allergen substitution: Nut-free, soy-free, and egg-free versions are easy—just check your bread and cheese labels.
My personal favorite? Adding a thin layer of pesto inside the sandwich before grilling. It’s an unexpected burst of flavor and always gets rave reviews. Don’t be afraid to experiment—grilled cheese is endlessly customizable!
Serving & Storage Suggestions
Serve these crispy heart shaped grilled cheese sandwiches hot off the skillet for the best experience. I like to plate them on a colorful napkin with a side of tomato soup or a fresh salad. For extra fun, arrange the hearts in a circle—perfect for Pinterest-worthy photos!
Complementary dishes: Tomato soup, veggie sticks, apple slices, or even a mug of hot cocoa. For grownups, pair with a crisp cider or sparkling lemonade.
Storage: If you have leftovers (unlikely!), store in an airtight container in the refrigerator for up to 2 days. To freeze, layer sandwiches with parchment paper between them and seal in a freezer bag for up to 1 month.
Reheating: Air fry at 350°F (175°C) for 2-3 minutes or pop in a toaster oven until crisp. Microwave works in a pinch, but you’ll lose some crunch. Pro tip: Reheat on the stovetop for best texture.
Flavor notes: As the sandwiches sit, the cheese melds into the bread, creating an even richer flavor. Honestly, they’re so good you might never have leftovers!
Nutritional Information & Benefits
Each crispy heart shaped grilled cheese sandwich (using standard white bread and American cheese) contains approximately:
- Calories: 320
- Protein: 11g
- Fat: 18g
- Carbohydrates: 26g
- Sodium: 640mg
Health benefits: Using whole grain bread boosts fiber. Cheese is a good source of calcium and protein. You can make this recipe lower in fat by using reduced-fat cheese and less butter. It’s easily adapted for gluten-free, vegetarian, or dairy-free diets (just swap the ingredients as needed).
Allergen alert: Contains wheat, dairy, and possibly soy (check cheese labels). From a wellness perspective, I love that these sandwiches are portion-controlled and satisfying—perfect for a cozy, balanced treat!
Conclusion
Crispy heart shaped grilled cheese sandwiches are more than just adorable—they’re the ultimate cozy meal idea. Whether you’re making lunch for your kids, surprising someone special, or just treating yourself, these sandwiches bring a little extra joy to the table. The crunchy edges, melty cheese, and buttery bread make every bite worth savoring.
Don’t be afraid to customize with your favorite breads, cheeses, or add-ins. That’s half the fun! Personally, I love making these for rainy afternoons and watching everyone rush to the kitchen. It’s a recipe that’s easy enough for weeknights but memorable enough for parties.
If you try these crispy heart shaped grilled cheese sandwiches, I’d love to hear how you adapt them! Leave a comment below, share your photos, or tag me on social media. Now go ahead—spread a little love (and cheese) with your next cozy meal!
Frequently Asked Questions
Can I make crispy heart shaped grilled cheese sandwiches without a cookie cutter?
Absolutely! Use a sharp knife to cut hearts freehand. They might look rustic, but they’ll taste just as delicious.
What’s the best cheese for these sandwiches?
American, cheddar, and mozzarella blend is my favorite for flavor and meltiness. Feel free to experiment with other cheeses like Swiss or Havarti.
Can I prepare these ahead of time?
Yes! Assemble the sandwiches and refrigerate for up to 24 hours before grilling. For longer storage, freeze them and grill straight from frozen.
How do I keep them crispy if serving later?
Reheat in an air fryer or toaster oven for 2-3 minutes to restore the crunch. Avoid microwaving if possible.
Are these suitable for people with allergies?
You can easily make them gluten-free and dairy-free by using appropriate bread and cheese. Always check ingredient labels for hidden allergens.
Pin This Recipe!

Crispy Heart Shaped Grilled Cheese Sandwiches

These adorable heart-shaped grilled cheese sandwiches are crispy, cheesy, and perfect for cozy meals or special occasions. Easy to make with simple ingredients, they deliver nostalgic comfort and a fun twist on a classic favorite.
- Prep Time: 10 minutes
- Cook Time: 6 minutes
- Total Time: 16 minutes
- Yield: 2 sandwiches 1x
- Category: Main Course
- Cuisine: American
Ingredients
- 4 slices sandwich bread (white, whole wheat, or sourdough)
- 4 tablespoons unsalted butter, softened
- 8–12 slices cheese (American, cheddar, and mozzarella blend recommended)
- Optional: pinch of garlic powder or Italian seasoning
- Extra butter or neutral oil for greasing the pan
Instructions
- Lay out 2 slices of sandwich bread on a cutting board. Use a heart-shaped cutter (about 3-4 inches wide) to press out a heart from each slice. Save the crusts for snacking or homemade croutons.
- Spread about 1 tablespoon of softened unsalted butter evenly on one side of each heart-shaped slice.
- Flip one slice so the buttered side is facing down. Add 2-3 slices of cheese (mix American, cheddar, and mozzarella for best texture). Sprinkle a pinch of garlic powder or Italian herbs if desired.
- Place the second heart-shaped slice on top, buttered side up. Gently press together.
- Heat a nonstick skillet over medium heat. Add a dab of butter or a drizzle of neutral oil to coat the pan.
- Carefully lay the sandwich in the skillet. Cook for 2-3 minutes until the bottom is golden and crispy. Flip gently and cook the other side for another 2-3 minutes.
- Check for doneness: cheese should be melted and bread golden all over. For extra crispiness, press down lightly with the spatula during the last minute.
- Transfer to a paper towel-lined plate and let cool for 1 minute before serving.
Notes
For best results, use day-old bread and a blend of cheeses. Cook over medium heat for even crispiness. To make gluten-free or dairy-free, substitute appropriate bread and cheese. For extra crunch, press the sandwich lightly while cooking. Prep all heart shapes ahead for batch cooking. Reheat in an air fryer or toaster oven for best texture.
Nutrition
- Serving Size: 1 sandwich
- Calories: 320
- Sugar: 3
- Sodium: 640
- Fat: 18
- Saturated Fat: 10
- Carbohydrates: 26
- Fiber: 1
- Protein: 11
Keywords: grilled cheese, heart shaped, cozy meal, easy lunch, kid friendly, comfort food, sandwich, Valentine’s Day, quick recipe


