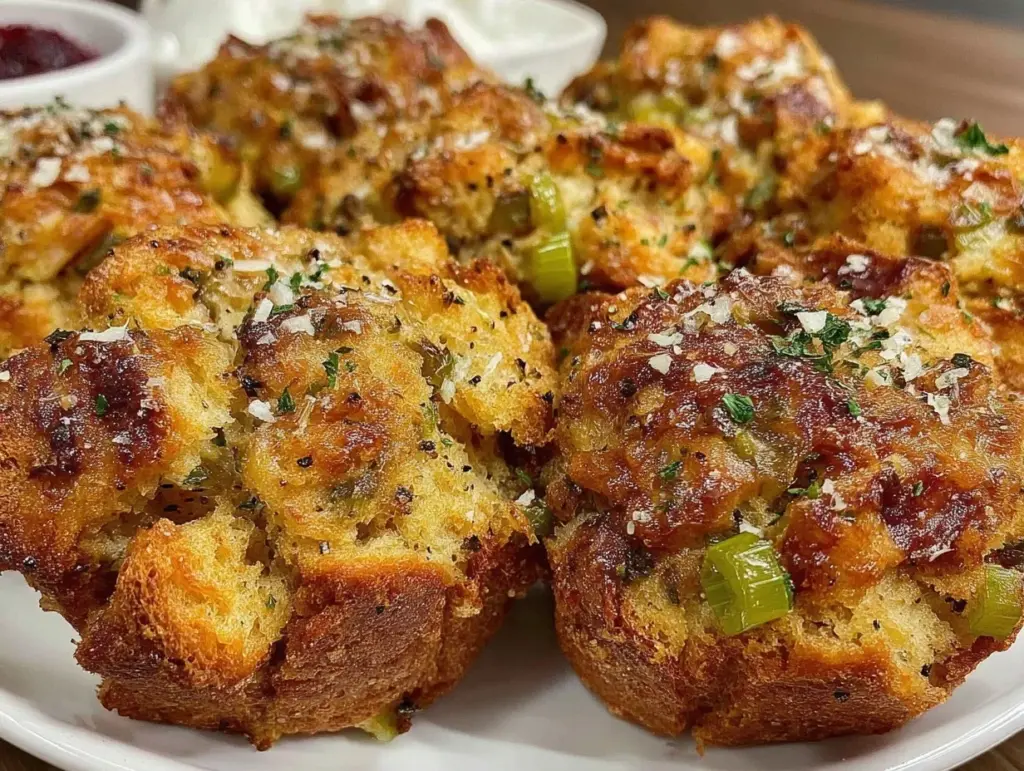
Let me tell you, the first whiff of these crispy stuffing balls baking away in my oven is pure holiday magic—herbs mingling with buttery goodness, a hint of onion, and that irresistible crunch just waiting to happen. There’s something about the sound of a fork cracking through that golden exterior that brings back memories of my childhood Thanksgivings, when I was knee-high to a grasshopper and sneaking bites before dinner. The first time I made these stuffing balls, I wasn’t even planning on reinventing the wheel; I just wanted a handheld version of classic stuffing for a potluck. But after that first bite—warm, savory, and so satisfyingly crispy—I knew I’d stumbled onto something special. Honestly, it was the kind of moment where you pause, take a deep breath, and just smile because you know you’re onto something truly special.
These crispy stuffing balls have become a staple at our family gatherings. My kids hover near the oven, stealing them off the cooling rack (I can’t really blame them), and even my picky uncle asked for the recipe last year. There’s a nostalgic comfort in every bite, but with a playful twist that makes them perfect for Friendsgiving, holiday brunches, or as a sweet treat for your kids’ lunchboxes. I wish I’d thought of these years ago—so many leftovers could’ve found a delicious new life! Whether you’re brightening up your Pinterest board or just looking for the easiest Thanksgiving appetizer, these stuffing balls deliver pure joy. And yes, I’ve tested this recipe more times than I’ll admit (in the name of research, of course). Each batch just feels like a warm hug, and you’re going to want to bookmark this one for sure.
Why You’ll Love This Crispy Stuffing Balls Recipe
After years of Thanksgiving cooking and more trial runs than I can count, I can honestly say these crispy stuffing balls are my secret weapon. I’ve tweaked, tasted, and tested every step—so you’re getting my best tips, straight from my kitchen. Whether you’re a beginner or a seasoned cook, you’ll appreciate how these bites come together in a snap.
- Quick & Easy: Ready in under 45 minutes, perfect for busy holiday hosts or last-minute cravings.
- Simple Ingredients: No wild goose chases for specialty groceries—you probably have everything in your pantry right now.
- Perfect for Any Occasion: From potlucks to holiday brunches, these stuffing balls are a hit everywhere they go.
- Crowd-Pleaser: Kids gobble them up, adults ask for seconds, and even the “I don’t eat stuffing” folks are converted every time.
- Unbelievably Delicious: The contrast of a crispy shell with soft, savory stuffing inside is next-level comfort food.
What sets this recipe apart? I use a mix of fresh herbs and a touch of broth for depth, plus a quick roll in panko for that perfect crunch. This isn’t just another stuffing ball recipe—it’s the one that actually gets requested year after year. I’ve swapped in gluten-free bread, added sausage for extra flavor, and even tried it with vegan alternatives (just for fun). Each version has its own charm, but this classic is the one I keep coming back to. There’s something about sharing a platter of these bites that turns a regular meal into a celebration. They’re comfort food, but lighter and more fun—and honestly, they make Thanksgiving leftovers exciting again.
What Ingredients You Will Need for Crispy Stuffing Balls
This recipe uses simple, wholesome ingredients to deliver bold flavor and satisfying texture without any fuss. Most are pantry staples, and you’ll find they’re easy to swap or customize for your family’s tastes.
- For the stuffing mixture:
- 4 cups (about 240g) cubed bread (day-old or slightly stale works best; sourdough, white, or whole wheat)
- 1/2 cup (115g) unsalted butter (melted; adds richness)
- 1 medium yellow onion, finely diced (about 100g)
- 2 stalks celery, finely chopped (about 80g)
- 2 cloves garlic, minced
- 1/4 cup (10g) fresh parsley, chopped (or 2 tbsp dried)
- 1 tbsp fresh sage, chopped (or 1 tsp dried)
- 1 tsp fresh thyme leaves (or 1/2 tsp dried)
- 1/2 tsp salt (or to taste)
- 1/4 tsp black pepper
- 2 large eggs, beaten (helps bind the mixture)
- 3/4 cup (180ml) chicken or vegetable broth (adds moisture; use low-sodium if preferred)
- For coating and frying:
- 1 cup (50g) panko breadcrumbs (for extra crunch)
- 1/2 cup (120ml) vegetable oil (for frying; can use avocado oil or olive oil for a lighter touch)
- Optional add-ins:
- 1/2 cup (90g) cooked sausage, crumbled (for a hearty twist)
- 1/3 cup (40g) dried cranberries (for a pop of sweetness)
- 1/2 cup (65g) chopped pecans or walnuts (for crunch)
If you need gluten-free, swap in your favorite gluten-free bread and panko. For dairy-free, use plant-based butter. Honestly, I’ve made these with store-brand ingredients and with premium ones—the result is always delicious, but I do recommend using a sturdy bread for the best texture.
Equipment Needed
- Large mixing bowl – For combining the stuffing mixture. I use my trusty glass bowl, but any large bowl will do.
- Chef’s knife & cutting board – For chopping veggies and herbs. A sharp knife makes quick work of onions and celery (and saves your eyes, too).
- Measuring cups & spoons – Accuracy matters here, especially for the broth and panko.
- Baking sheet – For cooling the stuffing balls before frying, or for baking instead of frying.
- Large skillet or deep frying pan – For frying to golden perfection. Nonstick pans make cleanup a breeze.
- Slotted spoon or tongs – For flipping and draining the balls after frying. I love my silicone tongs—they don’t scratch the pan.
- Paper towels – For draining excess oil after frying.
If you don’t have a deep pan, you can bake these on a lined baking sheet—just brush them with a little oil first. For budget-friendly options, I’ve used basic aluminum pans and thrift store bowls with great results. Keep knives sharp and wash pans right after frying to avoid sticky cleanup.
How to Make Crispy Stuffing Balls (Step-by-Step)

- Prep the bread: Cut your bread into 1/2-inch cubes (about 1.5 cm). Lay them out on a baking sheet and let them dry for an hour, or toast in a 300°F (150°C) oven for 10 minutes until slightly crisp. This helps the stuffing balls hold together.
- Sauté veggies: In a skillet, melt 1/2 cup (115g) butter over medium heat. Add diced onion and chopped celery, sauté for 5-6 minutes until soft and fragrant. Toss in garlic, cook another minute. You’ll smell that classic stuffing aroma—don’t rush this step!
- Combine mixture: In your large mixing bowl, add the toasted bread cubes, sautéed veggies, parsley, sage, thyme, salt, and pepper. Pour in the beaten eggs and broth. If using sausage, cranberries, or nuts, fold those in now. Stir gently—don’t mash—until evenly moistened. The mixture should hold together when pressed (add a splash more broth if dry).
- Shape balls: Scoop about 2 tablespoons (30g) of mixture and roll into balls, slightly smaller than a golf ball. Place on a lined baking sheet. You should get 16-20 balls.
- Chill: Pop the tray in the fridge for 15-20 minutes. Chilling helps them firm up and fry without falling apart (honestly, skipping this step leads to stuffing ball heartbreak). Meanwhile, prepare your panko coating.
- Coat balls: Roll each ball lightly in panko breadcrumbs to coat. Press gently so crumbs stick. If you want an extra-thick crust, double dip: roll in egg wash, then panko again.
- Fry: Heat 1/2 cup (120ml) oil in your skillet to 350°F (175°C). Fry stuffing balls in batches, turning gently, for 2-3 minutes per side until deep golden brown. Don’t crowd the pan—work in batches for even crisping. Transfer to paper towels to drain.
- Alternative baking method: Preheat oven to 400°F (200°C). Place coated balls on a greased or parchment-lined baking sheet. Spray lightly with oil and bake 18-20 minutes, flipping halfway, until crispy.
- Cool & serve: Let stuffing balls cool for 5 minutes before serving. They’ll crisp up even more as they cool—trust me, the wait is worth it!
Troubleshooting Tips: If balls fall apart, add a bit more egg or broth. If they burn, lower the oil temp. If they’re too dry, brush with extra butter after cooking. I’ve learned the hard way—don’t skip chilling and don’t overcrowd the pan.
Cooking Tips & Techniques for Perfect Crispy Stuffing Balls
After more than a few stuffing ball “fails” (hey, it happens to the best of us), I’ve picked up some tricks that really make a difference. First, using day-old bread is key—it absorbs flavors without getting mushy. If you’re short on time, just toast fresh bread cubes; works like a charm.
When sautéing veggies, let them get soft but not brown—this keeps the flavor balanced and prevents bitter notes. Don’t rush the chilling stage, even if you’re in a hurry. This step keeps the balls from breaking apart in the oil (I’ve had a few stuffing “pancakes” before learning this).
For frying, maintain the oil between 350°F (175°C) and 370°F (190°C). Too hot, and the outside burns before the inside cooks; too cool, and you’ll get greasy bites. I use a candy thermometer for accuracy, but if you drop in a breadcrumb and it sizzles instantly, you’re good to go.
Multitasking tip: While the balls chill, prep your coating and heat your oil. This keeps things moving. If you prefer baking, use a wire rack on your baking sheet for even airflow (more crunch!).
For consistent results, don’t overmix the stuffing mixture—just enough to let it bind. And always taste for seasoning before shaping. A little extra sage or thyme can make all the difference in flavor.
Variations & Adaptations for Every Table
One of the best things about this crispy stuffing balls recipe is how easily you can switch things up. Over the years, I’ve tried all sorts of twists—some planned, some out of necessity (hello, empty fridge). Here are my favorites:
- Gluten-Free: Use gluten-free bread and panko. It works surprisingly well, and the crunch is still fantastic.
- Vegetarian/Vegan: Swap chicken broth for veggie broth, use plant-based butter, and skip the eggs (try flaxseed meal mixed with water as a binder).
- Seasonal Flavors: Add diced apples and dried cranberries for a sweet-tart twist. In spring, swap in fresh chives and lemon zest for brightness.
- Protein Boost: Mix in crumbled cooked sausage or bacon bits. My husband is a big fan of the sausage version—he says it’s like Thanksgiving breakfast in a bite.
- Nut-Free: Just leave out nuts if allergies are a concern. You can add sunflower seeds for crunch if you’d like.
- Baked, Not Fried: Brush balls with oil and bake on a wire rack for lighter, oil-free bites. Still delicious!
I’ve personally made a version with pecans and dried cherries for a friends’ brunch—it was gone in minutes. The beauty of this recipe is you can tailor it to almost any dietary need or flavor craving without losing that signature crispy bite.
Serving & Storage Suggestions
Serve these crispy stuffing balls hot and fresh for the best crunch. I like to pile them up on a farmhouse platter with a side of cranberry sauce or a drizzle of gravy. They’re perfect as a Thanksgiving appetizer, alongside turkey, or even as a fun lunchbox treat for kids (honestly, they travel well).
For drinks, these bites pair beautifully with sparkling cider, light white wine, or even a mug of hot apple tea. If you’re planning ahead, stuffing balls can be made a day in advance—just store them in an airtight container in the refrigerator.
To reheat, pop them in a 350°F (175°C) oven for 8-10 minutes, or air fry for 2-3 minutes until crispy again. They freeze well, too; just thaw overnight in the fridge and reheat as above. I’ve noticed the flavor deepens after a day, making leftovers even tastier (if you’re lucky enough to have any left!).
Nutritional Information & Benefits
Each crispy stuffing ball (based on a batch of 18) contains approximately: 110 calories, 7g fat, 10g carbohydrates, and 3g protein. They’re a great source of fiber from the bread and veggies, and fresh herbs provide antioxidants and lovely flavor.
If you use gluten-free or dairy-free substitutions, the calorie and carb counts will shift slightly, but the recipe remains lower carb than traditional stuffing servings. Allergens to watch: wheat, eggs, and dairy—easy to modify with swaps mentioned above.
From a wellness angle, I love that you can sneak in extra veggies or use whole grain bread for a healthier twist. These bites feel indulgent but can fit most dietary needs with a few simple changes.
Conclusion: Why You Should Try These Crispy Stuffing Balls
There’s something truly magical about transforming classic stuffing into crispy, poppable bites. Whether you’re looking for an easy Thanksgiving appetizer or a fun way to reinvent leftovers, this crispy stuffing balls recipe is worth making at least once (though, let’s face it, you’ll probably make it every year).
Feel free to tweak the herbs, toss in your favorite add-ins, or play with baking versus frying—make it your own! I love this recipe because it brings people together, sparks nostalgia, and turns ordinary moments into holiday memories. My family keeps asking for it, and I bet yours will too.
If you try these, let me know how you adapt them in the comments—share your twists, tips, and favorite add-ins! Bookmark this recipe for every festive gathering, and don’t forget to spread the crispy stuffing ball love. Wishing you a cozy, delicious holiday season!
FAQs About Crispy Stuffing Balls Recipe
Can I make stuffing balls ahead of time?
Absolutely! You can prepare and shape the balls a day ahead. Just store them covered in the fridge, then fry or bake fresh when you’re ready to serve.
What’s the best bread for stuffing balls?
Day-old sourdough or white bread works best for texture, but whole wheat or gluten-free options are great, too. Just choose a sturdy bread that holds up to mixing.
Can I bake instead of fry stuffing balls?
Yes, baking works well! Place balls on a parchment-lined baking sheet, spray with oil, and bake at 400°F (200°C) for about 20 minutes, flipping halfway. They turn out crispy, just a tad lighter than fried.
How do I keep stuffing balls from falling apart?
Chilling the shaped balls before cooking and making sure the mixture is moist (but not soggy) helps them hold together. A little extra egg or broth can help if the mixture is crumbly.
Can I freeze stuffing balls?
Definitely! Freeze cooked balls on a tray, then transfer to a bag or container. Reheat from frozen in the oven or air fryer until hot and crispy.
Pin This Recipe!
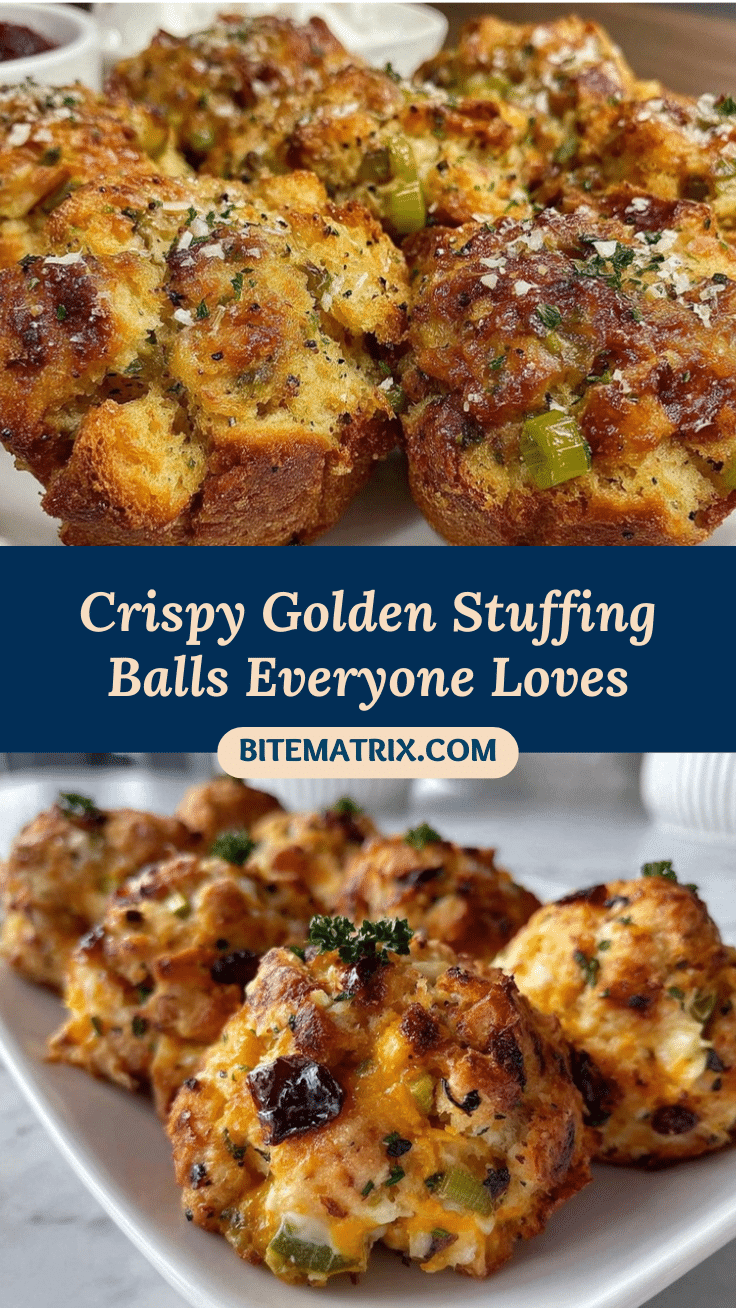
Crispy Stuffing Balls

These crispy stuffing balls are a handheld twist on classic Thanksgiving stuffing, featuring a golden, crunchy exterior and a savory, herb-packed interior. Perfect as an appetizer, potluck snack, or a fun way to reinvent holiday leftovers.
- Prep Time: 20 minutes
- Cook Time: 20 minutes
- Total Time: 40 minutes
- Yield: 16-20 balls (about 6-8 servings) 1x
- Category: Appetizer
- Cuisine: American
Ingredients
- 4 cups cubed bread (day-old or slightly stale; sourdough, white, or whole wheat)
- 1/2 cup unsalted butter, melted
- 1 medium yellow onion, finely diced
- 2 stalks celery, finely chopped
- 2 cloves garlic, minced
- 1/4 cup fresh parsley, chopped (or 2 tbsp dried)
- 1 tbsp fresh sage, chopped (or 1 tsp dried)
- 1 tsp fresh thyme leaves (or 1/2 tsp dried)
- 1/2 tsp salt
- 1/4 tsp black pepper
- 2 large eggs, beaten
- 3/4 cup chicken or vegetable broth (low-sodium if preferred)
- 1 cup panko breadcrumbs
- 1/2 cup vegetable oil (for frying; or avocado/olive oil)
- Optional: 1/2 cup cooked sausage, crumbled
- Optional: 1/3 cup dried cranberries
- Optional: 1/2 cup chopped pecans or walnuts
Instructions
- Cut bread into 1/2-inch cubes. Lay out on a baking sheet and let dry for 1 hour, or toast in a 300°F oven for 10 minutes until slightly crisp.
- In a skillet, melt butter over medium heat. Add onion and celery; sauté for 5-6 minutes until soft. Add garlic and cook 1 more minute.
- In a large mixing bowl, combine toasted bread cubes, sautéed veggies, parsley, sage, thyme, salt, and pepper. Pour in beaten eggs and broth. Fold in optional add-ins if using. Stir gently until evenly moistened; mixture should hold together when pressed.
- Scoop about 2 tablespoons of mixture and roll into balls, slightly smaller than a golf ball. Place on a lined baking sheet (makes 16-20 balls).
- Chill tray in fridge for 15-20 minutes to firm up.
- Roll each ball in panko breadcrumbs to coat. For extra crunch, double dip: roll in egg wash, then panko again.
- Heat oil in a skillet to 350°F. Fry stuffing balls in batches, turning gently, for 2-3 minutes per side until deep golden brown. Transfer to paper towels to drain.
- Alternative baking method: Preheat oven to 400°F. Place coated balls on a greased or parchment-lined baking sheet. Spray lightly with oil and bake 18-20 minutes, flipping halfway, until crispy.
- Let stuffing balls cool for 5 minutes before serving.
Notes
Use day-old bread for best texture. Chilling the balls before cooking helps them hold together. For gluten-free, use GF bread and panko; for vegan, use plant-based butter and a flaxseed egg. Balls can be made ahead and reheated. Baking is a lighter alternative to frying. Add-ins like sausage, cranberries, or nuts can be customized.
Nutrition
- Serving Size: 1 stuffing ball
- Calories: 110
- Sugar: 1
- Sodium: 150
- Fat: 7
- Saturated Fat: 2.5
- Carbohydrates: 10
- Fiber: 1
- Protein: 3
Keywords: stuffing balls, Thanksgiving appetizer, crispy stuffing, holiday bites, easy stuffing recipe, potluck snack, Friendsgiving, vegetarian stuffing balls, baked stuffing balls, fried stuffing balls


