
“You know that moment when you realize you need a cake big enough to feed fifty hungry guests, but your budget is tighter than your high school jeans? That was me last spring, standing in my tiny kitchen with a half-empty pantry and a growing guest list for my niece’s graduation party. Honestly, I thought about calling the bakery, but the prices made me wince. Then, as I stared at my scratched-up mixing bowl, I remembered a tip my neighbor, Linda, shared one blustery Thursday evening while borrowing sugar: a simple sheet cake recipe that stretches like magic and tastes like a dream.
Linda wasn’t a professional baker—just a mom with a knack for comforting desserts and a smile that made you believe she could turn flour and eggs into gold. That night, while I was half-watching a soccer game on TV, I scribbled her recipe on a scrap of paper. The next day, with a few tweaks and a little patience, I baked what turned out to be the easiest, most budget-friendly graduation sheet cake I’d ever made. It fed everyone—and then some.
Maybe you’ve been there—facing a crowd and a budget, wanting something homemade but without the fuss. This recipe stayed with me because it’s more than just cake; it’s the kind of dessert that brings people together without breaking the bank. Let me tell you, it’s a crowd-pleaser that even your most skeptical guests will ask for again.
Why You’ll Love This Recipe
After testing this easy budget graduation sheet cake recipe several times (including one chaotic weekend when the power flickered mid-bake), I can confidently say it’s a winner. Here’s why it should be your go-to for big celebrations:
- Quick & Easy: Comes together in under 45 minutes, perfect for those last-minute party preps or when you have a million other things to do.
- Simple Ingredients: Uses pantry staples you likely already have—no fancy or expensive ingredients needed.
- Perfect for Parties: Sized generously to feed 50 guests, making it ideal for graduations, potlucks, or any big gathering.
- Crowd-Pleaser: The moist, tender crumb and classic flavor get rave reviews from kids and adults alike.
- Unbelievably Delicious: The frosting is creamy without being too sweet, balancing the cake perfectly.
This isn’t just another sheet cake recipe; it’s the one that balances cost and taste without compromise. I fine-tuned the baking time and frosting consistency so you get that soft, melt-in-your-mouth texture every time. Honestly, it’s the kind of cake that makes you close your eyes after the first bite and smile—comfort food, no frills, just pure good stuff. Whether you’re impressing a crowd or just want a fuss-free dessert, this recipe has your back.
What Ingredients You Will Need
This easy budget graduation sheet cake recipe uses simple, wholesome ingredients to deliver a moist texture and familiar, comforting flavor without any fuss. Most of these are pantry staples, and substitutions are easy if you’re short on anything.
- For the Cake Batter:
- 3 cups all-purpose flour (I prefer King Arthur for consistency)
- 2 ½ cups granulated sugar
- 1 tbsp baking powder (leavens the cake just right)
- 1 tsp baking soda
- 1 tsp salt
- 1 cup vegetable oil (adds moisture without flavor interference)
- 1 ½ cups whole milk, room temperature (or use dairy-free milk like almond if needed)
- 3 large eggs, room temperature
- 2 tsp vanilla extract (use pure for best aroma)
- 1 cup boiling water (helps make the cake super tender)
- For the Frosting:
- 1 cup unsalted butter, softened (Land O’Lakes has great consistency)
- 4 cups powdered sugar, sifted
- 2 tsp vanilla extract
- 4-6 tbsp whole milk or cream (adjust for desired frosting thickness)
- Pinch of salt to balance sweetness
Substitution tip: If you want a lighter frosting, swap half the butter for cream cheese, though it changes the flavor slightly. For gluten-free, use a one-to-one gluten-free flour blend, but expect a denser texture. Also, seasonal twist? Add fresh berries or edible flowers on top for a festive look without adding much cost.
Equipment Needed
To pull off this easy budget graduation sheet cake, you’ll need a few basic kitchen tools. Nothing fancy required, which is great if you’re cooking in a modest kitchen or just don’t want to run out and buy special gear.
- One large sheet pan (about 18×24 inches) – this size is perfect for feeding 50 guests. If you don’t have one, two smaller pans (9×13 inches) work fine; just adjust baking time slightly.
- Mixing bowls: A large one for the batter and a medium for the frosting.
- Electric mixer or sturdy whisk: An electric hand mixer makes frosting and batter blending easier, but a whisk works if you’re patient.
- Measuring cups and spoons: Precise measurements matter here; I recommend a set with clear markings.
- Rubber spatula: Essential to scrape down the bowl and smooth the batter evenly in the pan.
- Cooling rack: Helps the cake cool evenly and faster.
Pro tip: I once used a pizza stone as a makeshift cooling rack in a pinch—worked better than expected! Also, keep your mixer beaters clean and dry for fluffier frosting. Don’t stress if you’re working with budget or older tools; this recipe is forgiving.
Preparation Method
- Preheat your oven to 350°F (175°C). Grease and flour your sheet pan well to prevent sticking—it helps to use a pastry brush for even coating. Set aside.
- In a large bowl, whisk together the dry ingredients: 3 cups all-purpose flour, 2 ½ cups sugar, 1 tbsp baking powder, 1 tsp baking soda, and 1 tsp salt. Mixing these dry ensures even distribution and perfect rise.
- Add the wet ingredients: Pour in 1 cup vegetable oil, 1 ½ cups whole milk, 3 large eggs, and 2 tsp vanilla extract. Using an electric mixer on medium speed, beat until smooth and well combined, about 2-3 minutes. The batter will be fairly thick.
- Slowly stir in 1 cup boiling water: This step thins the batter, making it super moist. Don’t skip this—your cake’s texture depends on it. Mix gently until fully incorporated. The batter will be thin and runny, which is exactly right!
- Pour the batter into your prepared pan: Use a rubber spatula to scrape every bit in and smooth out the top. Tap the pan lightly on the counter to release any trapped air bubbles.
- Bake for 40-45 minutes: No peeking before 35 minutes! When done, a toothpick inserted in the center should come out clean or with just a few moist crumbs. If it’s wet batter, bake a few minutes longer. The smell will fill your kitchen with that reassuring, warm vanilla scent.
- Cool the cake completely on a rack: This takes about 1-1.5 hours. Patience here is key; frosting a warm cake leads to sliding messes. You can speed cooling by placing the cake in a cool spot or near an open window (weather permitting).
- While cake cools, make the frosting: Beat 1 cup softened butter with 4 cups powdered sugar, 2 tsp vanilla, a pinch of salt, and 4 tbsp milk on medium speed. Add milk one tablespoon at a time until you get a creamy, spreadable consistency. Beat for 3-4 minutes until fluffy.
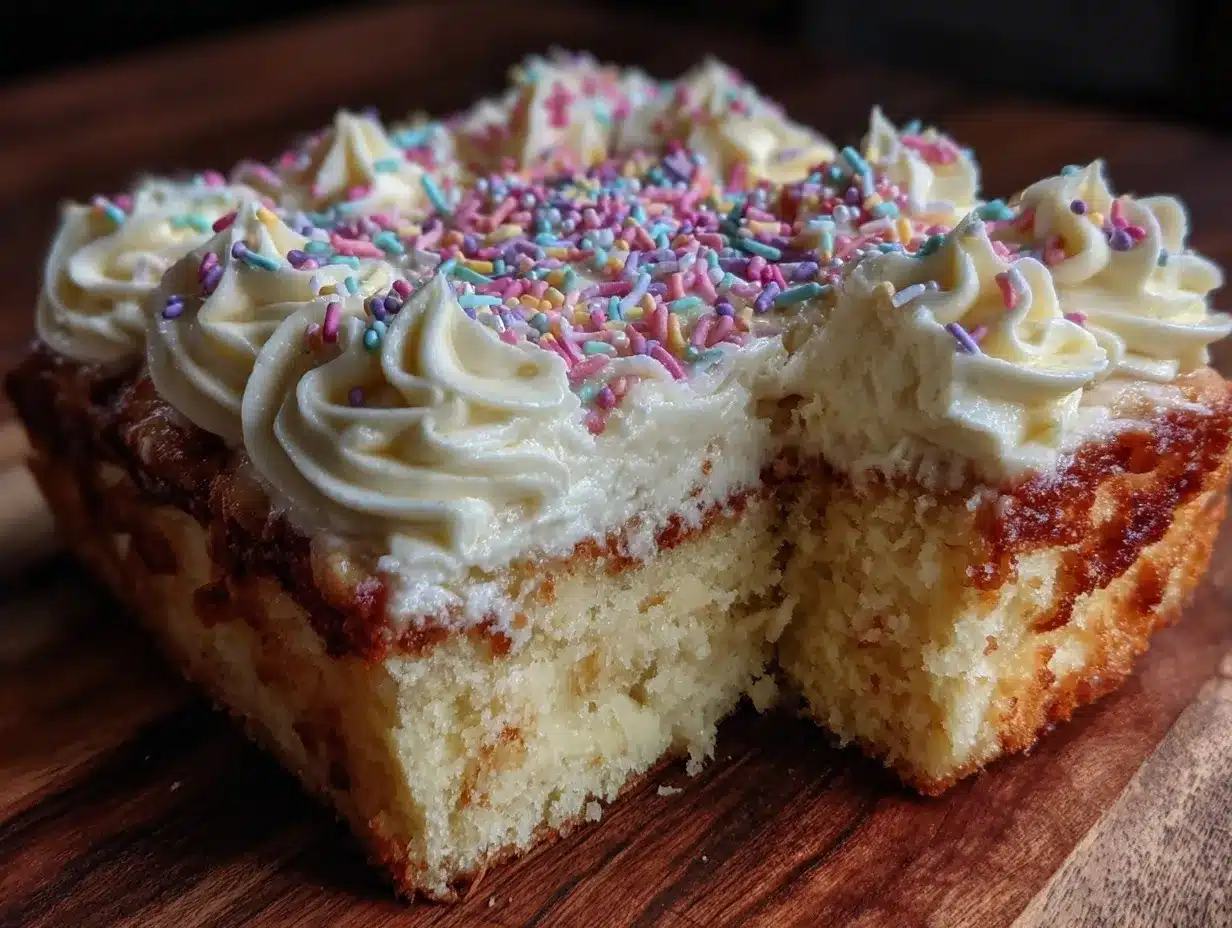
- Frost the cake evenly: Use an offset spatula or butter knife to spread frosting gently over the top. For a festive graduation touch, add sprinkles, piped borders, or edible glitter.
- Serve and enjoy! Cut into 2×2 inch squares to feed 50 guests comfortably. Store leftovers covered at room temperature for up to 2 days or refrigerate up to 5 days.
Quick tip: If your frosting is too thick, add a splash more milk. If it’s too thin, a little extra powdered sugar will fix it right up. I’ve learned the hard way that patience during cooling and frosting makes all the difference.
Cooking Tips & Techniques
Making a cake this size can feel intimidating, but with a few tricks, you’ll have a smooth experience. Here’s what I’ve learned, sometimes the hard way:
- Don’t rush the cooling: I once frosted a warm cake after a power outage and ended up with frosting sliding right off. Let it cool fully on a rack for best results.
- Use room temperature ingredients: Eggs and milk at room temp mix more evenly, producing a tender crumb.
- Mix just enough: Overmixing flour can make a cake tough; stop once ingredients are combined and smooth.
- Boiling water is your secret weapon: It helps break down the flour proteins for a softer cake and keeps the crumb moist.
- Grease and flour the pan well: It’s easy to skip this step, but trust me, this cake sticks otherwise.
- Timing is everything: Start frosting only when the cake is fully cooled; multitask by whipping frosting while cake cools.
- Use an offset spatula for frosting: It makes spreading smoother and less messy.
These little steps helped me avoid a few kitchen disasters and made this recipe foolproof—perfect for when you have a room full of hungry, impatient guests.
Variations & Adaptations
Want to switch things up or accommodate special diets? Here are some variations I’ve tried and loved:
- Chocolate Twist: Add ¾ cup cocoa powder to the dry ingredients and reduce flour by the same amount for a rich chocolate version.
- Gluten-Free: Swap all-purpose flour with a one-to-one gluten-free blend like Bob’s Red Mill. The cake will be slightly denser but still delicious.
- Dairy-Free/Vegan: Use almond or oat milk instead of dairy, replace eggs with flax eggs (1 tbsp flaxseed meal + 3 tbsp water per egg), and use dairy-free butter or coconut oil for frosting.
- Seasonal Fruit Addition: Fold in 1 cup fresh or frozen berries (like blueberries or raspberries) before baking for a fruity surprise.
Once, I tried a lemon zest and poppy seed variation, adding zest of two lemons and 2 tbsp poppy seeds to the batter. It was a hit at a spring brunch! Feel free to experiment with flavors to make this recipe truly your own.
Serving & Storage Suggestions
This graduation sheet cake is best enjoyed at room temperature, allowing the frosting and crumb to shine. I like to serve it on a simple platter with a few fresh berries or edible flowers for a festive touch.
It pairs wonderfully with a cup of coffee, iced tea, or even a sparkling lemonade for a party vibe. For larger gatherings, serving it buffet-style with disposable plates and forks keeps things casual and easy.
To store, cover the cake tightly with plastic wrap or place in an airtight container. It keeps well at room temperature for up to 2 days, but refrigerate if your kitchen is warm or if you prefer chilled cake. Leftovers freeze beautifully: wrap individual slices in plastic and foil, then freeze up to 3 months. Thaw overnight in the fridge and bring to room temperature before serving.
Flavors tend to mellow and deepen after a day, so if you can wait, the next-day cake is even better. Just remember to keep it covered to avoid drying out.
Nutritional Information & Benefits
Per serving (approximate, based on 50 servings):
| Calories | 250 |
|---|---|
| Fat | 10g |
| Carbohydrates | 38g |
| Protein | 3g |
| Sugar | 25g |
This cake offers a comforting energy boost with its carbohydrates and fats, perfect for celebrations. Using vegetable oil instead of butter in the batter reduces saturated fat, and opting for whole milk adds a bit of calcium and vitamin D. The eggs provide protein and essential nutrients.
Gluten-free and dairy-free adaptations make this recipe accessible for common dietary needs. Just be mindful of allergies—this recipe contains eggs and dairy by default. For a lighter treat, consider pairing smaller slices with fresh fruit.
Conclusion
Whether you’re scrambling to find a dessert that feeds a crowd or want a budget-friendly crowd-pleaser for your next graduation party, this easy budget graduation sheet cake recipe has you covered. It balances simplicity, flavor, and size without the stress or expense. I love this recipe because it feels like a warm hug—familiar, reliable, and just plain good.
Give it a try, and don’t hesitate to tweak it to match your taste or dietary needs. I’d love to hear how it worked for your celebration—drop a comment, share your photos, or tell me about your favorite variations. Happy baking and congratulations to all the grads out there!
FAQs
Can I make this cake a day ahead?
Absolutely! Bake and frost the cake the day before your event and store it covered at room temperature or in the fridge. It actually tastes better after resting overnight.
What if I don’t have a large sheet pan?
You can use two 9×13 inch pans instead. Adjust baking time to about 30-35 minutes and test for doneness.
Can I use boxed cake mix instead of making from scratch?
Sure, if you’re short on time! Just choose a quality mix and follow the package instructions, but homemade gives you more control over flavor and cost.
How do I keep the cake moist if I need to transport it?
Cover the cake tightly with plastic wrap or place in a cake carrier. Transport in a cool place to prevent frosting melting.
What’s the best way to cut a sheet cake evenly for 50 guests?
Measure and mark cuts to make 2×2 inch squares. A long serrated knife or a cake cutter works best for clean edges.
Pin This Recipe!
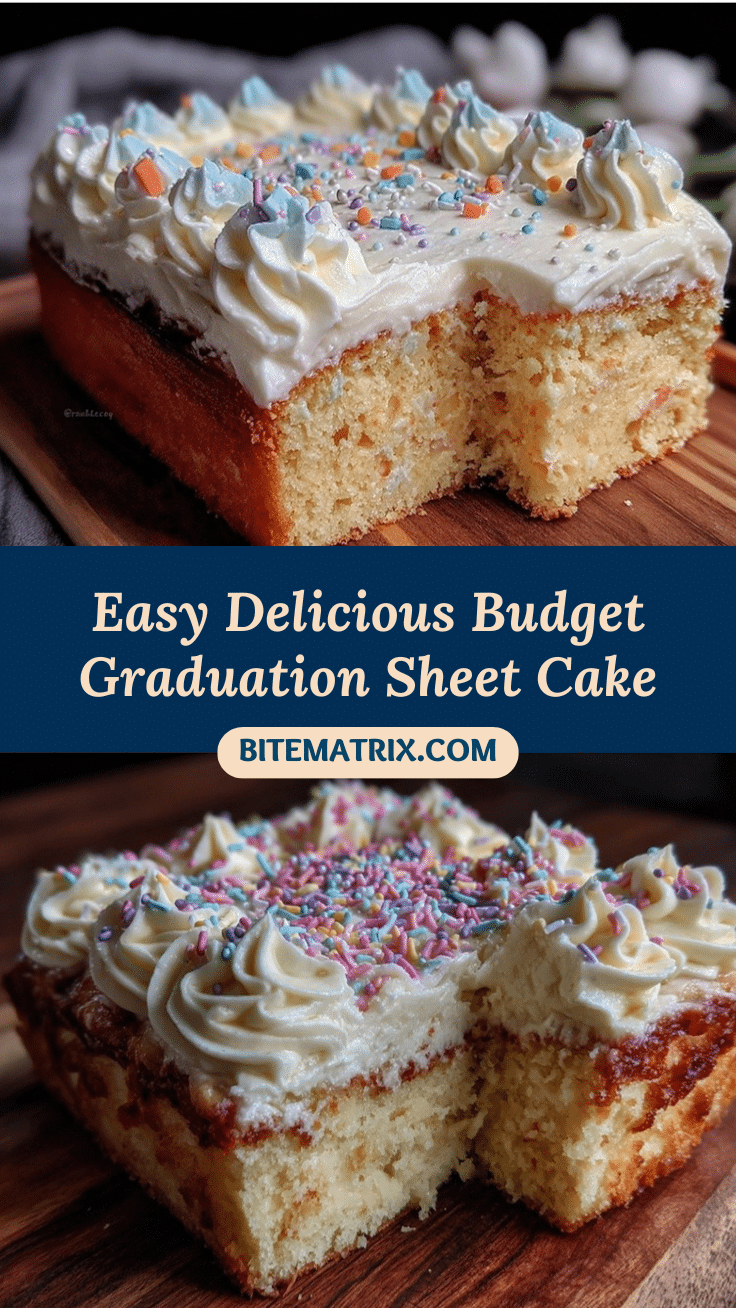
Easy Budget Graduation Sheet Cake Recipe to Feed 50 Guests Perfect for Parties

A simple, budget-friendly sheet cake recipe that feeds 50 guests, perfect for graduations and large gatherings. Moist, tender, and easy to make with pantry staples.
- Prep Time: 15 minutes
- Cook Time: 40-45 minutes
- Total Time: 1 hour 15 minutes to 1 hour 30 minutes
- Yield: 50 servings 1x
- Category: Dessert
- Cuisine: American
Ingredients
- 3 cups all-purpose flour
- 2 ½ cups granulated sugar
- 1 tbsp baking powder
- 1 tsp baking soda
- 1 tsp salt
- 1 cup vegetable oil
- 1 ½ cups whole milk, room temperature
- 3 large eggs, room temperature
- 2 tsp vanilla extract
- 1 cup boiling water
- 1 cup unsalted butter, softened
- 4 cups powdered sugar, sifted
- 2 tsp vanilla extract (for frosting)
- 4–6 tbsp whole milk or cream
- Pinch of salt
Instructions
- Preheat your oven to 350°F (175°C). Grease and flour your sheet pan well to prevent sticking.
- In a large bowl, whisk together the dry ingredients: flour, sugar, baking powder, baking soda, and salt.
- Add the wet ingredients: vegetable oil, whole milk, eggs, and vanilla extract. Beat on medium speed until smooth and well combined, about 2-3 minutes.
- Slowly stir in boiling water until fully incorporated. The batter will be thin and runny.
- Pour the batter into the prepared pan and smooth the top with a rubber spatula. Tap the pan lightly to release air bubbles.
- Bake for 40-45 minutes. Check doneness with a toothpick inserted in the center; it should come out clean or with a few moist crumbs.
- Cool the cake completely on a cooling rack for 1-1.5 hours before frosting.
- To make the frosting, beat softened butter with powdered sugar, vanilla, salt, and 4 tbsp milk on medium speed. Add milk one tablespoon at a time until creamy and spreadable. Beat for 3-4 minutes until fluffy.
- Frost the cooled cake evenly using an offset spatula or butter knife. Decorate as desired.
- Cut into 2×2 inch squares to serve 50 guests. Store leftovers covered at room temperature for up to 2 days or refrigerate up to 5 days.
Notes
Use room temperature ingredients for best results. Do not frost the cake while warm to avoid sliding frosting. Boiling water thins the batter and makes the cake moist. Adjust frosting thickness by adding milk or powdered sugar as needed. For gluten-free, use a one-to-one gluten-free flour blend. For dairy-free/vegan, substitute milk and butter accordingly.
Nutrition
- Serving Size: One 2x2 inch square
- Calories: 250
- Sugar: 25
- Fat: 10
- Carbohydrates: 38
- Protein: 3
Keywords: sheet cake, graduation cake, budget cake, party dessert, easy cake recipe, large cake recipe, crowd-pleaser


