Let me tell you, the smell of buttery, flaky pastry dough mingling with sweet jam as it bakes in the oven is enough to make anyone’s mouth water. The first time I baked these easy homemade flaky Pop-Tarts, I was instantly hooked—the kind of moment where you pause, take a deep breath, and just smile because you know you’re onto something truly special. I remember when I was knee-high to a grasshopper, my grandma would pull out store-bought Pop-Tarts for a quick breakfast treat, but nothing compared to the homemade kind I stumbled upon years ago on a rainy weekend, trying to recreate that nostalgic favorite from scratch.
Honestly, my family couldn’t stop sneaking them off the cooling rack (and I can’t really blame them). These flaky Pop-Tarts have since become a staple for our weekend breakfasts, holiday mornings, and even last-minute potlucks. They’re dangerously easy to make and provide that pure, nostalgic comfort that’s hard to beat. You know what? Whether you’re craving a sweet start to your day or a fun baking project, this recipe is perfect for brightening up your Pinterest cookie board or delighting your kids with a homemade treat. After testing this recipe multiple times (in the name of research, of course), I can confidently say you’re going to want to bookmark this one.
Why You’ll Love This Recipe
Having tried countless Pop-Tart recipes over the years, I can say this one stands out for all the right reasons. It’s been family-approved and kitchen-tested to bring you a flaky, tender crust with endless flavor possibilities. Here’s why this easy homemade flaky Pop-Tarts recipe will quickly become your go-to:
- Quick & Easy: Comes together in under 30 minutes, perfect for busy mornings or spontaneous baking sessions.
- Simple Ingredients: No fancy grocery trips needed; you likely already have everything in your pantry.
- Perfect for Any Occasion: Great for breakfast, brunch, potlucks, or even a sweet snack.
- Crowd-Pleaser: Always gets rave reviews from kids and adults alike—trust me, they’ll be asking for seconds.
- Unbelievably Delicious: That flaky crust paired with your favorite filling is comfort food at its best.
What makes this recipe different? It’s all about the flaky dough technique—no store-bought crust here! I blend cold butter into the flour just right to get those perfect layers. Plus, the filling options are endless; from classic strawberry jam to decadent Nutella, every bite feels like a warm, homemade hug. This isn’t just another version—it’s your best version, the kind that makes you close your eyes after the first bite. It’s comfort food reimagined: homemade, fast, and ridiculously tasty.
What Ingredients You Will Need
This recipe uses simple, wholesome ingredients to deliver bold flavor and that satisfying flaky texture without any fuss. Most of these are pantry staples, and you can easily swap a few if needed.
- All-Purpose Flour – 2 1/2 cups (310g), for the flaky dough base
- Cold Unsalted Butter – 1 cup (227g), diced and chilled (adds richness and flakiness; I recommend Plugrá for best texture)
- Granulated Sugar – 2 tablespoons, just a touch for sweetness in the dough
- Salt – 1/2 teaspoon, to balance flavors
- Cold Whole Milk – 1/2 cup (120ml), for moisture (use dairy-free milk if needed)
- Vanilla Extract – 1 teaspoon, for subtle flavor
- Egg – 1 large, room temperature, for the dough and egg wash
- Filling of Choice – 1/2 cup per batch, such as:
- Strawberry, raspberry, or apricot jam (homemade or store-bought)
- Nutella or chocolate spread
- Peanut butter and jelly combo
- Apple butter or cinnamon sugar mixture
- Powdered Sugar – Optional, for a simple glaze
- Milk or Lemon Juice – For the glaze (mix with powdered sugar)
If you want to switch things up, use almond flour for a gluten-free take or swap Greek yogurt for milk if you prefer a tangier crust. Just remember, keeping the butter cold is key for that flaky texture, so don’t skip chilling your butter before mixing.
Equipment Needed
- Mixing Bowls: One large for dough, one small for egg wash.
- Pastry Cutter or Food Processor: To blend butter into flour quickly. If you don’t have one, use two knives or your fingertips, but keep the butter cold!
- Rolling Pin: Essential for rolling out the dough evenly to about 1/8-inch thickness.
- Baking Sheet: Preferably rimmed to catch any drips.
- Parchment Paper or Silicone Baking Mat: For easy cleanup and to prevent sticking.
- Pastry Brush: For applying the egg wash—cheap and makes a big difference.
- Sharp Knife or Pizza Cutter: To cut the dough into rectangles.
Honestly, I’ve tried making these without a rolling pin (using a wine bottle—don’t judge!), but a proper rolling pin just makes life easier. For budget-friendly options, look for silicone brushes and non-stick mats online or at your local store—totally worth it when you bake often.
Preparation Method
- Mix Dry Ingredients: In a large bowl, whisk together 2 1/2 cups (310g) all-purpose flour, 2 tablespoons sugar, and 1/2 teaspoon salt. This sets the base for your flaky dough.
- Cut in Butter: Add 1 cup (227g) cold, diced unsalted butter. Use a pastry cutter or food processor pulsing until the mixture resembles coarse crumbs with pea-sized butter bits. Those chunks are what create the flaky layers.
- Add Wet Ingredients: In a small bowl, whisk 1 large egg, 1/2 cup (120ml) cold whole milk, and 1 teaspoon vanilla extract. Pour into the flour mixture and gently stir with a fork until dough just begins to come together. Don’t overmix! The dough will be shaggy but should hold when pressed.
- Chill the Dough: Shape the dough into a flat disk, wrap in plastic, and refrigerate for at least 30 minutes. This step firms up the butter and makes rolling easier.
- Roll Out Dough: On a lightly floured surface, roll the chilled dough to about 1/8-inch (3mm) thickness. Try to keep it rectangular for easy cutting. If the dough softens too much, pop it back into the fridge for 10 minutes.
- Cut Rectangles: Use a sharp knife or pizza cutter to cut the dough into rectangles approximately 3×4 inches (7.5x10cm). You should get about 8-10 per batch.
- Fill Pop-Tarts: Place half of the rectangles on a parchment-lined baking sheet. Spoon about 1 tablespoon of your chosen filling onto the center of each, leaving a 1/4-inch border.
- Seal Edges: Brush the edges with a beaten egg (egg wash). Top with remaining dough rectangles, pressing edges firmly with a fork to seal. Poke a few holes in the top with a fork for steam to escape.
- Apply Egg Wash: Brush the tops with egg wash for a golden finish.
- Bake: Preheat oven to 375°F (190°C). Bake for 20-25 minutes, until golden brown and puffed. Keep an eye near the end to avoid overbrowning.
- Cool & Glaze (Optional): Let cool on a wire rack. If desired, mix powdered sugar with milk or lemon juice and drizzle on top for a sweet glaze.
If your dough cracks or tears, don’t panic! Just pinch it back together gently. The key is to keep everything chilled and handle the dough lightly. The smell while baking is heavenly—you’ll know they’re done when that buttery aroma fills your kitchen and the edges turn a perfect golden brown.
Cooking Tips & Techniques
Making flaky Pop-Tarts isn’t rocket science, but a few tips from the trenches will make your life easier and your pastries better. First, cold butter is non-negotiable. If your kitchen is warm, chill your butter chunks and even your flour beforehand if you can—it helps keep the dough nice and flaky.
When rolling out your dough, try to keep it even in thickness. Uneven dough can lead to some parts baking faster, leaving you with soggy or burnt edges. If you notice your dough getting sticky, a quick chill in the fridge or a dusting of flour helps.
Sealing edges properly is key to avoid filling leakage. Don’t be shy with the fork pressing, and remember to leave a small border so the filling doesn’t ooze out during baking. Also, don’t overfill—less is more here!
One time, I forgot the steam holes and ended up with a Pop-Tart that puffed up like a balloon—funny-looking but still tasty. Lesson learned: poke those vents! Lastly, timing is everything. Keep an eye on the oven after 20 minutes. Ovens vary, and you want a golden crust, not a burnt one.
Variations & Adaptations
One of the best things about this easy homemade flaky Pop-Tarts recipe is how adaptable it is. Here are some fun ways to switch things up:
- Dietary Tweaks: Use gluten-free flour blends to make these safe for gluten-sensitive folks. Swap dairy milk for almond or oat milk, and butter for coconut oil or vegan butter for a dairy-free version.
- Seasonal Fillings: Swap in fresh fruit preserves in summer (think blueberry or peach), or go for pumpkin butter and warm spices in fall. A little cinnamon sugar sprinkled inside makes an easy sweet twist.
- Flavor Twists: Add a sprinkle of cinnamon or nutmeg to the dough for extra warmth. For a savory take, try filling with cream cheese and chives or bacon jam.
- Cooking Method: For a quicker option, pan-fry sealed Pop-Tarts in a little butter over medium heat for a golden crust on both sides, then finish with a quick bake or serve fresh.
Personally, I once tried a peanut butter and jelly combo with a sprinkle of sea salt on top—let’s just say it was an instant hit at a family brunch. Feel free to get creative; that’s what makes homemade Pop-Tarts so much fun.
Serving & Storage Suggestions
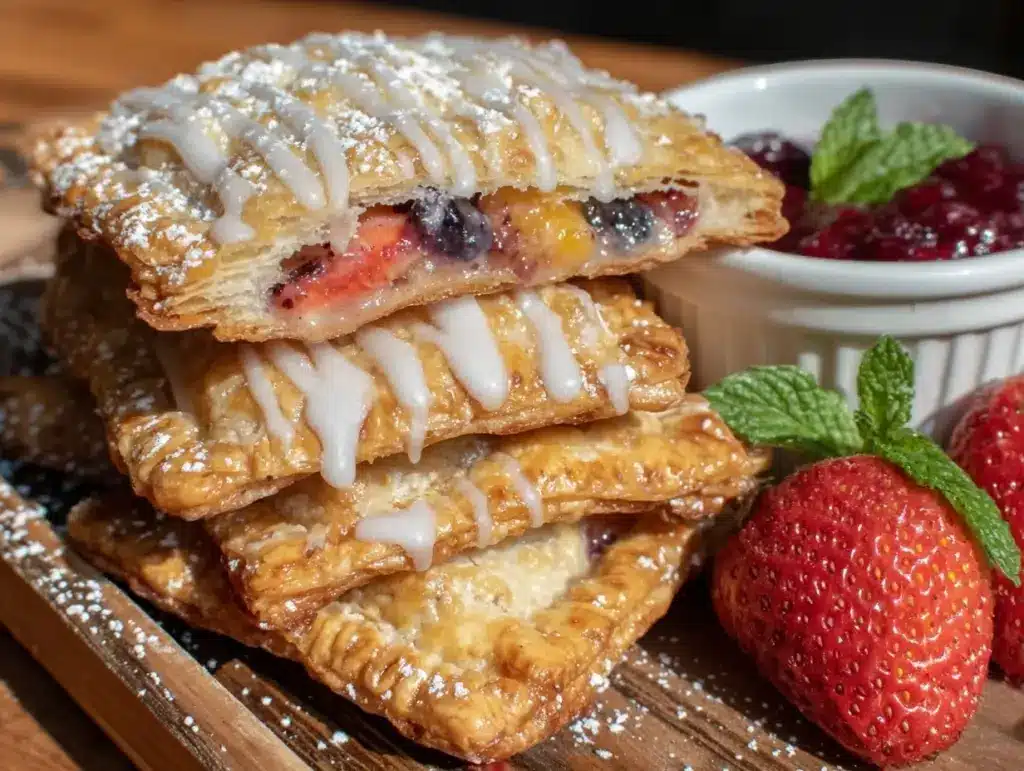
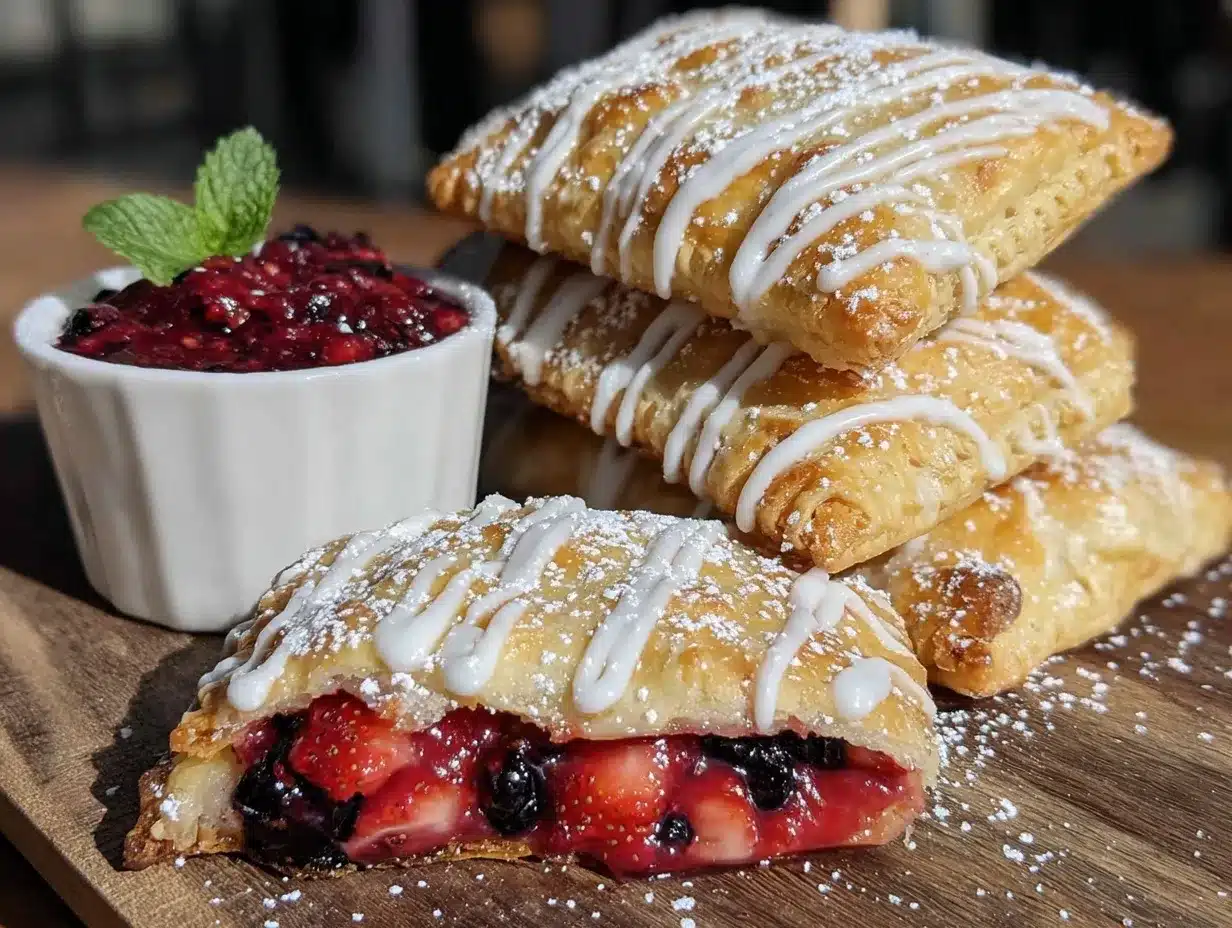
Serve your homemade flaky Pop-Tarts warm or at room temperature. They’re perfect paired with a hot cup of coffee or a cold glass of milk. For breakfast, I love stacking them on a pretty plate and adding a dollop of whipped cream or fresh berries for a little extra flair.
Leftovers store beautifully. Keep them in an airtight container at room temperature for up to 2 days or in the fridge for up to 5 days. You can also freeze them, wrapped tightly in plastic wrap and placed in a freezer bag, for up to 2 months.
To reheat, pop them in a toaster oven or regular oven at 350°F (175°C) for about 5-7 minutes until warm and crisp again. Microwaving works in a pinch but can make the crust a bit soggy.
Over time, the flavors meld beautifully, especially if you’ve made them with a jam filling—the fruit notes become more pronounced, making day-old Pop-Tarts a treat in their own right.
Nutritional Information & Benefits
Each homemade Pop-Tart contains roughly 250-300 calories depending on filling and size, with about 10-15 grams of fat and 30-35 grams of carbohydrates. Using real butter and whole ingredients means no weird preservatives or additives, which is always a win in my book.
The flour provides energy-giving carbs, while butter lends essential fats that keep you satisfied. Choosing fillings like fruit preserves adds natural antioxidants and vitamins, making these a better choice than their processed counterparts.
If you’re watching gluten or dairy, the recipe is easily adapted as mentioned earlier. Just be mindful of fillings if allergies are a concern—always double-check labels.
Conclusion
So there you have it—easy homemade flaky Pop-Tarts that are truly worth the little extra effort. Whether you stick to classic strawberry jam or experiment with your favorite flavor combos, these Pop-Tarts bring that perfect blend of buttery, flaky crust and sweet filling that feels like a warm hug.
I love this recipe because it’s flexible, approachable, and downright delicious. Plus, seeing my family’s faces light up when they bite into these homemade treats never gets old. Give it a try, make it your own, and don’t forget to share your adaptations—I’d love to hear what you come up with!
Now go on, grab your rolling pin and get baking. You won’t regret it!
FAQs
Can I make these Pop-Tarts ahead of time?
Absolutely! You can prepare and shape them, then refrigerate for up to 24 hours before baking. Just cover them tightly to prevent drying out.
What’s the best way to store leftover Pop-Tarts?
Keep them in an airtight container at room temperature for a couple of days, or freeze for longer storage. Reheat in the oven or toaster oven for best results.
Can I use a different type of filling besides jam?
Yes! Nutella, peanut butter, cream cheese, or even savory fillings work great. Just make sure the filling isn’t too runny to avoid leaks.
How do I make the crust extra flaky?
Keep your butter and dough cold, and avoid overworking the dough. Those little butter chunks create the flaky layers when baked.
Is there a gluten-free version of this recipe?
You can substitute a gluten-free all-purpose flour blend. Just be aware that texture may vary slightly, but it still tastes delicious!
Pin This Recipe!

Easy Homemade Flaky Pop-Tarts Recipe Perfect for Any Flavor Variation

This recipe delivers flaky, tender crust Pop-Tarts with endless flavor possibilities, perfect for breakfast, brunch, or snacks. Made with simple pantry ingredients and a flaky dough technique, these homemade treats are quick, easy, and crowd-pleasing.
- Prep Time: 15 minutes
- Cook Time: 20-25 minutes
- Total Time: 40 minutes
- Yield: 8-10 Pop-Tarts 1x
- Category: Breakfast
- Cuisine: American
Ingredients
- 2 1/2 cups (310g) all-purpose flour
- 1 cup (227g) cold unsalted butter, diced and chilled
- 2 tablespoons granulated sugar
- 1/2 teaspoon salt
- 1/2 cup (120ml) cold whole milk (or dairy-free milk alternative)
- 1 teaspoon vanilla extract
- 1 large egg, room temperature (for dough and egg wash)
- 1/2 cup filling of choice (e.g., strawberry, raspberry, or apricot jam; Nutella; peanut butter and jelly; apple butter or cinnamon sugar mixture)
- Powdered sugar (optional, for glaze)
- Milk or lemon juice (for glaze)
Instructions
- In a large bowl, whisk together 2 1/2 cups all-purpose flour, 2 tablespoons sugar, and 1/2 teaspoon salt.
- Add 1 cup cold, diced unsalted butter. Use a pastry cutter or food processor to pulse until mixture resembles coarse crumbs with pea-sized butter bits.
- In a small bowl, whisk 1 large egg, 1/2 cup cold whole milk, and 1 teaspoon vanilla extract. Pour into flour mixture and gently stir with a fork until dough just begins to come together. Do not overmix.
- Shape dough into a flat disk, wrap in plastic, and refrigerate for at least 30 minutes.
- On a lightly floured surface, roll chilled dough to about 1/8-inch thickness, keeping it rectangular.
- Cut dough into rectangles approximately 3×4 inches. You should get about 8-10 per batch.
- Place half of the rectangles on a parchment-lined baking sheet. Spoon about 1 tablespoon of filling onto the center of each, leaving a 1/4-inch border.
- Brush edges with beaten egg (egg wash). Top with remaining dough rectangles, pressing edges firmly with a fork to seal. Poke a few holes in the top with a fork for steam to escape.
- Brush tops with egg wash for a golden finish.
- Preheat oven to 375°F (190°C). Bake for 20-25 minutes until golden brown and puffed.
- Let cool on a wire rack. Optionally, mix powdered sugar with milk or lemon juice and drizzle on top for a glaze.
Notes
Keep butter and dough cold to ensure flaky layers. Do not overmix dough to avoid toughness. Chill dough if it softens while rolling. Seal edges well to prevent filling leakage. Poke steam holes in the top crust. Optional glaze adds sweetness and visual appeal. Can be adapted for gluten-free or dairy-free diets by substituting flours and milk/butter alternatives.
Nutrition
- Serving Size: 1 Pop-Tart
- Calories: 275
- Sugar: 10
- Sodium: 180
- Fat: 13
- Saturated Fat: 8
- Carbohydrates: 33
- Fiber: 1
- Protein: 4
Keywords: Pop-Tarts, homemade Pop-Tarts, flaky pastry, breakfast recipe, easy baking, sweet snack, jam-filled pastry


