
“Mom, what’s for lunch?” That question hit me like a freight train one hectic afternoon when I had exactly five minutes to whip something up before my kiddo dashed out the door. Honestly, I wasn’t ready to cave into another boring sandwich or pre-packaged snack. I rummaged through the fridge and spotted some pizza toppings leftovers from last night’s dinner. An idea clicked—why not make a quick, homemade take on those store-bought Pizza Lunchables? Skeptical at first, I figured it’d be a fun little experiment to break up the usual lunch routine.
Fast forward, and those Easy Homemade Pizza Lunchables became a staple in our house. The best part? They’re just as loved by my friends’ kids during playdates and even my husband, who can’t resist assembling his own mini pizzas during a quick afternoon snack. There’s something satisfying about pulling out all the components and building your own bite-sized pizza. It’s hands-on, customizable, and honestly, so much better (and cheaper) than the plastic-packed versions.
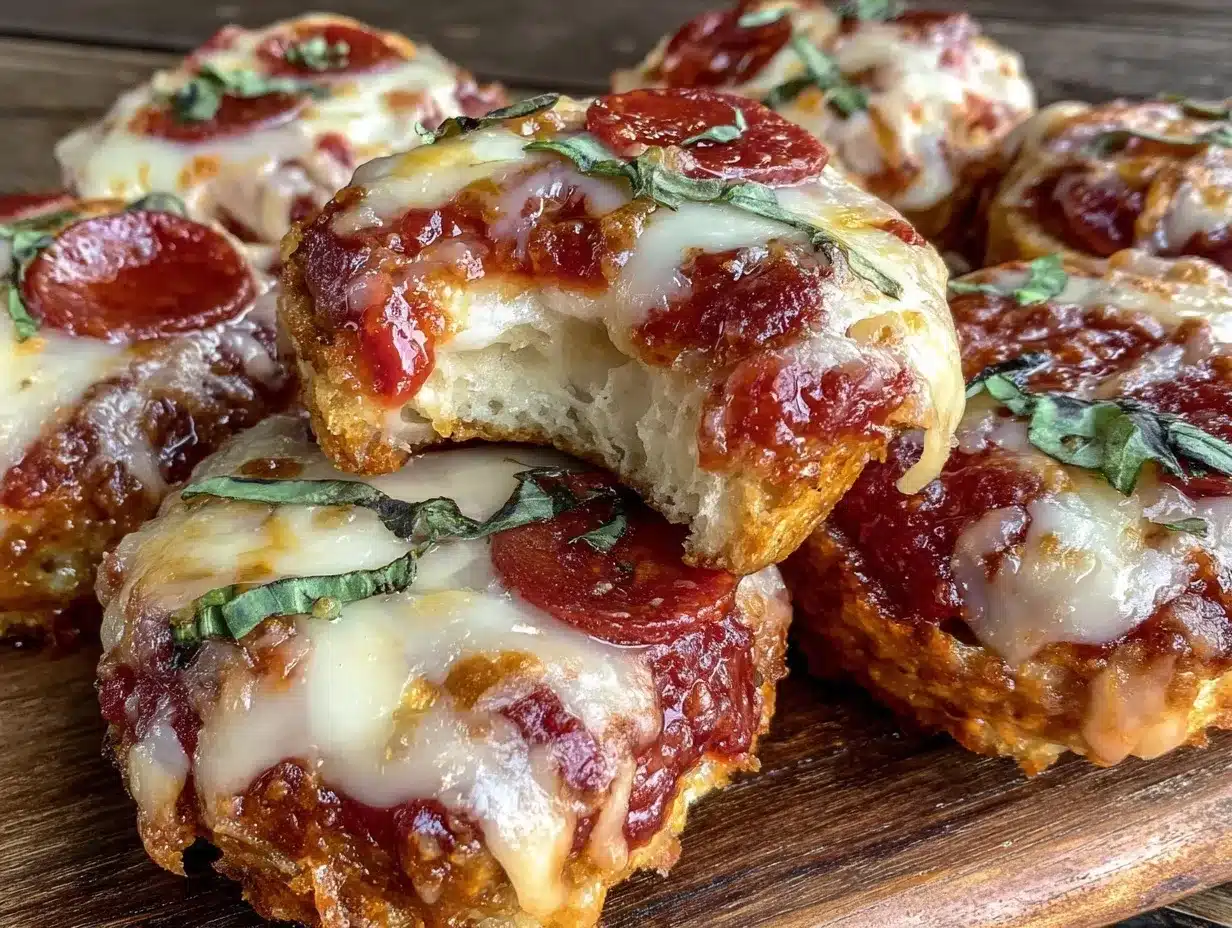
The crunch of the crackers, the gooeyness of melted cheese, and the burst of tomato sauce blend into a fun, nostalgic snack that fills you up without feeling heavy. I even started making these for myself on those busy solo afternoons when I wanted a little comfort without the fuss. It’s funny how such a simple idea came from a last-minute scramble but turned into a go-to for all ages. It’s a quiet little joy—one bite and you know it’s just right.
Why You’ll Love This Recipe
- Quick & Easy: Whips up in under 5 minutes, perfect when time’s tight but hunger’s real.
- Simple Ingredients: No need for specialty stores—most items are pantry staples or easy to find at your local market.
- Perfect for Anytime Snacking: Great for school lunches, after-school snacks, or casual gatherings.
- Customizable: Everyone can build their own pizza, so picky eaters and adults alike get exactly what they want.
- Family & Crowd Favorite: Always a hit with kids and adults both, making it a versatile snack that brings smiles.
- Better Than Store-Bought: No preservatives, fewer additives, and way more flavor because you control the toppings and portion sizes.
This recipe isn’t just another pizza snack hack. I tested different cracker bases (trust me, not all are created equal), tried various cheeses, and found the perfect balance of sauce tanginess to keep those mini pizzas tasting fresh, never soggy. The magic lies in the layering—starting with crisp crackers, then a swipe of sauce, a sprinkle of cheese, and your favorite toppings. Plus, it’s a chance to sneak in some veggies without the usual mealtime battles.
Honestly, it’s the kind of snack that feels like a little celebration in the middle of a busy day. Whether you’re packing lunchboxes or creating a playful snack tray for friends, this homemade pizza lunchables recipe brings comfort food vibes with none of the hassle.
What Ingredients You Will Need
This recipe uses simple, wholesome ingredients to deliver bold flavor and satisfying texture without the fuss. Most of these are pantry staples, and you can easily swap or add ingredients based on what you have on hand.
- Cracker base: Choose sturdy crackers like Ritz or Wheat Thins for a firm, crunchy base (avoid super thin or flaky ones that get soggy quickly).
- Pizza sauce: About ¼ cup (60 ml) of your favorite marinara or pizza sauce. I like Classico brand for its fresh flavor and balanced acidity.
- Cheese: Shredded mozzarella (½ cup / 50 g) works best for that classic melty texture. You can also mix in cheddar for a sharper bite.
- Pepperoni slices: About 12 small slices (optional for kids who prefer meat-free, you can swap for sliced olives or roasted peppers).
- Vegetable toppings: Mini diced bell peppers, sliced black olives, or chopped mushrooms (about ¼ cup / 30 g total).
- Optional extras: Sprinkle of dried oregano or Italian seasoning for an authentic pizza flavor.
Pro tip: Use fresh mozzarella torn into small pieces for a creamier texture, or pre-shredded for convenience. For a gluten-free option, swap the crackers for gluten-free varieties or rice cakes. If dairy-free, try dairy-free shredded cheese alternatives or nutritional yeast for a savory twist.
Equipment Needed
- Small mixing bowl: For combining sauce and seasoning if you like to add herbs to your pizza sauce.
- Measuring spoons and cups: For accuracy, especially if you’re making multiple snack trays.
- Sharp knife or kitchen scissors: To slice pepperoni or veggies into bite-sized pieces.
- Spoon or small spatula: To spread sauce evenly over crackers.
- Serving tray or lunchbox: For arranging the components if you want to pack them separately or let everyone assemble their snack.
If you don’t have a dedicated cracker spreader, a butter knife or the back of a teaspoon works just fine. Nothing fancy required—this snack keeps it real and easy.
Preparation Method
- Gather all ingredients: Lay out crackers, sauce, cheese, and toppings on your prep surface. This assembly line approach speeds things up. (1 minute)
- Prepare the sauce: If you want to jazz up your pizza sauce, mix in a pinch of dried oregano or Italian seasoning in a small bowl. This gives a fresh flavor boost. (30 seconds)
- Spread sauce on crackers: Using a spoon, spread about 1 teaspoon (5 ml) of sauce evenly onto each cracker. Don’t overload, or the cracker gets soggy. (1 minute)
- Add cheese: Sprinkle a small handful (about 1 tablespoon / 10 g) of shredded mozzarella over the sauce. The cheese should cover the sauce but not pile up too thickly. (1 minute)
- Top with pepperoni and veggies: Arrange 2-3 small pepperoni slices per cracker, plus a few bits of diced veggies like bell peppers or olives for texture and flavor. (1 minute)
- Optional step for melting: If you want melted cheese, place crackers on a baking sheet and broil for 1-2 minutes, watching closely to avoid burning. This step is optional but adds that authentic pizza vibe. (2 minutes)
- Serve immediately or pack: Arrange on a plate or pack into snack containers for lunch. Keep sauce separate if you want to avoid sogginess during transport. (30 seconds)
Note: Watch the crackers carefully if broiling—cheese melts fast, and you don’t want it to burn. If you’re making these ahead, keep components separate and assemble just before eating for best freshness.
Cooking Tips & Techniques
One trick I learned the hard way is to not over-sauce the crackers. Too much sauce can turn them into a soggy mess, which kills the whole fun. A thin, even layer is perfect. Also, choosing the right crackers makes all the difference—something sturdy enough to hold toppings but not so hard it’s like eating a rock.
For adults or kids who enjoy a little spice, a dash of crushed red pepper flakes on top before melting adds a nice kick. When it comes to cheese, fresh mozzarella melts beautifully but can be messy if not shredded small. Pre-shredded mozzarella is convenient but sometimes lacks that fresh stretchiness.
Multitasking helps! While you prep the sauce and toppings, get your crackers ready so assembly goes super fast. If you want to get fancy, use a small piping bag or zip-top bag with a tiny corner cut to spread sauce neatly.
Remember, the best part is the building process itself—letting kids or guests create their own mini pizzas means everyone gets exactly what they want, and it’s a fun, interactive snack time.
Variations & Adaptations
I’m all about making recipes fit your lifestyle, so here are some tasty tweaks for this homemade pizza lunchables recipe:
- Vegetarian version: Skip the pepperoni and add sliced cherry tomatoes, mushrooms, or even artichoke hearts for a veggie-loaded snack.
- Gluten-free adaptation: Use gluten-free crackers or mini rice cakes as the base. Works surprisingly well and keeps the snack light.
- Mini flatbread pizzas: Swap crackers for mini naan rounds or pita bread for a heartier snack that feels more like a meal.
- Seasonal toppings: In fall, try roasted butternut squash cubes or caramelized onions as toppings. Summer calls for fresh basil leaves and sun-dried tomatoes.
- Protein boost: Add small cubes of cooked chicken or turkey pepperoni for extra protein. I once tossed in bits of grilled chicken from my savory beer can chicken leftovers—it was a hit!
One variation I tried recently was using a spicy chipotle tomato sauce instead of regular pizza sauce. It gave the lunchables a smoky, bold flavor that my husband really loved.
Serving & Storage Suggestions
This snack is best served right after assembly, especially if you’ve melted the cheese. The crisp cracker base and gooey toppings are a perfect combo fresh out of the oven or broiler.
If you’re packing these for lunch, keep the sauce in a small container and add it just before eating to avoid sogginess. Store the crackers and toppings separately in airtight containers in the fridge for up to 2 days.
Reheat assembled mini pizzas on a baking sheet at 350°F (175°C) for 5-7 minutes to restore crispness and melt cheese again. Avoid using the microwave if you want to keep the cracker crunch.
Pair your pizza lunchables with simple sides like a fresh cucumber dill salad, which complements the snack’s richness beautifully (you can find my easy recipe for fresh creamy cucumber dill salad right here). For drinks, a cold lemonade or iced tea works perfectly.
Nutritional Information & Benefits
Each serving of these homemade pizza lunchables (about 6 mini pizzas) contains roughly:
| Nutrient | Amount |
|---|---|
| Calories | 320 kcal |
| Protein | 15 g |
| Fat | 18 g |
| Carbohydrates | 25 g |
| Fiber | 2 g |
| Sugar | 4 g |
Key ingredients like mozzarella provide calcium and protein, supporting bone health and satiety. The tomato sauce adds lycopene, a powerful antioxidant. Using fresh veggies boosts fiber and vitamins. This snack can fit well into balanced diets, and with gluten-free cracker swaps, it’s accessible for those avoiding gluten. Just watch for pepperoni if you’re avoiding processed meats.
Conclusion
Making your own Easy Homemade Pizza Lunchables is a small but satisfying way to brighten up snack time. It’s flexible, fast, and fun—whether you’re packing school lunches, feeding a hungry crowd, or just craving a quick bite. I love this recipe because it turns ordinary ingredients into a mini pizza feast you can assemble in minutes, with zero stress and all the flavor.
Feel free to customize toppings, swap crackers, or add your favorite herbs to make it truly your own. If you try this recipe, I’d love to hear how you put your own spin on it—drop a comment or share your tweaks. Sometimes the simplest ideas feed the biggest smiles!
FAQs About Easy Homemade Pizza Lunchables
Can I make these ahead of time?
Yes, but keep the crackers and toppings separate until ready to eat to prevent sogginess. Assemble just before serving.
What’s the best cracker to use?
I recommend sturdy crackers like Ritz or Wheat Thins. Avoid thin or flaky crackers that won’t hold toppings well.
Can I make these dairy-free?
Absolutely! Use dairy-free shredded cheese or nutritional yeast as a savory topping alternative.
How do I keep the crackers from getting soggy?
Spread a thin layer of sauce and assemble just before eating. You can also pack sauce separately for dipping.
Can adults enjoy this snack too?
Definitely! It’s a fun, customizable snack perfect for all ages. In fact, it’s become a favorite quick bite for grown-ups in my house.
Pin This Recipe!
Easy Homemade Pizza Lunchables Recipe 5-Minute Snack for Kids and Adults

A quick and customizable homemade take on store-bought Pizza Lunchables, perfect for kids and adults as a fun, hands-on snack or lunch option.
- Prep Time: 3 minutes
- Cook Time: 2 minutes (optional broiling)
- Total Time: 5 minutes
- Yield: 6 mini pizzas 1x
- Category: Snack
- Cuisine: American
Ingredients
- Sturdy crackers like Ritz or Wheat Thins (avoid thin or flaky crackers)
- ¼ cup (60 ml) pizza or marinara sauce (Classico brand recommended)
- ½ cup (50 g) shredded mozzarella cheese (or mix with cheddar)
- About 12 small pepperoni slices (optional)
- ¼ cup (30 g) mini diced bell peppers, sliced black olives, or chopped mushrooms
- Optional: sprinkle of dried oregano or Italian seasoning
Instructions
- Gather all ingredients and lay out crackers, sauce, cheese, and toppings on your prep surface.
- If desired, mix a pinch of dried oregano or Italian seasoning into the pizza sauce in a small bowl.
- Spread about 1 teaspoon (5 ml) of sauce evenly onto each cracker without overloading.
- Sprinkle about 1 tablespoon (10 g) of shredded mozzarella cheese over the sauce on each cracker.
- Top each cracker with 2-3 small pepperoni slices and a few pieces of diced veggies like bell peppers or olives.
- Optional: Place crackers on a baking sheet and broil for 1-2 minutes to melt the cheese, watching closely to avoid burning.
- Serve immediately or pack into snack containers. Keep sauce separate if packing for later to avoid sogginess.
Notes
Use sturdy crackers to avoid sogginess. Spread sauce thinly to keep crackers crisp. For gluten-free, use gluten-free crackers or rice cakes. For dairy-free, use dairy-free shredded cheese or nutritional yeast. If broiling, watch carefully to prevent burning. Assemble just before eating if packing for later.
Nutrition
- Serving Size: About 6 mini pizzas
- Calories: 320
- Sugar: 4
- Fat: 18
- Carbohydrates: 25
- Fiber: 2
- Protein: 15
Keywords: pizza lunchables, homemade pizza snack, quick snack, kids lunch, easy pizza recipe, customizable snack, pizza crackers


