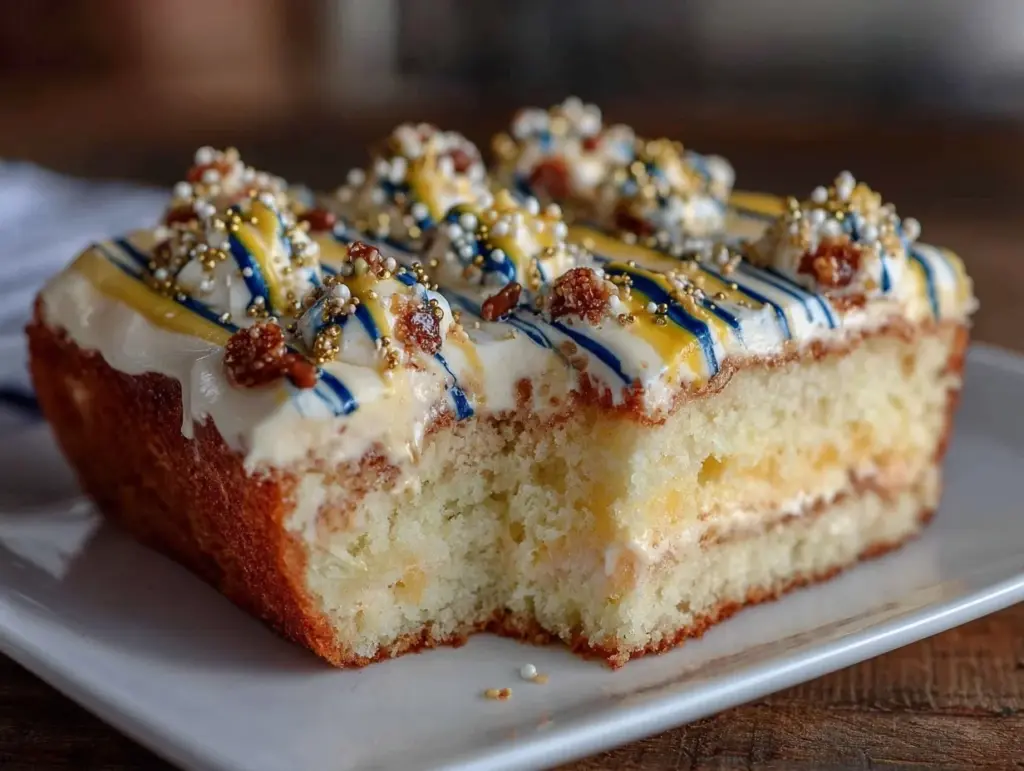
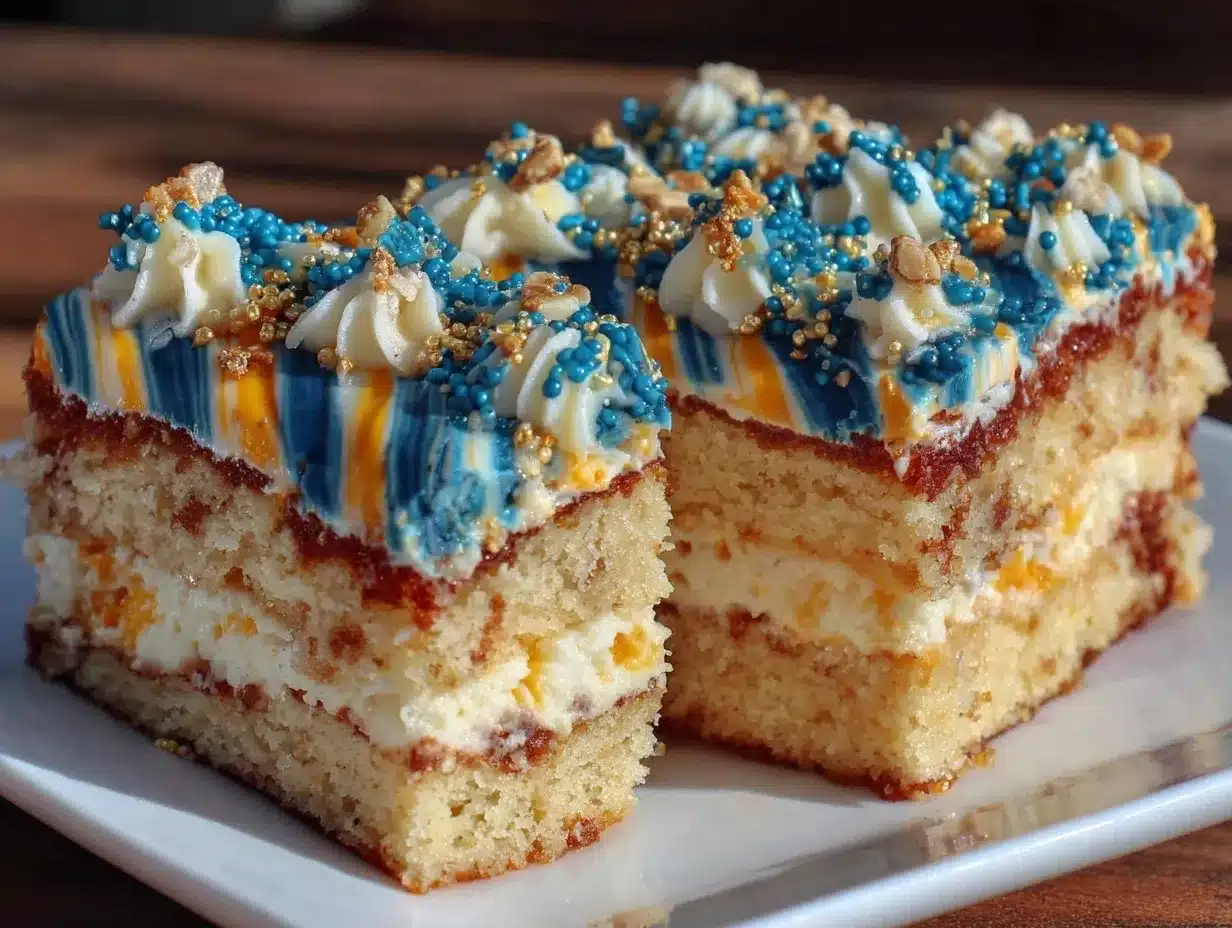
“You know that feeling when you walk into a room and the colors just hit you—like, wow, this is exactly the vibe!” That’s how it was the first time I stumbled upon this easy vibrant sheet cake. It wasn’t at some fancy bakery or a high-end party, but rather at a local high school’s end-of-year celebration, tucked between the bleachers and the popcorn machine. I wasn’t expecting much from a school event dessert, honestly, but this cake stopped me in my tracks. The way the bright blue and gold swirled together on a simple sheet cake pan reminded me of the kind of joy you get from something homemade yet festive.
Funny thing: I forgot my camera that day, and even spilled a bit of frosting on my shirt while trying to snap a quick picture with my phone. Classic me. But that cake stuck with me, so much so that I begged the baker, Mrs. Thompson, for the recipe. She gave it to me with a wink, saying it’s her go-to for every pep rally and birthday. Since then, I’ve made this easy vibrant sheet cake more times than I can count—each time with a little tweak or a splash of another school’s colors. Maybe you’ve been there too, wanting to create something colorful and fun without the fuss. Well, this recipe is the answer.
Let me tell you, it’s not just about the looks. The texture is moist and tender, the frosting sweet but not over the top, and the whole thing feels like a little celebration in every bite. It’s the kind of cake that makes you close your eyes, savoring that first forkful, and then reach for more before anyone else notices. Whether you’re prepping for a game day, a school event, or just craving a cheerful treat, this cake stays with you. You’ll see why it’s become my secret weapon for making any gathering pop with color and flavor.
Why You’ll Love This Recipe
This easy vibrant sheet cake recipe isn’t just pretty—it’s a trusted favorite that I’ve tested over countless celebrations, and here’s why it stands out:
- Quick & Easy: Comes together in under 45 minutes, perfect for last-minute school spirit or unexpected guests.
- Simple Ingredients: Uses pantry staples you likely already have—no hunting for obscure items.
- Perfect for Celebrations: Great for school events, birthdays, or any occasion that calls for a splash of color and fun.
- Crowd-Pleaser: Always gets rave reviews from kids and adults alike, thanks to the moist crumb and creamy frosting.
- Customizable Colors: The vibrant frosting can be tailored to match any school’s palette, making it super versatile.
What makes this recipe different? Honestly, it’s the frosting technique I picked up from a professional baker friend, which gives you that bold, smooth swirl without the mess or stress. Plus, the cake’s texture is spot-on—not too dense, not too crumbly. I’ve tried other versions before, but this one nails the balance every single time. It’s comfort food with a festive twist—bright, cheerful, and satisfying in all the right ways. So, if you want a cake that looks like it belongs on the highlight reel at a school pep rally yet tastes like grandma’s Sunday best, this one’s for you.
What Ingredients You Will Need
This recipe uses simple, wholesome ingredients to deliver bold flavor and a satisfying texture without the fuss. Most are pantry staples, and you can swap a few for dietary needs or preferences.
- For the Cake:
- All-purpose flour – 2 ½ cups (310g), sifted for a tender crumb
- Granulated sugar – 2 cups (400g), for just the right sweetness
- Baking powder – 2 ½ teaspoons, to give the cake a nice lift
- Baking soda – ½ teaspoon, balances the acidity
- Salt – ½ teaspoon, enhances all the flavors
- Unsalted butter – ½ cup (115g), softened (I usually use Kerrygold for richness)
- Buttermilk – 1 cup (240ml), room temperature (if you don’t have buttermilk, stir 1 tablespoon vinegar into milk and let sit 5 minutes)
- Large eggs – 3, room temperature for better mixing
- Pure vanilla extract – 2 teaspoons, for that warm, inviting note
- Whole milk – ½ cup (120ml), room temperature
- For the Frosting:
- Unsalted butter – 1 cup (230g), softened
- Powdered sugar – 4 cups (480g), sifted for smoothness
- Pure vanilla extract – 1 ½ teaspoons
- Whole milk or heavy cream – 3-4 tablespoons, to adjust consistency
- Gel food coloring – vibrant blue and gold (or your school colors) for bold, lasting hues
For the frosting, I recommend using AmeriColor gel colors—they pack a punch without watering down the icing. If you want to try dairy-free, swap butter with vegan margarine and use coconut milk instead of regular milk. For a gluten-free option, try Bob’s Red Mill 1-to-1 gluten-free flour blend—it works surprisingly well here.
Equipment Needed
- 9×13-inch (23×33 cm) sheet pan – standard size, but you can use a slightly larger one if you want a thinner cake
- Electric mixer – stand or hand, for creaming butter and mixing batter smoothly
- Mixing bowls – at least two, for batter and frosting
- Rubber spatula – for scraping down the sides and folding ingredients neatly
- Measuring cups and spoons – precise measurements matter here
- Cooling rack – lets the cake cool evenly and prevents sogginess
- Offset spatula or butter knife – ideal for spreading frosting evenly and creating those vibrant swirls
If you don’t have an electric mixer, a sturdy whisk and some elbow grease will do the trick (I’ve been there!). Also, a silicone spatula is my personal favorite for scraping bowls clean without losing any batter. For budget-friendly baking, check thrift stores for decent sheet pans or borrow from a friend—you don’t need anything fancy.
Preparation Method
- Preheat your oven to 350°F (175°C). Grease your 9×13-inch sheet pan with butter or nonstick spray and lightly dust with flour to prevent sticking. You want an even coating but not thick.
- In a medium bowl, whisk together dry ingredients: all-purpose flour, granulated sugar, baking powder, baking soda, and salt. This helps distribute the leavening agents evenly.
- In a large bowl, cream the softened butter with an electric mixer on medium speed for about 2 minutes, until it’s light and fluffy. This step traps air, giving the cake a tender lift.
- Add the eggs one at a time to the butter, beating well after each addition. Make sure each egg is fully incorporated before adding the next. If the batter looks a bit curdled, that’s okay—it’ll come together.
- Mix in the vanilla extract. The aroma here always makes me smile; it’s like the cake’s personality waking up.
- Alternate adding the dry ingredients and buttermilk to the butter mixture, beginning and ending with the dry ingredients. Beat on low speed to prevent flour flying everywhere. This keeps the batter smooth and prevents gluten overdevelopment.
- Finally, stir in the whole milk until the batter is pourable but not runny. The texture should be thick but easy to spread. If it feels too thick, add a splash more milk.
- Pour the batter into the prepared pan and smooth the top with your spatula. I like to tap the pan gently on the counter to release any big air bubbles.
- Bake for 30-35 minutes, or until a toothpick inserted in the center comes out clean. Around 32 minutes is usually my sweet spot—moist but fully cooked.
- Remove the cake from the oven and place on a cooling rack. Let it cool completely before frosting; otherwise, the frosting melts and becomes a mess (learned that one the hard way!).
- Make the frosting by beating the softened butter on medium speed for 3 minutes, until creamy and light.
- Gradually add powdered sugar, one cup at a time, beating on low speed until combined, then increase speed to medium and beat until smooth.
- Add vanilla extract and 3 tablespoons of milk or cream, and beat for another 2 minutes. Adjust consistency with more milk if needed; it should be spreadable but not runny.
- Divide the frosting into bowls for coloring. Add gel food coloring to each bowl to get your school colors. Use just a drop at a time—you can always add more!
- Spread one color of frosting on the cake, then dollop the other color(s) in spots on top. Use an offset spatula or butter knife to swirl the colors gently for a vibrant, marbled effect. Don’t overdo it—you want distinct swirls, not a muddy mix.
- Chill the cake for 30 minutes before serving to let the frosting set. This also makes slicing cleaner.
Cooking Tips & Techniques
Here’s what I’ve learned from many batches of this easy vibrant sheet cake:
- Room Temperature Ingredients: Eggs, butter, and milk should be at room temperature for a smooth batter. Cold ingredients can cause the batter to curdle or bake unevenly.
- Don’t Overmix: Once you add the flour, mix just until combined. Overmixing develops gluten, making the cake tough.
- Frosting Consistency: If your frosting feels too stiff, add milk a teaspoon at a time. Too thin? Add a little more powdered sugar. You want it creamy and spreadable.
- Gel Food Coloring: Use gel instead of liquid colors to keep the frosting thick and vibrant. A little goes a long way, so start small.
- Swirling Technique: When swirling the frosting colors, use light pressure and a gentle hand. Too much mixing blends the colors into a dull shade.
- Multitasking: While the cake bakes, prepare your frosting ingredients to save time. Just remember to beat the butter well for fluffiness.
- Cooling Time: Patience is key—frosting a warm cake is a recipe for a mess. I once tried this and ended up with frosting dripping off the sides!
Variations & Adaptations
This easy vibrant sheet cake is a blank canvas, so feel free to tweak it for your needs:
- Dietary: Swap all-purpose flour with a gluten-free blend (like King Arthur’s) and use dairy-free butter and milk to make it vegan-friendly.
- Seasonal Twist: Add a teaspoon of orange zest or lemon juice to the batter for a citrusy lift perfect for spring celebrations.
- Flavor Boost: Mix in ½ cup mini chocolate chips or chopped nuts for extra texture and surprise bites.
- Frosting Flavors: Try swapping vanilla extract for almond or peppermint for a different flavor profile.
- Cooking Method: If you don’t have a sheet pan, bake in two 8-inch (20 cm) round pans. Adjust baking time to 25-30 minutes.
One variation I adore is replacing half the butter with cream cheese in the frosting for a tangy contrast. It’s a little richer but totally worth it for special occasions. Honestly, experimenting with colors and flavors here is half the fun!
Serving & Storage Suggestions
This easy vibrant sheet cake shines when served slightly chilled or at room temperature. I recommend slicing it into generous squares and arranging on a bright platter to show off those swirls.
Pair it with a simple cup of black coffee or a fruity iced tea to balance the sweetness. For parties, add a side of fresh berries or whipped cream to give guests options.
Store leftover cake covered tightly in the refrigerator for up to 4 days. To keep the frosting looking fresh, bring slices to room temperature before serving. You can also freeze slices wrapped well for up to 2 months—just thaw overnight in the fridge.
Reheating? A quick 15-second zap in the microwave softens the frosting and cake, but don’t overdo it or the frosting may melt.
Fun fact: the colors actually deepen a bit after chilling, making it even more vibrant the next day. So if you’re prepping ahead, that’s a bonus!
Nutritional Information & Benefits
Here’s an estimate per serving (based on 12 servings):
| Calories | 380 kcal |
|---|---|
| Fat | 18g |
| Carbohydrates | 52g |
| Protein | 4g |
| Sugar | 35g |
This cake isn’t exactly health food, but it shines in moderation. The use of buttermilk adds a slight tang and tenderness without extra fat, and homemade frosting means you control the sugar level (no preservatives or weird additives).
For those watching gluten or dairy, the recipe adapts easily to meet those needs without losing flavor or texture, which is always a win in my book. Plus, celebrating with a homemade treat brings joy and connection that no store-bought dessert can match.
Conclusion
To wrap things up, this easy vibrant sheet cake is a simple way to add color, flavor, and fun to any school celebration or gathering. It’s approachable enough for bakers of all levels but impressive enough to steal the show. I love how customizable it is—whether you’re matching team colors or adding a personal twist, it always turns out beautifully.
Give this recipe a try, and don’t be shy about making it your own with flavors or decorations that feel right for you. I’d love to hear how your cake turned out or what colors you chose—drop a comment or share your photos! After all, the best part of baking is sharing those moments with others.
So go ahead, grab your mixing bowl, pick your colors, and make a cake that’s as spirited and vibrant as the community it celebrates. Happy baking!
FAQs
Can I make this cake a day ahead?
Absolutely! Bake and frost the cake the day before your event, then store it covered in the fridge. Bring it to room temperature before serving for the best taste and texture.
What if I don’t have buttermilk?
No worries! You can make a quick substitute by adding 1 tablespoon of vinegar or lemon juice to 1 cup of milk, then let it sit for 5 minutes before using.
How do I prevent the frosting colors from bleeding into each other?
Use gel food coloring for vibrant hues and swirl gently with a light hand. Avoid overmixing once colors are combined to keep them distinct.
Can I freeze this sheet cake?
Yes, wrap slices tightly in plastic wrap and freeze for up to 2 months. Thaw overnight in the fridge, and bring to room temperature before serving.
Is this recipe suitable for beginners?
Definitely! The steps are straightforward, and the frosting technique is forgiving. If you’re new to baking, just remember to measure carefully and be patient while the cake cools before frosting.
Pin This Recipe!
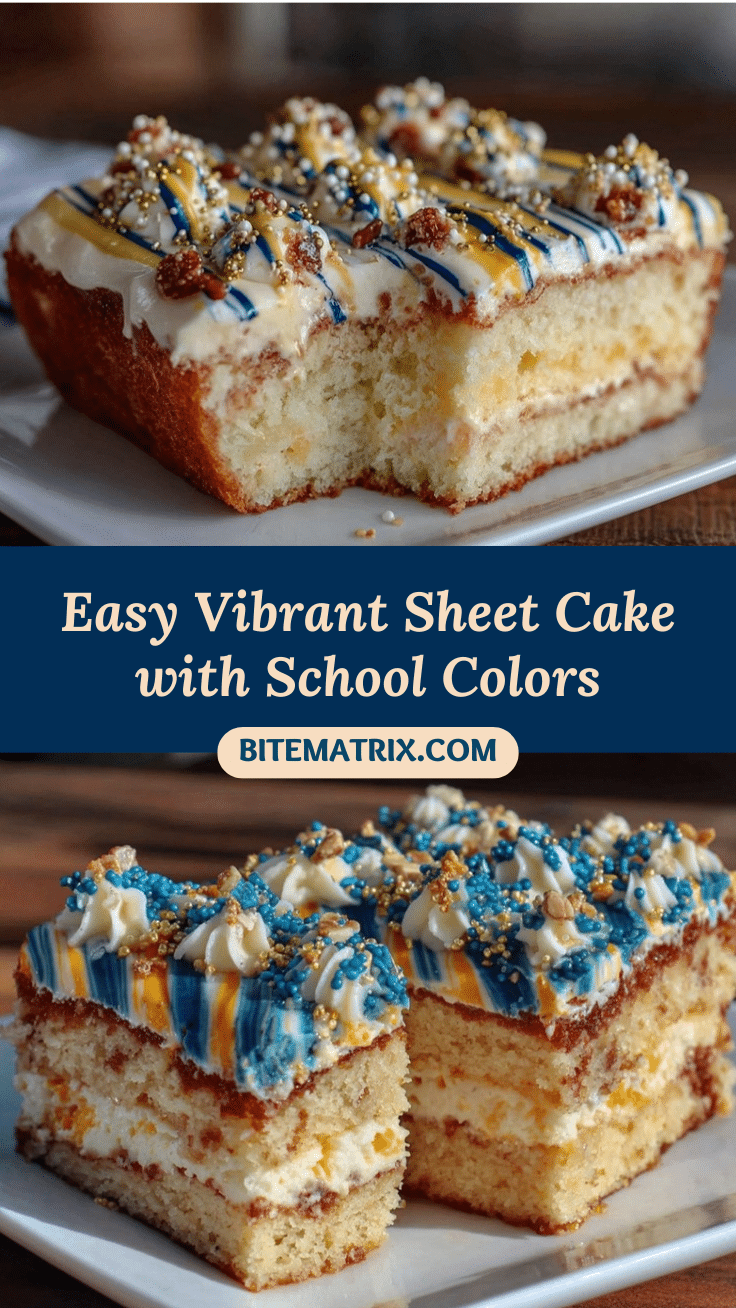
Easy Vibrant Sheet Cake Recipe Perfect for School Colors Celebration
A moist and tender sheet cake with vibrant, customizable frosting perfect for school events and celebrations. Quick and easy to make with simple pantry ingredients.
- Prep Time: 15 minutes
- Cook Time: 32 minutes
- Total Time: 47 minutes
- Yield: 12 servings 1x
- Category: Dessert
- Cuisine: American
Ingredients
- 2 ½ cups (310g) all-purpose flour, sifted
- 2 cups (400g) granulated sugar
- 2 ½ teaspoons baking powder
- ½ teaspoon baking soda
- ½ teaspoon salt
- ½ cup (115g) unsalted butter, softened
- 1 cup (240ml) buttermilk, room temperature (or 1 cup milk + 1 tbsp vinegar, let sit 5 minutes)
- 3 large eggs, room temperature
- 2 teaspoons pure vanilla extract
- ½ cup (120ml) whole milk, room temperature
- For the Frosting:
- 1 cup (230g) unsalted butter, softened
- 4 cups (480g) powdered sugar, sifted
- 1 ½ teaspoons pure vanilla extract
- 3–4 tablespoons whole milk or heavy cream
- Gel food coloring (vibrant blue and gold or your school colors)
Instructions
- Preheat oven to 350°F (175°C). Grease a 9×13-inch sheet pan with butter or nonstick spray and lightly dust with flour.
- In a medium bowl, whisk together flour, sugar, baking powder, baking soda, and salt.
- In a large bowl, cream softened butter with an electric mixer on medium speed for about 2 minutes until light and fluffy.
- Add eggs one at a time to the butter, beating well after each addition.
- Mix in vanilla extract.
- Alternate adding dry ingredients and buttermilk to the butter mixture, beginning and ending with dry ingredients. Beat on low speed until combined.
- Stir in whole milk until batter is pourable but not runny.
- Pour batter into prepared pan and smooth the top. Tap pan gently to release air bubbles.
- Bake for 30-35 minutes or until a toothpick inserted in the center comes out clean.
- Remove cake from oven and place on a cooling rack. Let cool completely before frosting.
- Make frosting by beating softened butter on medium speed for 3 minutes until creamy.
- Gradually add powdered sugar, one cup at a time, beating on low speed until combined, then increase speed and beat until smooth.
- Add vanilla extract and 3 tablespoons milk or cream, beat for 2 minutes. Adjust consistency with more milk if needed.
- Divide frosting into bowls and add gel food coloring to each to achieve desired school colors.
- Spread one color of frosting on the cake, then dollop other color(s) on top. Use an offset spatula or butter knife to swirl colors gently for a marbled effect.
- Chill cake for 30 minutes before serving to set frosting and make slicing cleaner.
Notes
[‘Use room temperature ingredients for smooth batter.’, ‘Do not overmix after adding flour to avoid tough cake.’, ‘Adjust frosting consistency with milk or powdered sugar as needed.’, ‘Use gel food coloring to keep frosting vibrant and thick.’, ‘Swirl frosting colors gently to avoid muddy colors.’, ‘Chill cake before slicing for cleaner cuts.’, ‘Can substitute gluten-free flour and dairy-free butter/milk for dietary needs.’, ‘Try adding citrus zest or chocolate chips for variations.’, ‘Bake in two 8-inch round pans if no sheet pan is available, adjusting baking time to 25-30 minutes.’]
Nutrition
- Serving Size: 1 slice (1/12 of cak
- Calories: 380
- Sugar: 35
- Fat: 18
- Carbohydrates: 52
- Protein: 4
Keywords: sheet cake, vibrant cake, school colors cake, easy cake recipe, celebration cake, colorful frosting, moist cake


