
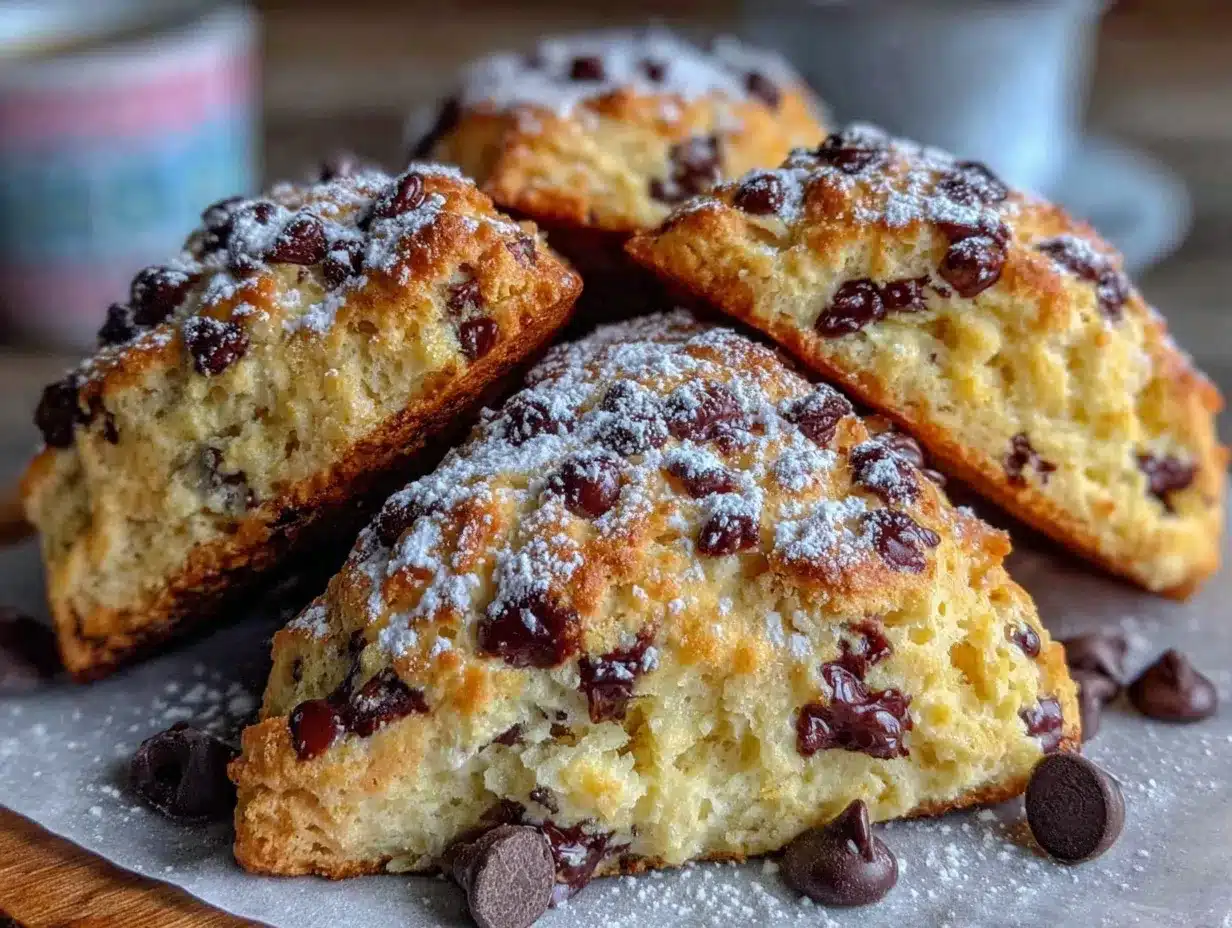
Picture this: the morning sunlight streams through your kitchen window, casting just the right glow on a tray of freshly baked Fluffy Chocolate Chip Heart Scones. The aroma—warm vanilla mingling with melty chocolate chips—fills the air and, honestly, you can’t help but pause and take a deep breath. The scones are golden, edges just crisp, and the centers so tender they threaten to crumble if you look at them too long. The first time I pulled a batch from the oven, I swear I was instantly hooked. It was the kind of moment where you pause, smile, and maybe even do a little happy dance because, you know, you’ve stumbled onto something truly special.
Back when I was knee-high to a grasshopper, my grandma would make scones on lazy Sunday mornings—always with a sprinkle of love and a little mischief. She’d let me sneak a few chocolate chips straight from the bag (don’t tell my mom!) and insisted that scones should feel like a hug in pastry form. Years later, after experimenting with countless recipes (in the name of research, of course), I finally landed on these heart-shaped beauties. I wish I’d found this method years ago. My family couldn’t stop sneaking them off the cooling rack, and honestly, I can’t really blame them. These scones have become a staple for family gatherings, quick gifting, and those days when you just need a little pick-me-up.
Let’s face it—Fluffy Chocolate Chip Heart Scones are dangerously easy, pure nostalgic comfort, and perfect for potlucks or a sweet treat for your kids. They brighten up any Pinterest cookie board (trust me, the hearts are adorable), and every bite feels like a warm hug. If you’re searching for a breakfast recipe that’s guaranteed to wow, you’re going to want to bookmark this one.
Why You’ll Love This Fluffy Chocolate Chip Heart Scones Recipe
If you’ve ever found yourself craving a breakfast treat that’s equal parts fun and delicious, these scones are your answer. Years of baking (and a fair share of kitchen flops) led me to this recipe, and I’m telling you—there’s a reason it gets requested over and over. Here’s why you’ll fall head over heels for these heart-shaped scones:
- Quick & Easy: Ready in under 35 minutes. Perfect for busy mornings or surprise guests.
- Simple Ingredients: No weird specialty items; you probably have everything in your pantry right now.
- Perfect for Breakfast or Brunch: These scones shine at brunch tables, tea parties, or as a sweet start to your day.
- Crowd-Pleaser: Kids love the chocolate chips, adults love the fluffy texture, and everyone loves the heart shape (it’s just cute).
- Unbelievably Delicious: Soft, melt-in-your-mouth centers, golden edges, and pockets of gooey chocolate. It’s comfort food at its finest.
What makes these scones stand out? I use cold butter (grated, for extra fluffiness!), just the right splash of cream, and a gentle mixing technique that keeps them tender—not dry or crumbly like some scones out there. The heart shape isn’t just for looks—it means every bite gets those irresistible crispy edges and soft center. Plus, you can swap the chocolate chips for berries or nuts when the mood strikes.
This recipe is more than just good—it’s the kind that makes you close your eyes after the first bite. It’s breakfast reimagined: just as comforting, but with a playful twist and zero stress. Whether you’re aiming to impress guests or simply want to turn a regular morning into something memorable, Fluffy Chocolate Chip Heart Scones are always the answer.
What Ingredients You Will Need
This recipe uses simple, wholesome ingredients to deliver bold flavor and the perfect fluffy texture—no fuss, just pure breakfast joy. Most are pantry staples, and there’s plenty of room for swaps if you’re out of something or need to adapt for allergies.
- For the Scone Dough:
- 2 cups (250g) all-purpose flour (King Arthur or Bob’s Red Mill are my go-tos for consistent results)
- 1/3 cup (65g) granulated sugar (adds just enough sweetness)
- 2 tsp baking powder (for a good rise and fluffy crumb)
- 1/2 tsp baking soda (helps with tender texture)
- 1/2 tsp salt (balances the sweetness)
- 1/2 cup (115g) unsalted butter, cold and grated (use Kerrygold for extra richness)
- 1/2 cup (120ml) heavy cream, cold (can sub with half-and-half or full-fat coconut milk for dairy-free)
- 1/4 cup (60ml) plain Greek yogurt or sour cream (adds moisture and tang)
- 1 large egg, cold (for binding and richness)
- 1 1/2 tsp vanilla extract (pure vanilla, if possible)
- 3/4 cup (135g) mini chocolate chips (Nestlé Toll House or Enjoy Life for allergy-friendly)
- For Topping (Optional):
- Extra mini chocolate chips (for sprinkling)
- Coarse sugar (for sparkle and crunch)
Ingredient Notes & Substitutions:
– If you’re gluten-free, swap the all-purpose flour for a 1:1 gluten-free blend (Bob’s Red Mill works well here).
– Dairy-free? Use plant-based butter and coconut cream.
– Don’t have Greek yogurt? Regular plain yogurt or even thick coconut yogurt will do the trick.
– Want a fruity twist? Replace half the chocolate chips with chopped dried cherries or fresh raspberries.
– For a nutty flavor, toss in a handful of toasted pecans or walnuts.
I always say—use what you have! These scones are forgiving, and a little bit of improvisation makes breakfast even more fun.
Equipment Needed
- Mixing Bowls: You’ll want at least two—one for dry, one for wet. Glass or stainless steel is sturdy and easy to clean.
- Grater: For cold butter. A box grater works best, but you can use a food processor with the grating attachment if you’re fancy (or lazy, no judgment).
- Whisk & Spatula: For mixing dough and scraping the bowl.
- Heart-Shaped Cookie Cutter: About 2.5 to 3 inches wide. If you don’t have one, a sharp knife and a steady hand work. Or use a round cutter and pinch one end for a DIY heart.
- Baking Sheet: Line with parchment paper for easy cleanup and even browning.
- Pastry Brush: Optional, but helpful for brushing cream on top before baking.
Honestly, you don’t need anything fancy—just sturdy basics. I’ve used a drinking glass as a cutter in a pinch, and the scones still turned out adorable. For budget buys, the Wilton heart cutter set is cheap and cheerful. If you use a food processor for the butter, just remember to pulse gently (overmixing is the enemy of fluffy scones). Keep your gear clean and dry for best results, especially with dough mixing bowls.
Preparation Method
- Prep Your Ingredients: Measure out all your ingredients. Keep butter, cream, and egg in the fridge until you’re ready (cold ingredients are key for fluffy scones).
- Mix Dry Ingredients: In a large bowl, whisk together 2 cups (250g) flour, 1/3 cup (65g) sugar, 2 tsp baking powder, 1/2 tsp baking soda, and 1/2 tsp salt. If your flour is lumpy, sift it first.
- Grate Butter: Grate 1/2 cup (115g) cold butter directly into the dry mix. Toss lightly to coat the butter shreds with flour. (If using a food processor, pulse just until coarse crumbs form.)
- Combine Wet Ingredients: In a separate bowl, whisk together 1/2 cup (120ml) cream, 1/4 cup (60ml) yogurt, 1 large egg, and 1 1/2 tsp vanilla. Pour over the flour-butter mixture.
- Mix Dough: Use a spatula or your hands to gently mix until just combined. The dough will be a bit shaggy—don’t overwork it! Fold in 3/4 cup (135g) mini chocolate chips. If the dough seems dry, add a splash more cream.
- Shape & Chill: Turn the dough onto a floured surface. Pat it into a 3/4-inch (2cm) thick rectangle. If it’s sticky, sprinkle more flour. Pop the dough in the fridge for 10 minutes (helps with cutting and prevents spread).
- Cut Hearts: Using a heart-shaped cutter (2.5 to 3 inches), press out as many scones as possible. Re-roll scraps gently and cut more hearts. You should get about 10-12 scones.
- Arrange on Baking Sheet: Place scones on parchment-lined sheet, about 2 inches apart. Brush tops with cream and sprinkle extra chocolate chips or coarse sugar if you like.
- Bake: Bake in a preheated oven at 400°F (205°C) for 15-18 minutes. Scones should be golden on top, with firm edges and soft centers. (If bottoms brown too fast, double up the baking sheet.)
- Cool & Serve: Let scones cool for 5 minutes before transferring to a rack. They’re best eaten warm, but honestly, they’re good any time.
Troubleshooting: If scones spread too much, your butter was probably too warm—try chilling the dough longer next time. If they seem dry, add a splash more cream. The dough should be soft but not sticky, and the hearts should hold their shape.
Sensory Cues: The scones will smell sweet and buttery as they bake, and the tops should look lightly golden, not pale. When you break one open, you’ll see pockets of gooey chocolate and a fluffy, cake-like crumb.
My personal tip: always bake a test scone before the whole batch. It’s a little trick I learned after burning a tray (just once, but still!). This way, you get your timing perfect—and a little sneak taste never hurts!
Cooking Tips & Techniques
- Keep Ingredients Cold: Cold butter and cream are non-negotiable for fluffy, flaky scones. If your kitchen runs hot (mine does in summer!), chill your bowl and cutter too.
- Don’t Overwork the Dough: Mix just until combined. Overmixing develops gluten, leading to tough scones. Honestly, lumpy dough is a good sign here.
- Grating Butter: Grated butter distributes evenly, creating steam pockets for extra lift. If you don’t have a grater, cube the butter and rub it into the flour with your fingertips.
- Proper Cutting: Press the cutter straight down—no twisting! Twisting seals edges and prevents a nice rise.
- Chill Before Baking: A short chill helps the hearts hold shape and keeps butter from melting out. Learned this the hard way when my first batch turned into chocolate puddles.
- Oven Placement: Bake in the center of the oven. If your scones brown unevenly, rotate the tray halfway.
- Test for Doneness: Scones should feel firm at the edges and just set in the center. If they’re pale, give them another minute, but don’t overbake—they dry out fast.
My favorite multitasking trick: while the scones chill, clean up your workspace and set out plates and drinks. This way, you’re ready to serve right when they come out of the oven. And if you’re baking for a crowd, double the recipe and freeze half the dough for later—future you will thank present you!
Variations & Adaptations
It’s fun to play with flavors and keep breakfast exciting. Here are some tasty variations for Fluffy Chocolate Chip Heart Scones:
- Gluten-Free: Swap the flour for a 1:1 gluten-free blend. I’ve done this with Bob’s Red Mill—no one could tell the difference!
- Berries & White Chocolate: Replace half the chocolate chips with fresh blueberries or raspberries and swap the rest for white chocolate chips. Perfect for spring brunches.
- Nutty Scones: Add 1/4 cup (30g) toasted pecans or walnuts for crunch and warmth. Almond extract instead of vanilla gives a bakery-style twist.
- Dairy-Free: Use plant-based butter and coconut cream. Sub Greek yogurt for thick coconut yogurt (I’ve tried this for a friend with allergies—worked like a charm).
- Mini Scones: Use a smaller cutter and reduce baking time by 2-3 minutes. Great for parties or lunchboxes.
My personal favorite? Swapping chocolate chips for chopped dried apricots and pistachios. The sweet-tart combo is seriously addictive. You can bake these scones in wedges or rounds if you don’t have a heart cutter—the taste stays the same, it’s just less Instagram-worthy (but still delicious!).
Serving & Storage Suggestions
Serve these Fluffy Chocolate Chip Heart Scones warm, straight from the oven. The chocolate chips will be gooey, and the scones soft and fragrant. For presentation, stack them on a pretty plate or arrange in a basket lined with a tea towel—perfect for brunch spreads or breakfast trays.
Pair with fresh fruit, a dollop of whipped cream or Greek yogurt, and a mug of coffee or hot cocoa. If you’re feeling fancy, drizzle a little melted chocolate or dust with powdered sugar for extra flair.
For storage, let the scones cool completely. Store in an airtight container at room temperature for up to 2 days. To freeze, wrap individually in plastic, then pop in a freezer bag—they’ll keep for up to 2 months. Reheat scones in a 350°F (175°C) oven for 7-8 minutes or microwave for 20 seconds (watch out, chocolate chips get hot!). Flavors deepen slightly after a day, so leftover scones are just as tasty—if not more so!
Nutritional Information & Benefits
Each Fluffy Chocolate Chip Heart Scone (based on a batch of 12) has roughly:
- Calories: 220
- Fat: 11g
- Carbohydrates: 28g
- Protein: 4g
- Sugar: 10g
Key ingredients like Greek yogurt add protein and calcium, while the use of real butter provides essential fats for satiety. If you opt for dark chocolate chips, you’ll get a little antioxidant boost. The scones can be adapted for gluten-free or dairy-free diets, just watch out for allergens in the chocolate chips. From a wellness perspective, these are a treat—best enjoyed in moderation, with plenty of joy!
Conclusion
Fluffy Chocolate Chip Heart Scones are the kind of recipe you’ll turn to again and again—perfect for breakfast, brunch, or just a little sweet comfort when you need it. They’re easy, crowd-pleasing, and endlessly customizable. I love them because they bring smiles to my family’s faces and make every morning feel a bit more special.
Give this recipe a try and don’t be afraid to make it your own—tweak the flavors, play with shapes, or add a personal touch. I’d love to hear how you make these scones your own (leave a comment below, share your photos, or tag me on Pinterest!). Wishing you cozy mornings and plenty of chocolatey goodness!
FAQs
Can I make Fluffy Chocolate Chip Heart Scones ahead of time?
Absolutely! You can prep the dough, cut out the hearts, and freeze them on a tray. Bake from frozen, adding 2-3 minutes to the baking time.
What if I don’t have a heart-shaped cutter?
No problem—just use a round cutter or shape the dough into triangles. The taste is the same, and you can always pinch one end for a DIY heart!
Can I use regular chocolate chips instead of mini?
Yes, but mini chips spread more evenly and give better chocolate distribution. Chopped chocolate bars work too for larger pockets.
How do I know when the scones are done?
The tops should be golden and the edges firm. If unsure, break one open—look for a fluffy center and melted chocolate chips.
Are these scones good for kids’ lunchboxes?
Definitely! Make mini scones for perfect lunchbox treats. They hold up well for a day or two and taste great cold or slightly warmed.
Pin This Recipe!

Fluffy Chocolate Chip Heart Scones

These heart-shaped scones are fluffy, tender, and packed with mini chocolate chips. They make a quick, comforting breakfast or brunch treat that’s easy to customize and guaranteed to bring smiles.
- Prep Time: 15 minutes
- Cook Time: 18 minutes
- Total Time: 33 minutes
- Yield: 10-12 scones 1x
- Category: Breakfast
- Cuisine: American
Ingredients
- 2 cups (250g) all-purpose flour
- 1/3 cup (65g) granulated sugar
- 2 tsp baking powder
- 1/2 tsp baking soda
- 1/2 tsp salt
- 1/2 cup (115g) unsalted butter, cold and grated
- 1/2 cup (120ml) heavy cream, cold
- 1/4 cup (60ml) plain Greek yogurt or sour cream
- 1 large egg, cold
- 1 1/2 tsp vanilla extract
- 3/4 cup (135g) mini chocolate chips
- Extra mini chocolate chips (for sprinkling, optional)
- Coarse sugar (for topping, optional)
Instructions
- Measure out all ingredients and keep butter, cream, and egg cold until ready to use.
- In a large bowl, whisk together flour, sugar, baking powder, baking soda, and salt. Sift flour if lumpy.
- Grate cold butter directly into the dry mix and toss lightly to coat.
- In a separate bowl, whisk together cream, yogurt, egg, and vanilla extract.
- Pour wet ingredients over the flour-butter mixture and gently mix until just combined. Fold in mini chocolate chips. If dough is dry, add a splash more cream.
- Turn dough onto a floured surface and pat into a 3/4-inch thick rectangle. Chill dough for 10 minutes.
- Using a heart-shaped cutter (2.5 to 3 inches), cut out scones. Re-roll scraps gently and cut more hearts (yields about 10-12 scones).
- Place scones on a parchment-lined baking sheet, 2 inches apart. Brush tops with cream and sprinkle with extra chocolate chips or coarse sugar if desired.
- Bake in a preheated oven at 400°F (205°C) for 15-18 minutes, until golden on top and firm at the edges.
- Cool scones for 5 minutes before transferring to a rack. Serve warm.
Notes
Keep all ingredients cold for best results. Don’t overwork the dough—mix just until combined for fluffy scones. You can substitute gluten-free flour, plant-based butter, or coconut cream for dietary needs. Freeze unbaked scones and bake from frozen, adding 2-3 minutes to baking time. Scones are best enjoyed warm but keep well for up to 2 days in an airtight container.
Nutrition
- Serving Size: 1 scone
- Calories: 220
- Sugar: 10
- Sodium: 180
- Fat: 11
- Saturated Fat: 7
- Carbohydrates: 28
- Fiber: 1
- Protein: 4
Keywords: scones, chocolate chip scones, breakfast, brunch, heart scones, easy scones, fluffy scones, kid-friendly, comfort food


