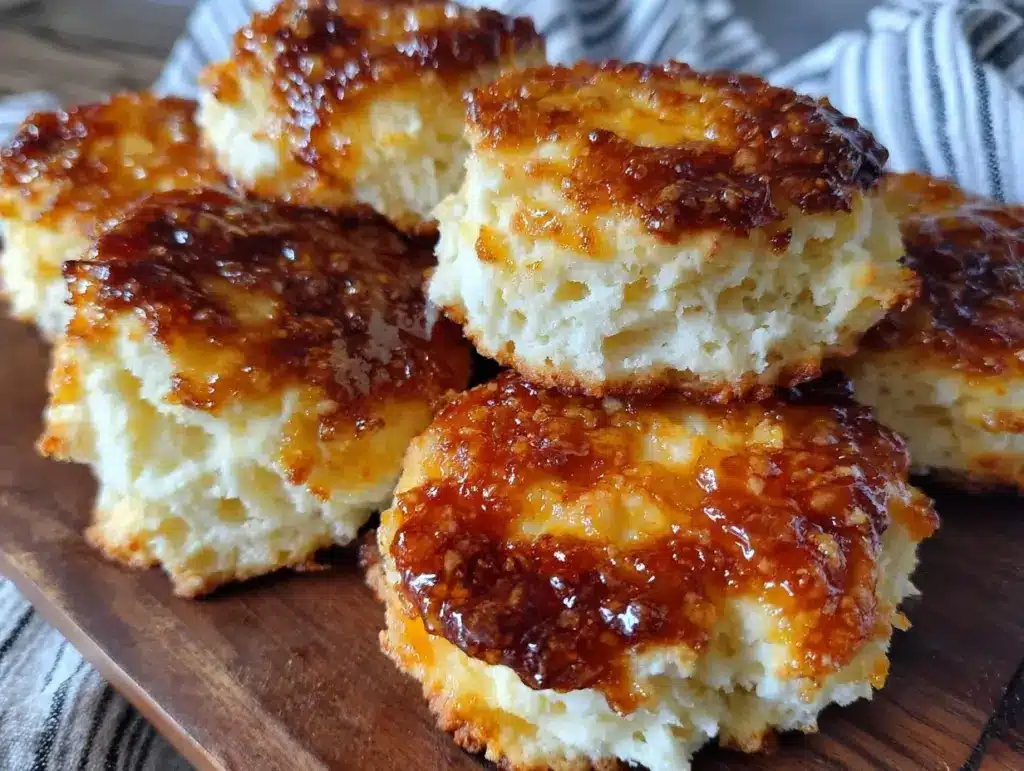
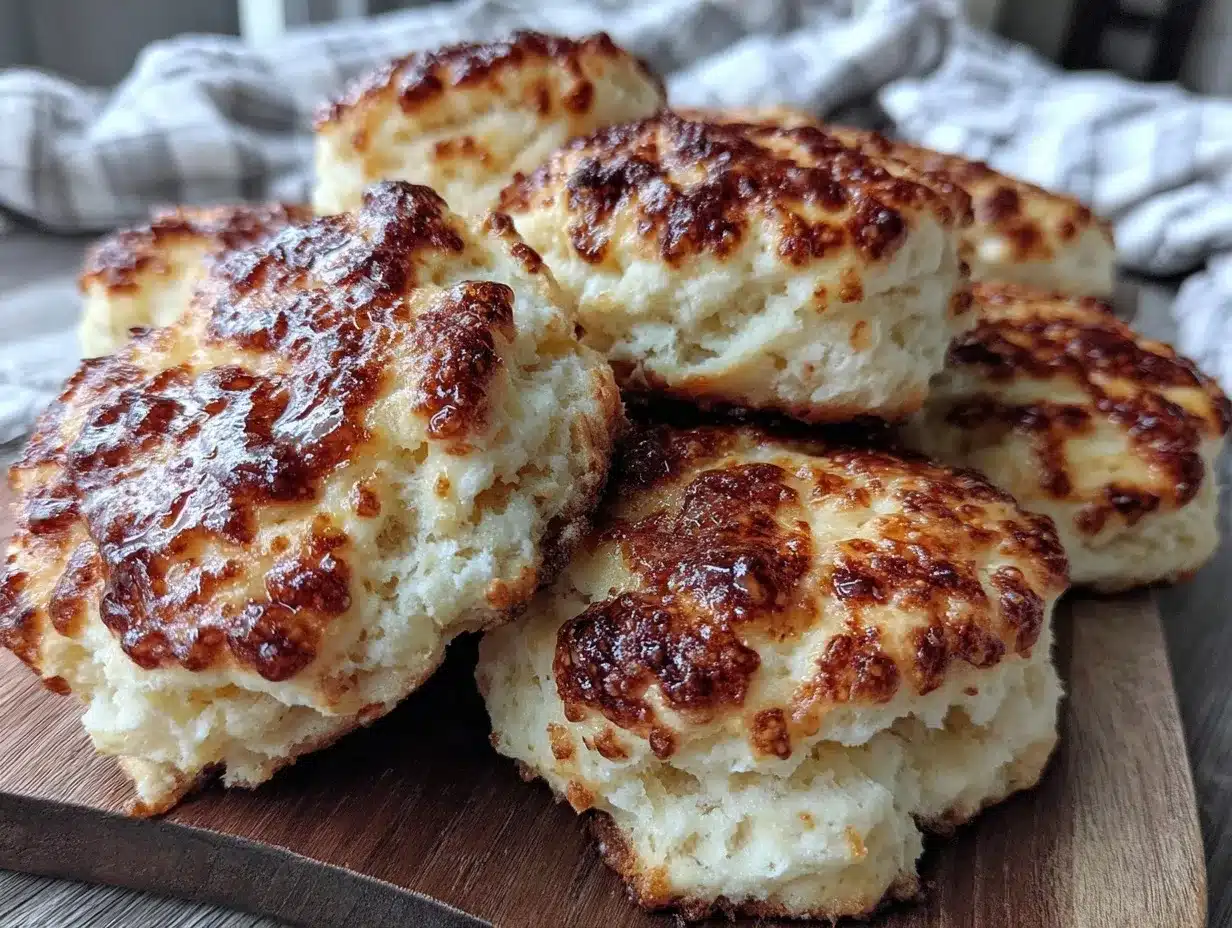
Imagine stepping into your kitchen and being greeted by the warm, buttery aroma of freshly baked biscuits—honestly, it’s enough to make your stomach do a happy little dance. The first time I pulled these Fluffy Gluten-Free Biscuits from the oven, I stared in disbelief at their golden tops and pillowy layers. I’d been on a quest for a gluten-free biscuit that wasn’t dense or sad-looking, and suddenly, there they were: tender, crumbly, and practically begging for a pat of melting butter. It was the kind of moment where you pause, take a deep breath, and just smile because you know you’re onto something truly special.
Years ago, when I was knee-high to a grasshopper, my grandma used to make towering buttermilk biscuits that the whole family fought over at Sunday supper. I missed that pure, nostalgic comfort when I had to cut out gluten. These biscuits? They’re my answer—a recipe that’s been tweaked, tested, and maybe even obsessed over (I’ve definitely baked them a dozen times in the name of research, of course). My family couldn’t stop sneaking them off the cooling rack (and I can’t really blame them). Even my gluten-loving friends polished off their share without a clue they were eating something gluten-free.
Let’s face it: good biscuits can brighten a dreary morning, steal the show at a holiday brunch, or add a cozy touch to a Pinterest-worthy dinner spread. Whether you’re making breakfast sandwiches, sopping up gravy, or just craving a simple, homemade treat, these biscuits fit the bill. They’re dangerously easy, use simple ingredients, and deliver pure biscuit bliss every single time. If you’ve been searching for a gluten-free biscuit recipe that feels like a warm hug, you’re going to want to bookmark this one.
Why You’ll Love This Fluffy Gluten-Free Biscuits Recipe
After countless kitchen adventures and more than a few “Oops, that’s hockey puck” moments, I can say these biscuits are the real deal. Here’s why you’ll fall head over heels for them (and why I keep them in my regular rotation):
- Quick & Easy: Ready in just about 30 minutes, these biscuits won’t keep you chained to the kitchen. Perfect for last-minute cravings or when you want something warm with your morning coffee.
- Simple Ingredients: No need for a wild grocery run. Most of these are pantry staples—nothing fancy, nothing fussy.
- Perfect for Every Occasion: Whether it’s a lazy Saturday, a family brunch, or a holiday dinner, these fluffy gluten-free biscuits add a homemade touch without stress.
- Crowd-Pleaser: I’ve served these to kids, grandparents, hardcore gluten-eaters—you name it. The verdict? Clean plates and requests for seconds every single time.
- Unbelievably Delicious: The outside is golden and slightly crisp; the inside is tender, crumbly, and just melts in your mouth. Even without gluten, you get that classic biscuit texture (secret’s in the technique—more on that below!).
What makes them different? Well, a couple of things. I use a blend of gluten-free flours that balances structure and tenderness, plus a little trick with cold butter (grated, not cubed) to create those dreamy layers. There’s a splash of buttermilk for that old-school biscuit tang, and a touch of baking powder for extra lift. No dry, sad biscuits here—these actually rise and flake!
But, honestly, the main reason I love this fluffy gluten-free biscuits recipe is because it’s the kind of food that brings people together. It’s comfort food, gluten-free style—easy enough for a weeknight, special enough for company, and so satisfying you might just eat two (or three) straight off the pan. If you’ve struggled to find a gluten-free biscuit worth making again, this is your answer. It’s the recipe I wish I’d had years ago, and now it’s my go-to for every occasion.
What Ingredients You Will Need
This fluffy gluten-free biscuits recipe leans into simple, reliable ingredients that work together to build flavor, structure, and that irresistible crumb. You probably have most of these in your pantry already, and if not, I’ll offer my favorite brands and some handy swaps.
- For the Biscuit Dough:
- Gluten-Free All-Purpose Flour Blend (2 cups / 240g): Look for a 1-to-1 blend with xanthan gum—my favorite is Bob’s Red Mill or King Arthur’s.
- Baking Powder (1 tablespoon / 12g): Gives the biscuits their signature lift and fluff (don’t skimp on this one!).
- Baking Soda (1/2 teaspoon / 3g): Reacts with buttermilk for extra rise and tenderness.
- Kosher Salt (3/4 teaspoon / 4g): Balances flavor—table salt works in a pinch, but I prefer kosher for its gentle flavor.
- Granulated Sugar (1 tablespoon / 12g): Just a hint to round out the flavor—not enough to make them sweet, but helps with browning.
- Unsalted Butter (6 tablespoons / 85g), cold and grated: Cold butter is crucial for flaky layers; I use Kerrygold for extra richness. Dairy-free butter works, too!
- Buttermilk (3/4 cup / 180ml), cold: Classic biscuit flavor and tenderness. If you’re dairy-free, use unsweetened almond milk with 2 teaspoons lemon juice or apple cider vinegar.
- Optional Topping:
- Melted Butter (1-2 tablespoons / 15-30ml): For brushing the tops after baking. Makes them extra golden and irresistible.
Ingredient Notes & Swaps:
- If you can’t find buttermilk, make your own: 3/4 cup milk + 2 teaspoons lemon juice or vinegar, let sit 5 minutes.
- For dairy-free, use vegan butter and your favorite plant-based milk plus acid (see above).
- Not all gluten-free blends are created equal—make sure yours has xanthan gum. If not, add 1/2 teaspoon per cup of flour.
- Want a little herby kick? Add a tablespoon of chopped chives, parsley, or dill to the dry mix.
- For a hint of cheese, fold in 1/2 cup (60g) shredded sharp cheddar before adding the buttermilk (my kids love this version!).
These ingredients come together to give you those classic biscuit vibes—fluffy, tender, and no one will guess they’re gluten-free!
Equipment Needed
You don’t need anything fancy to whip up a batch of fluffy gluten-free biscuits, but a few key tools make the process smoother (and less messy):
- Mixing Bowls: One large for dry ingredients, one small for wet.
- Box Grater or Pastry Cutter: I prefer grating cold butter for even distribution, but a pastry cutter or two knives do the trick if that’s what you have.
- Measuring Cups & Spoons: Accurate measurements matter for biscuits—no “eyeballing” here if you want consistent results.
- Rubber Spatula or Wooden Spoon: For gently mixing the dough without overworking it.
- Baking Sheet: Lined with parchment paper for easy cleanup (and to prevent sticking).
- Round Biscuit Cutter (2.5-inch/6cm): Gives you that classic shape, but a drinking glass works too. I’ve even used a soup can in a pinch.
- Pastry Brush: For brushing on that glorious melted butter after baking (totally optional but worth it!).
If you don’t have all of these, improvise! I’ve patted out dough with my hands and cut rounds with a mason jar lid before. No judgment. If you do invest in a biscuit cutter, keep it dry and wash by hand—dishwashers tend to rust them out fast. Budget-friendly tip: Thrift stores often have old-school pastry cutters and rolling pins for a few bucks.
How to Make Fluffy Gluten-Free Biscuits
-
Prep and Preheat:
- Preheat your oven to 425°F (220°C). Line a baking sheet with parchment paper.
- Gather and measure all your ingredients—the butter should be straight from the fridge, cold as possible.
-
Mix the Dry Ingredients:
- In a large mixing bowl, whisk together 2 cups (240g) gluten-free all-purpose flour, 1 tablespoon (12g) baking powder, 1/2 teaspoon (3g) baking soda, 3/4 teaspoon (4g) salt, and 1 tablespoon (12g) sugar.
- Make sure everything is well combined—gluten-free blends can separate a little in the bag.
-
Grate and Add the Butter:
- Using a box grater, grate 6 tablespoons (85g) cold unsalted butter directly into the dry mix. (If you don’t have a grater, cut butter into small cubes.)
- Toss the butter in the flour until it’s coated and looks like coarse crumbs—some pea-sized bits are perfect. This is what creates those magical flaky layers.
-
Add the Wet Ingredients:
- Pour in 3/4 cup (180ml) cold buttermilk. Stir gently with a spatula or wooden spoon until just combined. The dough will look shaggy and slightly sticky—that’s what you want. Don’t over-mix!
- If it’s very dry, add a tablespoon (15ml) more buttermilk. Gluten-free flours can be thirsty, especially on dry days.
-
Shape the Dough:
- Turn the dough out onto a lightly floured surface (use more gluten-free flour, but go easy).
- Gently pat into a rectangle about 1-inch (2.5cm) thick. Fold the dough in half, then pat out again. Repeat twice—this creates layers without overworking.
- Pat to a final thickness of 3/4-inch (2cm).
-
Cut the Biscuits:
- Use a floured 2.5-inch (6cm) round cutter to cut out biscuits. Press straight down—don’t twist, or you’ll seal the edges.
- Gather scraps, gently re-pat, and cut more biscuits. You should get 8-10 total.
-
Bake:
- Arrange biscuits on the prepared baking sheet, sides just barely touching for extra-soft sides or spaced apart for crispier edges.
- Bake for 13-16 minutes, until tops are golden brown and biscuits feel set when lightly pressed (they’ll smell buttery and amazing!).
-
Optional: Butter the Tops:
- Brush hot biscuits with 1-2 tablespoons (15-30ml) melted butter for extra shine and flavor.
-
Cool & Serve:
- Let cool 5 minutes before digging in—if you can wait that long. Best served warm.
- If you spot dry edges or the dough seems tough, next time check your flour blend or add a little extra buttermilk. Gluten-free baking can be a little finicky, but these biscuits are forgiving.
Pro tip: If the dough feels sticky, dust your hands with flour instead of adding more to the dough. You want it soft, not dry!
Cooking Tips & Techniques for Perfect Gluten-Free Biscuits
Making biscuits can be a little intimidating, especially when gluten-free flours are involved. Here’s what I’ve learned from plenty of kitchen experiments (and a few flops along the way):
- Keep Everything Cold: Cold butter is your best friend. If your kitchen is warm, chill your flour and bowl in the freezer for 10 minutes first. Warm butter melts too soon and you lose the flake factor.
- Don’t Overwork the Dough: Gluten-free doughs don’t need much mixing. Stir just until the flour disappears. Over-mixing means tough, flat biscuits (been there, done that).
- Fold for Layers: Those simple folds during shaping are what give you tender, layered biscuits. Don’t skip this step—it really does make a difference.
- Use a Sharp Cutter: Press straight down when cutting. Twisting seals the edges and you lose the rise. If you’re using a glass, make sure the rim is floured and sharp.
- Don’t Crowd the Pan: Placing biscuits close together gives you softer sides, but a little space helps them brown all over. I usually do a mix—some touching, some apart—so everyone gets their favorite edge!
- Watch the Bake Time: Ovens vary. Check at 13 minutes; if the tops aren’t golden, give them another minute or two. Underbaked biscuits can taste doughy.
- Troubleshooting: If your biscuits are dry or crumbly, try adding an extra tablespoon of buttermilk next time. If they spread too much, your butter may have been too soft or you added too much liquid.
My first few tries were a mess (think hockey puck texture), but once I got the hang of cold butter and gentle folding, I never looked back. Trust the process and don’t stress—biscuits are meant to be a bit rustic, anyway!
Variations & Adaptations
One of my favorite things about this fluffy gluten-free biscuits recipe is how easy it is to tweak for your mood, the season, or dietary needs. Here are some of my go-tos:
- Dairy-Free: Swap in plant-based butter (like Earth Balance) and make your own dairy-free buttermilk with unsweetened almond milk and lemon juice. The biscuits still come out tender and delicious—my sister-in-law was shocked they were dairy-free!
- Herb & Cheese Biscuits: Stir in 1 tablespoon fresh chopped herbs (chives, parsley, or dill) and 1/2 cup (60g) shredded sharp cheddar or vegan cheese. These are incredible for brunch or alongside soup.
- Savory Breakfast Biscuits: Mix 1/4 cup (30g) cooked and crumbled bacon or sausage into the dough, plus a sprinkle of black pepper. Perfect for breakfast sandwiches or a hearty snack.
- Sweet Biscuits: Add 2 tablespoons (24g) sugar and 1/2 teaspoon cinnamon to the dry mix, then fold in 1/2 cup (70g) blueberries or diced strawberries. Top with a dusting of powdered sugar after baking for a treat that’s basically dessert!
- Vegan Version: Use dairy-free butter, your favorite plant-based milk, and a tablespoon of apple cider vinegar. No eggs needed—these biscuits are naturally egg-free.
- Nut-Free: Choose a gluten-free flour blend with no almond flour (King Arthur’s is a good bet).
I’ve tried all of these at least once—my personal favorite is the herb and cheese combo for a holiday spread. Don’t be afraid to experiment; biscuits are forgiving, and you might just find a new favorite twist on this classic!
Serving & Storage Suggestions
Fresh from the oven, these fluffy gluten-free biscuits are pure magic. Here’s how I like to serve and store them:
- Serving: Best served warm, right off the pan. Slather with butter, fruit preserves, honey, or use as the base for a breakfast sandwich (try eggs and bacon or even a slice of roasted turkey).
- Presentation: Pile them high on a pretty plate or basket, with a little dish of soft butter on the side. They look gorgeous on a brunch board next to sliced fruit and jam.
- Pairings: These biscuits pair beautifully with hearty soups, chili, or a simple salad. For breakfast, a cup of coffee or hot tea is all you need.
- Storing: Let biscuits cool completely, then store in an airtight container at room temperature for up to 2 days. For longer storage, freeze individually wrapped biscuits for up to 2 months.
- Reheating: To revive the fresh-baked flavor, pop biscuits in a 350°F (175°C) oven for 5-7 minutes or microwave for 10-15 seconds. If frozen, thaw overnight in the fridge before reheating.
- Flavor Notes: The flavor and texture are best the day they’re baked, but they stay surprisingly tender even after a day or two. If you have leftovers, split and toast them for a crispy snack!
Honestly, I rarely have leftovers—these tend to disappear fast at my house. But if you do, they’re just as tasty with soup or as the base for strawberry shortcake the next day!
Nutritional Information & Benefits
Here’s the scoop on what you’re eating with these fluffy gluten-free biscuits:
- Estimated Nutrition (per biscuit, recipe makes 10):
- Calories: 170
- Carbs: 23g
- Fat: 8g
- Protein: 3g
- Fiber: 2g
- Sugar: 2g
- Key Ingredient Benefits:
- Gluten-free flour blends often include whole grain flours, rice flour, and sometimes added fiber. Buttermilk adds calcium and protein, and using real butter means no trans fats.
- These biscuits are naturally egg-free and can be dairy-free with swaps, making them a great choice for multiple dietary needs.
- Allergen Notes: The recipe is gluten-free and can be made nut-free with the right flour blend. For dairy-free, swap butter and buttermilk as outlined above.
From a wellness perspective, I love that these biscuits bring comfort without the gluten, and I can feel good sharing them with friends who have allergies. Everything in moderation, right?
Conclusion
If you’ve been searching for a fluffy gluten-free biscuits recipe that actually lives up to the hype, this is it. These biscuits are tender, buttery, and honestly, a little addictive. They’re easy enough for a cozy breakfast, impressive enough for guests, and versatile enough for any meal.
Don’t be afraid to make these your own—try the variations, play with herbs or cheese, or just keep them classic. I make them for family get-togethers, bake sales, and sometimes just because I need a bit of gluten-free comfort food. Every batch reminds me of my grandma’s kitchen, only now everyone at the table can enjoy them, no matter their dietary needs.
If you give these a try, I’d love to hear how they turn out! Leave a comment below with your favorite twist, share the recipe on Pinterest, or tag me if you bake a batch. Happy biscuit baking, friends—may your kitchen always smell this good!
Frequently Asked Questions
Can I make these biscuits dairy-free?
Absolutely! Use plant-based butter and make dairy-free buttermilk by mixing unsweetened almond milk with a little lemon juice or vinegar. The biscuits stay fluffy and tasty!
Do I have to use a gluten-free flour blend with xanthan gum?
It’s best, as xanthan gum helps mimic the stretch and structure of gluten. If your blend doesn’t include it, add 1/2 teaspoon per cup of flour.
How can I store leftover biscuits?
Store completely cooled biscuits in an airtight container for up to 2 days at room temperature, or freeze for up to 2 months. Reheat in the oven or microwave for best results.
My biscuits turned out dry—what went wrong?
Dry biscuits usually need a bit more buttermilk. Gluten-free flours can vary in how much liquid they soak up, so add an extra tablespoon next time if needed.
Can I make these biscuits ahead of time?
Yes! You can cut the dough, freeze the unbaked biscuits on a tray, then bake straight from frozen. Just add 2-3 extra minutes to the bake time.
Pin This Recipe!

Fluffy Gluten-Free Biscuits

These fluffy gluten-free biscuits are tender, buttery, and easy to make with simple pantry ingredients. They bake up golden and soft, perfect for breakfast, brunch, or as a comforting side for any meal.
- Prep Time: 15 minutes
- Cook Time: 15 minutes
- Total Time: 30 minutes
- Yield: 8-10 biscuits 1x
- Category: Bread
- Cuisine: American
Ingredients
- 2 cups gluten-free all-purpose flour blend (with xanthan gum, such as Bob’s Red Mill or King Arthur’s)
- 1 tablespoon baking powder
- 1/2 teaspoon baking soda
- 3/4 teaspoon kosher salt
- 1 tablespoon granulated sugar
- 6 tablespoons unsalted butter, cold and grated (or dairy-free butter)
- 3/4 cup cold buttermilk (or unsweetened almond milk + 2 teaspoons lemon juice or apple cider vinegar for dairy-free)
- Optional: 1-2 tablespoons melted butter for brushing tops
Instructions
- Preheat oven to 425°F (220°C). Line a baking sheet with parchment paper.
- Gather and measure all ingredients. Keep butter as cold as possible.
- In a large mixing bowl, whisk together gluten-free flour, baking powder, baking soda, salt, and sugar until well combined.
- Grate cold butter into the dry ingredients using a box grater (or cut into small cubes). Toss to coat until mixture resembles coarse crumbs with some pea-sized bits.
- Pour in cold buttermilk. Stir gently with a spatula or wooden spoon until just combined and a shaggy, slightly sticky dough forms. If dough is very dry, add 1 tablespoon more buttermilk.
- Turn dough onto a lightly floured surface. Gently pat into a rectangle about 1-inch thick. Fold in half, pat out again, and repeat twice for layers. Pat to a final thickness of 3/4-inch.
- Cut biscuits with a floured 2.5-inch round cutter, pressing straight down. Gather scraps, re-pat, and cut more biscuits (makes 8-10).
- Arrange biscuits on the baking sheet, sides just touching for soft sides or spaced for crispier edges.
- Bake 13-16 minutes, until tops are golden brown and biscuits feel set.
- Optional: Brush hot biscuits with melted butter for extra flavor.
- Let cool 5 minutes before serving. Best served warm.
Notes
For best results, keep all ingredients cold and avoid over-mixing the dough. If your gluten-free flour blend does not contain xanthan gum, add 1/2 teaspoon per cup of flour. For dairy-free biscuits, use vegan butter and make your own buttermilk with plant-based milk and lemon juice. Biscuits are best the day they’re baked but can be stored or frozen and reheated. Add herbs or cheese for variation.
Nutrition
- Serving Size: 1 biscuit (recipe ma
- Calories: 170
- Sugar: 2
- Sodium: 250
- Fat: 8
- Saturated Fat: 5
- Carbohydrates: 23
- Fiber: 2
- Protein: 3
Keywords: gluten-free biscuits, fluffy biscuits, easy gluten-free bread, homemade biscuits, dairy-free option, brunch, breakfast, comfort food


