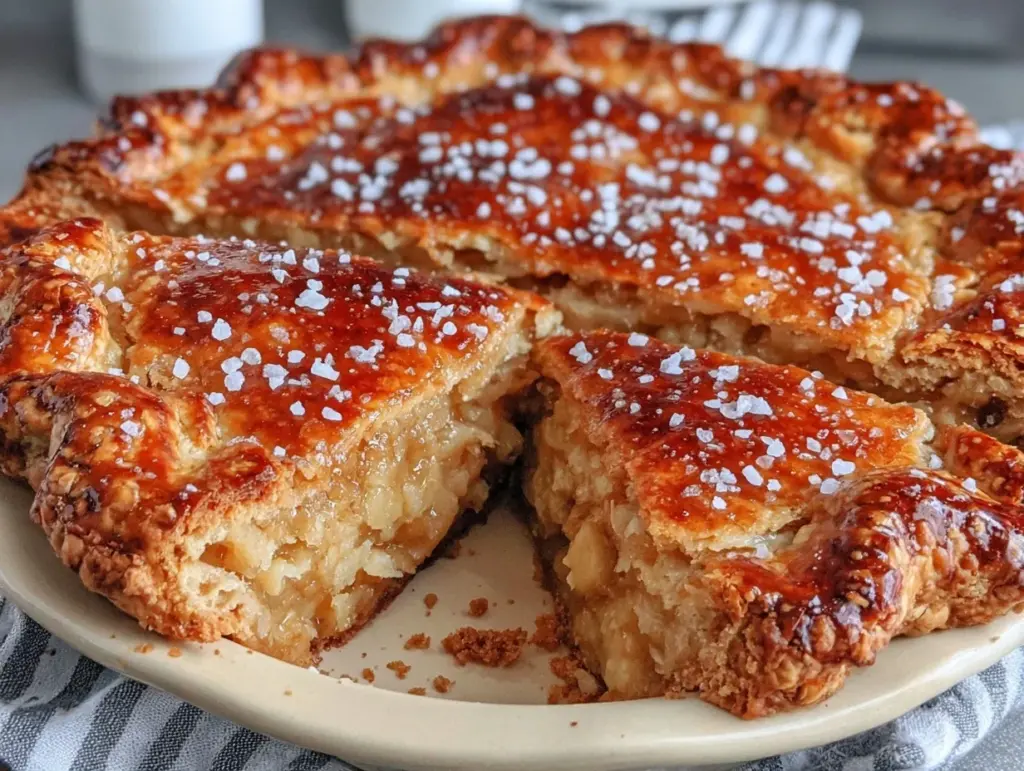
Let me paint you a picture: the golden, glossy surface of this Gooey Salted Maple Pie catches the afternoon sun, while the unmistakable scent of warm maple syrup and toasted butter wafts through the kitchen. The first time I pulled this beauty from my oven, I could hardly wait for it to cool—the sweet, nutty aroma had me hovering by the counter, fork in hand, impatient as ever. When I finally sliced through that flaky butter crust, the filling oozed just enough to make me grin. It’s the kind of moment where you pause, take a deep breath, and just smile because you know you’re onto something truly special.
This pie has roots in my family’s holiday traditions—think chilly autumn afternoons and that maple syrup bottle you save for special occasions. Years ago, when I was knee-high to a grasshopper, my grandma would bring out her pie tin and roll out dough so thin and buttery it almost melted at the touch. I tried recreating her magic for years, finally stumbling upon this salted maple filling during a rainy weekend experiment. I wish I’d found this combo ages ago; it’s pure, nostalgic comfort wrapped in a dangerously easy package.
Honestly, my family couldn’t stop sneaking slices off the cooling rack (and I can’t really blame them). The salty finish on top makes each bite pop, and the gooey maple center is just… well, let’s face it, it’s addictive. Perfect for potlucks, cozy evenings, or when you want to brighten up your Pinterest cookie board with something a little extra. After many rounds of “in the name of research, of course,” this Gooey Salted Maple Pie became a staple for family gatherings and thoughtful gifting. It feels like a warm hug every time I make it, and you’re going to want to bookmark this one—trust me!
Why You’ll Love This Gooey Salted Maple Pie Recipe
If you’re searching for a pie that checks all the boxes—easy, unforgettable, and crowd-pleasing—this Gooey Salted Maple Pie with Flaky Butter Pie Dough is about to become your new favorite. Over years of baking, testing, and tweaking, I’ve landed on a recipe that consistently delivers gooey, sweet perfection with a crust so crisp it almost shatters. Here’s why you’ll fall head over heels for it:
- Quick & Easy: The whole pie comes together in under 30 minutes of prep, with minimal fuss—ideal for busy holiday mornings or when you need a last-minute treat.
- Simple Ingredients: No need to run all over town; you likely already have everything in your pantry (just maple syrup, butter, eggs, flour, and a pinch of sea salt).
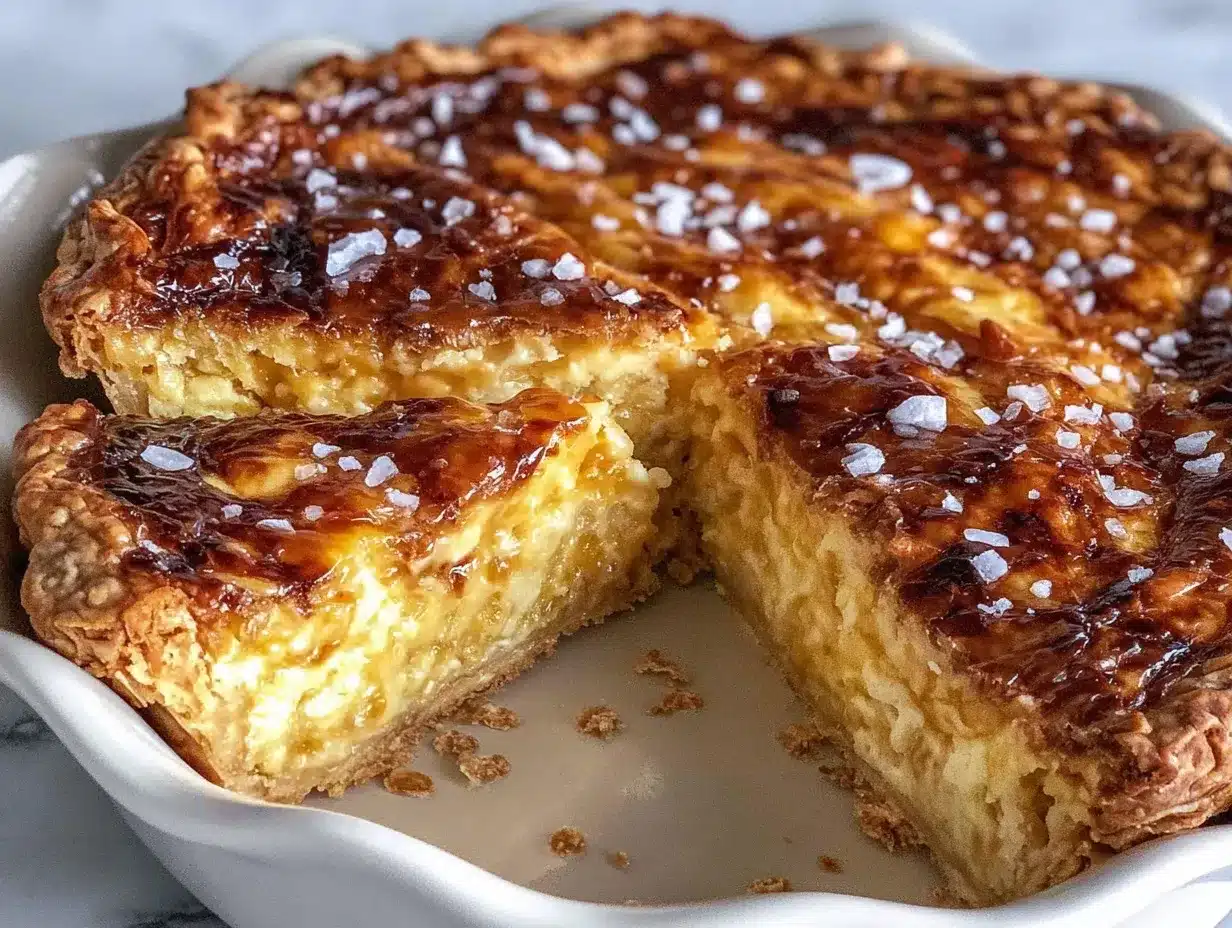
- Perfect for Any Occasion: This pie fits right in at brunch, family dinners, or festive potlucks. It’s a guaranteed conversation starter—just look at that gooey center!
- Crowd-Pleaser: Kids and adults go nuts for the sweet and salty combo. There’s something about the way the maple filling mixes with the buttery crust that gets rave reviews every time.
- Unbelievably Delicious: The texture is next-level comfort food—gooey, rich, and just a little chewy, all set off by the crisp, flaky crust.
What sets this Gooey Salted Maple Pie apart from the rest? For starters, the butter dough is made with a cold, hands-off technique that guarantees flakiness. The maple filling is perfectly balanced—not too sweet, but deeply flavorful thanks to a splash of cream and a sprinkle of flaky sea salt. I even tested blending the filling to make sure it’s ultra-smooth—no grainy bits here!
This isn’t just another maple pie—it’s the one that makes you close your eyes after the first bite and say, “Wow.” It’s comfort food at its finest, but lighter and easier than most. Whether you’re impressing guests or just sneaking a midnight slice with a cup of tea, it’s the kind of recipe that turns a simple moment into something memorable.
What Ingredients You Will Need
This recipe uses simple, wholesome ingredients to deliver bold flavor and a truly satisfying texture without the fuss. I love that most of these are pantry staples, but if you want to get fancy, there’s room for some fun swaps and seasonal touches.
- For the Flaky Butter Pie Dough:
- 2 cups (250 g) all-purpose flour (I prefer King Arthur or Bob’s Red Mill for perfect texture)
- 1 tsp fine sea salt
- 1 tbsp granulated sugar (adds a hint of sweetness)
- 3/4 cup (170 g) unsalted butter, very cold and cubed (use European-style for extra richness)
- 1/3 cup (80 ml) ice water (add more, a tablespoon at a time, if needed)
- For the Gooey Salted Maple Filling:
- 1 cup (240 ml) pure maple syrup (Grade A dark is best for rich flavor—avoid pancake syrup!)
- 3/4 cup (150 g) packed light brown sugar
- 1/2 cup (120 ml) heavy cream
- 1/2 cup (115 g) unsalted butter, melted and cooled slightly
- 3 large eggs, room temperature
- 1 tbsp all-purpose flour (prevents sogginess, trust me on this)
- 1/2 tsp pure vanilla extract (optional, but it deepens the flavor)
- 1/2 tsp fine sea salt (for the filling)
- For Finishing:
- Flaky sea salt (such as Maldon, for sprinkling)
Ingredient Tips: Look for real maple syrup—don’t settle for anything less. Use cold, cubed butter for the dough (it’s the secret to flakiness). If you need to go gluten-free, swap the flour with a 1:1 gluten-free blend. Dairy-free folks can use coconut cream and plant-based butter, though the flavor will shift a bit (still delicious!).
In summer, you can toss in a handful of fresh berries atop the filling before baking for a fruity twist. If you’re out of heavy cream, half-and-half works fine—been there, done that, and no one complained. I’ve used Bob’s Red Mill gluten-free flour for a friend once and the crust was surprisingly crisp (just add a pinch more water).
Equipment Needed
- 9-inch (23 cm) pie pan (glass or metal—both work, but I love glass for watching that golden crust)
- Rolling pin (wooden is classic, but a marble one chills the dough as you work)
- Mixing bowls (at least two: one for dough, one for filling)
- Pastry cutter or fork (to blend butter into flour)
- Whisk (for smooth filling)
- Measuring cups and spoons (accuracy matters, folks!)
- Plastic wrap (for chilling dough)
- Pie weights or dried beans (for blind baking the crust)
- Baking sheet (to catch any drips—trust me, you don’t want to clean burnt maple off your oven)
If you don’t have a pastry cutter, use two forks or even your fingertips (though be quick—warm hands melt butter). For pie weights, dried beans work just as well and are budget-friendly. I’ve even used rice in a pinch. If you’re working on a tight space, try rolling out your dough between two sheets of parchment—makes cleanup a breeze. Maintenance tip: keep your rolling pin dry and dusted with flour, and wash your pie pan gently to preserve its non-stick finish.
Preparation Method
- Prepare the Butter Pie Dough
- In a large bowl, combine 2 cups (250 g) flour, 1 tsp salt, and 1 tbsp sugar. Whisk briefly.
- Add 3/4 cup (170 g) cold, cubed unsalted butter. Toss to coat in flour, then use a pastry cutter or fork to cut butter until pea-sized bits remain.
- Drizzle in 1/3 cup (80 ml) ice water, stirring with a fork until dough starts to clump. If it’s dry, add more water, 1 tbsp at a time.
- Turn dough onto a floured surface and gently knead a few times. It should look shaggy, not sticky. Shape into a disc, wrap in plastic, and chill 1 hour.
- Tip: If your kitchen is warm, freeze your butter cubes for 10 minutes before starting.
- Roll Out and Blind Bake the Crust
- Preheat oven to 375°F (190°C).
- Roll chilled dough on a floured surface to a 12-inch (30 cm) circle. Drape into the pie pan, pressing gently into corners.
- Trim edges, fold under, and crimp decoratively.
- Line crust with parchment and fill with pie weights or beans. Bake 15 minutes, then remove weights and bake 5 minutes more (edges should be lightly golden).
- Cool crust on a rack while you make the filling.
- Warning: Don’t skip blind baking or your crust will get soggy!
- Make the Gooey Maple Filling
- In a bowl, whisk together 1 cup (240 ml) maple syrup, 3/4 cup (150 g) brown sugar, 1/2 cup (120 ml) heavy cream, 1/2 cup (115 g) melted butter, 3 eggs, 1 tbsp flour, 1/2 tsp vanilla (if using), and 1/2 tsp salt until smooth.
- Poke the bottom of your crust a few times with a fork.
- Pour filling into crust. Tap pan gently to release air bubbles.
- Note: If the filling looks foamy, let it sit 5 minutes to settle.
- Bake the Pie
- Place pie on baking sheet and bake at 375°F (190°C) for 35-40 minutes. Edges should be set, center slightly wobbly (like cheesecake).
- If crust browns too fast, cover edges with foil halfway through.
- Remove, sprinkle with flaky sea salt, and cool 2 hours before slicing. Filling sets as it cools.
- Personal tip: I always let my pie cool overnight for the gooey center to hold its shape.
Troubleshooting: If your filling leaks under the crust, check that you blind baked and sealed the edges well. If the crust shrinks, make sure dough rested long enough. Filling too runny? Bake a few minutes longer and chill completely before slicing.
Cooking Tips & Techniques
There’s a little art to making the best Gooey Salted Maple Pie, and I’ve learned most of it through trial and error (and a few pies that, let’s say, never made it to the table).
- Keep Everything Cold: Cold butter equals flaky crust. If your kitchen is warm, chill your utensils or work in small batches. Once, I forgot to chill the dough and ended up with a tough, flat crust—never again!
- Don’t Overmix the Filling: Whisk gently just until smooth. Overmixing can introduce too much air, causing cracks. If you see bubbles, let the filling rest a few minutes before pouring.
- Blind Bake for Success: Blind baking isn’t optional. It keeps the base crisp and prevents that dreaded soggy bottom. I used to skip this step, but honestly, the pie is 10x better with it.
- Timing Matters: Start the dough first, then prep the filling while it chills. Multitasking means you’ll be eating pie sooner.
- Use a Baking Sheet Under Your Pie: Maple syrup can bubble over, and cleaning burnt sugar off your oven is no fun (learned the hard way!).
- Chill Before Slicing: The pie is gooey when hot but firms as it cools. Overnight is best for neat slices, but warm, messy ones taste pretty great too.
Consistency comes from measuring your ingredients and trusting your senses—look for a gentle wobble in the center and golden, flaky edges. If your crust cracks, patch with a bit of dough before filling. And don’t sweat imperfections; honestly, the rustic look is part of the charm.
Variations & Adaptations
This Gooey Salted Maple Pie is flexible, so let’s talk swaps and tweaks for every taste, season, and dietary need.
- Gluten-Free: Use a 1:1 gluten-free flour blend for both the crust and filling. Bob’s Red Mill works great—just add an extra tablespoon of water to the dough.
- Dairy-Free: Swap butter with plant-based margarine and heavy cream with coconut cream. The flavor is slightly different but still rich and gooey.
- Nutty Maple: Add 1/2 cup (60 g) toasted pecans or walnuts to the filling before baking for crunch and extra warmth.
- Seasonal Twist: Top the finished pie with fresh berries or sliced figs for a summer vibe. In winter, dust with cinnamon or nutmeg.
- Chocolate Maple: Stir in 1/3 cup (60 g) chopped bittersweet chocolate to the filling for a decadent twist. My kids love this version!
If you prefer less sweetness, use dark maple syrup and cut the brown sugar by half. For extra saltiness, double the flaky sea salt on top. I’ve made a mini version using tart pans for gifting—just reduce baking time by 10 minutes. If nut allergies are a concern, skip the nuts and try a sprinkle of toasted oats for crunch. One weekend, I added a handful of dried cranberries—honestly, it was a hit with everyone.
Serving & Storage Suggestions
This Gooey Salted Maple Pie is best served slightly warm or at room temperature, where the filling is gooey and the crust crisp. For a pretty presentation, dust the top with extra flaky salt and slice with a sharp, damp knife (trust me, it helps!).
- Serving: Pair with whipped cream, vanilla ice cream, or a dollop of crème fraîche for extra indulgence. A mug of hot coffee or black tea sets it off perfectly.
- Storage: Wrap leftovers tightly in plastic and refrigerate up to 4 days. The flavors deepen over time and the filling stays gooey. For longer storage, freeze tightly wrapped slices for up to 2 months—thaw overnight in the fridge.
- Reheating: Warm slices in a 300°F (150°C) oven for 10-15 minutes, or microwave briefly (10-15 seconds). The crust stays crisp if you oven-reheat, but honestly, cold pie is secretly fantastic.
If you’re prepping ahead, bake the crust and make the filling a day in advance, then assemble and bake fresh before serving. The pie travels well, making it perfect for potlucks or gifting—just pack slices in parchment for easy sharing. Bonus: the sweet and salty flavors get even more pronounced the next day.
Nutritional Information & Benefits
This Gooey Salted Maple Pie is a treat, so let’s break down what you’re getting in every gooey bite (based on 1/8 of the pie):
- Calories: ~420
- Fat: ~23 g
- Carbohydrates: ~52 g
- Protein: ~5 g
- Fiber: ~1 g
Health Benefits: Maple syrup is loaded with antioxidants and minerals like zinc and manganese, making it a better sweetener choice than refined sugar. The eggs and butter provide protein and Vitamin A, while the pie’s moderate portion size keeps it in the treat zone. For gluten-free or dairy-free diets, the swaps listed above keep things inclusive. Allergens? Watch out for eggs, butter, and wheat in the classic recipe. My wellness take: enjoy in moderation, savor every bite, and appreciate the honest ingredients—no artificial flavors, just pure comfort.
Conclusion
If you’re looking for a dessert that’s nostalgic, gooey, and absolutely unforgettable, this Gooey Salted Maple Pie with Flaky Butter Pie Dough is the recipe you need to try. It’s simple to make, easy to adapt, and perfect for bringing smiles to any table—whether you’re a beginner baker or a seasoned pie pro.
Don’t be afraid to tweak it to suit your taste! Add nuts, swap the flour, or dial up the salt—it’ll still be fantastic. Personally, I love how this pie brings back memories while making new ones with each batch. So grab your mixing bowls, roll out that buttery dough, and treat yourself to a slice of pure comfort.
I’d love to hear how your Gooey Salted Maple Pie turns out—drop a comment below, share your tweaks, or tag me on Pinterest with your gorgeous pie photos. Happy baking, friends! May your crusts be flaky and your fillings always gooey.
FAQs about Gooey Salted Maple Pie
Can I make Gooey Salted Maple Pie ahead of time?
Absolutely! You can make the crust and filling separately a day before, then bake fresh. The pie also tastes great the next day, as the flavors deepen overnight.
Can I use store-bought pie crust?
Sure, if you’re short on time. Homemade crust is flakier and more flavorful, but store-bought works in a pinch—just blind bake before filling.
Is maple syrup necessary, or can I substitute honey?
Maple syrup gives the pie its signature flavor, but honey can be used for a different taste. The texture will be similar, but the flavor won’t be as deep or caramel-like.
How do I prevent a soggy bottom crust?
Blind bake the crust before adding the filling, and make sure your pie pan isn’t too cold before pouring in the filling. This keeps the base crisp and delicious.
Can I freeze Gooey Salted Maple Pie?
Yes! Slice the cooled pie and wrap tightly. Freeze for up to 2 months. Thaw slices overnight in the fridge and reheat gently in the oven for best results.
Pin This Recipe!
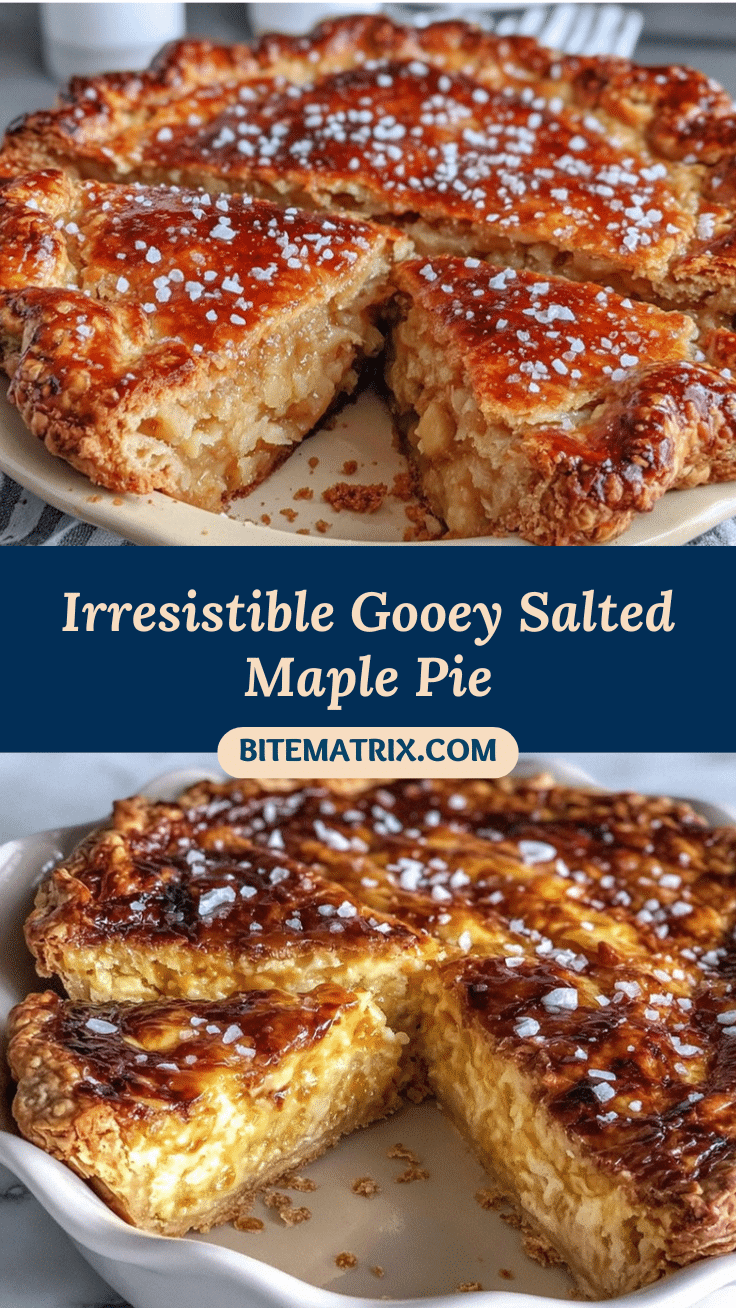
Gooey Salted Maple Pie

This nostalgic Gooey Salted Maple Pie features a flaky butter crust and a rich, gooey maple filling finished with flaky sea salt. It’s easy to make, crowd-pleasing, and perfect for holidays, potlucks, or cozy evenings.
- Prep Time: 30 minutes
- Cook Time: 45 minutes
- Total Time: 1 hour 15 minutes
- Yield: 8 servings 1x
- Category: Dessert
- Cuisine: American
Ingredients
- 2 cups all-purpose flour
- 1 tsp fine sea salt
- 1 tbsp granulated sugar
- 3/4 cup unsalted butter, very cold and cubed
- 1/3 cup ice water (add more, a tablespoon at a time, if needed)
- 1 cup pure maple syrup (Grade A dark preferred)
- 3/4 cup packed light brown sugar
- 1/2 cup heavy cream
- 1/2 cup unsalted butter, melted and cooled slightly
- 3 large eggs, room temperature
- 1 tbsp all-purpose flour
- 1/2 tsp pure vanilla extract (optional)
- 1/2 tsp fine sea salt (for filling)
- Flaky sea salt, for sprinkling
Instructions
- In a large bowl, combine flour, salt, and sugar. Whisk briefly.
- Add cold, cubed butter. Toss to coat in flour, then use a pastry cutter or fork to cut butter until pea-sized bits remain.
- Drizzle in ice water, stirring with a fork until dough starts to clump. If dry, add more water, 1 tbsp at a time.
- Turn dough onto a floured surface and gently knead a few times. Shape into a disc, wrap in plastic, and chill for 1 hour.
- Preheat oven to 375°F (190°C).
- Roll chilled dough on a floured surface to a 12-inch circle. Drape into a 9-inch pie pan, pressing gently into corners.
- Trim edges, fold under, and crimp decoratively.
- Line crust with parchment and fill with pie weights or beans. Bake 15 minutes, then remove weights and bake 5 minutes more until edges are lightly golden.
- Cool crust on a rack while making the filling.
- In a bowl, whisk together maple syrup, brown sugar, heavy cream, melted butter, eggs, flour, vanilla (if using), and salt until smooth.
- Poke the bottom of the crust a few times with a fork.
- Pour filling into crust. Tap pan gently to release air bubbles.
- Place pie on baking sheet and bake at 375°F (190°C) for 35-40 minutes. Edges should be set, center slightly wobbly.
- If crust browns too fast, cover edges with foil halfway through.
- Remove, sprinkle with flaky sea salt, and cool for 2 hours before slicing. Filling sets as it cools.
Notes
For best results, use real maple syrup and cold butter. Blind baking the crust prevents sogginess. Let the pie cool completely before slicing for a gooey but set filling. Variations include gluten-free and dairy-free swaps, adding nuts or chocolate, and topping with berries. Store leftovers tightly wrapped in the fridge for up to 4 days or freeze for up to 2 months.
Nutrition
- Serving Size: 1/8 of pie
- Calories: 420
- Sugar: 34
- Sodium: 320
- Fat: 23
- Saturated Fat: 14
- Carbohydrates: 52
- Fiber: 1
- Protein: 5
Keywords: maple pie, salted maple pie, gooey pie, butter crust, holiday dessert, easy pie recipe, comfort food, family recipe, fall dessert, Thanksgiving pie


