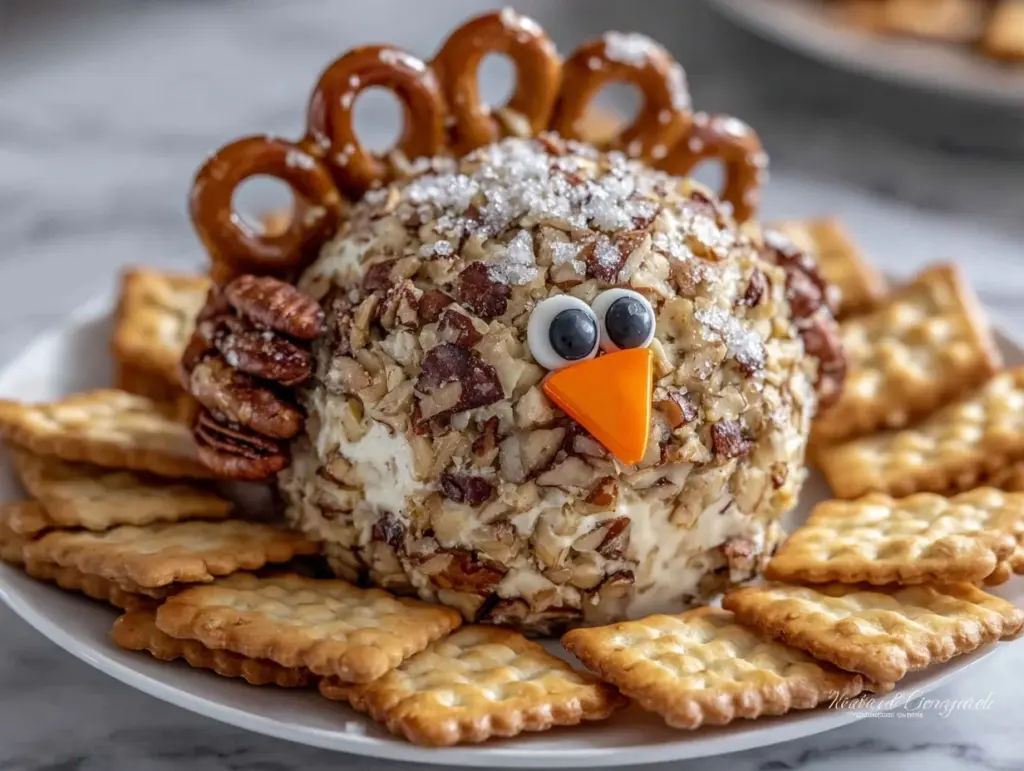
There’s something magical about the holidays, isn’t there? The laughter, the cozy vibes, the delicious food. And let me tell you, this Thanksgiving Turkey Cheese Ball is the ultimate star of any holiday gathering. (It’s almost too cute to eat—almost!) Whether you’re hosting family or attending a potluck, this whimsical appetizer is sure to bring smiles to everyone at the table. It’s creamy, flavorful, and irresistibly festive. Honestly, it’s one of those recipes that makes you feel like a culinary rockstar without spending hours in the kitchen.
The first time I made this cheese ball, I was nervous about creating the turkey shape—would it look like a turkey or a Pinterest fail? But after a little trial and error (and a few laughs), I realized it’s actually super forgiving! Every year now, it’s become a tradition in our home. The kids love helping me assemble it, and it’s always the first thing to disappear from the appetizer spread. Let me show you how to make this adorable Thanksgiving Turkey Cheese Ball that will have your guests gobbling it up in no time!
Why You’ll Love This Recipe
- Fun and Festive: This cheese ball looks like a turkey—it’s the perfect centerpiece for your holiday appetizers!
- Easy to Make: You don’t need special skills or tools to shape your cheese ball. If I can make it look like a turkey, so can you!
- Customizable Flavors: You can adjust the seasonings, cheeses, and add-ins to suit your family’s taste buds.
- Crowd-Pleaser: Adults love the flavor, and kids can’t resist the cute design.
- Make-Ahead Friendly: Prepare this cheese ball a day or two in advance to save time on the big day.
- Kid-Friendly: The little ones will love helping you decorate this festive turkey, making it a fun family activity.
What makes this recipe stand out is the combination of flavors. The creamy, tangy cheese blends perfectly with the savory seasonings and crunchy toppings. Plus, the creative turkey design transforms this appetizer into a true showstopper. It’s not just food—it’s a conversation starter!
Whether you’re looking for a way to impress your guests or simply want to add a dose of whimsy to your holiday spread, this Thanksgiving Turkey Cheese Ball is a must-make. Trust me, you’ll love watching your family and friends admire your handiwork before they dig in!
What Ingredients You Will Need
This recipe uses simple ingredients that come together to create a delicious and festive appetizer. You might already have some of these in your fridge or pantry!
- Cream cheese: Two blocks, softened (make sure it’s room temperature for easy mixing).
- Shredded cheddar cheese: Sharp cheddar works beautifully for a bold flavor.
- Green onion: Chopped finely for a hint of freshness.
- Worcestershire sauce: Adds depth and a savory kick.
- Garlic powder: For subtle, aromatic flavor.
- Smoked paprika: Enhances the cheese ball with a smoky, slightly sweet note.
- Crushed pecans: Perfect for the “feathers” and adds crunch and nuttiness.
- Bell pepper: Use orange and red for the turkey’s beak and wattle.
- Black olives: For the turkey’s eyes—get the pitted ones for easy assembly.
- Pretzel sticks: These create the turkey feathers; they’re crunchy, tasty, and decorative!
Feel free to experiment with different cheeses or toppings. You can swap cheddar for gouda or pepper jack for a unique flavor twist. Want to make it nut-free? Use crushed pretzels or breadcrumbs instead of pecans. This recipe is super flexible and forgiving, so have fun playing around with it!
Equipment Needed
Here’s what you’ll need to create this festive masterpiece:
- Mixing bowls: One large bowl for mixing the cheese ball ingredients.
- Plastic wrap: Helps shape the cheese ball and keep it fresh.
- Serving platter: A large plate or platter to hold your turkey cheese ball.
- Rubber spatula: Perfect for combining the ingredients without making a mess.
- Knife: For chopping green onions, bell peppers, and slicing olives.
- Measuring spoons: For accurate seasoning measurements.
If you don’t have plastic wrap, you can use parchment paper to mold the cheese ball. And don’t worry if you don’t have a fancy platter—just grab your prettiest plate and you’re good to go!
Preparation Method
- Prepare the cheese mixture: In a large mixing bowl, combine the softened cream cheese, shredded cheddar cheese, chopped green onions, Worcestershire sauce, garlic powder, and smoked paprika. Mix until smooth and well-combined. (This is where a rubber spatula comes in handy!)
- Shape the cheese ball: Lay a large sheet of plastic wrap on your counter. Scoop the cheese mixture onto the center of the wrap and gather the edges to form a ball. Twist the ends of the plastic wrap to secure the shape. Refrigerate for at least 2 hours to firm up.
- Prepare the decorations: While the cheese ball chills, slice the bell peppers into small triangles for the turkey’s beak and wattle. Cut the olives into round slices for the eyes. Break pretzel sticks into different lengths to create the turkey’s feathers.
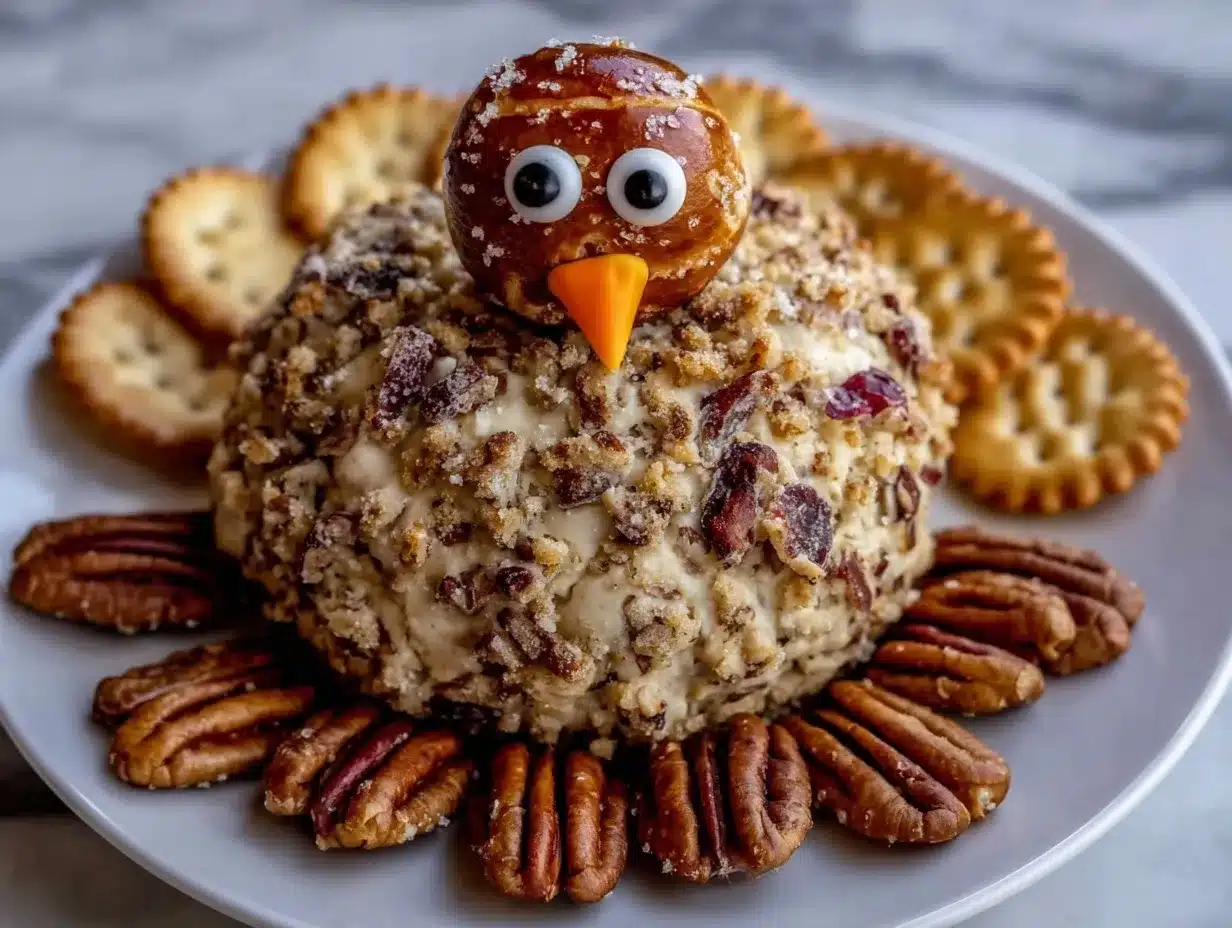
- Assemble the turkey: Once the cheese ball is firm, unwrap it and place it on your serving platter. Coat the outside with crushed pecans, pressing them gently into the surface so they stick. Arrange pretzel sticks around the back of the cheese ball to form the turkey’s tail feathers.
- Add the face details: Position the bell pepper triangles and olive slices to create the turkey’s face. Use a small piece of bell pepper to fashion the wattle below the beak.
- Serve and enjoy: Pair the turkey cheese ball with crackers, veggie sticks, or slices of toasted baguette. Watch as your guests admire your edible artwork before devouring it!
Cooking Tips & Techniques
Here are some tips to ensure your Thanksgiving Turkey Cheese Ball turns out perfect every time:
- Room temperature ingredients: Make sure your cream cheese is softened before mixing. Cold cream cheese is harder to work with and won’t combine smoothly.
- Mix thoroughly: Don’t rush the mixing process. Take your time to ensure all the ingredients are evenly incorporated for the best flavor.
- Shape with ease: If you’re finding it tricky to shape the ball, dampen your hands slightly to prevent sticking.
- Refrigeration is key: Chilling the cheese ball allows it to firm up, making it easier to decorate and serve.
- Get creative with decorations: Don’t worry about perfection! The charm of this recipe is in its homemade look. Have fun and let your creativity shine.
Remember, this recipe is all about having fun and adding a touch of personality to your holiday table. Even if your turkey looks a little goofy, it’ll still taste amazing!
Variations & Adaptations
- Make it spicy: Add diced jalapeños or a pinch of cayenne pepper to the cheese mixture for a kick of heat.
- Herb-infused cheese ball: Mix in fresh herbs like parsley, dill, or chives for an herby flavor profile.
- Nut-free option: Skip the pecans and use crushed pretzels or panko breadcrumbs for the outer layer instead.
- Vegan adaptation: Use dairy-free cream cheese and vegan shredded cheese to make this recipe suitable for plant-based eaters.
- Different shapes: Instead of a turkey, shape the cheese ball into a pumpkin or a cornucopia for another fun, festive presentation.
Feel free to experiment with flavors and decorations based on your preferences. I’ve made a jalapeño cheddar version for a spicy twist, and it was a hit!
Serving & Storage Suggestions
This Thanksgiving Turkey Cheese Ball is best served chilled, straight from the fridge. Arrange it on a platter with an assortment of crackers, pretzels, and fresh veggies like celery and carrot sticks for dipping. The contrast of the creamy cheese ball with crunchy dippers is pure magic!
Leftovers (if there are any!) can be stored in an airtight container in the refrigerator for up to 3 days. To preserve the turkey design, cover the cheese ball loosely with plastic wrap. When you’re ready to enjoy it again, let it sit at room temperature for about 10 minutes to soften before serving.
If you want to make this ahead of time, you can prepare the cheese mixture and shape the ball up to 2 days in advance. Keep it wrapped in plastic wrap in the fridge, then decorate it just before serving to keep the toppings fresh.
Nutritional Information & Benefits
Here’s a breakdown of the nutritional highlights for this Thanksgiving Turkey Cheese Ball:
- Calories: Approximately 150 calories per serving.
- Protein: High protein content from cream cheese and cheddar (great for active lifestyles).
- Healthy fats: The pecans provide heart-healthy fats.
- Low carb option: Pair the cheese ball with low-carb veggies like celery or cucumber for keto-friendly snacking.
- Dietary considerations: Contains dairy and nuts—be sure to alert guests with allergies.
Not only is this cheese ball a feast for the eyes and taste buds, but it also offers a good dose of protein and healthy fats. It’s a great way to balance out the carb-heavy dishes typically served at holiday meals!
Conclusion
If you’re looking for a holiday appetizer that’s as festive as it is delicious, this Thanksgiving Turkey Cheese Ball is the way to go. It’s easy to prepare, endlessly customizable, and a guaranteed conversation starter! Every time I make it, I’m reminded of the joy of sharing food with loved ones and creating memories that last forever.
So why not give this recipe a try? Gather your ingredients, get creative with the decorations, and have fun putting together your masterpiece. Don’t forget to tag me in your photos—I’d love to see your creations! And if you have any questions or tweaks to share, drop them in the comments below. Happy Thanksgiving!
FAQs
Can I make this cheese ball ahead of time?
Yes! You can prepare the cheese ball up to 2 days in advance. Just keep it wrapped in plastic wrap in the fridge and decorate it right before serving.
What can I use instead of pecans?
If you need a nut-free option, crushed pretzels or panko breadcrumbs work great for the outer coating.
How do I store leftovers?
Store any leftovers in an airtight container in the refrigerator for up to 3 days. Let it soften slightly at room temperature before serving again.
Can I make this vegan?
Absolutely! Use dairy-free cream cheese and vegan shredded cheese to make a plant-based version of this recipe.
What should I serve with the turkey cheese ball?
Pair it with crackers, pretzel sticks, and fresh veggies like celery, carrot sticks, and cucumber slices for dipping.
Pin This Recipe!

Irresistible Thanksgiving Turkey Cheese Ball Recipe Perfect for Holidays

This Thanksgiving Turkey Cheese Ball is a fun, festive, and delicious appetizer that will be the star of any holiday gathering. It’s creamy, flavorful, and irresistibly cute!
- Prep Time: 20 minutes
- Cook Time: 2 hours (chilling time)
- Total Time: 2 hours 20 minutes
- Yield: 10 servings 1x
- Category: Appetizer
- Cuisine: American
Ingredients
- 2 blocks cream cheese, softened
- 1 cup shredded sharp cheddar cheese
- 1/4 cup green onion, finely chopped
- 1 tablespoon Worcestershire sauce
- 1 teaspoon garlic powder
- 1 teaspoon smoked paprika
- 1 cup crushed pecans
- 1 orange bell pepper, sliced into small triangles
- 1 red bell pepper, sliced into small triangles
- Black olives, pitted and sliced
- Pretzel sticks
Instructions
- In a large mixing bowl, combine the softened cream cheese, shredded cheddar cheese, chopped green onions, Worcestershire sauce, garlic powder, and smoked paprika. Mix until smooth and well-combined.
- Lay a large sheet of plastic wrap on your counter. Scoop the cheese mixture onto the center of the wrap and gather the edges to form a ball. Twist the ends of the plastic wrap to secure the shape. Refrigerate for at least 2 hours to firm up.
- Slice the bell peppers into small triangles for the turkey’s beak and wattle. Cut the olives into round slices for the eyes. Break pretzel sticks into different lengths to create the turkey’s feathers.
- Once the cheese ball is firm, unwrap it and place it on your serving platter. Coat the outside with crushed pecans, pressing them gently into the surface so they stick. Arrange pretzel sticks around the back of the cheese ball to form the turkey’s tail feathers.
- Position the bell pepper triangles and olive slices to create the turkey’s face. Use a small piece of bell pepper to fashion the wattle below the beak.
- Serve the turkey cheese ball with crackers, veggie sticks, or slices of toasted baguette.
Notes
[‘Make sure your cream cheese is softened before mixing for easier blending.’, ‘Chill the cheese ball for at least 2 hours to firm up before decorating.’, “Feel free to get creative with the decorations—it’s all about having fun!”]
Nutrition
- Serving Size: 1/10 of cheese ball
- Calories: 150
- Sugar: 1
- Sodium: 200
- Fat: 12
- Saturated Fat: 6
- Carbohydrates: 4
- Fiber: 0.5
- Protein: 5
Keywords: Thanksgiving, Cheese Ball, Holiday Appetizer, Festive Recipe, Turkey Cheese Ball