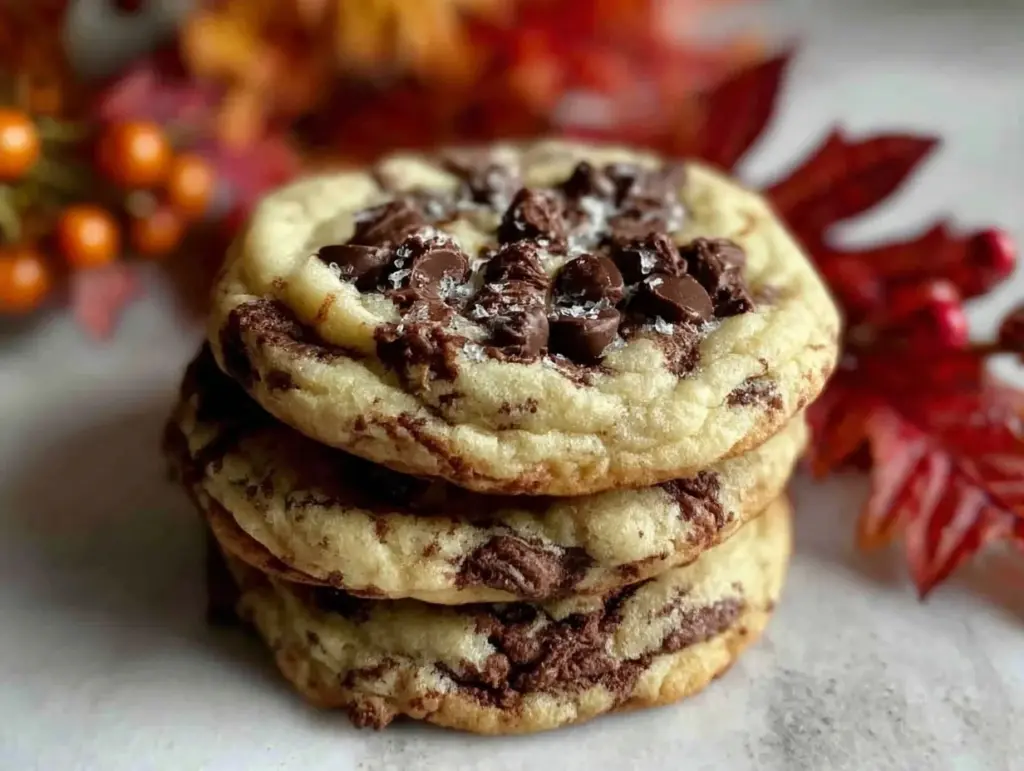
Let me tell you, the scent of freshly baked marble chocolate chip cookies mingling with the crisp autumn air is just about the best thing you can imagine. Imagine a golden swirl of chocolate and vanilla, studded with melty chips—each bite a cozy, nostalgic hug. The first time I made these cookies, I was knee-high to a grasshopper, perched on a kitchen stool next to my grandma, watching her swirl the dough with a butter knife until it looked like a little edible masterpiece. She’d wink and say, “The secret’s in the swirl, kiddo!” Honestly, that’s the kind of moment where you pause, take a deep breath, and just smile because you know you’re onto something truly special.
These marble chocolate chip cookies aren’t just beautiful to look at—they’re dangerously easy to make, and they give off some serious “fall gathering” vibes. Whether I whip up a batch for a casual potluck or tuck them into a cute jar for teacher gifts, my family can’t stop sneaking them off the cooling rack (and I can’t really blame them—who could resist those perfect swirls?). Years ago, I tried to recreate those cookies for a rainy weekend movie night. I wish I’d had this recipe then, because it nails that perfect balance of chewy, crisp, and gooey, all wrapped in a swirl that looks like it belongs on a Pinterest board.
Honestly, every time I test these marble chocolate chip cookies (in the name of research, of course), they end up vanishing faster than I can count. They’ve become a staple for family gatherings, gifting, and just about any fall event that needs a little extra sweetness. If you’re looking for pure, nostalgic comfort with a twist, you’re going to want to bookmark this one.
Why You’ll Love This Recipe
After years of baking and tweaking, I can say these marble chocolate chip cookies are more than just a pretty treat—they’re the kind of cookies that steal the show at any fall gathering. Here’s why you’ll find yourself coming back to this recipe again and again:
- Quick & Easy: You can whip these up in under 30 minutes, which means no fussing over complicated steps or waiting around all day.
- Simple Ingredients: No need for fancy grocery trips—you probably have everything you need sitting in your pantry right now.
- Perfect for Fall Gatherings: These cookies are just right for potlucks, holiday parties, or even as a sweet treat to brighten up your Pinterest cookie board.
- Crowd-Pleaser: Kids and adults alike rave about these cookies—my own family practically fights over the last one!
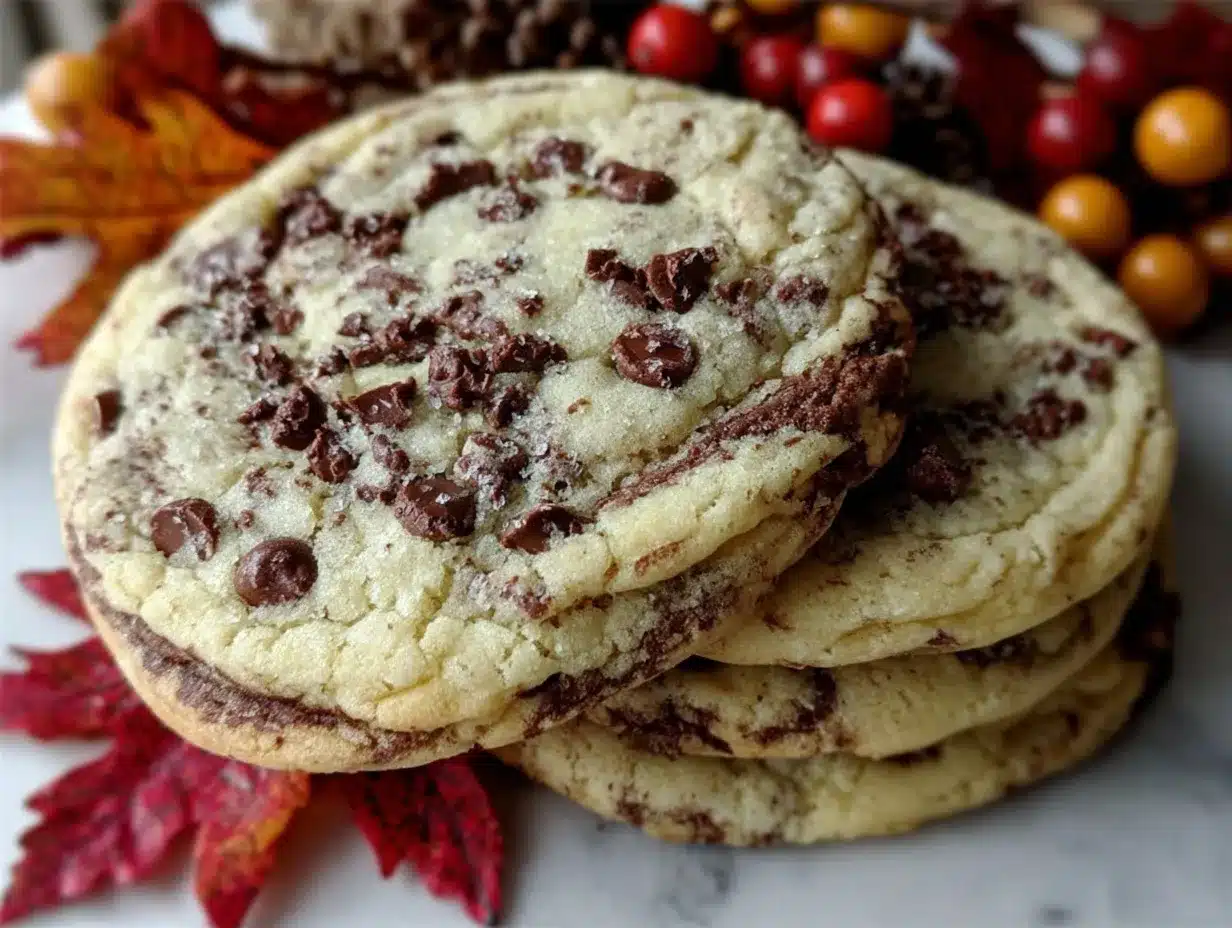
- Unbelievably Delicious: The swirl of chocolate and vanilla brings next-level flavor, and the texture is spot-on: chewy, crisp edges, gooey centers.
What makes this recipe different? You get the best of both worlds—a rich chocolate dough and a classic vanilla base—blended into a cookie that’s as gorgeous as it is tasty. The swirling technique is simple but creates stunning results every time (no need to be a pastry chef to pull it off). I’ve tested everything from chilling the dough for thicker cookies to using different chip brands (Ghirardelli and Guittard are my favorites for meltiness). Let’s face it, these cookies deliver soul-soothing satisfaction without any hassle.
This isn’t just another chocolate chip cookie recipe—it’s a memory maker, a showstopper, and a comfort food classic with a beautiful marble twist. Whether you’re impressing guests or just treating yourself after a long day, these cookies turn any moment into something memorable. Close your eyes after the first bite and you’ll know exactly what I mean!
What Ingredients You Will Need
This recipe uses simple, wholesome ingredients to deliver bold flavor and satisfying texture without any complicated steps. Most of these are pantry staples, and you can easily swap or tweak what you have on hand. Here’s what you’ll need:
- For the Vanilla Dough:
- 1 cup (226g) unsalted butter, softened (adds richness)
- 3/4 cup (150g) granulated sugar
- 3/4 cup (165g) packed light brown sugar (boosts chewiness and flavor)
- 2 large eggs, room temperature
- 2 teaspoons pure vanilla extract (use real vanilla for best flavor)
- 2 1/2 cups (312g) all-purpose flour (King Arthur is my go-to for consistency)
- 1 teaspoon baking soda
- 3/4 teaspoon kosher salt
- For the Chocolate Dough:
- 1/2 cup (45g) unsweetened cocoa powder (Dutch-process if possible for deeper flavor)
- 1 tablespoon milk (whole or 2%, helps blend the cocoa smoothly)
- 1/4 cup (30g) additional all-purpose flour (balances the extra cocoa)
- Mix-ins:
- 2 cups (340g) chocolate chips (semi-sweet or dark, Ghirardelli or Guittard for best melting)
- Optional: 1/2 cup (60g) chopped walnuts or pecans (for crunch)
If you need gluten-free marble chocolate chip cookies, swap in your favorite 1:1 gluten-free flour blend. For dairy-free, use vegan butter and plant-based milk. In summer, I sometimes add a handful of dried cherries or cranberries for a fruity twist. If you want smaller cookies, just use a smaller scoop—easy peasy!
Don’t have chocolate chips? Chop up a good-quality chocolate bar instead (it adds pools of melty goodness). If you’re out of brown sugar, you can use all white sugar, but the cookies won’t be quite as chewy. Honestly, this recipe is as flexible as you need it to be.
Equipment Needed
- Mixing Bowls: At least two medium bowls for separating the vanilla and chocolate doughs.
- Electric Mixer: Stand or hand mixer works—if you’re mixing by hand, prepare for a little arm workout (it’s worth it!).
- Rubber Spatula: For folding in the chocolate chips and scraping the dough (nothing sticks like cookie dough).
- Baking Sheet: Standard rimmed sheets lined with parchment paper—makes cleanup a breeze.
- Cookie Scoop: A medium scoop (about 2 tablespoons) keeps cookies evenly sized. A regular spoon works in a pinch.
- Butter Knife or Toothpick: For swirling the dough into that signature marble pattern.
- Wire Cooling Rack: Helps cookies cool evenly and keeps them from going soggy underneath.
I’ve used everything from ancient hand-me-down cookie sheets to shiny new ones; just line them with parchment for best results. If your mixer is on the fritz, don’t stress—good old elbow grease works. Maintenance tip: Wash spatulas and mixing attachments right away so dough doesn’t harden (learned that the hard way!). If you’re on a budget, most of these items are available at big box stores or online, and you don’t need anything fancy—just reliable basics.
Preparation Method
- Preheat the Oven: Set oven to 350°F (175°C). Line baking sheets with parchment paper, or lightly grease them.
- Cream the Butter and Sugars: In a large bowl, beat 1 cup (226g) unsalted butter, 3/4 cup (150g) granulated sugar, and 3/4 cup (165g) packed light brown sugar with an electric mixer on medium speed for 2-3 minutes, until light and fluffy. Scrape down the sides as needed.
- Add Eggs and Vanilla: Beat in 2 large eggs, one at a time, mixing well after each. Add 2 teaspoons vanilla extract and mix until combined. The mixture should look creamy and pale.
- Combine Dry Ingredients: In a separate bowl, whisk together 2 1/2 cups (312g) all-purpose flour, 1 teaspoon baking soda, and 3/4 teaspoon kosher salt. Gradually add to wet mixture, mixing on low until just combined.
- Divide the Dough: Split dough evenly into two bowls. To one bowl, add 1/2 cup (45g) cocoa powder, 1 tablespoon milk, and 1/4 cup (30g) flour. Mix until just incorporated. This is your chocolate dough; the other bowl remains vanilla.
- Add Chocolate Chips: Fold 1 cup (170g) chocolate chips into each dough portion. Add nuts if using.
- Form Cookie Balls: For each cookie, scoop one tablespoon of vanilla dough and one tablespoon of chocolate dough. Press them gently together and roll into a ball (don’t overmix—you want visible swirls).
- Swirl the Dough: Use a butter knife or toothpick to gently twist the dough ball, creating a marble effect. Place on prepared baking sheet, spacing cookies at least 2 inches apart.
- Bake: Bake for 10-12 minutes, until edges are set but centers look slightly underbaked. Cookies will firm up as they cool.
- Cool: Let cookies rest on the baking sheet for 5 minutes before transferring to a wire rack. Enjoy the aroma—this is when my kids start hovering!
Preparation Notes: If dough feels too sticky, chill for 15-20 minutes. For extra-thick cookies, chill dough balls for 30 minutes before baking. If cookies spread too much, your butter may have been too warm—try chilling longer next time.
Sensory Cues: Cookies should be lightly golden at the edges, soft in the center, and smell sweet and chocolatey. If you see shiny chocolate pools and distinct swirls, you nailed it!
Efficiency tip: Scoop all dough balls onto parchment first, then swirl them—saves time when working in batches. Don’t worry if each cookie looks a little different; that’s the charm!
Cooking Tips & Techniques
After baking more batches than I care to admit, I’ve picked up a few tricks for getting these marble chocolate chip cookies just right:
- Room Temperature Ingredients: Make sure butter and eggs are at room temp—cold ingredients can lead to lumpy dough or uneven baking.
- Don’t Overmix: Once you add the flour, mix only until combined. Overmixing makes tough cookies (learned this after a few hockey puck disasters!).
- Perfect Swirls: Gently swirl, don’t knead. Overdoing it turns the whole cookie brown—aim for visible streaks.
- Cookie Size Consistency: Use a cookie scoop for even baking. Uneven sizes mean some cookies burn while others stay raw.
- Watch the Bake Time: These cookies go from soft to crispy fast. Check at 10 minutes—edges should look set, centers a bit gooey.
- Batch Baking: Rotate baking sheets halfway through for even browning, especially if your oven has hot spots.
Common mistakes? Rushing the dough—if your butter’s too soft or melted, the cookies spread too thin. If you forget to chill the dough, you’ll get flat cookies (not the end of the world, but they’re best thick and chewy). Timing is everything—a few extra minutes can dry them out, so set a timer and trust your nose. I’ve burned my fair share, but you know, that’s how you learn!
For multitasking, prep dough balls ahead and chill while you tidy up. Once you get the hang of swirling, it’s actually kind of fun—and every cookie will look like a little work of art.
Variations & Adaptations
One of the best things about marble chocolate chip cookies is how easily you can switch them up. Here are my favorite ways to adapt this recipe:
- Gluten-Free: Use a 1:1 gluten-free flour blend—Bob’s Red Mill works well. No other adjustments needed.
- Dairy-Free: Swap unsalted butter for vegan butter and use dairy-free chocolate chips. Almond or oat milk works for the chocolate dough.
- Seasonal Flavors: Add 1 teaspoon pumpkin spice to the vanilla dough for a fall twist, or mix in dried cranberries and orange zest for a festive holiday version.
- Nutty Variation: Stir in chopped pecans or walnuts for crunch. If you have a nut allergy, skip or use toasted seeds.
- Decadent Add-In: Try white chocolate chips or caramel bits for extra sweetness.
If you prefer crisp cookies, flatten the dough balls slightly before baking. For a softer center, chill the dough for an hour before baking. You can even bake these in a cast iron skillet for a “cookie cake”—just press dough into the pan, swirl, and bake for 20-25 minutes.
My favorite personal twist? A sprinkle of flaky sea salt on top right after baking—those little salt crystals bring out the chocolate flavor like nothing else. Feel free to get creative—these cookies are as versatile as your imagination!
Serving & Storage Suggestions
Serve marble chocolate chip cookies warm, with the chocolate still gooey—honestly, it’s hard to beat that first bite straight off the rack. For parties, arrange them in a rustic basket lined with a fall-themed napkin, or stack in a glass jar for a Pinterest-worthy display.
Pair with hot apple cider, spiced chai, or classic milk. They’re also a sweet finish to a cozy autumn dinner—try them alongside roasted butternut squash soup or a hearty stew.
To store, let cookies cool completely, then keep in an airtight container at room temperature for up to 5 days. For longer storage, freeze them in a single layer, then transfer to freezer bags—thaw at room temp or microwave for 10 seconds for chewy perfection.
Reheating? Pop in a low oven (300°F/150°C) for a few minutes, or use the microwave for a quick fix. The flavors actually deepen after a day or two, so don’t be afraid to make ahead for your fall gatherings!
Nutritional Information & Benefits
Each marble chocolate chip cookie (about 40g) offers roughly 180 calories, 9g fat, 24g carbs, and 2g protein. It’s a treat, sure, but you get some wholesome benefits from the eggs (protein), nuts (if added, for heart-healthy fats), and dark chocolate chips (antioxidants).
This recipe can be made gluten-free or dairy-free, so it’s accessible to most dietary needs. Just watch out for allergens: wheat, eggs, and dairy are present in the base version.
From a wellness perspective, I say treats like these are all about balance. Enjoy in moderation, and savor the comfort they bring—sometimes, a little sweetness is just the self-care you need.
Conclusion
If you’re after the perfect cookie for your next fall gathering, these marble chocolate chip cookies are worth every swirl. They’re as beautiful as they are delicious, and honestly, they bring some serious joy to any occasion. Customize with your favorite chips, nuts, or spices—make them yours!
I love this recipe because it’s a little piece of my family’s history, a lot of fun, and always a hit no matter who’s at the table. Give them a try, and let me know your favorite twist!
Drop a comment below if you bake these, share your photos on social, or tag me with your wildest marble creations. You know what? You’re going to want to make these again and again—so go ahead, bookmark and enjoy!
FAQs
How do I get perfect swirls in my marble chocolate chip cookies?
Gently twist the vanilla and chocolate dough together, then use a butter knife or toothpick for a few quick swirls. Don’t overmix—less is more for visible marbling.
Can I freeze the dough for later?
Yes! Scoop and swirl dough balls, freeze them on a tray, then store in freezer bags. Bake straight from frozen, just add 1-2 minutes to the baking time.
What’s the best chocolate for marble chocolate chip cookies?
Semi-sweet or dark chocolate chips work best. Ghirardelli and Guittard melt beautifully. You can also chop up a high-quality chocolate bar for larger chocolate pockets.
Can I make these cookies gluten-free?
Absolutely, just swap the all-purpose flour for your favorite 1:1 gluten-free blend. No other changes needed—super easy!
Why did my cookies turn out flat?
Usually, it’s because the butter was too warm or you skipped chilling the dough. Try chilling dough balls for 15-30 minutes before baking for thicker cookies.
Pin This Recipe!
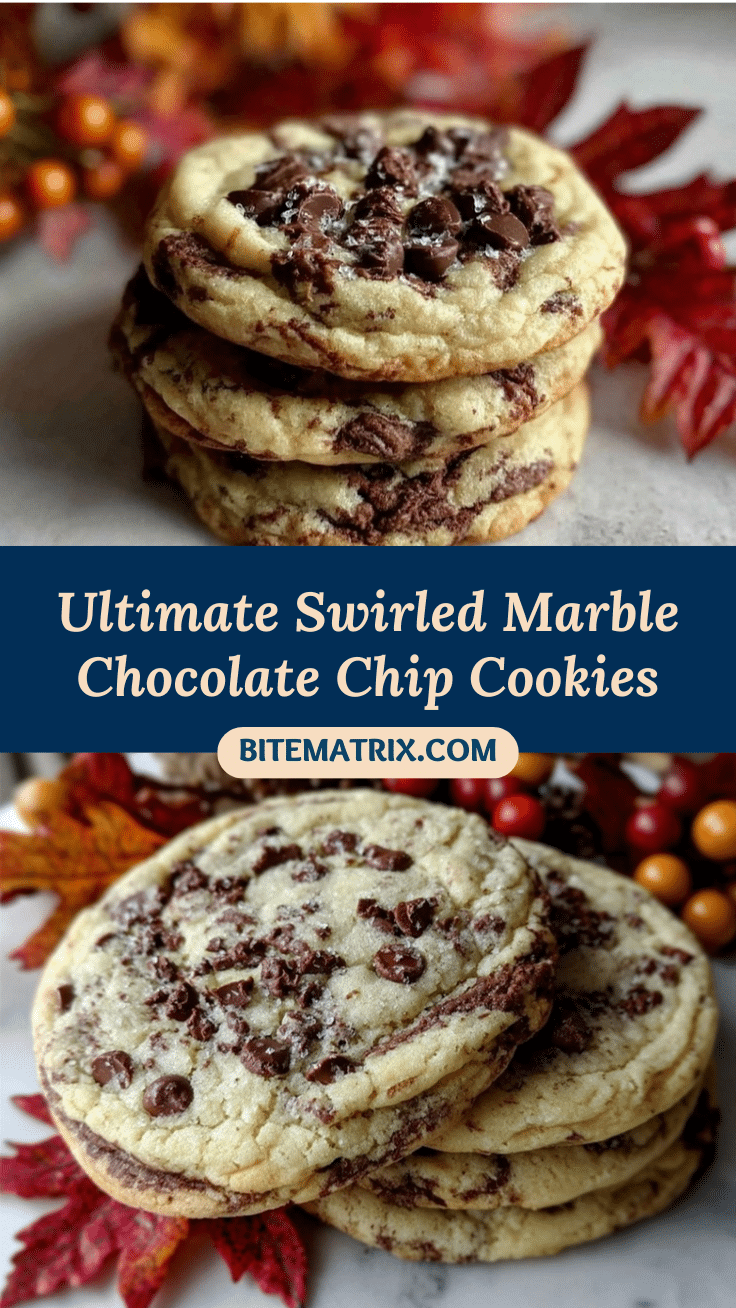
Marble Chocolate Chip Cookies: Easy Fall Party Recipe for Perfect Swirls

These marble chocolate chip cookies feature a beautiful swirl of chocolate and vanilla dough studded with melty chips. They’re quick, easy, and perfect for fall gatherings, offering chewy centers and crisp edges in every bite.
- Prep Time: 15 minutes
- Cook Time: 12 minutes
- Total Time: 27 minutes
- Yield: 24 cookies 1x
- Category: Dessert
- Cuisine: American
Ingredients
- 1 cup (226g) unsalted butter, softened
- 3/4 cup (150g) granulated sugar
- 3/4 cup (165g) packed light brown sugar
- 2 large eggs, room temperature
- 2 teaspoons pure vanilla extract
- 2 1/2 cups (312g) all-purpose flour
- 1 teaspoon baking soda
- 3/4 teaspoon kosher salt
- 1/2 cup (45g) unsweetened cocoa powder (Dutch-process preferred)
- 1 tablespoon milk (whole or 2%)
- 1/4 cup (30g) additional all-purpose flour
- 2 cups (340g) chocolate chips (semi-sweet or dark)
- Optional: 1/2 cup (60g) chopped walnuts or pecans
Instructions
- Preheat oven to 350°F (175°C). Line baking sheets with parchment paper or lightly grease.
- In a large bowl, beat butter, granulated sugar, and brown sugar with an electric mixer on medium speed for 2-3 minutes until light and fluffy. Scrape down sides as needed.
- Beat in eggs one at a time, mixing well after each. Add vanilla extract and mix until combined.
- In a separate bowl, whisk together 2 1/2 cups flour, baking soda, and salt. Gradually add to wet mixture, mixing on low until just combined.
- Divide dough evenly into two bowls. To one bowl, add cocoa powder, milk, and 1/4 cup flour. Mix until just incorporated for chocolate dough; the other bowl remains vanilla.
- Fold 1 cup chocolate chips into each dough portion. Add nuts if using.
- For each cookie, scoop one tablespoon of vanilla dough and one tablespoon of chocolate dough. Press gently together and roll into a ball (do not overmix).
- Use a butter knife or toothpick to gently twist the dough ball, creating a marble effect. Place on prepared baking sheet, spacing cookies at least 2 inches apart.
- Bake for 10-12 minutes, until edges are set but centers look slightly underbaked.
- Let cookies rest on the baking sheet for 5 minutes before transferring to a wire rack to cool.
Notes
For thicker cookies, chill dough balls for 30 minutes before baking. Use room temperature butter and eggs for best texture. Don’t overmix after adding flour to avoid tough cookies. Swirl gently for distinct marble patterns. Cookies can be made gluten-free or dairy-free with simple swaps. Sprinkle flaky sea salt on top after baking for extra flavor.
Nutrition
- Serving Size: 1 cookie (about 40g)
- Calories: 180
- Sugar: 15
- Sodium: 90
- Fat: 9
- Saturated Fat: 5
- Carbohydrates: 24
- Fiber: 2
- Protein: 2
Keywords: marble cookies, chocolate chip cookies, fall dessert, party cookies, swirled cookies, easy cookie recipe, autumn baking, chewy cookies, vanilla chocolate cookies


