Let me set the scene: a chilly autumn afternoon, the leaves swirling outside, and the scent of apples and warm cinnamon tumbling out of the oven. The first time I whipped up this Old-Fashioned Apple Crisp with Oats, I’ll be honest—I had no idea it would become a staple in our house. The apples bubbling away beneath a golden, oat-packed topping create this magical aroma that wraps around you like your favorite sweater. I was instantly hooked, pausing just to breathe it all in and realizing, you know, this is one of those recipes you wish you’d found years ago.
Back when I was knee-high to a grasshopper, my grandma used to make apple crisp for lazy Sunday suppers. She’d let me help slice the apples (never too thin, never too thick—her rule, not mine). That warm, syrupy apple filling, the crunchy oat topping, and the way everyone fought over the corner pieces? It’s pure, nostalgic comfort. I tried recreating her version on a rainy weekend, and after a few tweaks—adding just the right amount of cinnamon, using old-fashioned oats for extra texture—I landed on this recipe. My family couldn’t stop sneaking spoonfuls straight from the pan (honestly, I caught my husband in the act more than once), and the kids begged for it in their lunchboxes.
There’s something wickedly satisfying about seeing folks gathered around the kitchen, forks in hand, waiting for the apple crisp to cool just enough to dig in. This dessert is dangerously easy, perfect for potlucks, holiday gatherings, or those nights when you crave something sweet but don’t want a fuss. You’re going to want to bookmark this one—it’s the kind of comfort food that feels like a warm hug every time, and I’ve tested it more times than I’ll admit (purely in the name of research, of course). If you’re searching for an easy homemade dessert that’ll brighten up your Pinterest board and make your kitchen smell like heaven, this apple crisp with oats is it.
Why You’ll Love This Old-Fashioned Apple Crisp with Oats
After years of tweaking, taste-testing, and more than a few late-night cravings, here’s why this recipe stands out. It’s not just another apple crisp—it’s the one you’ll keep coming back to, trust me.
- Quick & Easy: Comes together in under an hour, perfect for busy weeknights or when you need a last-minute dessert.
- Simple Ingredients: No fancy grocery trips required—you probably have everything you need right in your pantry.
- Perfect for Any Occasion: Works for cozy dinners, fall brunches, potlucks, and even holiday mornings.
- Crowd-Pleaser: Every time I serve it, kids and adults alike rave about the crispy topping and gooey apples.
- Unbelievably Delicious: The combo of tart apples, buttery oats, and cinnamon is classic comfort food at its best.
What sets this recipe apart? I always use old-fashioned oats instead of quick oats—they give the topping a chewy, rustic texture that’s leagues above the usual. I add a touch more cinnamon than most (my grandma’s trick), and I keep the sugar balanced so the apples shine through. Sometimes, I’ll toss in a bit of lemon juice for brightness or chopped pecans for crunch. It’s flexible—make it yours!
This apple crisp isn’t just tasty—it’s the kind of dessert that makes you close your eyes at the first bite. It’s cozy comfort, with all the soul-satisfying goodness you want, but you can whip it up in a snap. Great for impressing guests without breaking a sweat, or turning a regular meal into something special. If you love recipes that feel familiar and taste homemade, this one’s for you.
What Ingredients You Will Need
This Old-Fashioned Apple Crisp with Oats delivers bold flavor and that irresistible, crumbly texture—all with simple, wholesome ingredients. Most are pantry staples, and you can swap or tweak as needed. Here’s what you’ll need:
For the Apple Filling
- 6 cups (about 900g) tart apples, peeled, cored, and sliced (Granny Smith is my go-to, but Honeycrisp works great too)
- 1/4 cup (50g) granulated sugar (adjust based on apple sweetness)
- 2 tablespoons (15g) all-purpose flour (helps thicken the juices)
- 1 teaspoon ground cinnamon (warm and cozy flavor)
- 1/4 teaspoon ground nutmeg (optional, adds a little depth)
- 1 tablespoon lemon juice (brightens everything up)
For the Oat Topping

- 1 cup (100g) old-fashioned rolled oats (don’t use quick oats—trust me, the texture matters)
- 1 cup (120g) all-purpose flour (or substitute with gluten-free flour blend)
- 1/2 cup (100g) light brown sugar, packed (adds caramel notes)
- 1/2 cup (115g) unsalted butter, melted (plus a bit for greasing the pan)
- 1/2 teaspoon ground cinnamon (for the topping, too—layer that flavor!)
- 1/4 teaspoon salt (balances sweetness)
Optional Add-Ins & Swaps
- 1/3 cup chopped pecans or walnuts (for extra crunch)
- 1/3 cup dried cranberries or raisins (a little tartness)
- Substitute coconut sugar or maple syrup for a different sweetness profile
- Use dairy-free butter or vegan margarine if needed
For best results, I recommend Bob’s Red Mill oats—they stay chewy and never mushy. If you want a gluten-free version, King Arthur’s flour blend works wonders. In summer, I’ve swapped in fresh peaches or mixed berries instead of apples, and it’s just as dreamy. And hey, if you’re short on apples, mix in pears—it’ll still be delicious. This recipe is forgiving, so feel free to play around.
Equipment Needed
- 9×13-inch (or similar) baking dish: Glass or ceramic is ideal for even browning.
- Large mixing bowl: For tossing apples and prepping the topping.
- Apple peeler/corer/slicer: Makes prep way faster, but a plain paring knife works too (I’ve definitely used whatever’s handy).
- Measuring cups & spoons: Accuracy helps with the perfect crisp-to-apple ratio.
- Wooden spoon or spatula: Easy for mixing without crushing the oats.
- Small saucepan (optional): For melting butter—microwave works fine, if you don’t want extra dishes.
If you don’t own a fancy apple peeler, no worries! I’ve used a regular knife plenty of times, just go slow so you don’t lose too much apple. Glass pans help the topping crisp up, but metal works in a pinch (just watch the edges for over-browning). For budget-friendly gear, I’ve found thrift shops are gold mines for baking dishes and mixing bowls. Keep your pans seasoned and clean—old, sticky residue can mess with the texture. Easy maintenance tip: soak pans in warm water right after serving, so cleanup is a breeze.
Preparation Method
- Preheat the oven: Set your oven to 350°F (175°C). Grease your 9×13-inch baking dish with a bit of butter.
- Prepare the apples: Peel, core, and slice apples into 1/4-inch thick pieces. You’ll need about 6 cups (900g). Toss the slices with lemon juice in a large bowl to keep them from browning and add brightness.
- Mix the filling: Add granulated sugar, flour, cinnamon, and nutmeg to the apples. Stir until well coated—each slice should have a light dusting of sugar and spice. If apples are extra juicy, add an extra tablespoon of flour to help thicken.
- Layer the apples: Spread the apple mixture evenly into your greased baking dish. Press lightly so the apples settle in one layer.
- Make the oat topping: In a separate bowl, combine rolled oats, flour, brown sugar, cinnamon, and salt. Pour in melted butter and stir until the mixture is crumbly but sticks together when pressed.
- Add optional extras: If you’re using nuts or dried fruit, fold them into the oat mixture now. I love chopped pecans for extra crunch.
- Top the apples: Sprinkle the oat topping evenly over the apples. Use your hands to spread it out—don’t pack it down too tight, or it won’t crisp properly.
- Bake: Place the dish in the center rack of your preheated oven. Bake for 40-45 minutes, until the topping is golden brown and the apple filling is bubbling around the edges. Check at 35 minutes—if the top is browning too quickly, loosely cover with foil.
- Cool: Remove from the oven and let the crisp sit for at least 15 minutes before serving. The filling thickens as it cools (and let’s face it, it’s hard to wait, but worth it).
- Serving: Scoop out generous portions and serve warm. Top with vanilla ice cream or whipped cream, if you like.
Troubleshooting tips: If your apples aren’t bubbling after 45 minutes, give it an extra 5-10 minutes. Some apples release less juice, so don’t panic if the filling looks a bit dry—just drizzle a tablespoon of water over the apples before topping. If the topping looks pale, crank up the oven to 375°F (190°C) for the last five minutes. For extra efficiency, prep the apples and topping the night before, then assemble and bake when you’re ready. Sensory cues: you’ll smell the cinnamon and see the topping turning golden—those are your best signals. If you hear a gentle bubbling, that’s the apples doing their thing!
Cooking Tips & Techniques
Here’s what I’ve learned from years of making apple crisp (and a few kitchen mishaps):
- Don’t overmix the oat topping. If you stir too much, it gets pasty and loses its crumbly texture. Just mix until combined.
- Layer apples evenly. Uneven layers can lead to undercooked pockets or dry spots. I gently press them down for uniform cooking.
- Butter matters. Melted butter binds the oats and flour, but too much makes a greasy topping. Stick to the measured amount, and use good-quality butter.
- Baking time is flexible. Ovens vary. If the apples aren’t soft enough, add a few extra minutes. Don’t be afraid to check with a fork.
- Let it rest. If you dig in too soon, the filling will be runny. Giving it a bit of cooling time lets the juices thicken up nicely.
I once forgot to add flour to the filling—let’s just say, apple soup isn’t quite the same! Lesson learned: double-check before tossing in the oven. For multitasking, prep the apples while the oven preheats and melt the butter while you mix the topping. For consistent results, use the same type of apples each time (Granny Smith and Honeycrisp are my winners). If your topping isn’t crisping, try broiling for 2-3 minutes at the end—but watch closely, as it can burn fast. These little tricks make all the difference between “good” and “can I have seconds?” apple crisp.
Variations & Adaptations
Apple crisp is endlessly flexible—here are some favorite twists and swaps:
- Gluten-Free: Use a certified gluten-free flour blend and oats. I’ve made this version for friends, and it’s just as delicious (sometimes even better!).
- Vegan: Swap butter with coconut oil or a vegan margarine. Use coconut sugar for a lower glycemic index, and you’ll still get that golden crunch.
- Seasonal Fruit: Mix in pears, peaches, or berries depending on what’s fresh. In summer, a peach-apple combo is dreamy.
- Nutty Crunch: Add chopped pecans, almonds, or walnuts to the topping for extra texture. If you’re nut-free, skip or use seeds like pumpkin or sunflower.
- Spice It Up: Try adding cardamom, ginger, or clove for a unique flavor profile.
If you’re baking for allergies, swap in sunflower seed butter for a nutty flavor without the nuts. I’ve tried a cranberry-apple crisp for Thanksgiving, and it was a hit—just reduce the sugar a touch since cranberries are tart. For a breakfast version, use less sugar and serve with Greek yogurt. My favorite personal twist? A handful of shredded coconut in the topping for a chewy, tropical vibe. Don’t be afraid to get creative—this recipe loves experimentation!
Serving & Storage Suggestions
Apple crisp shines when served warm, straight from the oven. Here’s how to make it even better:
- Serving Temperature: Warm is best, but room temperature works too if you’re short on time.
- Presentation: Scoop into bowls and top with a scoop of vanilla ice cream, whipped cream, or even a drizzle of salted caramel.
- Pairings: Serve alongside a cup of black tea, hot apple cider, or a mug of coffee. This crisp goes great with savory dishes like roast chicken or pork, especially for fall dinners.
- Storage: Cover leftovers tightly and refrigerate for up to 4 days. For longer storage, freeze in airtight containers for up to 2 months.
- Reheating: Warm individual servings in the microwave for 30-45 seconds, or reheat larger amounts in a 350°F (175°C) oven for 10-15 minutes. The topping crisps up again nicely.
- Flavor Development: The cinnamon and apple flavors deepen overnight. Honestly, day-two apple crisp might be even better than day one!
If you’re gifting or bringing to a potluck, assemble and bake right before serving for best texture. For meal prep, freeze unbaked crisp and bake straight from frozen, adding 10-15 minutes to bake time. Trust me, that little extra effort means you’ll have homemade dessert in a flash.
Nutritional Information & Benefits
This apple crisp is all about balance—comfort food with a wholesome twist. Here’s a rough breakdown (per serving, assuming 8 servings):
- Calories: About 275
- Fat: 10g
- Carbs: 45g
- Fiber: 4g
- Sugar: 25g
- Protein: 3g
Apples are packed with antioxidants and fiber, oats add heart-healthy whole grains, and cinnamon brings anti-inflammatory perks. Using less sugar and real fruit keeps this dessert lighter than many pies or cakes. For gluten-free diets, swap the flour and oats. If you’re watching dairy, use plant-based butter. Main allergens are wheat and dairy (easy to substitute). Personally, I love that this dessert satisfies sweet cravings without feeling heavy—it’s a treat you can feel good about enjoying.
Conclusion
Old-Fashioned Apple Crisp with Oats is one of those recipes you’ll turn to again and again. It’s easy, comforting, and always gets rave reviews. Whether you keep it classic or tweak it for dietary needs, it’s a dessert that brings people together—no special occasion needed.
Make it your own: switch up the fruit, try new spices, or add a personal twist. I love this recipe because it’s simple but always feels special, and honestly, few things beat the smell of apples and cinnamon baking while your family waits eagerly around the kitchen. If you try it, drop a comment below, share your photos, or tell me your favorite variation—let’s swap stories and keep the comfort food tradition alive. Go ahead, bake a batch and see why this recipe deserves a spot in your kitchen. Happy baking!
FAQs
What type of apples work best for apple crisp?
Tart apples like Granny Smith or Honeycrisp are great—they hold their shape and balance the sweetness. You can mix varieties if you like more depth of flavor.
Can I make this apple crisp gluten-free?
Yes! Use a gluten-free flour blend and certified gluten-free oats. The texture stays just as chewy and delicious.
How do I store leftovers?
Cover tightly and refrigerate for up to 4 days. For longer storage, freeze in an airtight container for up to 2 months.
Can I use other fruits besides apples?
Absolutely—try pears, peaches, berries, or a mix. Just adjust sugar based on fruit sweetness.
What’s the best way to reheat apple crisp?
Microwave individual servings for 30-45 seconds, or reheat in a 350°F (175°C) oven until warmed through. The topping crisps up again nicely!
Pin This Recipe!

Old-Fashioned Apple Crisp with Oats

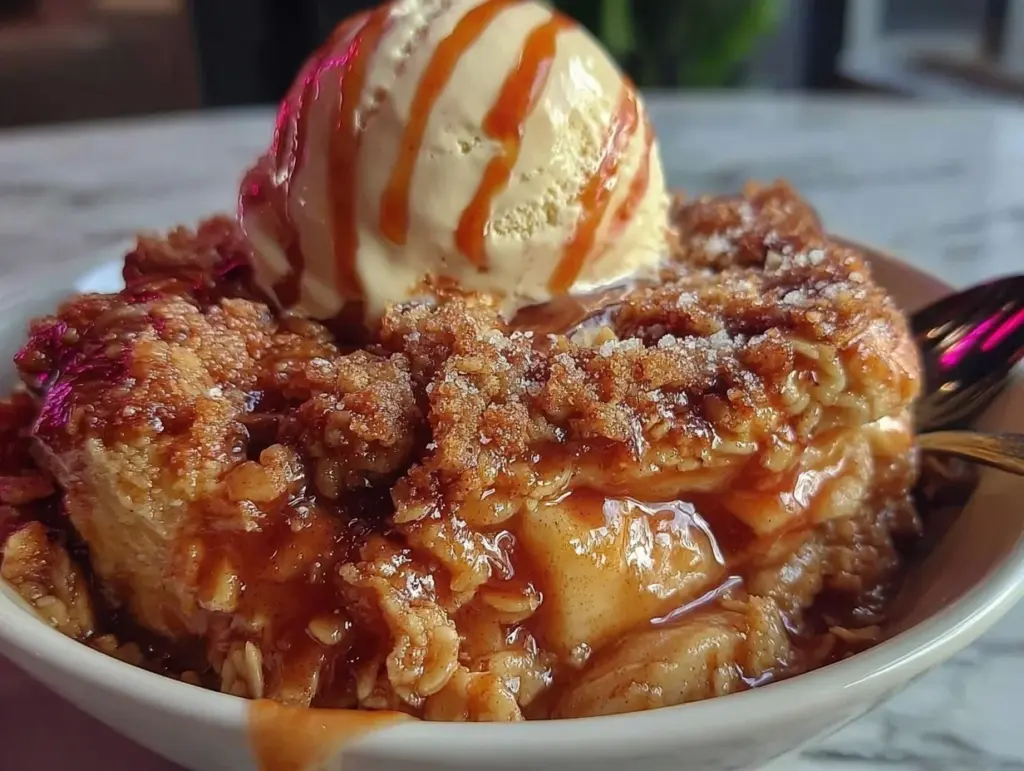
This easy homemade apple crisp features tart apples bubbling beneath a golden, oat-packed topping with warm cinnamon. It’s a comforting dessert perfect for chilly evenings, potlucks, or holiday gatherings.
- Prep Time: 15 minutes
- Cook Time: 40-45 minutes
- Total Time: 55-60 minutes
- Yield: 8 servings 1x
- Category: Dessert
- Cuisine: American
Ingredients
- 6 cups tart apples (about 6 medium apples), peeled, cored, and sliced (Granny Smith or Honeycrisp recommended)
- 1/4 cup granulated sugar
- 2 tablespoons all-purpose flour
- 1 teaspoon ground cinnamon
- 1/4 teaspoon ground nutmeg (optional)
- 1 tablespoon lemon juice
- 1 cup old-fashioned rolled oats
- 1 cup all-purpose flour (or gluten-free flour blend)
- 1/2 cup light brown sugar, packed
- 1/2 cup unsalted butter, melted (plus extra for greasing pan)
- 1/2 teaspoon ground cinnamon
- 1/4 teaspoon salt
- 1/3 cup chopped pecans or walnuts (optional)
- 1/3 cup dried cranberries or raisins (optional)
Instructions
- Preheat oven to 350°F (175°C). Grease a 9×13-inch baking dish with butter.
- Peel, core, and slice apples into 1/4-inch thick pieces. Toss slices with lemon juice in a large bowl.
- Add granulated sugar, flour, cinnamon, and nutmeg to apples. Stir until well coated.
- Spread apple mixture evenly into the prepared baking dish and press lightly.
- In a separate bowl, combine oats, flour, brown sugar, cinnamon, and salt. Pour in melted butter and stir until crumbly.
- Fold in optional nuts or dried fruit if using.
- Sprinkle oat topping evenly over apples. Do not pack down.
- Bake for 40-45 minutes, until topping is golden brown and apple filling is bubbling. If topping browns too quickly, cover loosely with foil.
- Remove from oven and let cool for at least 15 minutes before serving.
- Serve warm, optionally topped with vanilla ice cream or whipped cream.
Notes
For gluten-free, use certified gluten-free oats and flour blend. For vegan, substitute butter with coconut oil or vegan margarine. Mix up the fruit with pears, peaches, or berries. Let crisp cool before serving for best texture. Day-two flavor is even better. If topping isn’t crisping, broil for 2-3 minutes at the end, watching closely.
Nutrition
- Serving Size: 1/8 of recipe (about
- Calories: 275
- Sugar: 25
- Sodium: 100
- Fat: 10
- Saturated Fat: 6
- Carbohydrates: 45
- Fiber: 4
- Protein: 3
Keywords: apple crisp, oats, easy dessert, fall recipe, comfort food, homemade, old-fashioned, cinnamon, potluck, gluten-free option, vegan option


