“You know that moment when you walk into a graduation party, and the smell of fresh sugar cookies instantly brings a smile? That happened to me last spring at my cousin Jenna’s celebration. She wasn’t expecting much from the dessert table, but then these perfectly decorated cap and diploma sugar cookies stole the spotlight. Honestly, I wasn’t sure if I could pull off something so detailed in my own kitchen. The icing looked like it belonged in a bakery window, not on my cluttered countertop where flour was dusting every surface and my cookie cutters were mysteriously missing one handle.”
It all started when I found an old cookie cutter set at a local thrift store, the kind you don’t usually expect to find—complete with tiny graduation caps and scrolls. I figured, why not try making something special for my nephew’s graduation party? Little did I realize, these cookies would become my go-to graduation treat, the recipe I’d be asked for by neighbors and friends alike. Maybe you’ve been there—wanting something that’s festive yet simple enough to make without a kitchen meltdown.
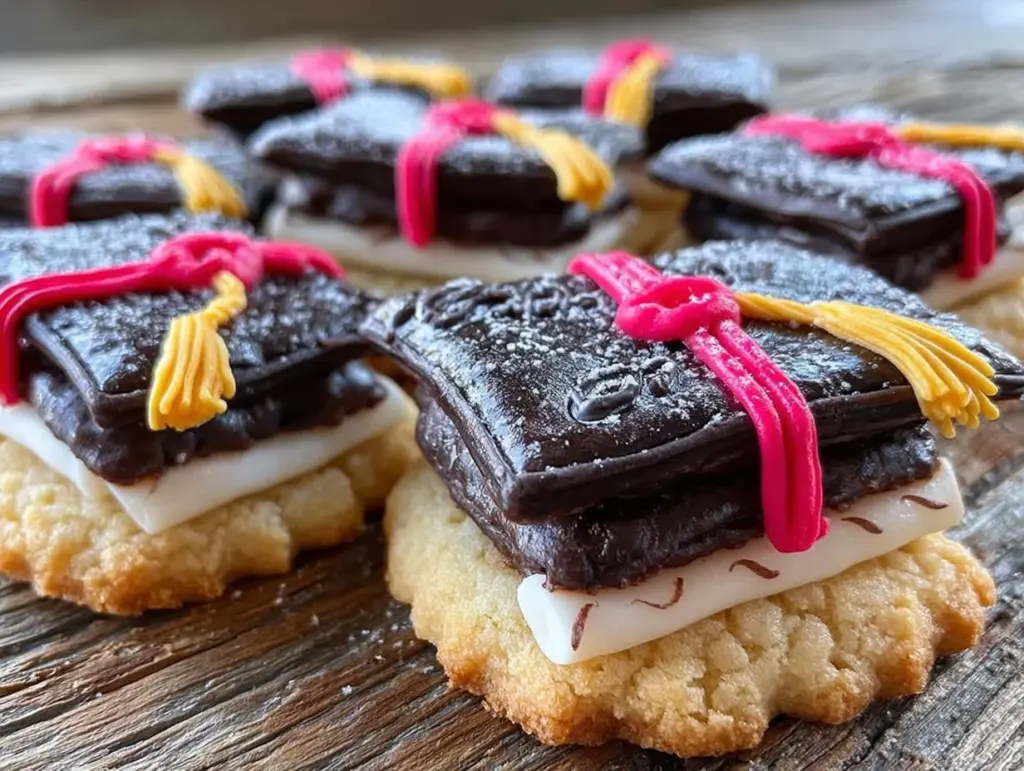
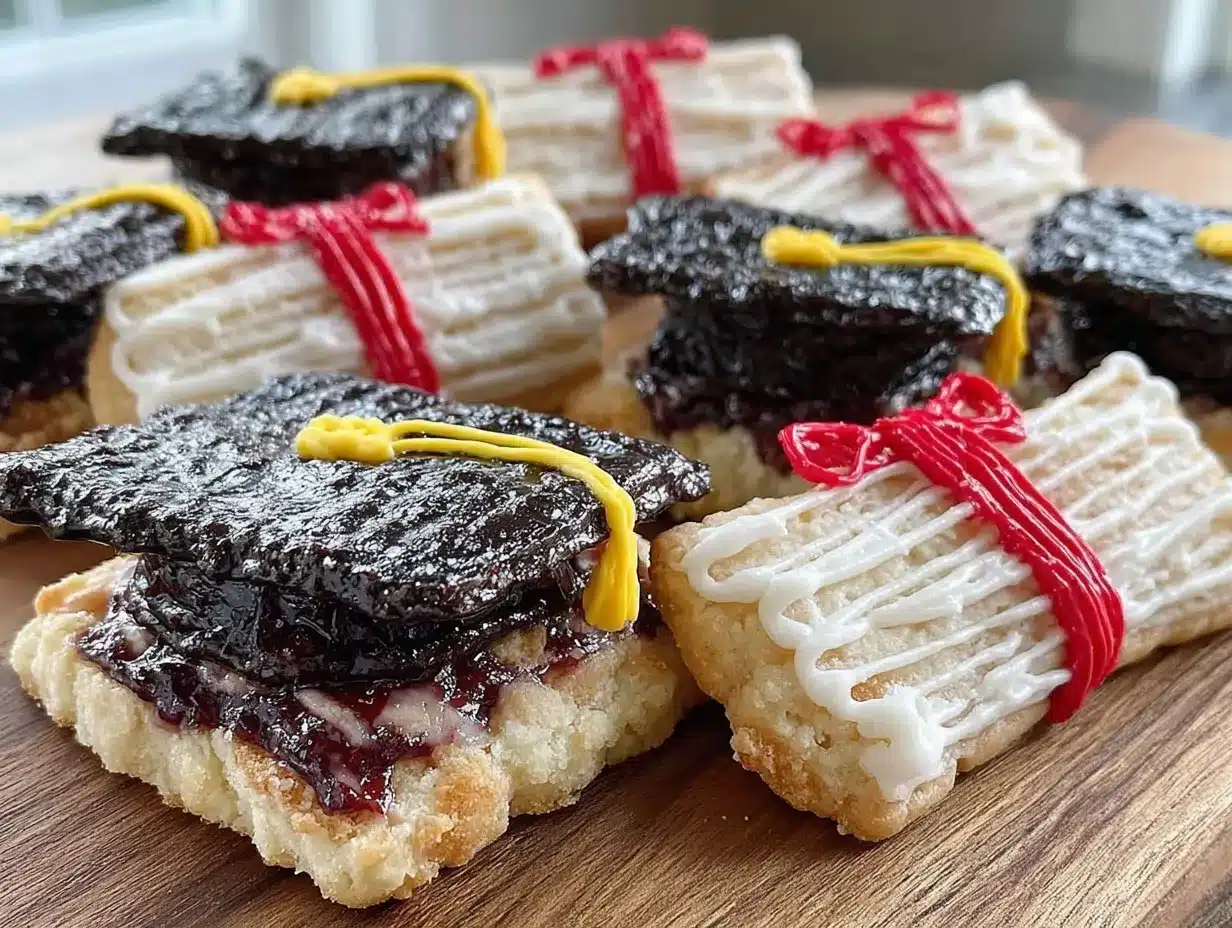
These decorated cap and diploma sugar cookies have a crisp edge with a tender crumb inside, perfect for icing that holds just right without bleeding colors. They’re not only fun to make but also bring a sense of accomplishment, much like the graduates they celebrate. Let me tell you, the look on Jenna’s face when she saw her name piped on those tiny diplomas made the flour and frosting mess totally worth it.
Why You’ll Love This Recipe
After testing countless sugar cookie recipes (some disasters included), this version stood out for several reasons. It’s not just about looks—though, honestly, these cookies are showstoppers—but the ease and reliability make it a keeper in my recipe box. Here’s why you might find yourself baking these again and again:
- Quick & Easy: The dough comes together in under 20 minutes, and with chilling, you can have cookies ready to decorate in about an hour.
- Simple Ingredients: Basic pantry staples like butter, sugar, eggs, and flour—no exotic items needed.
- Perfect for Graduation Parties: Whether it’s a small family gathering or a big bash, these cookies fit right in.
- Crowd-Pleaser: Both kids and adults love them, especially when they see the cute cap and diploma shapes.
- Unbelievably Delicious: The balance of buttery flavor and sweet, smooth royal icing is honestly next-level comfort food.
This recipe isn’t just another sugar cookie. The trick is in the chilling time and the royal icing recipe I use, which dries perfectly smooth and hard enough to stack cookies without smudging. Plus, the playful shapes bring a festive spirit that’s hard to beat. I’ve tried other decorated cookies, but these have that nostalgic, celebratory vibe that makes you want to savor each bite while reminiscing about all those late-night study sessions or the excitement of walking across the stage.
What Ingredients You Will Need
This recipe uses simple, wholesome ingredients to deliver bold flavor and a smooth texture without fuss. Most of these are pantry staples, and if you’re short on time, you can grab everything at your local grocery store without a second thought.
- Unsalted butter, softened (1 cup / 227g): Adds richness and tenderness to the cookies. I usually go for Land O Lakes when I want consistent results.
- Granulated sugar (3/4 cup / 150g): Sweetens and helps create that slight crisp edge.
- Large egg (1, room temperature): Binds the dough together and adds moisture.
- Pure vanilla extract (1 tsp): For that warm, inviting aroma.
- Almond extract (1/2 tsp, optional): Just a hint adds a subtle depth. I recommend Nielsen-Massey for pure flavor.
- All-purpose flour (2 1/2 cups / 312g): The base of the dough. If you need gluten-free, swap with a gluten-free blend like Bob’s Red Mill 1-to-1.
- Baking powder (1 tsp): Helps the cookies puff slightly without spreading too much.
- Salt (1/2 tsp): Balances the sweetness and enhances flavors.
For the royal icing:
- Powdered sugar (4 cups / 480g): Sifted for smoothness.
- Pasteurized egg whites or meringue powder (3 tbsp): This is the magic for that firm, glossy finish.
- Fresh lemon juice (1 tbsp): Adds brightness and helps the icing dry properly.
- Food coloring gels: Black for the caps, gold or yellow for tassels, and white for the diplomas. I prefer AmeriColor gels because they don’t thin the icing.
If you want to swap dairy, you can use vegan butter and aquafaba for an egg substitute, though the texture will be slightly different. Seasonal tip: In spring or summer, try decorating with pastel colors or edible glitter for extra flair.
Equipment Needed
Having the right tools makes this recipe a smoother ride, though I get it—not everyone owns a full baking arsenal. Here’s what you’ll want:
- Mixing bowls: At least two—one for the dough, one for the icing. Glass or stainless steel works best.
- Electric mixer: A stand mixer is ideal, but a hand mixer does the job, especially for the icing.
- Measuring cups and spoons: Accuracy is key here.
- Rolling pin: A non-stick or silicone rolling pin helps keep the dough even. I’ve used a wine bottle in a pinch—totally works!
- Graduation cap and diploma cookie cutters: You can find these online or at craft stores. If not, a sharp knife and a printed template work too.
- Baking sheets: Heavy-duty, rimmed sheets with parchment paper or silicone mats.
- Cooling rack: To keep those cookies crisp and prevent sogginess.
- Piping bags and tips: Small round tips (#1 or #2) for detailed icing work. Zip-top bags with a corner snipped are fine for beginners.
If you’re on a budget, parchment paper and a plastic bag for piping can substitute most specialty items. Just wash and reuse your equipment carefully to keep everything in good shape for next time.
Preparation Method
- Make the dough: In a large bowl, cream together 1 cup (227g) softened unsalted butter and 3/4 cup (150g) granulated sugar using an electric mixer on medium speed until light and fluffy—about 3 minutes. This step is key; don’t rush it, or your cookies might turn dense.
- Add egg and flavorings: Beat in 1 large egg, 1 teaspoon vanilla extract, and 1/2 teaspoon almond extract (if using) until fully combined. The mixture might look a bit curdled—don’t worry, that’s normal.
- Combine dry ingredients: In a separate bowl, whisk together 2 1/2 cups (312g) all-purpose flour, 1 teaspoon baking powder, and 1/2 teaspoon salt. Gradually add this to the wet mixture, mixing on low speed until the dough just comes together.
- Chill the dough: Divide the dough into two discs, wrap each in plastic wrap, and refrigerate for at least 1 hour, or overnight. This rest prevents spreading and makes rolling easier.
- Preheat oven: Set to 350°F (175°C). Line baking sheets with parchment paper or silicone mats.
- Roll and cut: On a lightly floured surface, roll out one dough disc to about 1/4-inch (6mm) thickness. Use your graduation cap and diploma cookie cutters to cut shapes. Transfer cookies carefully to baking sheets, spacing about 1 inch (2.5cm) apart.
- Bake: Bake for 8-10 minutes, or until edges just begin to turn golden. Watch closely—overbaking dries them out.
- Cool: Let cookies cool on the baking sheet for 5 minutes, then transfer to a wire rack to cool completely before decorating.
- Prepare royal icing: In a bowl, beat 4 cups (480g) powdered sugar with 3 tablespoons meringue powder and 1 tablespoon fresh lemon juice. Add water 1 teaspoon at a time until you reach a thick but pipeable consistency (about 1/2 cup total). Divide and color as desired.
- Decorate: Use piping bags fitted with small round tips to outline and flood the caps in black icing, diplomas in white, and add tassel details with gold or yellow. Let each color dry slightly before adding details to avoid bleeding.
- Dry completely: Allow decorated cookies to dry at room temperature for at least 4 hours or overnight before stacking or packaging.
Pro tip: If your dough feels too sticky while rolling, pop it back in the fridge for 15 minutes. Also, don’t skip the chilling step—it really helps keep those crisp edges.
Cooking Tips & Techniques
One thing I learned the hard way is that sugar cookies can be tricky if you rush. The dough needs that chill time—it’s the secret weapon for clean-cut shapes and a tender bite. I once tried skipping it and ended up with cookies spreading all over the pan like little pancakes. Not cute.
For royal icing, the consistency is everything. Too thick and it’s a nightmare to pipe; too thin and it bleeds over the edges. I usually start with thicker icing for outlines and thin it slightly for flooding. If your icing starts to crust over while decorating, just give it a quick stir or add a drop of water.
Multitasking tip: While your cookies bake and cool, prepare your icing. It saves time and keeps you in the decorating zone. And don’t forget to keep your piping tips clean—wipe them often with a damp cloth to avoid clogging.
Lastly, be patient with drying. Rushing this step can cause smudged or sticky surfaces. I sometimes place my cookies near (not on) a gentle fan to speed drying without risking cracks.
Variations & Adaptations
- Dietary tweaks: For a dairy-free version, swap butter for vegan margarine and use aquafaba instead of eggs. The texture changes a bit but still delicious.
- Seasonal colors: Try bright spring pastels or fall tones for tassels and caps to match your graduation’s theme or school colors.
- Flavor twists: Add a teaspoon of lemon or orange zest to the dough for a citrus kick that freshens up the classic sugar cookie.
- Alternative shapes: If you don’t have cap and diploma cutters, try stars or hearts and decorate them with graduation motifs using piping techniques.
- Personal touch: I once added edible gold dust to the tassels for a little sparkle—it was a hit at my niece’s party and felt extra festive.
Serving & Storage Suggestions
These cookies are best served at room temperature, allowing the buttery flavor and delicate icing to shine. Arrange them on a festive platter alongside fresh fruit or a light punch for a bright celebration spread. They pair well with coffee or iced tea too, especially during spring and summer parties.
Store leftover cookies in an airtight container at room temperature for up to 5 days. If you want to keep them longer, freeze undecorated cookies in a single layer wrapped well, then decorate after thawing. Decorated cookies can also be frozen but might lose some crispness.
When reheating, avoid microwaving as it can soften the icing and make the cookies chewy. Instead, let them come to room temperature naturally. Over time, the flavors meld and the icing hardens nicely, making them perfect for gifting days after baking.
Nutritional Information & Benefits
One decorated sugar cookie (about the size of these caps and diplomas) contains approximately 150-180 calories, 7 grams of fat, 25 grams of carbohydrates, and 1 gram of protein. While they’re a treat, the butter provides some vitamin A, and the egg adds a small protein boost.
These cookies are naturally gluten-based but can be made gluten-free with appropriate flour swaps. They’re free from nuts unless you add almond extract, which can be omitted for those with allergies.
From a wellness perspective, making these at home means controlling sugar levels and avoiding preservatives found in store-bought treats. Plus, the satisfaction of baking and decorating can be a sweet stress-relief during busy graduation season.
Conclusion
If you’re looking for a festive, fun, and surprisingly easy way to celebrate graduation, these decorated cap and diploma sugar cookies should be on your baking list. They combine classic flavors with playful presentation, making them memorable for guests and the graduate alike. Customize them with colors and details that speak to your own celebration style.
Honestly, I keep coming back to this recipe because it’s forgiving, delicious, and always brings a smile. Plus, it’s a lovely way to show some extra love in the form of baked goodness. Give it a try—then come back and tell me how your cookies turned out or what fun twists you added. Happy baking and congrats to all the grads out there!
FAQs
Can I make the cookie dough ahead of time?
Yes! The dough can be refrigerated for up to 3 days or frozen for up to 3 months. Just thaw before rolling out.
What if I don’t have royal icing ingredients?
You can use store-bought royal icing mixes or simple glaze icing made from powdered sugar and milk, but royal icing gives the best firm finish for detailed decorations.
How do I prevent the cookies from spreading?
Chilling the dough well before baking and using the right flour-to-fat ratio helps cookies keep their shape.
Can I use food coloring liquids instead of gels?
Gels are preferred because liquids can thin the icing and affect drying time. If using liquids, add sparingly.
What’s the best way to store decorated cookies?
Keep them in an airtight container at room temperature, separated by parchment paper, for up to 5 days. Avoid refrigeration to keep the icing from sweating.
Pin This Recipe!
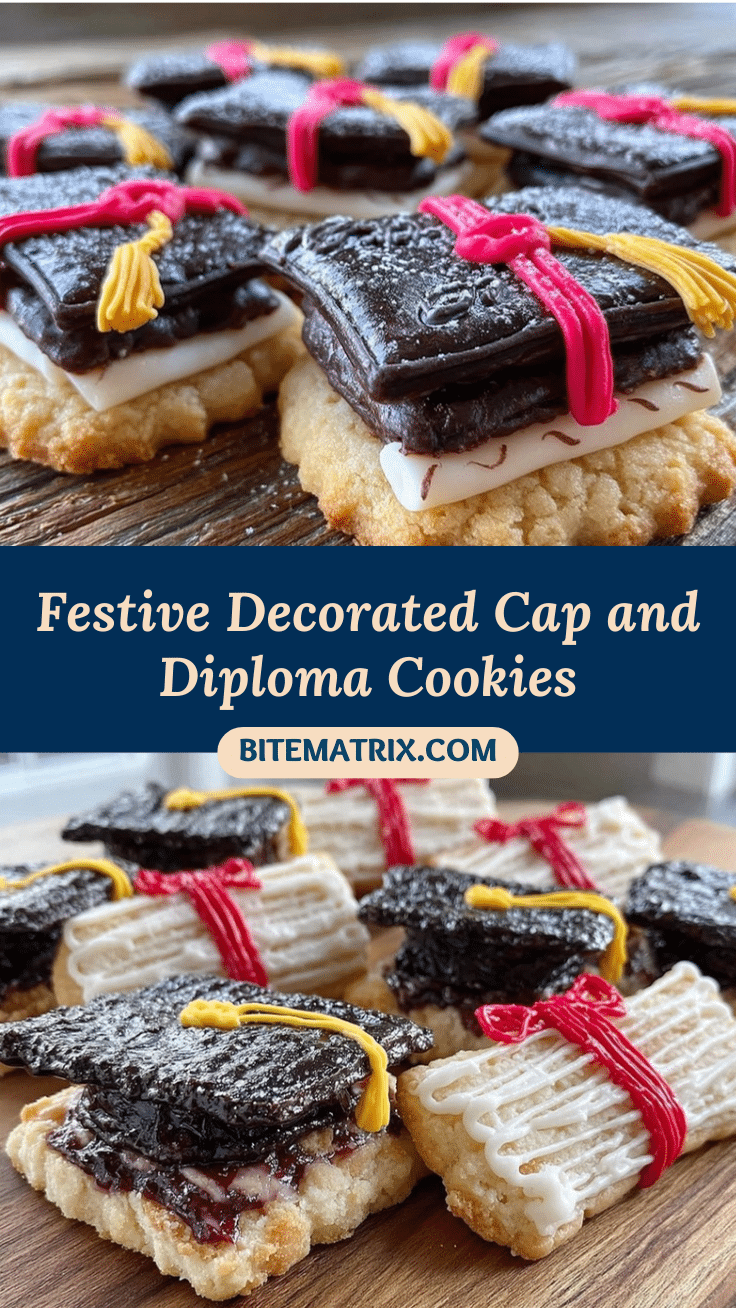
Perfect Decorated Cap and Diploma Sugar Cookies Easy Graduation Treats

These decorated cap and diploma sugar cookies feature a crisp edge with a tender crumb, perfect for detailed royal icing decorations. They are an easy, festive treat ideal for graduation parties.
- Prep Time: 20 minutes
- Cook Time: 10 minutes
- Total Time: 1 hour 30 minutes
- Yield: 24 cookies 1x
- Category: Dessert
- Cuisine: American
Ingredients
- 1 cup (227g) unsalted butter, softened
- 3/4 cup (150g) granulated sugar
- 1 large egg, room temperature
- 1 teaspoon pure vanilla extract
- 1/2 teaspoon almond extract (optional)
- 2 1/2 cups (312g) all-purpose flour
- 1 teaspoon baking powder
- 1/2 teaspoon salt
- 4 cups (480g) powdered sugar, sifted (for royal icing)
- 3 tablespoons pasteurized egg whites or meringue powder (for royal icing)
- 1 tablespoon fresh lemon juice (for royal icing)
- Water (about 1/2 cup, added gradually for royal icing)
- Food coloring gels: black, gold or yellow, white
Instructions
- In a large bowl, cream together 1 cup softened unsalted butter and 3/4 cup granulated sugar using an electric mixer on medium speed until light and fluffy, about 3 minutes.
- Beat in 1 large egg, 1 teaspoon vanilla extract, and 1/2 teaspoon almond extract (if using) until fully combined.
- In a separate bowl, whisk together 2 1/2 cups all-purpose flour, 1 teaspoon baking powder, and 1/2 teaspoon salt.
- Gradually add dry ingredients to the wet mixture, mixing on low speed until dough just comes together.
- Divide dough into two discs, wrap in plastic wrap, and refrigerate for at least 1 hour or overnight.
- Preheat oven to 350°F (175°C). Line baking sheets with parchment paper or silicone mats.
- Roll out one dough disc on a lightly floured surface to about 1/4-inch thickness.
- Use graduation cap and diploma cookie cutters to cut shapes and transfer to baking sheets, spacing about 1 inch apart.
- Bake for 8-10 minutes until edges begin to turn golden. Cool on baking sheet for 5 minutes, then transfer to wire rack to cool completely.
- Prepare royal icing by beating 4 cups powdered sugar with 3 tablespoons meringue powder and 1 tablespoon lemon juice. Add water 1 teaspoon at a time until thick but pipeable consistency is reached.
- Divide and color icing as desired. Use piping bags with small round tips to outline and flood caps in black, diplomas in white, and add tassel details with gold or yellow.
- Let each color dry slightly before adding details to avoid bleeding.
- Allow decorated cookies to dry at room temperature for at least 4 hours or overnight before stacking or packaging.
Notes
Chill dough for at least 1 hour to prevent spreading and ensure clean shapes. For royal icing, start with thicker consistency for outlines and thin slightly for flooding. Allow cookies to dry completely before stacking or packaging to avoid smudging. If dough is sticky, chill again for 15 minutes before rolling.
Nutrition
- Serving Size: 1 decorated cookie
- Calories: 165
- Fat: 7
- Carbohydrates: 25
- Protein: 1
Keywords: graduation cookies, sugar cookies, decorated cookies, royal icing, graduation treats, cap and diploma cookies


