
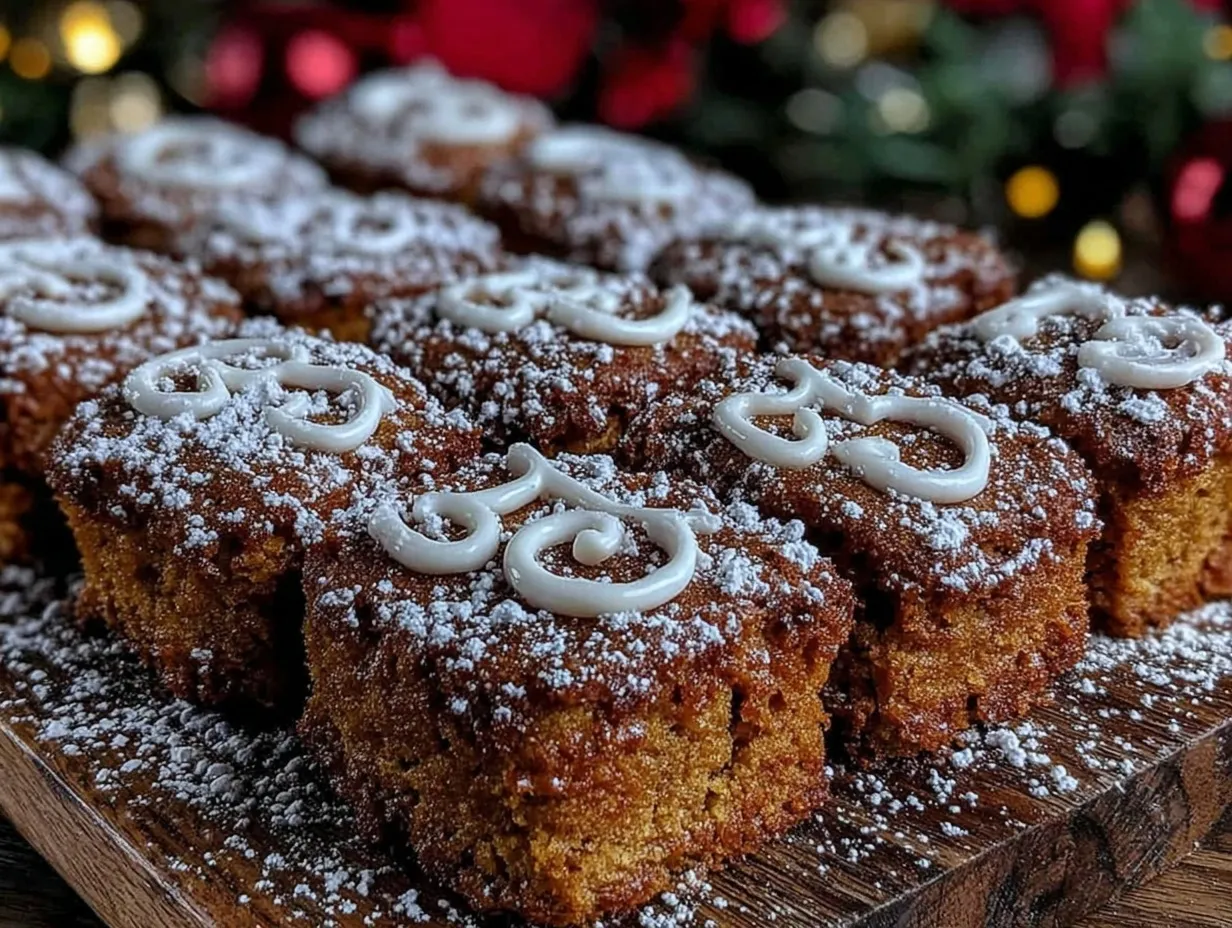
“Wait, you mean each little box is a cookie?” my friend asked, peering over the kitchen counter as the scent of cinnamon and vanilla filled the air. Honestly, I didn’t think I’d pull off this edible advent calendar idea when I first started. I was knee-deep in holiday chaos, wrapping gifts and juggling last-minute plans, and the thought of crafting 24 numbered cookie boxes felt borderline impossible. But somehow, as the dough rolled and the tiny numbers took shape, the whole project transformed from a stress trigger into a favorite tradition.
It wasn’t just about making cookies; it was about creating a tiny daily surprise, a moment of sweetness in the rush of December. The idea came from a random conversation with a neighbor who mentioned how much her kids loved opening those little advent drawers. I thought, “Why not bake the calendar itself?” So, I set out to design individual cookie boxes, each one numbered, that would not only taste amazing but also serve as a charming countdown to the holidays.
Now, this Perfect Edible Advent Calendar with 24 Numbered Cookie Boxes is something I find myself making every year. What started as a chaotic experiment has become a cozy ritual that brings smiles and a bit of magic to the mornings. It’s not flawless (some numbers got smudged the first time), but it’s real, warm, and absolutely delicious. And that’s why it stays on my holiday to-do list, year after year.
Why You’ll Love This Recipe
This recipe isn’t just a treat; it’s a whole festive experience baked into bite-sized boxes. I’ve tested it multiple times (trust me, I made way too many cookies before getting it just right), and here’s why it stands apart:
- Quick & Easy: The dough comes together in about 20 minutes, and once chilled, the assembly is surprisingly straightforward—perfect for busy holiday prep.
- Simple Ingredients: No fancy or hard-to-find items here; everything’s pantry-friendly. You probably have most of these ingredients already.
- Perfect for Gift-Giving: Whether it’s for family, neighbors, or coworkers, these numbered cookie boxes make a unique, edible gift that’s sure to impress.
- Crowd-Pleaser: The buttery, lightly spiced cookies get rave reviews from kids and adults alike—seriously, they disappear fast!
- Creative & Customizable: The numbering adds a fun countdown twist, and you can easily swap flavors or decorations to suit your style.
What really sets this recipe apart is the clever use of sturdy, yet tender cookie dough that holds its shape perfectly for boxes, paired with a classic spiced sugar cookie flavor. The secret is chilling the dough well and carefully scoring the folds—trust me, it makes all the difference. This isn’t just another sugar cookie recipe; it’s a festive centerpiece and an interactive holiday tradition all in one.
Plus, it hits that sweet spot between homemade charm and impressive presentation without needing fancy decorating skills. It’s the kind of recipe that makes you want to savor every little box, and that’s why it’s stuck with me through many holiday seasons.
What Ingredients You Will Need
This recipe uses simple, wholesome ingredients to deliver bold flavor and sturdy texture without fuss. You’ll find most of these are classic baking staples, with a few notes to help you pick the best or make substitutions.
- All-purpose flour (3 cups / 375 g) – Provides the structure; King Arthur or Bob’s Red Mill brands work great for consistent results.
- Unsalted butter (1 cup / 227 g), softened – Adds richness and helps the dough hold together without spreading too much.
- Granulated sugar (1 cup / 200 g) – Sweetens without overpowering; use standard white sugar.
- Large eggs (2, room temperature) – Bind the dough and add moisture.
- Vanilla extract (1 tsp) – Classic flavor enhancer; pure vanilla is best.
- Ground cinnamon (1 tsp) – Adds subtle warmth and holiday flair.
- Baking powder (1 tsp) – Helps the dough rise just enough for a tender texture.
- Salt (½ tsp) – Balances sweetness and enhances flavor.
- Powdered sugar (for dusting) – Optional, but adds a pretty snowy finish.
- Royal icing ingredients: powdered sugar, meringue powder, water – For numbering and decorating boxes.
If you want to make this gluten-free, almond flour is a good alternative, but note the texture will be a bit different. For a dairy-free option, swap the butter for a plant-based margarine that bakes well.
Fresh spices make a world of difference, so if you can, grind your own cinnamon for that extra aroma. And for the royal icing, I recommend using Wilton’s meringue powder for reliable consistency.
Equipment Needed
- Mixing bowls: A large bowl for the dough and a smaller one for the icing.
- Electric mixer: Hand or stand mixer to cream butter and sugar smoothly.
- Rolling pin: For rolling out the dough evenly—trust me, a good one saves headaches.
- Cookie cutters or template: To cut precise box shapes and tabs. A ruler and a craft knife work if you don’t have cutters.
- Baking sheets: Preferably non-stick or lined with parchment paper.
- Cooling racks: To cool cookies evenly without sogginess.
- Piping bags and fine tips: For numbering the boxes with royal icing.
- Food-safe markers: Optional for number guides before icing.
If you don’t own a stand mixer, a sturdy hand mixer will do just fine. For rolling, I like a silicone mat to keep things tidy and measure easily. When it comes to piping, practice on parchment paper first to get a steady hand—this step really personalizes each cookie box.
Preparation Method
- Cream butter and sugar: In a large bowl, beat 1 cup (227 g) of softened unsalted butter with 1 cup (200 g) granulated sugar until light and fluffy, about 3-4 minutes. The texture should be pale and smooth, which means air is incorporated for tender cookies.
- Add eggs and vanilla: Beat in 2 large eggs (room temperature) one at a time, followed by 1 teaspoon vanilla extract. Mix until combined but avoid overmixing.
- Combine dry ingredients: In a separate bowl, whisk together 3 cups (375 g) all-purpose flour, 1 teaspoon baking powder, 1 teaspoon ground cinnamon, and ½ teaspoon salt.
- Mix dry into wet: Gradually add the dry ingredients to the butter mixture, mixing on low speed until just combined. The dough should come together but not be sticky; if it is, add a tablespoon of flour at a time.
- Chill the dough: Wrap the dough in plastic wrap and refrigerate for at least 1 hour. This step is crucial for easy rolling and clean edges when cutting boxes.
- Preheat oven: Set oven to 350°F (175°C) and line baking sheets with parchment paper.
- Roll and cut shapes: On a lightly floured surface or silicone mat, roll the dough to about ¼-inch (6 mm) thickness. Use a template or ruler to cut out 24 box shapes with tabs for folding. Don’t forget to cut little flaps on edges for assembly.
- Bake: Place cookie pieces on baking sheets and bake for 10-12 minutes, or until edges are just starting to turn golden. Avoid overbaking to keep boxes sturdy but tender.
- Cool: Transfer cookies to wire racks to cool completely.
- Assemble boxes: Once cooled, gently bend tabs and use a little royal icing as glue to assemble each box. Hold pieces together briefly until set.
- Decorate and number: Prepare royal icing and pipe numbers 1 through 24 on each box. Let dry for several hours or overnight to harden.
Pro tip: If tabs crack while bending, warm them slightly with your hands or a hairdryer on low to make them more pliable. And don’t rush the drying process—it ensures your calendar stays intact all month.
Cooking Tips & Techniques
Getting these edible advent calendar boxes right is a balance of precision and a bit of patience. Here are some tips I’ve picked up from trial, error, and too many broken tabs:
- Chilling is non-negotiable: Cold dough rolls more cleanly and cuts crisply, which is essential for neat box shapes.
- Use a ruler or template: Consistency in size helps boxes stack and fit perfectly when assembled.
- Don’t over-flour your surface: Too much flour can dry the dough and cause cracks; a light dusting is enough.
- Practice piping numbers: Royal icing can be intimidating, but a steady hand and slow, deliberate motions make a huge difference.
- Assemble with patience: Let the icing set firmly before stacking or moving boxes to avoid collapse.
- Store in airtight containers: Keeps boxes crisp and fresh for weeks if you want to make ahead.
One lesson I learned the hard way was rushing the assembly before cookies cooled completely. It led to breakage and some tears (both in cookies and my spirit). Now, I always cool fully and handle pieces gently. Also, I like to keep extra royal icing on hand for quick repairs—trust me, it saves headaches when little tabs snap off.
Variations & Adaptations
This editable advent calendar is a fantastic base for mixing things up. Here are some ideas I’ve tried or thought would be fun:
- Flavor twists: Swap cinnamon for ground ginger or cardamom for a different warm spice profile.
- Chocolate-dipped boxes: Dip one edge of each assembled box in melted dark or white chocolate for a festive look.
- Gluten-free version: Use a 1:1 gluten-free flour blend; just watch the dough texture—sometimes it needs a bit more liquid.
- Decorations: Add edible glitter or colored sanding sugar before baking for extra sparkle.
- Alternative shapes: Instead of boxes, try flat cookie discs with pockets of jam or chocolate hidden inside for a surprise twist.
I once made a batch using a peppermint extract instead of vanilla, and the minty freshness was a hit with friends. Also, if you like savory surprises, you might appreciate the clever layering in the savory beer can chicken recipe with herb butter glaze for a holiday dinner pairing that contrasts sweet with savory beautifully.
Serving & Storage Suggestions
These cookie boxes are best served at room temperature, so if you’ve refrigerated or stored them, let them sit out for about 15 minutes before opening. The numbers and edges are delicate, so slow, gentle handling adds to the experience.
They make a charming centerpiece on the holiday table, and you can pair them with a warm cup of spiced cider or classic hot chocolate. For a festive brunch, these boxes complement well with lighter fare like the no-bake strawberry cheesecake cups, balancing indulgence and freshness.
To store, keep the assembled boxes in an airtight container at room temperature for up to 5 days. For longer storage, freeze unassembled cookie shapes in a single layer, wrapped tightly, for up to 3 months—then assemble and decorate fresh.
Reheating isn’t necessary, but if you want a warm cookie feel, pop the unassembled pieces in a low oven (200°F / 90°C) for 3-5 minutes—don’t overdo it or the boxes may become too fragile.
Nutritional Information & Benefits
Each cookie box contains roughly 120-140 calories, depending on size and decoration. The recipe uses real butter and eggs, providing a good source of protein and fat for energy. Cinnamon adds antioxidants and a hint of natural sweetness without extra sugar.
This recipe is naturally gluten-free adaptable and can be made dairy-free with simple swaps. While it’s a treat, the portion-controlled box design helps with mindful indulgence—a little festive joy each day without going overboard.
From my perspective, this cookie calendar is a way to celebrate holiday moments with wholesome ingredients and a bit of creativity, rather than relying on processed sweets. That’s part of why I keep coming back to it year after year.
Conclusion
Making this Perfect Edible Advent Calendar with 24 Numbered Cookie Boxes isn’t just about baking; it’s about creating small moments of joy and surprise during a hectic season. The balance of simple ingredients, easy-to-follow steps, and that little personal touch of icing numbers makes it a recipe worth trying.
Feel free to adapt the spices, decorations, or even the size of the boxes to suit your family’s style. For me, it’s become a way to connect, slow down, and share something sweet—literally and figuratively—with the people I care about most.
If you give this a try, I’d love to hear how your calendar turns out and what fun twists you add. Sharing these kinds of creative holiday projects makes the season even better.
Frequently Asked Questions
- Can I make the cookie boxes ahead of time? Yes! Bake and assemble up to a week in advance and store in an airtight container at room temperature.
- What if my cookie dough is too sticky? Chill it longer or add a tablespoon of flour at a time until it’s easy to handle.
- Can I use store-bought royal icing? You can, but homemade royal icing gives the best consistency for piping numbers and assembling boxes.
- How do I prevent the cookie boxes from breaking? Handle gently, don’t skip chilling the dough, and let the royal icing dry completely before stacking or gifting.
- Are there any allergen-free options? Yes, you can use gluten-free flour blends and dairy-free butter substitutes to accommodate common allergies.
Pin This Recipe!
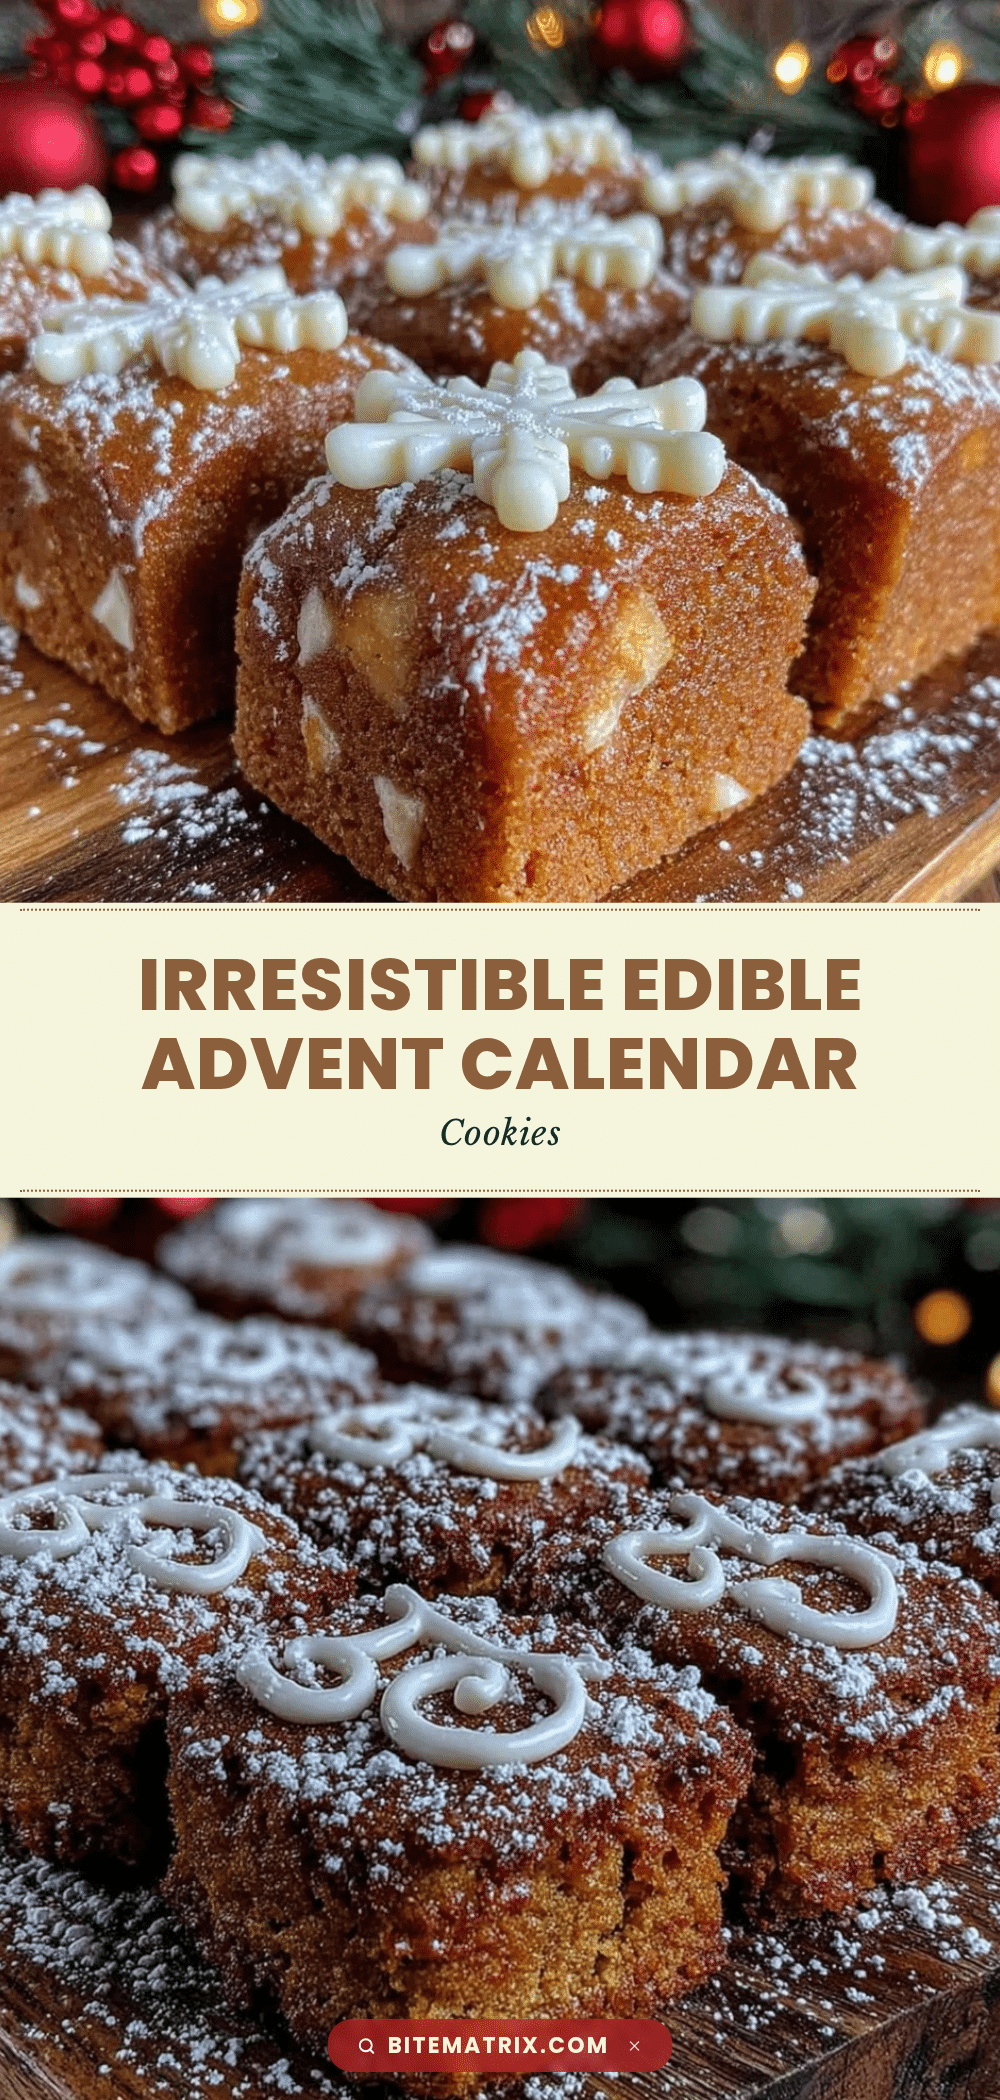
Perfect Edible Advent Calendar Recipe with 24 Numbered Cookie Boxes Made Easy

Create a festive and interactive holiday tradition with these buttery, lightly spiced cookie boxes numbered 1 to 24, perfect for a countdown to Christmas. This recipe combines simple ingredients and easy steps to make charming edible advent calendar boxes.
- Prep Time: 20 minutes
- Cook Time: 10-12 minutes per batch
- Total Time: 1 hour 40 minutes (including chilling and baking)
- Yield: 24 cookie boxes 1x
- Category: Dessert
- Cuisine: American
Ingredients
- 3 cups (375 g) all-purpose flour
- 1 cup (227 g) unsalted butter, softened
- 1 cup (200 g) granulated sugar
- 2 large eggs, room temperature
- 1 teaspoon vanilla extract
- 1 teaspoon ground cinnamon
- 1 teaspoon baking powder
- ½ teaspoon salt
- Powdered sugar (for dusting, optional)
- Royal icing ingredients: powdered sugar, meringue powder, water (for numbering and decorating boxes)
Instructions
- Cream butter and sugar: In a large bowl, beat 1 cup (227 g) softened unsalted butter with 1 cup (200 g) granulated sugar until light and fluffy, about 3-4 minutes.
- Add eggs and vanilla: Beat in 2 large eggs (room temperature) one at a time, followed by 1 teaspoon vanilla extract. Mix until combined but avoid overmixing.
- Combine dry ingredients: In a separate bowl, whisk together 3 cups (375 g) all-purpose flour, 1 teaspoon baking powder, 1 teaspoon ground cinnamon, and ½ teaspoon salt.
- Mix dry into wet: Gradually add the dry ingredients to the butter mixture, mixing on low speed until just combined. Add a tablespoon of flour at a time if dough is sticky.
- Chill the dough: Wrap the dough in plastic wrap and refrigerate for at least 1 hour.
- Preheat oven to 350°F (175°C) and line baking sheets with parchment paper.
- Roll and cut shapes: Roll dough to about ¼-inch (6 mm) thickness on a lightly floured surface or silicone mat. Cut out 24 box shapes with tabs for folding using a template or ruler.
- Bake: Place cookie pieces on baking sheets and bake for 10-12 minutes until edges start to turn golden.
- Cool: Transfer cookies to wire racks to cool completely.
- Assemble boxes: Gently bend tabs and use royal icing as glue to assemble each box. Hold pieces together briefly until set.
- Decorate and number: Prepare royal icing and pipe numbers 1 through 24 on each box. Let dry for several hours or overnight.
Notes
Chilling the dough is essential for clean cuts and sturdy boxes. Use a ruler or template for consistent box sizes. Warm tabs slightly if they crack when bending. Let royal icing dry completely before stacking boxes. Store assembled boxes in airtight containers at room temperature for up to 5 days or freeze unassembled shapes for up to 3 months.
Nutrition
- Serving Size: 1 cookie box
- Calories: 130
- Sugar: 9
- Sodium: 90
- Fat: 7
- Saturated Fat: 4.5
- Carbohydrates: 18
- Fiber: 0.5
- Protein: 2
Keywords: edible advent calendar, holiday cookies, numbered cookie boxes, Christmas countdown, spiced sugar cookies, festive baking, royal icing decoration