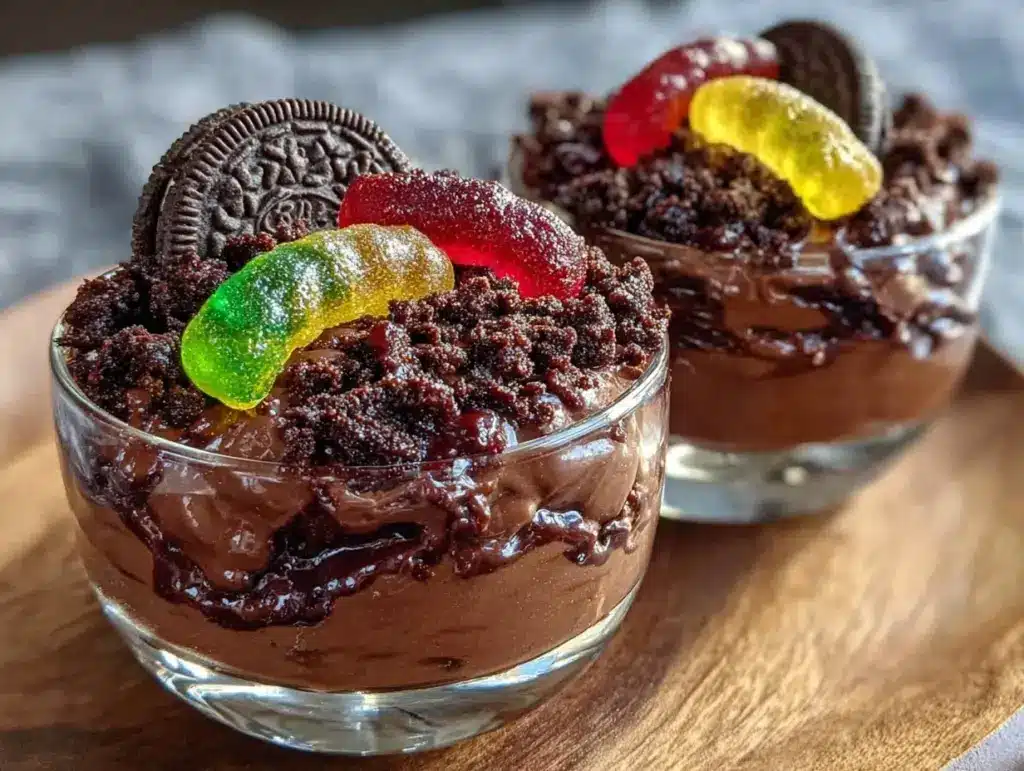
Let me tell you, the sight of those chocolate pudding cups topped with crushed cookies and gummy worms instantly takes me back to childhood birthday parties and backyard picnics. The smell of rich cocoa mixed with the sweet, slightly tangy scent of gummy candies is enough to make anyone’s mouth water. The first time I made these playful dirt and worms pudding cups, I was instantly hooked—the kind of moment where you pause, take a deep breath, and just smile because you know you’re onto something truly special.
Years ago, when I was knee-high to a grasshopper, my grandma used to whip up simple, fun treats that brought the whole family together. This recipe feels like a modern twist on those nostalgic goodies, perfect for brightening up any day with a little whimsy. I stumbled on this dessert while looking for a playful idea for a rainy weekend, and honestly, I wish I’d known about it years ago! My family couldn’t stop sneaking them off the cooling rack (and I can’t really blame them).
These dirt and worms pudding cups are dangerously easy and provide pure, nostalgic comfort. Whether you’re planning a fun treat for your kids, a quirky addition to a potluck, or just want to brighten up your Pinterest cookie board with something a little different, this recipe fits the bill. Tested multiple times in the name of research, of course, it’s become a staple for family gatherings and gifting. Trust me—you’re going to want to bookmark this one.
Why You’ll Love This Recipe
Honestly, there are plenty of pudding cup recipes out there, but this playful dirt and worms pudding cups recipe stands apart for a few reasons that make it my go-to dessert whenever I want something fun yet fuss-free.
- Quick & Easy: Comes together in under 20 minutes, perfect for busy weeknights or last-minute cravings.
- Simple Ingredients: No fancy grocery trips needed; you likely already have everything in your pantry or fridge.
- Perfect for Kids’ Parties: Great for birthdays, school events, or just a sweet surprise after dinner.
- Crowd-Pleaser: Always gets rave reviews from kids and adults alike (and that gummy worm surprise never gets old!).
- Unbelievably Delicious: The creamy pudding paired with crunchy cookie crumbs and chewy gummy worms hits all the right texture notes.
What makes this recipe different? It’s all about the playful presentation and the perfect balance of flavors—the silky smooth pudding contrasts beautifully with the crumbly “dirt” and the fun, fruity worms. I usually blend my pudding base until ultra-smooth, which gives it that creamy feel everyone loves. Plus, swapping in a low-sugar pudding mix makes it a slightly healthier treat without losing any of the fun.
This recipe isn’t just good—it’s the kind that makes you close your eyes after the first bite. It’s comfort food reimagined—simple, fast, but with the same soul-soothing satisfaction. Perfect for impressing guests without stress or turning a simple snack into something memorable.
What Ingredients You Will Need
This recipe uses simple, wholesome ingredients to deliver bold flavor and satisfying texture without the fuss. Most are pantry staples, and if you need to swap anything out, I’ve got you covered with easy substitutions.
- Chocolate Pudding Mix (instant or homemade): I recommend a trusted brand like Jell-O for the best creamy texture, but homemade pudding works beautifully too.
- Milk (whole or 2%): About 2 cups (480 ml), room temperature for smooth mixing. Use dairy-free milk like almond or oat if needed.
- Oreos or chocolate sandwich cookies: About 20 cookies, crushed to create the “dirt.” For a gluten-free option, try gluten-free chocolate cookies.
- Gummy Worms: Approximately 15-20 worms to scatter on top—choose your favorite brand for chewy, fruity fun.
- Whipped Cream (optional): For a light, fluffy topping if you want to add extra flair.
- Vanilla Extract: 1 teaspoon (adds a warm, sweet note to the pudding).
- Butter (unsalted): 1 tablespoon, melted (optional, helps bind the cookie crumbs if you want a firmer dirt layer).
If you want to get creative, in summer I sometimes swap the gummy worms with fresh berries for a fresher vibe. Or if you want a healthier twist, use sugar-free pudding mix and swap the gummy worms for dried fruit. The flexibility here is great—makes it easy to tailor to your pantry and taste.
Equipment Needed
- Mixing bowls: At least two—one for pudding, one for cookie crumbs.
- Whisk or electric mixer: For blending pudding smoothly; I find a hand mixer really speeds things up.
- Measuring cups and spoons: For precise ingredient amounts.
- Small dessert cups or jars: To assemble the pudding cups; clear cups work best to show off the layers.
- Food processor or plastic bag and rolling pin: To crush the cookies into “dirt.” If you don’t have a processor, just toss cookies in a bag and bash away carefully.
- Spoon or spatula: For layering and spreading pudding and crumbs.
For a budget-friendly option, reuse small mason jars or even clean yogurt containers. I’ve used everything from fancy glassware to simple plastic cups, and honestly, they all work as long as you have a way to layer the pudding and “dirt.” Keep your food processor blades sharp by running through ice cubes occasionally—helps with crushing cookies evenly.
Preparation Method
- Prepare the pudding: In a medium bowl, whisk together the instant chocolate pudding mix and 2 cups (480 ml) of milk. Whisk vigorously for about 2 minutes until the mixture thickens and is smooth. If using homemade pudding, prepare according to your recipe and let it cool slightly. (Tip: Room temperature milk helps the pudding set faster and smoother.)
- Crush the cookies: Place the Oreos or chocolate sandwich cookies into a food processor and pulse until they resemble fine crumbs, like dirt. No processor? Put cookies in a sealed plastic bag and gently crush with a rolling pin or heavy pan. Set aside.
- Optional step for firmer dirt: Mix 1 tablespoon melted unsalted butter into the cookie crumbs to help them clump slightly and hold together better on top of the pudding.
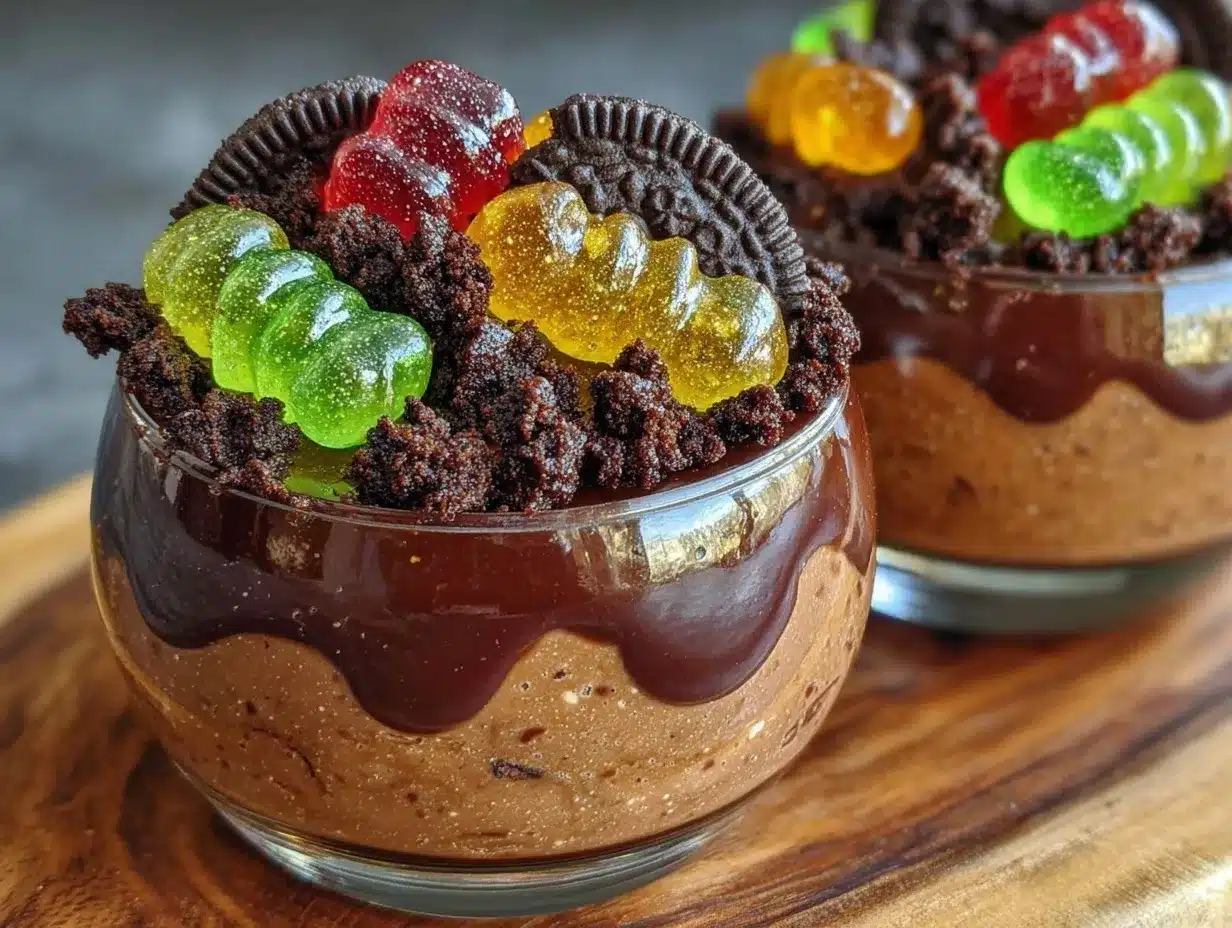
- Assemble the cups: Spoon a layer of chocolate pudding into each dessert cup, filling about one-third of the way. Then sprinkle a generous layer of cookie crumbs over the pudding to create the “dirt” layer. Repeat layering once more, ending with the cookie crumbs on top.
- Add gummy worms: Place 2-3 gummy worms on top of each cup, letting some peek out from the cookie crumbs for that fun, creepy-crawly look.
- Optional topping: Add a dollop of whipped cream on top of the dirt and worms for extra creaminess and visual appeal.
- Chill: Refrigerate the pudding cups for at least 1 hour before serving to let the pudding set completely and flavors meld.
- Serve and enjoy: Grab a spoon and dig into the fun! The first bite is always a delight, with creamy pudding, crunchy dirt, and chewy worms all coming together.
Troubleshooting tip: If your pudding seems too runny, give it an extra 5 minutes to set in the fridge before assembling. The cookie crumbs will soak up some moisture, so don’t worry about them getting soggy too quickly if you serve within a day.
Cooking Tips & Techniques
One trick I’ve learned is to always use cold milk straight from the fridge when mixing the pudding—it helps it thicken faster and gives a silky texture. If you rush this step or use warm milk, the pudding can turn out a bit grainy. Also, don’t skip whisking the pudding for a full 2 minutes; it makes all the difference in smoothness.
When crushing your cookies, go for a fine crumb texture but avoid pulverizing into powder. A little chunkiness adds a nice crunch contrast to the creamy pudding. I once crushed my cookies too finely and missed that satisfying grit.
Timing is key here. Assemble the cups just before serving or chilling because the cookie crumbs will eventually soften if sitting too long. If you want to prepare ahead, keep the crumbs and gummy worms separate and add them just before serving.
Multitasking tip: While the pudding chills, you can prep the cookie crumbs and gummy worms, making the assembly quick and stress-free. This dessert is perfect for whipping up with kids since they love layering and decorating their own cups.
Variations & Adaptations
- Dietary Twist: For a dairy-free version, use coconut or almond milk and dairy-free pudding mix. Swap gummy worms for fruit leather strips cut into worm shapes.
- Seasonal Flavor: In the fall, add a pinch of cinnamon or pumpkin spice to the pudding mix for a cozy twist. Swap gummy worms with candy pumpkins or candy corn for a Halloween theme.
- Flavor Swap: Use vanilla or butterscotch pudding instead of chocolate for a different flavor profile. Pair with crushed shortbread cookies or graham crackers for the “dirt.”
- Cooking Method Alternative: Make a layered trifle in a larger bowl instead of individual cups for parties. Just multiply ingredients accordingly.
- Personal Variation: I once added a drizzle of caramel sauce over the top before adding gummy worms for an extra sweet surprise, and it was a hit!
Serving & Storage Suggestions
Serve these pudding cups chilled for the best texture and flavor. Presentation-wise, clear cups or small mason jars really show off the layers, making them perfect for parties or gifting. Pair them with a cold glass of milk or a light fruit punch to balance the rich chocolate flavors.
Store leftovers covered in the refrigerator for up to 2 days. The cookie crumbs will soften over time, so if you want to keep the crunch, store the crumbs and gummy worms separately and add them just before serving. Reheat is not recommended since this is a cold dessert, but letting it sit at room temperature for 10 minutes before serving helps bring out the pudding’s creaminess.
Flavors tend to meld and get even better after a few hours chilled, so making these a little ahead of time is actually a win. Just resist the temptation to add gummy worms too early—they look best fresh and chewy!
Nutritional Information & Benefits
Each playful dirt and worms pudding cup roughly contains around 250 calories, depending on ingredient choices. Using low-fat milk and sugar-free pudding mix can reduce calories and sugar content significantly. The chocolate pudding provides a quick source of energy and a comforting dose of magnesium from the cocoa.
The cookie crumbs add texture but also carbs and sugars, so moderation is key if you’re watching intake. Gummy worms are mostly sugar, so consider them a fun treat rather than a daily snack. For kids and adults alike, this dessert is a joyful indulgence that brings smiles and memories, balancing nutrition with pure fun.
Gluten-free and dairy-free adaptations are easy to make, so everyone can enjoy this playful dessert regardless of dietary needs or allergies.
Conclusion
In the end, these playful dirt and worms pudding cups are a simple, fun way to bring a smile to your table. They’re quick to make, use easy ingredients, and turn dessert into a playful experience that kids and adults love. Customize them to your taste or occasion, and you’ll find they’re as versatile as they are delicious.
I love this recipe because it combines nostalgia with creativity—plus, it’s one of those treats that instantly brightens any day. So go ahead, try it out, and make it your own.
Don’t forget to share your versions or tips in the comments—I’d love to hear how your dirt and worms pudding cups turned out! Happy mixing and munching!
FAQs
Can I make the pudding from scratch instead of using instant pudding mix?
Absolutely! Homemade pudding works great—just let it cool before assembling to avoid melting the cookie crumbs.
How far ahead can I prepare these pudding cups?
Prepare the pudding and cookie crumbs up to a day in advance, but assemble the cups and add gummy worms right before serving for best texture.
Can I use other candies instead of gummy worms?
Yes! Try fruit leather strips, candy snakes, or even chocolate chips for different looks and flavors.
Are these pudding cups suitable for gluten-free diets?
They can be! Use gluten-free pudding mix and gluten-free chocolate cookies to make this dessert safe for gluten-sensitive eaters.
What’s the best way to crush cookies without a food processor?
Place cookies in a sealed plastic bag and gently crush with a rolling pin or heavy pan until you get fine crumbs—just be careful not to over-crush into powder.
Pin This Recipe!
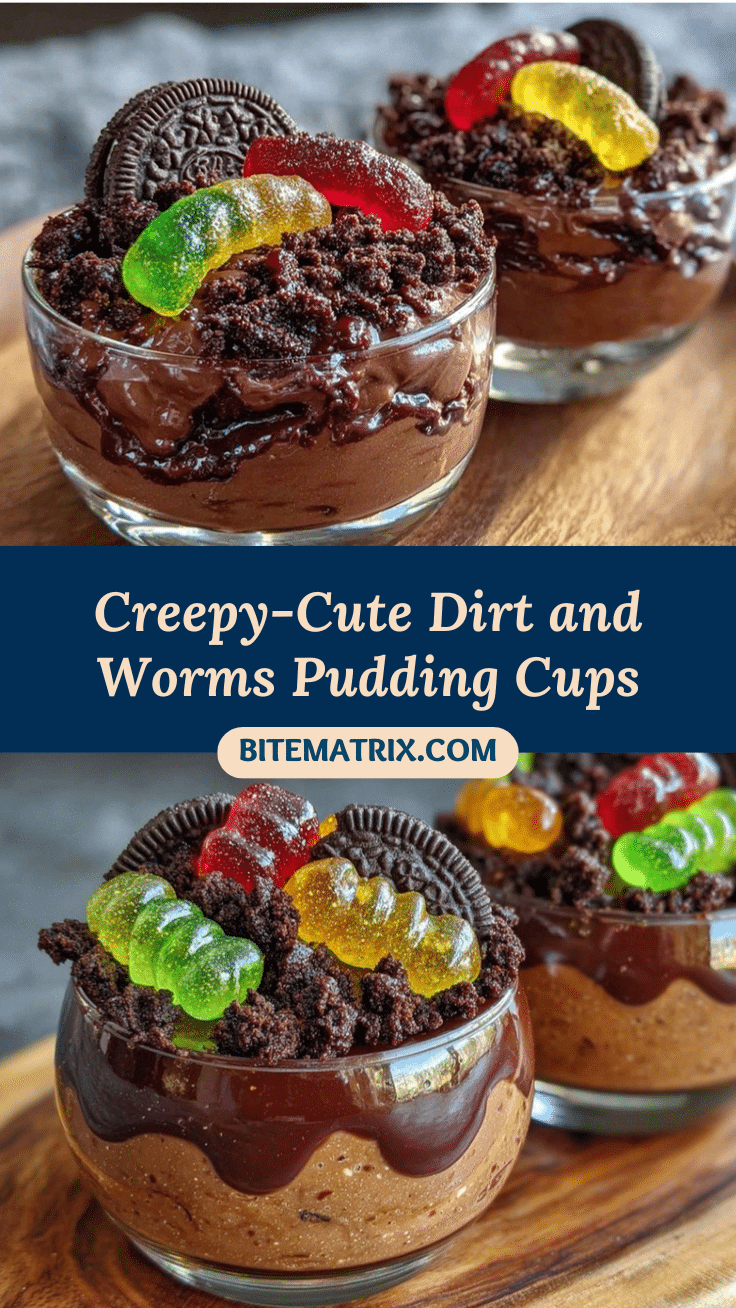
Playful Dirt and Worms Pudding Cups

A fun and easy kids dessert featuring creamy chocolate pudding layered with crushed cookies and gummy worms, perfect for parties and nostalgic treats.
- Prep Time: 10 minutes
- Cook Time: 0 minutes
- Total Time: 1 hour 10 minutes
- Yield: 8 servings 1x
- Category: Dessert
- Cuisine: American
Ingredients
- 1 package chocolate pudding mix (instant or homemade)
- 2 cups (480 ml) milk (whole or 2%)
- 20 Oreos or chocolate sandwich cookies, crushed
- 15–20 gummy worms
- 1 teaspoon vanilla extract
- 1 tablespoon unsalted butter, melted (optional)
- Whipped cream (optional)
Instructions
- In a medium bowl, whisk together the instant chocolate pudding mix and 2 cups (480 ml) of milk. Whisk vigorously for about 2 minutes until the mixture thickens and is smooth. If using homemade pudding, prepare according to your recipe and let it cool slightly.
- Place the Oreos or chocolate sandwich cookies into a food processor and pulse until they resemble fine crumbs, like dirt. Alternatively, put cookies in a sealed plastic bag and gently crush with a rolling pin or heavy pan. Set aside.
- Optional: Mix 1 tablespoon melted unsalted butter into the cookie crumbs to help them clump slightly and hold together better on top of the pudding.
- Spoon a layer of chocolate pudding into each dessert cup, filling about one-third of the way. Then sprinkle a generous layer of cookie crumbs over the pudding to create the “dirt” layer. Repeat layering once more, ending with the cookie crumbs on top.
- Place 2-3 gummy worms on top of each cup, letting some peek out from the cookie crumbs for a fun look.
- Optional: Add a dollop of whipped cream on top of the dirt and worms for extra creaminess and visual appeal.
- Refrigerate the pudding cups for at least 1 hour before serving to let the pudding set completely and flavors meld.
- Serve chilled and enjoy.
Notes
Use cold milk straight from the fridge for thicker pudding. Crush cookies to fine crumbs but avoid powder for texture. Assemble cups just before serving or chilling to keep cookie crumbs crunchy. Store cookie crumbs and gummy worms separately if preparing ahead.
Nutrition
- Serving Size: 1 pudding cup
- Calories: 250
- Sugar: 30
- Sodium: 150
- Fat: 8
- Saturated Fat: 3
- Carbohydrates: 40
- Fiber: 1
- Protein: 3
Keywords: chocolate pudding, kids dessert, gummy worms, easy dessert, party dessert, pudding cups, fun dessert, nostalgic dessert


