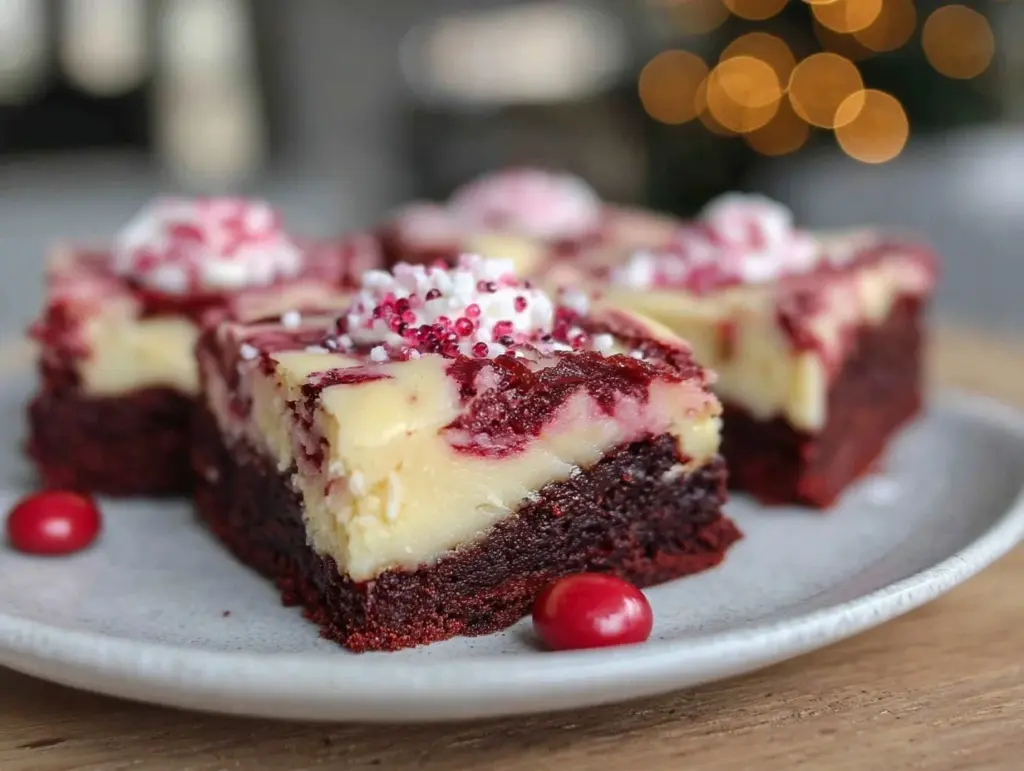
There’s something absolutely magical about the scent of cocoa and sweet cream cheese mingling in the air as these Red Velvet Cheesecake Swirl Brownies bake away in my oven. The first time I pulled out a pan of these beauties, I swear the world paused for a moment—the vivid red hue with creamy swirls just begged for attention. I was knee-high to a grasshopper when my grandma made red velvet cake for special occasions, but it wasn’t until a rainy Saturday years ago that I tried swirling cheesecake right into brownie batter. The result? Pure, nostalgic comfort and decadent flavor you’ll want to taste again and again.
If you’re anything like me, the simple joy of licking the spatula clean (in the name of research, of course!) is almost as good as sharing the finished treat. My family couldn’t stop sneaking pieces straight from the pan—the cooling rack became a battleground of sticky fingers and guilty smiles. These brownies have quickly become a staple for birthdays, holiday parties, and just about any gathering where a little indulgence is called for. Honestly, I wish I’d stumbled onto this combination years ago. The richness of red velvet, the tangy cream cheese swirl, and that fudgy texture—it’s dangerously easy and feels like a warm hug.
Let’s face it, whether you’re looking to brighten up your Pinterest dessert board or find the perfect sweet treat for your next celebration, Red Velvet Cheesecake Swirl Brownies deliver. They’re the kind of dessert that makes people pause mid-bite, close their eyes, and smile. You’re going to want to bookmark this one, trust me.
Why You’ll Love This Recipe
After countless batches and plenty of “taste-testing” (all for science!), I can say with complete confidence that these Red Velvet Cheesecake Swirl Brownies are a showstopper. Here’s what makes them such a standout:
- Quick & Easy: Ready in under an hour, these brownies are perfect for busy weeknights or when you need a last-minute party dessert.
- Simple Ingredients: No fancy grocery runs required—you probably have almost everything in your pantry already.
- Perfect for Celebrations: Whether it’s a birthday, Valentine’s Day, or a weekend potluck, their striking color and irresistible flavor make them a party favorite.
- Crowd-Pleaser: Kids and adults alike rave about the combination of fudgy brownie, rich cocoa, and that tangy cheesecake swirl. They disappear fast!
- Unbelievably Delicious: The brownie base is moist and chocolatey, while the cheesecake adds a creamy, dreamy layer that’s the perfect contrast.
What sets my version apart is a perfectly balanced cocoa profile (not too bitter, not too sweet) and a super-simple swirling technique that looks impressive but is totally doable. I use a little extra vanilla in the cheesecake layer and a dash of white vinegar in the brownie batter for that classic red velvet tang. This isn’t just another red velvet dessert—these brownies are rich, festive, and downright addictive.
Honestly, these brownies aren’t just good, they’re the kind you close your eyes for on the first bite. They’re comfort food for the soul—faster, easier, and with all the satisfaction you crave. You’ll win over guests, surprise your friends, and treat yourself to something special without breaking a sweat. That’s what I call baking brilliance!
What Ingredients You Will Need
This recipe uses simple, wholesome ingredients to create bold flavor and perfect texture—no fuss, no fancy steps. Most are pantry staples, and you can easily swap a few things to suit your preferences.
- For the Red Velvet Brownie Batter:
- 1/2 cup (115g) unsalted butter, melted (adds richness)
- 1 cup (200g) granulated sugar
- 2 large eggs, room temperature
- 2 teaspoons vanilla extract (I love Nielsen-Massey for best flavor)
- 2 tablespoons (16g) unsweetened cocoa powder (Hershey’s or Ghirardelli work great)
- 3/4 cup (95g) all-purpose flour (can swap with gluten-free blend if needed)
- 1/4 teaspoon salt
- 1/8 teaspoon baking powder
- 1 tablespoon white vinegar (for classic red velvet tang)
- 1 tablespoon red food coloring (gel is best for vibrant color)
- For the Cheesecake Swirl:
- 8 ounces (225g) cream cheese, softened (use full-fat for best results)
- 1/4 cup (50g) granulated sugar
- 1 large egg yolk
- 1/2 teaspoon vanilla extract
If you want to amp up flavor, add a pinch of espresso powder to the brownie batter—it deepens the chocolate notes. For a festive twist, you can mix in white chocolate chips or top with sprinkles before baking. In summer, fresh berries on top make a lovely addition. If dairy is an issue, swap cream cheese with a plant-based alternative and butter with coconut oil (works surprisingly well!).
Need a nut-free option? All ingredients here are naturally nut-free, but always check your labels if allergies are a concern. I recommend King Arthur gluten-free flour blend if you want to avoid wheat. Honestly, the beauty of this recipe is how adaptable it is—just use what you have and make it your own!
Equipment Needed
You don’t need a fancy kitchen to whip up these Red Velvet Cheesecake Swirl Brownies, but a few tools make things smoother:
- 8×8-inch (20x20cm) square baking pan (lined with parchment for easy removal)
- Mixing bowls—one medium, one small
- Whisk and rubber spatula (I love my OXO spatula for swirling)
- Hand mixer or stand mixer (optional, but helpful for the cheesecake layer)
- Measuring cups and spoons
- Toothpick or skewer for swirling
If you don’t have a square pan, a round cake pan works—just watch baking times. I’ve used both glass and metal pans; metal gives a bit crisper edge. For budget-friendly options, basic silicone spatulas are great (and easy to clean). If you’re working with a hand mixer, go slow with the cream cheese to avoid splatters. Keep your pans in good shape by lining with parchment and hand-washing—trust me, it saves headaches later.
Preparation Method
- Preheat your oven: Set to 350°F (175°C). Line your 8×8-inch pan with parchment, leaving an overhang for easy lifting.
- Make the brownie batter: In a medium bowl, whisk together melted butter and sugar until glossy. Add eggs and vanilla, whisk until smooth. Stir in cocoa powder, flour, salt, and baking powder. Mix gently until just combined (don’t overmix!).
- Add the red velvet flair: Pour in vinegar and red food coloring. Stir until the batter is a deep, vibrant red. If it looks a little pale, add a drop more coloring. The batter should be thick but pourable—if it’s too stiff, add a tablespoon of milk.
- Spread the brownie base: Pour about 3/4 of the brownie batter into your prepared pan. Smooth out with a spatula. Reserve the rest for swirling on top.
- Prepare the cheesecake swirl: In a small bowl, beat softened cream cheese, sugar, egg yolk, and vanilla until creamy and lump-free. If you see small lumps, keep mixing—cold cream cheese can make swirling tricky!
- Add the cheesecake layer: Dollop spoonfuls of the cream cheese mixture over the brownie base. Use the reserved brownie batter to add small spoonfuls on top of the cream cheese.
- Swirl it up: Take a toothpick or skewer, and gently swirl the cheesecake and brownie layers together. Don’t overdo it—you want visible swirls. Aim for 6-8 gentle figure-eight motions.
- Bake: Pop into the oven and bake for 30-35 minutes. Check with a toothpick—if it comes out mostly clean with a few moist crumbs, you’re good. If it’s gooey, give it 2-3 more minutes. The edges should look set, and the center slightly jiggly.
- Cool: Let brownies cool completely in the pan on a wire rack. This lets the cheesecake set up and makes slicing easier. Don’t rush this step, even though the temptation is real!
- Slice and serve: Lift out using the parchment overhang. Cut into 16 squares (or 9 for extra-large pieces). Wipe your knife between cuts for cleaner edges.
Preparation tips: If your batter seems too thick, check your flour measurement—spoon and level for accuracy. For a shiny top, don’t skip beating butter and sugar well. Swirling is an art, not a science—imperfect swirls taste just as amazing. If you accidentally overbake, the brownies will be cakier but still delicious.
I like to prep ingredients ahead—measure out dry stuff the night before if you’re baking for a party. And honestly, the hardest part is waiting for them to cool!
Cooking Tips & Techniques
Making Red Velvet Cheesecake Swirl Brownies is part science, part art. Here’s what I’ve learned through trial (and a few errors):
- Room-temperature ingredients are key: Cold eggs or cream cheese can lead to lumpy batter and uneven baking. Let them sit out for 30 minutes before starting.
- Don’t overmix: Once you add flour, stir gently. Overmixing makes brownies tough rather than fudgy.
- Swirling technique: Use a light touch when swirling. Deep swirls will muddy the layers. I’ve gotten a little carried away before—less is more!
- Watch your bake time: Every oven’s a little different. Start checking at 28 minutes. If the cheesecake jiggles too much, give it a couple more minutes.
- Cool completely before slicing: Warm brownies are tempting, but slicing too soon leads to gooey messes. Set a timer and walk away (maybe sneak a corner if you must).
- Consistency matters: Measure your flour with the spoon-and-level method. Packed flour equals dry brownies.
- Multitasking: While brownies bake, clean your bowls and prep your serving plate. Makes party prep easy!
I’ve had brownies come out underbaked and super gooey (still tasty, just more like pudding). If that happens, pop them in the fridge to firm up. If you forget the vinegar, the flavor won’t be quite as tangy but still delicious. Honestly, these brownies are forgiving—just follow the steps and you’ll be golden.
Variations & Adaptations
One of my favorite things about this recipe is how easy it is to customize. Here are a few fun twists:
- Gluten-Free: Swap all-purpose flour for your preferred gluten-free blend. King Arthur’s works beautifully, and no one will know the difference.
- Low-Sugar: Use a sugar substitute like Swerve in both layers. The flavor holds up, and you’ll cut down on sweetness if that’s your thing.
- Berry Swirl: Add a handful of fresh raspberries or swirl in strawberry jam with the cheesecake layer. It’s perfect for summer celebrations.
- Dairy-Free: Substitute cream cheese with vegan cream cheese and butter with coconut oil. I tried this for my lactose-intolerant cousin, and it’s shockingly good.
- Extra Chocolate: Sprinkle mini chocolate chips on top before baking for a more intense chocolate hit.
If you want to bake in a larger pan (9×13-inch), double the recipe and reduce the baking time by 5-7 minutes to prevent overbaking. For cake-like brownies, add an extra egg to the batter. I’ve even tried swirling in peanut butter for a nutty twist—just melt and drizzle before swirling. The options really are endless, so make it yours!
Serving & Storage Suggestions
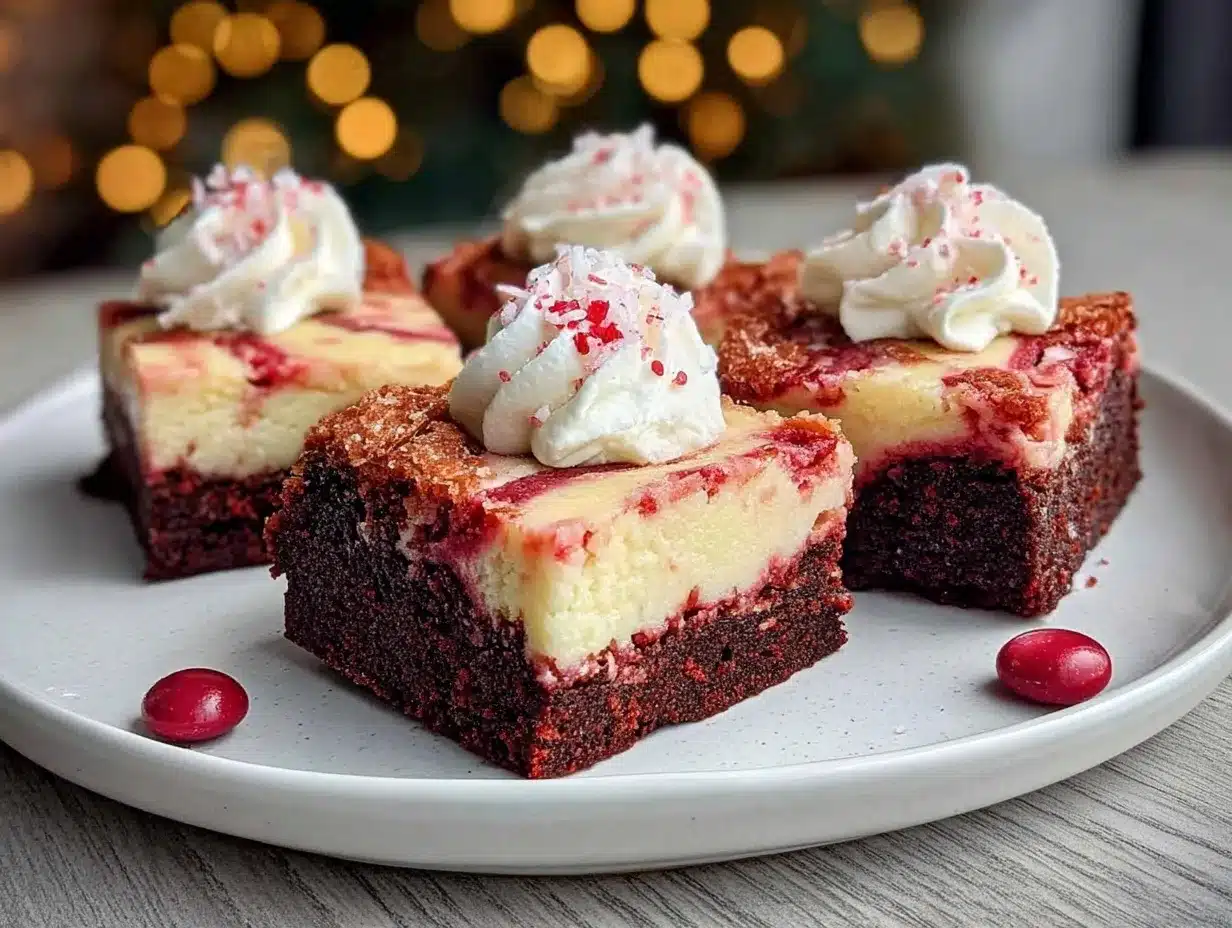
Serve these Red Velvet Cheesecake Swirl Brownies slightly chilled or at room temperature. The creamy cheesecake layer is especially dreamy when cool, but the fudgy brownie is always a hit. I like to present them on a white platter with a dusting of powdered sugar—makes that red pop!
Pair with a hot cup of coffee, a cold glass of milk, or even a scoop of vanilla ice cream if you’re feeling extra. They’re perfect for parties, brunch, or just a sweet afternoon pick-me-up.
To store, keep brownies in an airtight container in the refrigerator for up to 5 days. For longer storage, freeze in a single layer (then stack with parchment between). Thaw overnight in the fridge. To reheat, microwave a square for 10 seconds—just enough to warm without melting. The flavors deepen as they sit, so leftovers are even better the next day!
Nutritional Information & Benefits
Each brownie square (based on 16 servings) is about 180 calories, with 10g fat, 20g carbs, and 2g protein. The cream cheese adds calcium and a little protein, while cocoa powder offers antioxidants.
This recipe is naturally nut-free and can be made gluten-free or dairy-free with swaps. If you’re watching sugar, substitute with a low-glycemic sweetener. Eggs and dairy are present, so watch for allergens.
From a wellness perspective, these brownies are a treat—sometimes you need to indulge! I like that you can make them a little lighter or allergen-friendly for family and friends. Balance is key, and these brownies are pure happiness in moderation.
Conclusion
If you’re craving a dessert that’s as pretty as it is delicious, these Red Velvet Cheesecake Swirl Brownies are your ticket to celebration bliss. Easy to prepare, endlessly adaptable, and guaranteed to bring smiles—they’re proof that baking doesn’t have to be complicated to be amazing.
I absolutely love how this recipe brings together rich chocolate, creamy cheesecake, and striking color without any fuss. Don’t be afraid to add your own twist—swap flavors, adjust sweetness, or play with toppings. The best recipes are the ones you make your own.
Give these brownies a try for your next party, family gathering, or just because! I’d love to hear how you make them special—leave a comment, share your photos, or tell me your favorite variation. Happy baking, and remember, the sweetest moments are the ones you share.
FAQs
Can I make Red Velvet Cheesecake Swirl Brownies ahead of time?
Yes! Bake them up to two days in advance and store in the refrigerator. The flavors actually improve as they sit.
Can I use boxed brownie mix for the base?
You can use a boxed mix in a pinch—just add red food coloring and vinegar for that classic red velvet taste.
How do I get perfect swirls?
Use a toothpick or skewer and gently swirl in a figure-eight motion. Don’t overmix, or the layers will blend together too much.
What if I don’t have red food coloring?
The brownies will taste the same but lack that vibrant red color. Beet powder can work as a natural alternative, but the shade will be different.
Can I freeze these brownies?
Absolutely! Freeze in a single layer, then stack with parchment in an airtight container. Thaw overnight before serving.
Pin This Recipe!
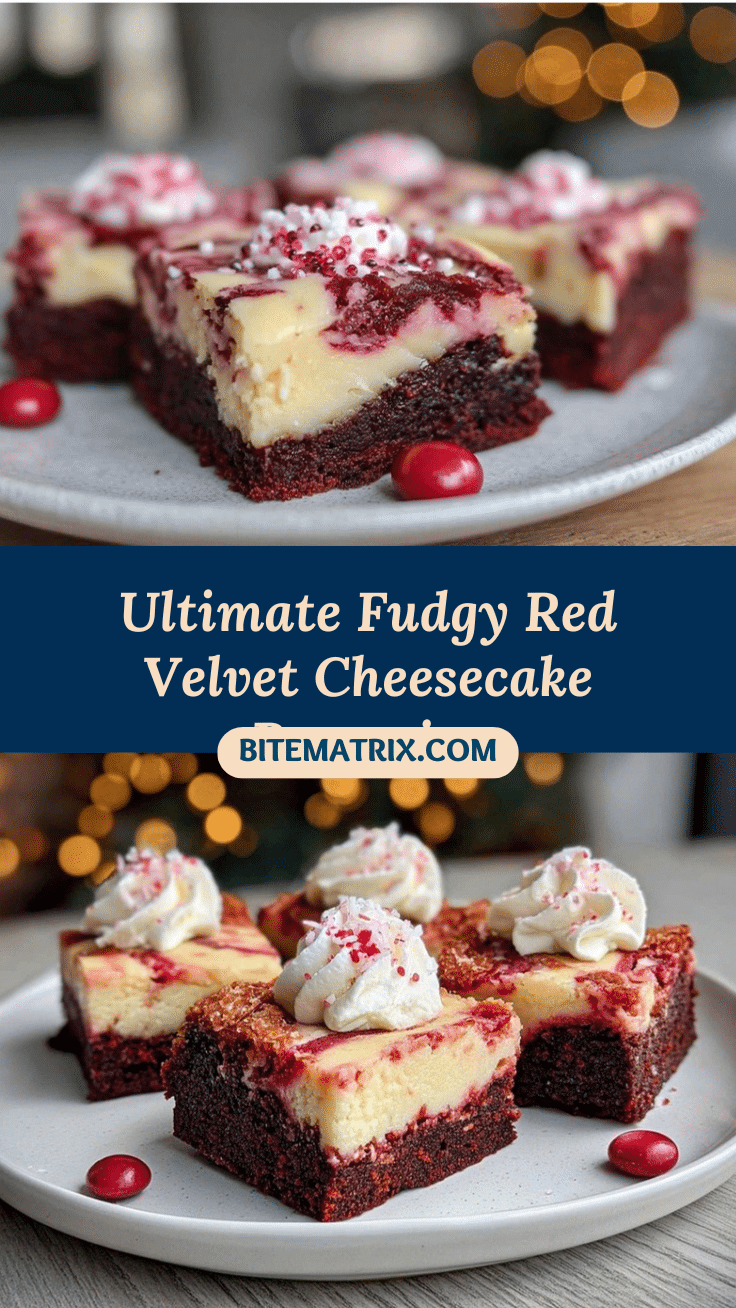
Red Velvet Cheesecake Swirl Brownies

These Red Velvet Cheesecake Swirl Brownies combine a rich, fudgy red velvet brownie base with a creamy, tangy cheesecake swirl for a showstopping party dessert. Easy to make and endlessly adaptable, they’re perfect for celebrations or a sweet treat anytime.
- Prep Time: 15 minutes
- Cook Time: 30-35 minutes
- Total Time: 50 minutes
- Yield: 16 servings 1x
- Category: Dessert
- Cuisine: American
Ingredients
- 1/2 cup unsalted butter, melted
- 1 cup granulated sugar
- 2 large eggs, room temperature
- 2 teaspoons vanilla extract
- 2 tablespoons unsweetened cocoa powder
- 3/4 cup all-purpose flour
- 1/4 teaspoon salt
- 1/8 teaspoon baking powder
- 1 tablespoon white vinegar
- 1 tablespoon red food coloring (gel preferred)
- 8 ounces cream cheese, softened
- 1/4 cup granulated sugar
- 1 large egg yolk
- 1/2 teaspoon vanilla extract
Instructions
- Preheat oven to 350°F (175°C). Line an 8×8-inch baking pan with parchment paper, leaving an overhang for easy removal.
- In a medium bowl, whisk together melted butter and sugar until glossy. Add eggs and vanilla, whisk until smooth.
- Stir in cocoa powder, flour, salt, and baking powder. Mix gently until just combined.
- Pour in vinegar and red food coloring. Stir until the batter is a deep, vibrant red. If needed, add a drop more coloring. Batter should be thick but pourable; add a tablespoon of milk if too stiff.
- Pour about 3/4 of the brownie batter into the prepared pan and smooth out with a spatula. Reserve the rest for swirling on top.
- In a small bowl, beat softened cream cheese, sugar, egg yolk, and vanilla until creamy and lump-free.
- Dollop spoonfuls of the cream cheese mixture over the brownie base. Add small spoonfuls of the reserved brownie batter on top of the cream cheese.
- Use a toothpick or skewer to gently swirl the cheesecake and brownie layers together with 6-8 figure-eight motions.
- Bake for 30-35 minutes, checking with a toothpick for mostly clean results with a few moist crumbs. Edges should look set and center slightly jiggly.
- Let brownies cool completely in the pan on a wire rack before slicing.
- Lift brownies out using the parchment overhang. Cut into 16 squares (or 9 for extra-large pieces), wiping the knife between cuts for cleaner edges.
Notes
Room-temperature ingredients help prevent lumps and ensure even baking. Don’t overmix the batter after adding flour for fudgy brownies. Swirl gently for distinct layers. Cool completely before slicing for clean edges. Adapt with gluten-free flour, dairy-free substitutes, or add-ins like berries or chocolate chips. Store in the fridge for up to 5 days or freeze for longer storage.
Nutrition
- Serving Size: 1 brownie square (1/
- Calories: 180
- Sugar: 15
- Sodium: 120
- Fat: 10
- Saturated Fat: 6
- Carbohydrates: 20
- Fiber: 1
- Protein: 2
Keywords: red velvet brownies, cheesecake swirl, party dessert, easy brownies, holiday baking, cream cheese brownies, fudgy brownies, celebration dessert


