Introduction
Let me tell you, the aroma of toasted pecans swirling with gooey maple filling in my kitchen is something I wish I could bottle up and send to everyone I know. The first time I pulled a tray of these salted maple pecan pie bars out of the oven, I was hit with that unmistakable, buttery scent—warm, sweet, and just a hint nutty. There’s something about the way the golden maple syrup bubbles up around those crunchy pecans that makes you pause, inhale deeply, and just grin because, honestly, you know you’ve hit dessert gold.
My connection to pecan pie goes way back—back to Thanksgiving afternoons at my grandma’s, where the dessert table was always groaning with pies. When I was knee-high to a grasshopper, I’d sneak extra slices, hoping nobody noticed (spoiler: they always did). I stumbled on the idea for these bars during a rainy weekend, trying to recreate that nostalgic pecan pie magic but in a form that’s a touch easier and, dare I say, dangerously snackable.
You know what? My family couldn’t stop sneaking these off the cooling rack, and even the most skeptical pie purists were convinced after one bite. These bars deliver all that classic pecan pie comfort—sweet, salty, and loaded with texture—but without the hassle of rolling out a crust. Perfect for potlucks, gifting, or just adding a little sparkle to your Pinterest dessert board. If you’re looking for a Thanksgiving treat that’s both familiar and just a bit special, you’re going to want to bookmark this one.
I’ve tested these salted maple pecan pie bars more times than I care to admit (in the name of research, of course), and now they’re a staple for family gatherings, last-minute gifts, and cozy evenings in. They really do feel like a warm hug, and trust me, you’re not going to want to miss out!
Why You’ll Love These Salted Maple Pecan Pie Bars
When it comes to Thanksgiving desserts, you want something memorable but not fussy—these salted maple pecan pie bars hit the sweet spot in every way. After years of baking (and quite a few recipe fails), I can say with confidence that these bars stand out for both taste and simplicity. Here’s why you’ll be reaching for this recipe again and again:
- Quick & Easy: These bars come together in under an hour, so you can whip them up even on busy holiday mornings or when that sweet craving hits unexpectedly.
- Simple Ingredients: No need for a specialty grocery trip—most of these are pantry staples. I bet you already have flour, butter, eggs, and pecans waiting in your kitchen.
- Perfect for Gatherings: Whether it’s Thanksgiving, Friendsgiving, or a cozy Sunday brunch, these bars slice up neat and travel well. No messy pie plates or soggy crusts!
- Crowd-Pleaser: Kids love the gooey texture, adults love the salty-sweet combo, and even the pie snobs get won over by that maple flavor. Seriously, these disappear fast.
- Unbelievably Delicious: The contrast of crunchy pecans, sticky maple filling, and buttery shortbread base is pure comfort food—like pecan pie, but with a fun twist.
Here’s what makes this recipe different: Instead of corn syrup, I use real maple syrup for richness and depth (plus, it’s a little less sweet and much more flavorful). A sprinkle of flaky salt at the end brings out all the toasty, caramel notes, and let’s face it, makes you feel like a dessert pro. This isn’t just another pecan pie bar recipe—it’s the version I wish I’d found years ago.
Honestly, salted maple pecan pie bars are the kind of treat that makes you close your eyes after the first bite. Comforting, easy, and a little bit special, they’re perfect for impressing guests without breaking a sweat. If you want a dessert that feels like a holiday hug (and tastes even better the next day), this one’s for you.
What Ingredients You Will Need
These salted maple pecan pie bars rely on simple, wholesome ingredients to deliver bold flavor and satisfying texture—no complicated shopping lists or hard-to-find specialty items. Most of these are pantry staples, with a few Thanksgiving-worthy upgrades. Let’s break it down:
- For the Shortbread Crust:
- All-purpose flour (120g / 1 cup) – forms the sturdy, buttery base
- Unsalted butter, softened (113g / 1/2 cup) – creates that rich, melt-in-your-mouth texture
- Granulated sugar (50g / 1/4 cup) – adds a touch of sweetness
- Salt (1/4 tsp) – balances the crust’s flavor
- For the Maple Pecan Filling:
- Large eggs, room temperature (2) – binds the filling and gives it that classic custard-like set
- Pure maple syrup (180ml / 3/4 cup) – the star ingredient, use Grade A for best flavor
- Brown sugar, packed (100g / 1/2 cup) – deepens the caramel flavor
- Unsalted butter, melted (57g / 1/4 cup) – makes the filling rich and smooth
- Vanilla extract (1 tsp) – rounds out the flavors
- Salt (1/2 tsp) – don’t skip, it’s what makes the sweetness pop
- Pecan halves (150g / 1 1/2 cups) – toasted for extra crunch and flavor
- Finishing Touch:
- Flaky sea salt (for sprinkling) – adds that irresistible salty kick at the end
I recommend using real maple syrup (not pancake syrup)—trust me, it’s worth it for that pure flavor. For pecans, I like to toast them lightly in a dry skillet before adding; it brings out their natural oils and makes them extra fragrant. If you’re short on pecans, walnuts are a solid substitute, though the flavor will shift slightly.
Gluten-free? Swap in a 1:1 gluten-free flour blend for the crust. Dairy-free? Use plant-based butter (I’ve had good results with Miyoko’s). If you’re out of brown sugar, coconut sugar works in a pinch, though it’s a tad less sticky. These ingredients are flexible—feel free to adjust based on what’s in your pantry.
Honestly, these bars are forgiving—just use the best-quality ingredients you can find. In summer, I’ve swapped in roasted almonds and a splash of bourbon for a grown-up twist. The basics, though, never let me down!
Equipment Needed
You don’t need much to whip up salted maple pecan pie bars—just a few tried-and-true kitchen tools. Here’s what I reach for every time:
- 8×8-inch (20x20cm) baking pan (lined with parchment for easy removal)
- Mixing bowls (medium and large)
- Whisk (for smooth filling)
- Spatula (for spreading crust and filling evenly)
- Measuring cups and spoons (accuracy matters for the syrup and flour!)
- Small skillet (optional, for toasting pecans)
- Sharp knife (for slicing bars)
If you don’t have parchment, a well-buttered pan works in a pinch—just let the bars cool fully before slicing. I’ve used glass and metal pans; both work, but metal gives a slightly crisper crust. For mixing, even a fork will do if you’re short on whisks.
Pro tip: Keep your baking pan in good shape by avoiding metal spatulas when slicing (they scratch the surface). I snagged my favorite pan for under $10 at a local store, so you don’t need anything fancy. Maintenance-wise, parchment is your best friend for stress-free cleanup!
Preparation Method
- Prep the Pan: Line an 8×8-inch (20x20cm) pan with parchment, leaving a slight overhang for easy lifting. Butter the parchment lightly if you like extra insurance.
-
Make the Shortbread Crust: In a medium bowl, combine 1 cup (120g) flour, 1/4 cup (50g) sugar, and 1/4 tsp salt. Cut in 1/2 cup (113g) softened butter using a pastry cutter (or your fingers) until mixture resembles coarse crumbs. Press evenly into prepared pan.
Tip: Don’t overwork—the crust should just hold together, not become doughy. -
Bake the Crust: Bake at 350°F (175°C) for 18-20 minutes, until lightly golden at the edges. While it bakes, prepare the filling.
Note: The crust will look pale in the center but will finish setting during the second bake. -
Toast the Pecans: Optional but recommended—toast 1 1/2 cups (150g) pecan halves in a dry skillet over medium heat for 3-5 minutes, stirring often, until fragrant. Let cool, then chop roughly if preferred.
Warning: Pecans burn fast, so keep an eye out! The nose knows—when you smell that toasty aroma, they’re ready. -
Mix the Maple Filling: In a large bowl, whisk together 2 large eggs, 3/4 cup (180ml) maple syrup, 1/2 cup (100g) brown sugar, 1/4 cup (57g) melted butter, 1 tsp vanilla, and 1/2 tsp salt until completely smooth.
Tip: If the butter clumps, your eggs may be too cold—let the mixture sit a minute, then whisk again. -
Combine & Pour: Stir in toasted pecans. Pour filling evenly over baked crust. Use a spatula to nudge pecans into an even layer.
Note: The filling is runny, but it will set as it bakes! -
Bake Again: Return to oven and bake at 350°F (175°C) for 22-28 minutes, until filling is just set (the center will jiggle slightly but not slosh). Edges may puff and darken.
Troubleshooting: If the top is browning too fast, tent loosely with foil for the last 10 minutes. -
Cool & Finish: Remove pan and sprinkle with flaky sea salt while warm. Cool completely in pan—about 2 hours for clean slices.
Tip: Don’t rush slicing! Warm bars are messy but tasty. For picture-perfect edges, chill in the fridge for 1 hour before cutting. -
Slice & Serve: Use parchment overhang to lift out bars. Slice into 16 squares (or fewer, if you crave bigger pieces).
Efficiency tip: Wipe your knife between cuts for neat edges.
Each step brings a sensory moment—crunch of crust, sticky maple bubbles, that toasted pecan scent. I always sneak a corner piece as soon as they’re cool enough—just to make sure they’re “safe” for everyone else!
Cooking Tips & Techniques
Years of baking (and a few kitchen disasters) taught me these tricks for perfect salted maple pecan pie bars every time:
- Toast Your Pecans: Toasting nuts is non-negotiable for flavor. Even a few minutes makes a difference—don’t skip!
- Don’t Overbake: The filling should jiggle slightly when you pull it out. If it’s rock-solid, it’ll be dry after cooling. I learned this the hard way (still tasty, just not gooey!).
- Use Room Temperature Eggs: Cold eggs can cause the filling to set unevenly. Let them sit on the counter while you prep the crust.
- Parchment Paper = Easy Removal: Trust me, prying bars out of a pan is never fun. A parchment sling saves time and stress.
- Cut with a Sharp Knife: Wipe between slices for those clean Pinterest-worthy edges. Serrated knives work well, too.
- Salt While Warm: The flaky sea salt sticks best when the bars are fresh out of the oven. Don’t wait until they’re cool!
- Multitasking Tip: Toast the pecans while the crust bakes. Saves time and dishes.
One time, I forgot to toast the pecans and the flavor was noticeably flatter. Lesson learned—those little details matter! For consistency, use accurate measurements and keep a close eye during the second bake. These tips guarantee gooey, crisp, and totally irresistible bars every time.
Variations & Adaptations
One of the best things about salted maple pecan pie bars is how easy they are to tweak for different tastes and dietary needs. Here are a few favorite variations:
- Gluten-Free: Swap the all-purpose flour for a 1:1 gluten-free blend. I’ve tried King Arthur’s and Bob’s Red Mill—both work beautifully.
- Dairy-Free: Use plant-based butter in both the crust and filling. Earth Balance or Miyoko’s are solid picks for flavor and texture.
- Nut-Free Option: Substitute pecans with toasted pumpkin seeds or sunflower seeds. The texture is crunchier, but it’s a fun twist!
- Seasonal Twists: In winter, add a pinch of cinnamon or orange zest to the filling. In summer, swap maple syrup for honey and top with sliced almonds.
- Bourbon Maple Bars: Add 1-2 tbsp bourbon to the filling for an adult-only treat (the flavor is subtle but amazing).
I once made these with dark chocolate chunks mixed into the filling—honestly, it was decadent and almost too rich (but not quite). For different cooking methods, you can double the recipe for a 9×13-inch pan; just increase baking time by 5-8 minutes. Allergens? If you’re baking for someone with nut allergies, make sure to clean all equipment thoroughly and use seed substitutes.
Customizing these bars is half the fun—don’t be afraid to experiment and make them your own!
Serving & Storage Suggestions
These salted maple pecan pie bars are best served at room temperature for the perfect balance of gooey filling and crisp shortbread. For a beautiful presentation, arrange them on a rustic wooden board or a pretty platter, and sprinkle with a little extra flaky salt just before serving.
Pair with strong coffee, spiced chai, or even a scoop of vanilla ice cream for a decadent Thanksgiving dessert. They’re also a hit alongside fresh whipped cream or a drizzle of caramel sauce if you’re feeling fancy.
To store, keep bars in an airtight container at room temperature for up to 3 days (they rarely last that long in my house!). For longer storage, refrigerate for up to 5 days, or freeze for up to 2 months—just thaw overnight in the fridge before serving.
Reheating isn’t usually necessary, but if you want a warm treat, microwave a bar for 10-15 seconds. As the bars sit, the flavors deepen and the texture gets even more fudgy—almost better than fresh!
Nutritional Information & Benefits
Each salted maple pecan pie bar (based on 16 servings) contains approximately:
- Calories: 210
- Fat: 13g
- Carbs: 22g
- Protein: 2g
- Sugar: 14g
Pecans are a natural source of healthy fats, antioxidants, and fiber. Maple syrup offers trace minerals like manganese and zinc, and opting for real syrup means fewer additives.
These bars are naturally gluten-free if you swap the flour, and can be dairy-free with plant-based butter. Note: Contains eggs and nuts—always check for allergens if sharing. I love that these bars offer a little wholesome nutrition (pecans are heart-healthy!), but let’s be honest—this is a treat best enjoyed in moderation.
Conclusion
Salted maple pecan pie bars aren’t just another dessert—they’re a slice of holiday comfort, packed with gooey maple goodness and a crunch that’ll keep you coming back. Whether you’re new to baking or a seasoned pro, this recipe is easy to customize and always delivers that wow-factor.
Try swapping ingredients, adjusting flavors, or making them ahead for stress-free entertaining. I keep coming back to these bars because they’re as simple as they are satisfying, and they never fail to bring a smile to my family (and friends!).
If you love them half as much as we do, leave a comment below, Pin them for later, or tag me with your own twist! Happy Thanksgiving—and here’s to sweet memories in every bite.
Frequently Asked Questions
Can I make salted maple pecan pie bars ahead of time?
Absolutely! These bars keep well for up to 5 days in the fridge or 2 months in the freezer. I often bake them the night before Thanksgiving, and they taste even better the next day.
What if I don’t have real maple syrup?
You can use honey or agave syrup in a pinch, but the classic maple flavor will be missing. Pancake syrup isn’t recommended—it’s much sweeter and less complex.
Can I double this recipe for a crowd?
Yes! Double all ingredients and use a 9×13-inch pan. Increase the baking time by 5-8 minutes to make sure the filling sets.
How do I keep the crust from getting soggy?
Be sure to bake the crust until lightly golden before adding the filling. Cooling bars fully before slicing also helps keep layers distinct.
Are salted maple pecan pie bars gluten-free?
Not as written, but you can easily swap in a gluten-free flour blend for the crust. I’ve had great results with King Arthur’s or Bob’s Red Mill blends.
Pin This Recipe!
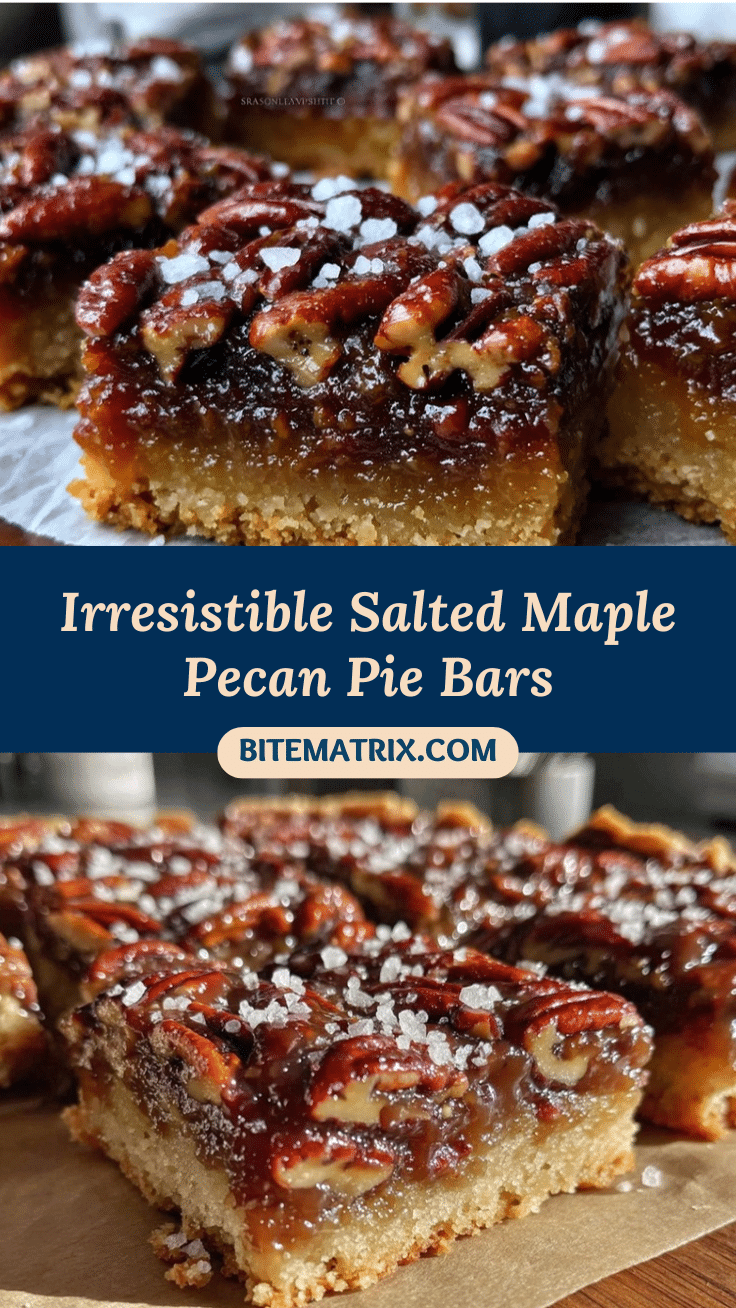
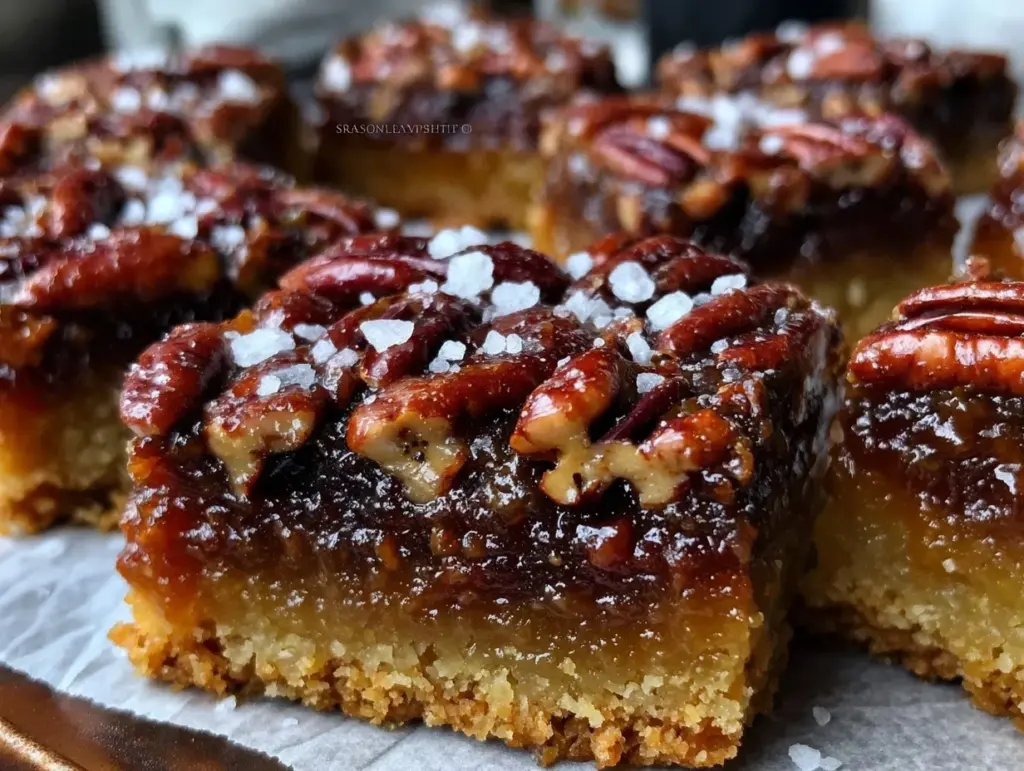
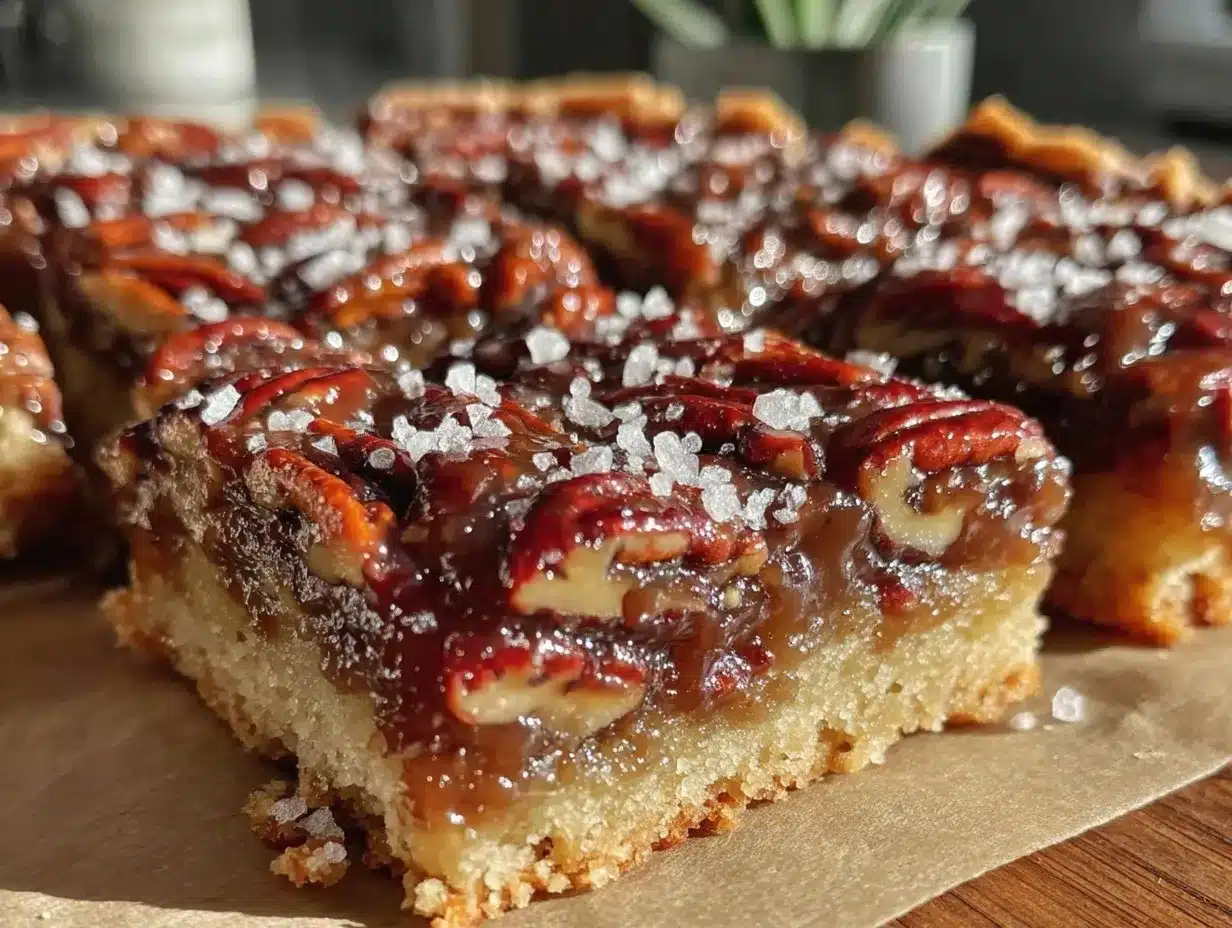
Salted Maple Pecan Pie Bars
These salted maple pecan pie bars combine a buttery shortbread crust with a gooey maple pecan filling, finished with a sprinkle of flaky sea salt. They’re an easy, crowd-pleasing Thanksgiving dessert that delivers all the comfort of classic pecan pie in a snackable bar form.
- Prep Time: 15 minutes
- Cook Time: 40 minutes
- Total Time: 2 hours 55 minutes
- Yield: 16 bars 1x
- Category: Dessert
- Cuisine: American
Ingredients
- 1 cup all-purpose flour
- 1/2 cup unsalted butter, softened
- 1/4 cup granulated sugar
- 1/4 teaspoon salt
- 2 large eggs, room temperature
- 3/4 cup pure maple syrup
- 1/2 cup brown sugar, packed
- 1/4 cup unsalted butter, melted
- 1 teaspoon vanilla extract
- 1/2 teaspoon salt
- 1 1/2 cups pecan halves, toasted
- Flaky sea salt, for sprinkling
Instructions
- Line an 8×8-inch baking pan with parchment paper, leaving an overhang for easy removal. Lightly butter the parchment if desired.
- In a medium bowl, combine flour, granulated sugar, and salt. Cut in softened butter using a pastry cutter or your fingers until the mixture resembles coarse crumbs. Press evenly into the prepared pan.
- Bake the crust at 350°F for 18-20 minutes, until lightly golden at the edges.
- While the crust bakes, toast pecan halves in a dry skillet over medium heat for 3-5 minutes, stirring often, until fragrant. Let cool, then chop roughly if preferred.
- In a large bowl, whisk together eggs, maple syrup, brown sugar, melted butter, vanilla extract, and salt until smooth.
- Stir in toasted pecans. Pour the filling evenly over the baked crust and use a spatula to spread pecans into an even layer.
- Return to oven and bake at 350°F for 22-28 minutes, until the filling is just set (center will jiggle slightly). If the top browns too quickly, tent loosely with foil for the last 10 minutes.
- Remove from oven and sprinkle with flaky sea salt while warm. Cool completely in the pan for about 2 hours.
- Use the parchment overhang to lift out bars. Slice into 16 squares. Wipe the knife between cuts for neat edges.
- Serve at room temperature. Store leftovers in an airtight container at room temperature for up to 3 days, or refrigerate for up to 5 days.
Notes
Toast pecans for best flavor. Use room temperature eggs for a smooth filling. Don’t overbake—the filling should jiggle slightly when done. For gluten-free, substitute a 1:1 gluten-free flour blend. For dairy-free, use plant-based butter. Chill bars before slicing for clean edges. Bars freeze well for up to 2 months.
Nutrition
- Serving Size: 1 bar (1/16 of recip
- Calories: 210
- Sugar: 14
- Sodium: 120
- Fat: 13
- Saturated Fat: 5
- Carbohydrates: 22
- Fiber: 1
- Protein: 2
Keywords: pecan pie bars, maple pecan bars, Thanksgiving dessert, easy dessert, salted maple bars, holiday baking, nut bars, shortbread crust, crowd-pleaser, potluck dessert


