
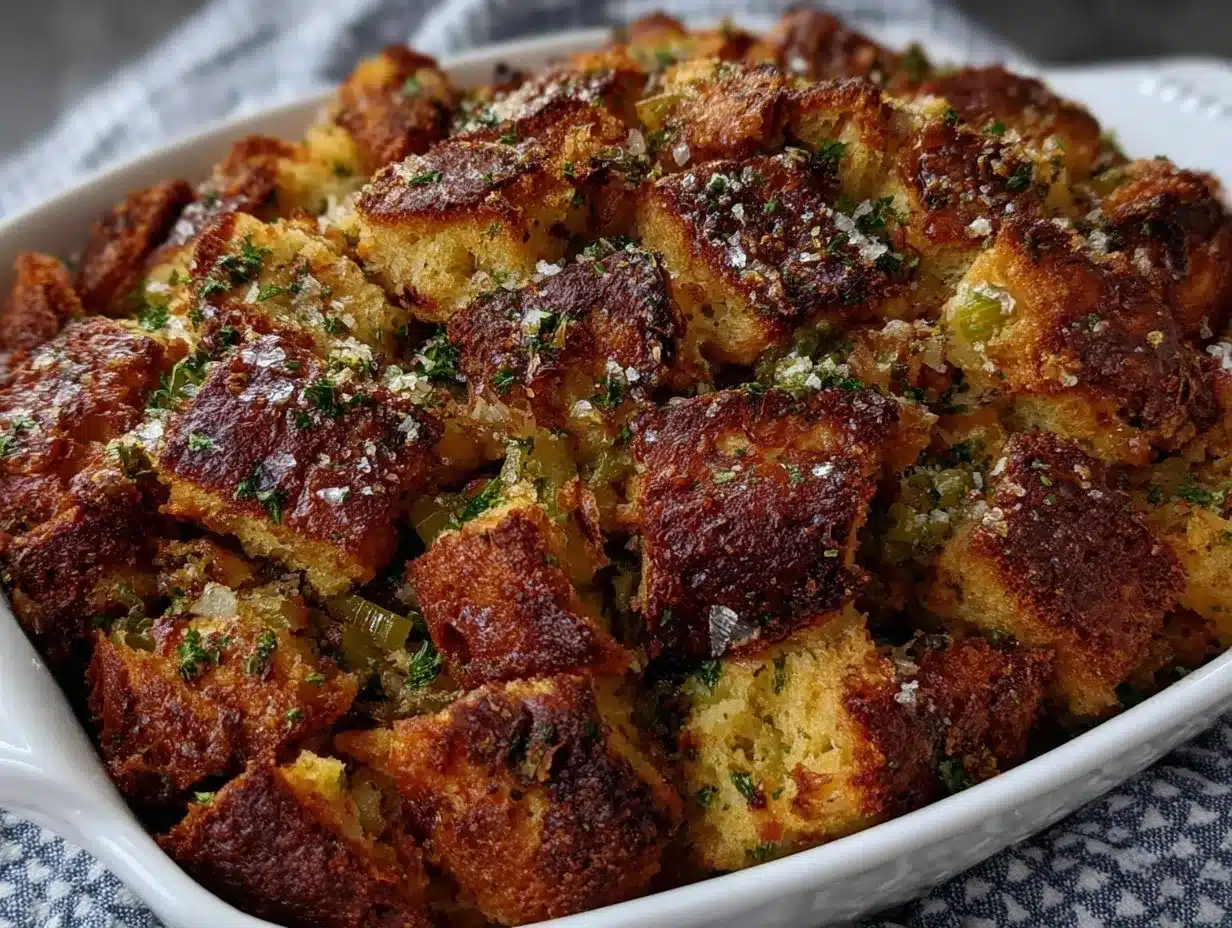
Let me tell you, when the scent of sautéed onions, fresh herbs, and toasted bread cubes starts swirling around my kitchen in late November, it’s impossible not to feel that classic Thanksgiving excitement. The savory Thanksgiving stuffing recipe I’m sharing today isn’t just a side dish—it’s the heart of the holiday table. Imagine every forkful: crispy, golden edges giving way to a soft, moist interior bursting with buttery flavor and that irresistible blend of sage, thyme, and celery. You know, it’s the kind of aroma that makes your stomach rumble and brings everyone running (even before the turkey’s carved!).
The first time I baked this savory Thanksgiving stuffing, I was instantly hooked. Picture this: I’m standing by the oven, peeking in with a mix of nerves and hope, and then—bam—the top goes gorgeously golden, and the scent is pure nostalgia. It was the kind of moment where you pause, take a deep breath, and just smile because you know you’re onto something truly special. This recipe reminds me of my grandma’s holiday table, where laughter mixed with the sound of forks clinking and stuffing always disappeared first. Back then, I was knee-high to a grasshopper and forever poking at the crusty bits on the edge of the pan (let’s face it, those are the best part!).
I actually stumbled on my best version of this stuffing after a rainy weekend spent trying to recreate the comfort foods I grew up with. Honestly, I wish I’d known this secret method years ago—it would’ve saved me so many soggy, bland attempts. My family couldn’t stop sneaking bites off the cooling rack (and I can’t really blame them). This stuffing is dangerously easy to make, providing pure, nostalgic comfort with every bite. It’s perfect for potlucks, a sweet treat for your kids, or to brighten up your Pinterest board with something that looks as good as it tastes.
After testing this savory Thanksgiving stuffing recipe more times than I care to admit (in the name of research, of course), it’s become a staple for family gatherings, gifting, and just about any occasion that calls for a warm hug from the oven. You’re going to want to bookmark this one—trust me.
Why You’ll Love This Savory Thanksgiving Stuffing Recipe
I’ve made a lot of stuffing in my years as a recipe developer, and this one stands out for all the right reasons. My kitchen has seen its fair share of trial-and-error, but this recipe passed every test—family dinners, potlucks with friends, and even picky eaters. Here’s why I know you’ll love it (and why I always end up with an empty dish at the end of Thanksgiving):
- Quick & Easy: Comes together in under an hour, so you won’t be stuck in the kitchen all day (perfect for busy holiday prep and last-minute cravings).
- Simple Ingredients: No fancy grocery trips required—most of these ingredients are pantry staples or already in your fridge.
- Perfect for Any Occasion: Whether it’s Thanksgiving, a cozy Sunday dinner, or a winter potluck, this stuffing fits right in.
- Crowd-Pleaser: Gets rave reviews from kids, adults, and even the “I don’t like stuffing” skeptics.
- Unbelievably Delicious: The combo of crispy top and moist center is next-level comfort food. The buttery flavor, crunchy edges, and fresh herbs make it totally irresistible.
So what sets this savory Thanksgiving stuffing recipe apart? Well, I use a few tricks: toasting the bread cubes for extra crunch, sautéing the veggies until just soft (but never mushy), and layering the herbs for a flavor that’s deep but never overpowering. It’s not just another stuffing—this is the best version I’ve ever tasted. I even threw in a splash of broth at the end for the perfect moist texture, and let’s be honest, it’s the kind that makes you close your eyes after the first bite.
This recipe brings together everything I love about comfort food—warmth, flavor, and that sense of home. It’s healthier, faster, and still delivers all the soul-soothing satisfaction of grandma’s original. You can impress your guests with zero stress or turn an everyday meal into something memorable. I trust this dish so much, I make it for every holiday (and sometimes just because I need a pick-me-up). Give it a try—you’ll see why it’s worth coming back to year after year.
What Ingredients You Will Need
This savory Thanksgiving stuffing recipe uses simple, wholesome ingredients to deliver bold flavor and a truly satisfying texture without any fuss. Most are pantry staples, and you can swap or adjust as needed. Here’s what you’ll need to make this magic happen:
- For the Bread Base:
- 1 pound (450g) rustic sourdough or country-style bread, cut into 3/4-inch (2cm) cubes (day-old bread works best for crispiness)
- Vegetables & Aromatics:
- 1 medium yellow onion, diced
- 3 celery stalks, diced
- 2 medium carrots, peeled and diced
- 2 cloves garlic, minced
- Herbs & Seasonings:
- 2 tablespoons fresh sage, chopped (or 2 teaspoons dried sage)
- 1 tablespoon fresh thyme leaves (or 1 teaspoon dried thyme)
- 2 tablespoons fresh parsley, chopped
- 1/2 teaspoon freshly ground black pepper
- 1 teaspoon kosher salt (adjust to taste)
- For Moisture & Flavor:
- 4 tablespoons (56g) unsalted butter, plus more for greasing the pan
- 2 cups (480ml) low-sodium chicken or vegetable broth (homemade is best, but store-bought works)
- 2 large eggs, lightly beaten (helps bind the stuffing, adds richness)
- Optional Add-Ins:
- 1 cup (150g) diced apples (for a sweet, tart twist)
- 1/2 cup (75g) dried cranberries or golden raisins
- 1 cup (120g) toasted pecans or walnuts
- 1/2 pound (225g) cooked sausage, crumbled (for a heartier version)
I usually stick with sourdough—it holds up beautifully and gets that lovely crunch. If you’re gluten-free, swap in your favorite GF bread (I like Canyon Bakehouse or Schär for texture). For a vegetarian version, stick with vegetable broth. Sage is the classic herb, but you can play around based on what’s fresh. And honestly, if you’re missing an ingredient, don’t panic—stuffing is forgiving and adapts well.
For the add-ins, apples and cranberries bring a hint of sweetness, while sausage or nuts add heft and depth. If you like a little heat, a pinch of crushed red pepper won’t hurt. Most of these ingredients are easy to find, and you can use up what’s already in your fridge (a true holiday miracle!).
Equipment Needed
You don’t need a fancy kitchen setup for this savory Thanksgiving stuffing recipe—just some reliable basics. Here’s what I always reach for:
- Large Mixing Bowl: Big enough to toss all the bread cubes and veggies.
- Chef’s Knife & Cutting Board: For dicing onions, celery, carrots—make sure your knife is sharp for easy prep.
- Large Skillet or Sauté Pan: For sautéing veggies and herbs (I love my old cast iron, but nonstick works too).
- Wooden Spoon or Silicone Spatula: For stirring and scraping up all those tasty browned bits.
- Measuring Cups & Spoons: For accurate broth and seasoning—don’t eyeball if you want consistent results!
- 9×13-inch (23x33cm) Baking Dish: Glass, ceramic, or metal pans work—just grease it well.
- Aluminum Foil: For covering during baking (helps keep the stuffing moist at first).
- Oven Mitts: Trust me, you’ll want these when it’s time for the crispy finish.
If you don’t have a big mixing bowl, use a stockpot. If your baking dish is smaller, split the stuffing between two pans for more crispy edges (a win-win). I’ve used everything from thrift store finds to hand-me-down pans—just make sure whatever you use is oven-safe and easy to clean. Maintenance tip: soak pans with stuck-on bits overnight; it saves your arms and sanity!
Budget-friendly gear works just fine here—no need for anything fancy or specialized. The only thing that really matters is that your equipment is sturdy enough to handle a holiday crowd. I’ve made this stuffing with a $2 wooden spoon and an old Pyrex dish, and it came out perfect every time.
Preparation Method
- Prep the Bread Cubes
- Preheat your oven to 350°F (175°C). Spread bread cubes in a single layer on a rimmed baking sheet.
- Toast in the oven for 15-20 minutes, stirring halfway, until golden and dry to the touch. Let cool slightly.
- Tip: Day-old bread works best, but you can toast fresh bread if needed. Bread should be crisp but not rock-hard.
- Sauté the Vegetables
- In a large skillet over medium heat, melt 4 tablespoons (56g) unsalted butter.
- Add diced onion, celery, and carrots. Cook, stirring often, for 8-10 minutes until veggies are soft and fragrant—but not brown.
- Stir in garlic, sage, thyme, parsley, salt, and pepper. Cook for another 2 minutes to bloom the herbs.
- Note: If veggies start sticking, add a splash of broth. The aroma here is amazing—don’t rush this step!
- Combine Bread and Veggies
- In your large mixing bowl, add toasted bread cubes. Pour sautéed veggies and melted butter over the top.
- Gently toss until bread is evenly coated with the veggie mix and herbs.
- Tip: Use hands or a big spoon—just be gentle to keep bread cubes intact.
- Add Moisture and Bind
- In a separate bowl, whisk together 2 cups (480ml) broth and 2 large eggs.
- Pour the mixture over the bread and veggie blend, tossing lightly until evenly soaked but not soggy.
- Warning: If mixture seems too wet, add a handful more bread cubes. If too dry, drizzle extra broth, 1/4 cup (60ml) at a time.
- Mix in Optional Add-Ins
- Fold in apples, cranberries, nuts, or sausage if using. Don’t overmix—just enough to distribute evenly.
- Tip: Taste for seasoning; add a pinch more salt or herbs if you like.
- Transfer & Bake
- Grease your 9×13-inch (23x33cm) baking dish with butter. Spoon stuffing mixture into the dish, pressing lightly to even out (but don’t pack it down hard).
- Cover tightly with aluminum foil and bake at 350°F (175°C) for 25 minutes.
- Remove foil and bake another 15-20 minutes until the top is golden and crispy.
- Tip: For extra crunch, broil the top for 2-3 minutes at the end, watching closely so it doesn’t burn.
- Rest & Serve
- Let stuffing cool for 5-10 minutes before serving. The texture should be moist inside and crisp on top.
- Note: If you like extra crispy edges, bake in two smaller dishes for more surface area.
I’ve learned that gentle tossing (not stirring like a madman) keeps the bread cubes fluffy and the veggies evenly distributed. If you find the stuffing is too wet, just pop it back in the oven uncovered for a few more minutes. And trust your nose—the scent will tell you when it’s ready!
Cooking Tips & Techniques
After years of stuffing experiments (and a few soggy disasters), I’ve picked up some tricks that really make a difference. Here are my best tips for stuffing success:
- Toast Bread, Don’t Just Dry: Toasting bread cubes in the oven—not just using stale bread—creates that crave-worthy crunch. I set a timer so I don’t forget and burn them (been there, done that).
- Sauté Veggies Until Soft, Not Mushy: The sweet spot is when onions turn translucent and carrots yield easily to a fork—too firm, and the stuffing feels chunky; too soft, and it turns mushy.
- Layer Herbs for Flavor: Add some fresh herbs with the veggies and sprinkle a little extra on top before baking. Dried herbs work in a pinch, but fresh really pop.
- Watch Your Moisture: The biggest mistake is over-wetting the bread. Start with less broth and add more as needed—stuffing should be damp, not soupy.
- Don’t Overmix: Gently fold everything together for the fluffiest texture. Packing it too tight in the pan makes it dense.
- Crispy Top Technique: Finish uncovered and, if you want extra crunch, broil for a couple of minutes. But don’t walk away—stuffing can go from golden to burnt in a blink.
- Timing & Multitasking: I sauté veggies while the bread toasts so everything’s ready at once. Prepping add-ins ahead (apples, nuts) saves time on the big day.
I’ve definitely had my stuffing go soggy from too much broth, and dry from too little. Now, I always check the mix before baking—if a bread cube squishes easily but holds its shape, you’re golden. For consistent results, use the same bread every time and measure your liquids. And don’t forget—stuffing is forgiving. If it’s not perfect, it’ll still taste amazing with gravy!
Variations & Adaptations
One of the best things about this savory Thanksgiving stuffing recipe is how customizable it is. Here are a few ways you can make it your own:
- Gluten-Free Stuffing: Swap in gluten-free bread. I love using Schär multigrain—it gets nice and crisp without turning to mush.
- Vegetarian & Vegan: Use vegetable broth and vegan butter. Skip the eggs and add a splash more broth for moisture—flaxseed meal mixed with water works as a binder if needed.
- Seasonal Flavors: Add roasted squash or sweet potatoes for autumn sweetness, or mix in chestnuts for a wintry touch.
- Flavor Boosters: Try mixing in sautéed mushrooms, leeks, or fennel for extra depth. A dash of smoked paprika gives a subtle warmth.
- Cooking Methods: Bake in muffin tins for single-serve stuffing “cups” or use a slow cooker for a hands-off version (add 1/4 cup extra broth and stir once halfway through).
For allergies, skip the nuts and double-check your bread ingredients. My personal favorite adaptation? I add diced Granny Smith apples and toasted pecans for a sweet-savory combo that gets raves. You can adjust the herbs to your taste—more sage for a classic vibe, or rosemary for a woodsy twist. Don’t be afraid to mix and match—stuffing is all about comfort and creativity!
Serving & Storage Suggestions
This stuffing is best served warm, straight from the oven, with those crispy edges on full display. Here are my tried-and-true tips for serving and storing:
- Serving: Serve stuffing in a pretty baking dish or mound onto a serving platter. Garnish with fresh parsley or thyme sprigs for a festive look.
- Pairings: Perfect alongside turkey, roast chicken, gravy, mashed potatoes, or even as a vegetarian main with a mushroom sauce. For drinks, I like a glass of crisp apple cider or a light pinot noir.
- Storage: Cool leftovers completely, then transfer to an airtight container. Refrigerate for up to 4 days. For longer storage, wrap tightly and freeze up to 1 month.
- Reheating: Warm in a 350°F (175°C) oven, covered with foil for 15 minutes, then uncover for another 5 to crisp the top. Microwave in single servings, but the oven keeps it crispy.
- Flavor Development: Flavors deepen over a day or two—leftover stuffing is amazing in breakfast hash or stuffed peppers.
If your stuffing dries out in the fridge, just add a splash of broth before reheating. Honestly, it’s almost better the next day—my family fights over the leftovers for sandwiches and snacks. Don’t be afraid to get creative with how you serve it!
Nutritional Information & Benefits
This savory Thanksgiving stuffing recipe is a balanced mix of carbs, veggies, and herbs. Here’s a rough breakdown per serving (based on 8 servings):
- Calories: ~210
- Fat: 7g
- Protein: 6g
- Carbohydrates: 30g
- Fiber: 3g
- Sodium: 370mg
Key health benefits come from the veggies and herbs—onions and celery provide antioxidants, sage and thyme support immune health, and using whole-grain bread adds fiber. You can make it lower-carb by choosing a low-carb bread or lighter by reducing butter. For gluten-free diets, swap in GF bread. Note: contains gluten, eggs, and potentially nuts if you add them—always check for allergens!
Personally, I find this stuffing to be a satisfying, wholesome side that actually sneaks in a decent serving of veggies. It’s comfort food with a little wellness boost—especially if you load it up with extra carrots and apples. Moderation is key, but honestly, on Thanksgiving, I let myself enjoy every bite!
Conclusion
If you’re searching for the ultimate savory Thanksgiving stuffing recipe that’s both moist and crispy, this one should be at the top of your list. It’s easy, forgiving, and packed with nostalgic flavor—perfect for making memories around the holiday table. Customize it to your taste, use what you have, and don’t stress about perfection (the crispy bits are always a win, anyway).
I love this recipe because it brings my family together with every bite—it’s tradition, comfort, and celebration rolled into one. Try it this year, and let me know how you make it your own. Drop a comment below with your favorite stuffing add-ins, share your photos, or tell me your holiday kitchen stories! I hope this stuffing brings warmth and happiness to your table—here’s to good food, good company, and plenty of second helpings.
FAQs
Can I make savory Thanksgiving stuffing ahead of time?
Yes! You can assemble everything up to a day ahead, cover tightly, and refrigerate. Bake just before serving for the crispiest texture.
What bread works best for stuffing?
Rustic sourdough or country-style bread is ideal for the crispy, moist combo. Day-old bread makes the best texture, but you can toast fresh bread if needed.
How do I keep stuffing from getting soggy?
Use less broth at first and add more as needed. Toast the bread well and don’t overmix. Bake uncovered at the end for a crisp top!
Can I make this recipe gluten-free?
Absolutely—just swap in your favorite gluten-free bread and double-check all ingredients for allergens.
What’s the best way to reheat leftovers?
Reheat in the oven at 350°F (175°C), covered for moisture, then uncovered for crispiness. Add a splash of broth if the stuffing seems dry.
Pin This Recipe!
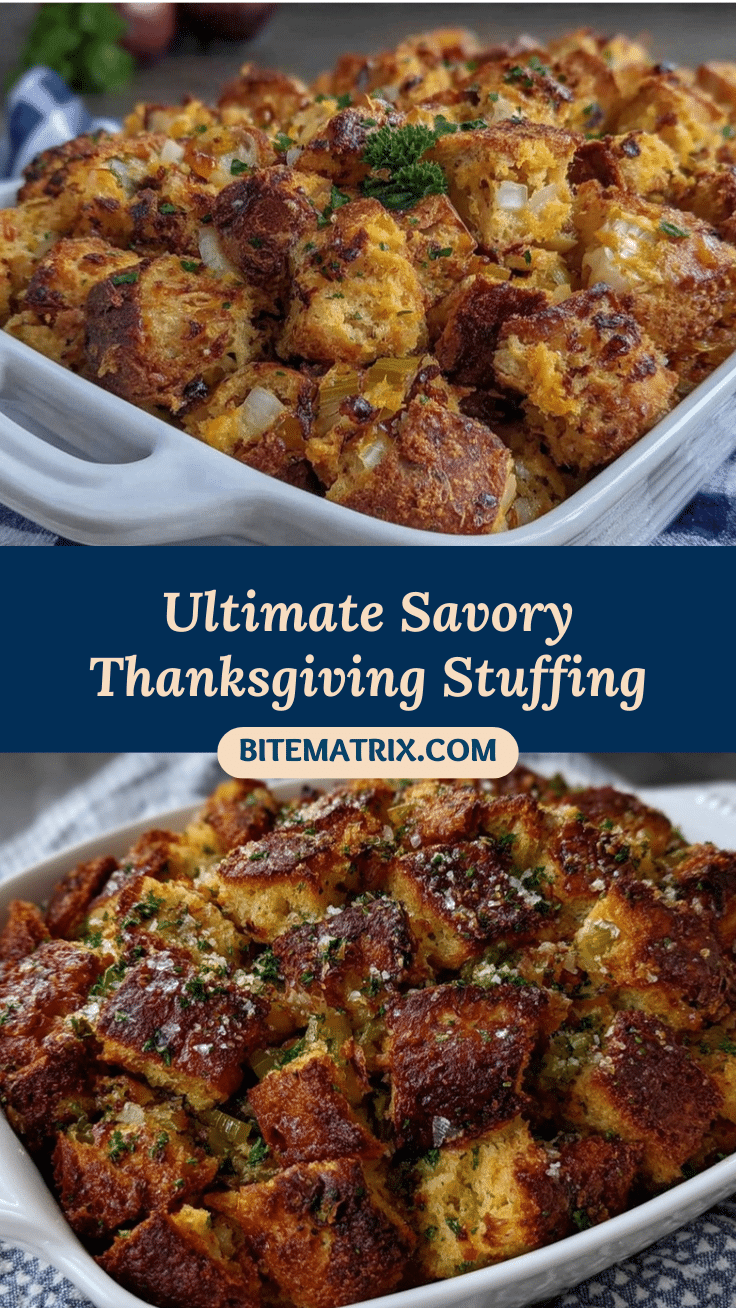
Savory Thanksgiving Stuffing Recipe: Easy Moist & Crispy Side Dish

This savory Thanksgiving stuffing features crispy, golden edges and a moist, buttery interior packed with fresh herbs, sautéed vegetables, and toasted bread cubes. It’s a nostalgic, crowd-pleasing side dish perfect for holiday gatherings and adaptable to suit any taste.
- Prep Time: 20 minutes
- Cook Time: 40 minutes
- Total Time: 1 hour
- Yield: 8 servings 1x
- Category: Side Dish
- Cuisine: American
Ingredients
- 1 pound rustic sourdough or country-style bread, cut into 3/4-inch cubes (about 10 cups, day-old preferred)
- 1 medium yellow onion, diced
- 3 celery stalks, diced
- 2 medium carrots, peeled and diced
- 2 cloves garlic, minced
- 2 tablespoons fresh sage, chopped (or 2 teaspoons dried sage)
- 1 tablespoon fresh thyme leaves (or 1 teaspoon dried thyme)
- 2 tablespoons fresh parsley, chopped
- 1/2 teaspoon freshly ground black pepper
- 1 teaspoon kosher salt (adjust to taste)
- 4 tablespoons unsalted butter, plus more for greasing pan
- 2 cups low-sodium chicken or vegetable broth
- 2 large eggs, lightly beaten
- Optional: 1 cup diced apples
- Optional: 1/2 cup dried cranberries or golden raisins
- Optional: 1 cup toasted pecans or walnuts
- Optional: 1/2 pound cooked sausage, crumbled
Instructions
- Preheat oven to 350°F (175°C). Spread bread cubes on a rimmed baking sheet and toast for 15-20 minutes, stirring halfway, until golden and dry. Let cool slightly.
- In a large skillet over medium heat, melt 4 tablespoons butter. Add onion, celery, and carrots; cook for 8-10 minutes until soft and fragrant but not browned.
- Stir in garlic, sage, thyme, parsley, salt, and pepper. Cook for 2 more minutes.
- In a large mixing bowl, combine toasted bread cubes and sautéed vegetables. Toss gently to coat.
- In a separate bowl, whisk together broth and eggs. Pour over bread mixture, tossing lightly until evenly soaked but not soggy.
- Fold in optional add-ins (apples, cranberries, nuts, sausage) if using. Taste and adjust seasoning.
- Grease a 9×13-inch baking dish with butter. Spoon stuffing mixture into dish, pressing lightly to even out.
- Cover tightly with aluminum foil and bake for 25 minutes.
- Remove foil and bake another 15-20 minutes until top is golden and crispy. For extra crunch, broil for 2-3 minutes at the end, watching closely.
- Let stuffing cool for 5-10 minutes before serving.
Notes
Day-old bread works best for crispiness. Toast bread cubes for extra crunch. Sauté veggies until just soft, not mushy. Adjust broth for desired moisture—stuffing should be damp, not soupy. For gluten-free, use GF bread. For vegan, use vegan butter and skip eggs (add extra broth or flaxseed meal as binder). Bake in two smaller dishes for more crispy edges. Leftovers can be refrigerated up to 4 days or frozen for 1 month.
Nutrition
- Serving Size: About 1 cup per serv
- Calories: 210
- Sugar: 4
- Sodium: 370
- Fat: 7
- Saturated Fat: 4
- Carbohydrates: 30
- Fiber: 3
- Protein: 6
Keywords: Thanksgiving stuffing, savory stuffing, holiday side dish, crispy stuffing, moist stuffing, easy stuffing recipe, bread stuffing, classic stuffing, vegetarian stuffing, gluten-free stuffing


