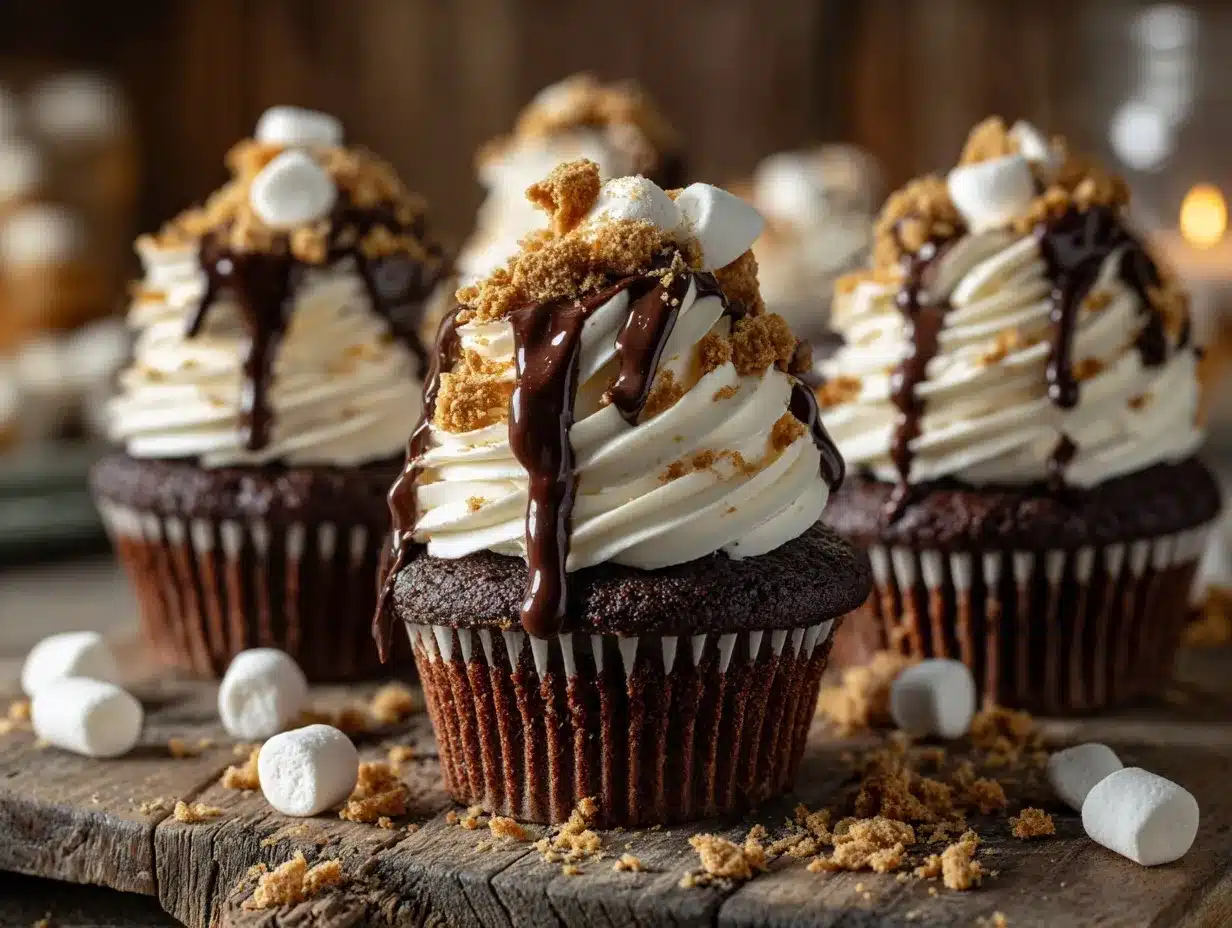
The scent of toasted marshmallows, gooey chocolate, and graham crackers always takes me straight back to summer nights around a crackling campfire. But let’s be honest—sometimes you just want that classic combo without the smoke in your hair or the hassle of hunting for the perfect stick. That’s exactly how my irresistible s’more cupcakes came to life! I wanted all the magic of a campfire s’more, but tucked inside the best homemade chocolate cupcake you’ve ever had. If you love decadent, chocolatey desserts and crave a playful twist on tradition, this s’more cupcakes recipe is about to become your new favorite.
I first baked these s’more cupcakes for a backyard birthday party, and everyone—from picky kids to dessert-loving adults—was obsessed at first bite. There’s something about the combination of a fudgy chocolate base, crunchy graham cracker crust, and swirled, lightly toasted marshmallow frosting that’s just plain fun. As someone who’s tested dozens of cupcake recipes (and eaten way too many s’mores in my life), I can honestly say these always get rave reviews. They’re rich, nostalgic, and just a little bit over-the-top in the best possible way.
Whether you’re planning a party, looking for a creative chocolate dessert idea, or just want to bring some campfire vibes into your kitchen, these s’more cupcakes deliver every single time. Plus, you don’t need a campfire or any fancy equipment—just your oven, a muffin pan, and a little bit of kitchen curiosity. Let’s get baking, because trust me, you’re going to want more than one of these irresistible s’more cupcakes!
Why You’ll Love This S’more Cupcakes Recipe
- Quick & Easy: Whip up these s’more cupcakes in just about an hour—no complicated steps, no waiting for dough to chill, and no campfire required. Perfect for busy days or last-minute gatherings.
- Simple Ingredients: Everything you need is right in your pantry—think cocoa powder, chocolate chips, graham crackers, and marshmallows. No oddball ingredients or expensive specialty items.
- Perfect for Any Occasion: I’ve brought these to birthday parties, weekend BBQs, and holiday potlucks, and they always disappear first. They’re fun and festive for kids, but rich and chocolatey enough for grown-ups.
- Crowd-Pleaser: The first time I made these, my neighbor asked for the recipe before she’d even finished her cupcake. Kids love the gooey marshmallow, and adults love the nostalgia.
- Unbelievably Delicious: We’re talking ultra-moist chocolate cupcakes with a buttery graham cracker base, stuffed with melty chocolate, and topped with a swirl of real toasted marshmallow. It’s the s’more, but leveled up!
What really sets this s’more cupcakes recipe apart is the layering. Instead of just mixing everything together, you get a real graham cracker crust, a soft, rich chocolate cake, and a marshmallowy topping that’s actually toasted. The contrast of textures—crunchy, fudgy, gooey—makes every bite exciting. And if you’ve ever struggled with runny frosting or dry cupcakes, I’ve got you covered. I’ve tested this recipe more times than I can count (even on rainy days when the marshmallows refused to brown), and it’s foolproof. These cupcakes aren’t just good—they’re the kind that make you close your eyes and smile after the first bite.
Whether you want to impress guests or just treat yourself at the end of a long week, this chocolate dessert idea is as easy as it is unforgettable. Trust me, one batch won’t be enough!
What Ingredients You Will Need for S’more Cupcakes
This s’more cupcakes recipe uses classic, easy-to-find ingredients that deliver bold chocolate flavor and that signature campfire vibe. Here’s what you’ll need:
- For the Graham Cracker Crust:
- 1 1/4 cups (125g) graham cracker crumbs (about 10 full sheets, finely crushed)
- 2 tablespoons (25g) granulated sugar
- 5 tablespoons (70g) unsalted butter, melted (adds that rich, toasty base)
- Pinch of salt (balances the sweetness)
- For the Chocolate Cupcake Batter:
- 3/4 cup (95g) all-purpose flour
- 1/2 cup (40g) unsweetened cocoa powder (I like Dutch-processed for deeper flavor)
- 1 cup (200g) granulated sugar
- 1/2 teaspoon baking soda
- 1/4 teaspoon baking powder
- 1/4 teaspoon salt
- 2 large eggs, room temperature
- 1/2 cup (120ml) buttermilk (or 1/2 cup milk + 1/2 tablespoon vinegar, let sit 5 min)
- 1/2 cup (120ml) vegetable oil (keeps cupcakes moist)
- 1 teaspoon vanilla extract
- 1/2 cup (120ml) hot water or hot coffee (coffee deepens chocolate flavor—highly recommend!)
- 1/2 cup (85g) mini chocolate chips (optional, but makes them extra gooey)
- For the Marshmallow Topping:
- 1 1/2 cups (180g) mini marshmallows or 12 large marshmallows (for topping each cupcake)
- Optional: 1/2 cup (115g) marshmallow creme or fluff (for extra gooeyness, but not required)
- For Decoration (Optional):
- Extra graham cracker crumbs (for sprinkling)
- Chocolate squares (think Hershey’s, for that classic s’more look)
- Mini chocolate chips or melted chocolate drizzle
Ingredient Tips:
For the best graham crust, I use Honey Maid graham crackers, but any brand works fine. If you’re gluten-free, swap in gluten-free graham crackers (they toast up just as well). You can use coconut oil instead of butter for a dairy-free option. And if you don’t have buttermilk, the milk + vinegar hack works every time.
Substitutions:
No eggs? Use flax eggs (1 tablespoon ground flax + 3 tablespoons water per egg). For a vegan version, use plant-based milk and marshmallows. Honestly, these cupcakes are super forgiving—just don’t skimp on the chocolate!
Equipment Needed for S’more Cupcakes
- Muffin or Cupcake Pan (12-cup): Standard size works best. I’ve used both nonstick and regular pans—just line with cupcake liners for easy removal.
- Cupcake Liners: Paper or silicone liners keep cupcakes from sticking and make cleanup a breeze. I like parchment or greaseproof for easy peeling.
- Mixing Bowls: At least two—one for the crust, one for the batter. Glass bowls are my go-to since they don’t stain.
- Hand Mixer or Stand Mixer: A whisk works if you’ve got strong arms, but electric mixers make things faster and fluffier.
- Measuring Cups and Spoons: For accuracy, especially with baking. I swear by my stainless steel set—never let me down.
- Rubber Spatula: For scraping the last bit of chocolatey batter from the bowl (never waste chocolate, right?).
- Ice Cream Scoop or Spoon: Makes dividing the batter super easy and mess-free.
- Baking Sheet (optional): Placing the cupcake pan on a baking sheet helps prevent accidental spills in the oven, especially when toasting marshmallows.
- Kitchen Torch (optional): For that perfect toasted marshmallow top. If you don’t have one, your broiler works, but watch closely—marshmallows go from golden to black in seconds (trust me, I’ve learned the hard way!).
Budget tip: No fancy torch? The broiler is your friend. And if you’re like me and have lost cupcake liners in the pantry, just grease the pan well—they’ll still taste amazing.
How to Make S’more Cupcakes: Step-by-Step
-
Preheat & Prep:
Preheat your oven to 350°F (175°C). Line a 12-cup muffin pan with cupcake liners. Set aside. This step keeps things moving—never underestimate the power of a ready oven. -
Make the Graham Cracker Crust:
Combine 1 1/4 cups (125g) graham cracker crumbs, 2 tablespoons (25g) sugar, a pinch of salt, and 5 tablespoons (70g) melted butter in a medium bowl. Mix until the crumbs are evenly coated and look like wet sand. Spoon about 1 tablespoon into each cupcake liner, pressing down firmly with the back of a spoon or a small glass. You want a compact base, so it doesn’t crumble when you bite in. Bake crusts for 5 minutes, then let cool while you prep the batter. -
Prepare the Chocolate Cupcake Batter:
In a large bowl, sift together 3/4 cup (95g) flour, 1/2 cup (40g) cocoa powder, 1 cup (200g) sugar, 1/2 teaspoon baking soda, 1/4 teaspoon baking powder, and 1/4 teaspoon salt. In a separate bowl, whisk 2 eggs, 1/2 cup (120ml) buttermilk, 1/2 cup (120ml) oil, and 1 teaspoon vanilla. Pour the wet ingredients into the dry, stirring until just combined—don’t overmix, or the cupcakes might turn out dense. -
Add Hot Water or Coffee:
Slowly pour in 1/2 cup (120ml) hot water or coffee, stirring gently. The batter will be quite runny—this is what makes the cupcakes extra moist. Fold in 1/2 cup (85g) mini chocolate chips if using. -
Fill the Cupcake Liners:
Divide the batter evenly over the cooled graham crusts, filling each about 2/3 full (roughly 3 tablespoons per cupcake). Don’t overfill—these rise nicely. Tap the pan gently on the counter to release air bubbles. -
Bake:
Bake for 18-22 minutes, or until a toothpick inserted in the center comes out clean (a few moist crumbs are okay). If your oven runs hot, check at 16 minutes. Overbaking dries them out, so keep an eye on them. -
Cool Completely:
Let cupcakes cool in the pan for 5 minutes, then transfer to a wire rack to cool fully. If you top with marshmallows too soon, they’ll melt right off. -
Add Marshmallow Topping:
Once cool, top each cupcake with a handful of mini marshmallows or one large marshmallow. For extra gooeyness, spoon a bit of marshmallow creme underneath. -
Toast the Marshmallows:
Use a kitchen torch to toast the tops until golden and bubbly. If using your oven broiler, set cupcakes on a baking sheet and broil on high for 1-2 minutes—stand by and watch closely! Marshmallows burn fast, and you want a golden top, not a charcoal mess (speaking from experience). -
Decorate and Serve:
Sprinkle with extra graham crumbs, add a chocolate square, or drizzle with melted chocolate for a bakery-worthy finish. Let cool a couple minutes before eating—those marshmallows are lava hot at first!
Troubleshooting Tips:
If your cupcakes sink in the middle, they may have been underbaked or overmixed—try reducing oven temp slightly or mixing less. If marshmallows slide off, let the cupcakes cool more before topping.
Sensory Cue:
The cupcakes should feel springy to the touch and smell deeply chocolatey with toasty, sweet marshmallow on top—kind of like a campfire in your kitchen!
Cooking Tips & Techniques for Perfect S’more Cupcakes
- Don’t Overmix the Batter: Stir just until combined—overmixing leads to dense cupcakes. I learned this the hard way after my first batch turned out chewy instead of fluffy.
- Use Hot Liquid: Adding hot water or coffee “blooms” the cocoa powder, making the chocolate flavor richer. I always use coffee for extra depth, but water works fine.
- Press the Graham Crust Firmly: If it’s too loose, the crust will crumble when you peel the wrapper. I use a shot glass to pack it down.
- Keep an Eye on the Marshmallows: Whether you use a torch or broiler, marshmallows burn in seconds. Don’t walk away—trust me, I’ve turned more than one batch into s’more “ashcakes.”
- Let Cupcakes Cool Before Topping: If the cupcakes are even a little warm, the marshmallow will melt and slide off. Patience pays off (even if it’s hard to wait!).
- Multitasking: While the cupcakes bake, clean up your workspace or prep the toppings. This keeps things moving and makes it feel less like a marathon.
- Consistency: Always use the same scoop for batter to keep cupcakes even in size—this way, they bake at the same rate.
Lesson Learned: Once, I tried to rush the process and topped warm cupcakes—marshmallows everywhere! Now I always make sure they’re completely cool, and I use the broiler with the oven door cracked open so I can watch every second.
Variations & Adaptations for S’more Cupcakes
- Gluten-Free S’more Cupcakes: Swap in gluten-free graham crackers and a 1:1 gluten-free flour blend. I’ve made these for a friend with celiac and they were a huge hit!
- Peanut Butter S’more Cupcakes: Add a tablespoon of creamy peanut butter to the chocolate batter, or swirl some on top before baking. The combo is unreal.
- Vegan S’more Cupcakes: Use plant-based milk and egg substitute (like flax eggs), dairy-free chocolate, and vegan marshmallows. The cupcakes stay rich and fudgy—no one notices the difference.
- Seasonal Twist: In the fall, add a pinch of cinnamon to the crust or batter. For summer, mix in some mini freeze-dried strawberries for a fruity twist.
- Different Cooking Methods: No oven? Try baking the cupcakes in an air fryer (at 320°F/160°C for about 10-12 minutes, checking halfway through).
- Personal Spin: Sometimes I stuff a small square of chocolate inside the batter before baking for a melty surprise. Honestly, it’s the extra chocolate that makes these over-the-top good.
Allergen Note: For nut allergies, skip any nut-based variations and double-check marshmallow brands for cross-contamination.
Serving & Storage Suggestions
These s’more cupcakes are best enjoyed slightly warm, when the marshmallow is gooey and the chocolate is soft. I love serving them on a rustic wooden board with extra crushed graham crackers and a sprinkle of mini chocolate chips—it just looks so inviting!
- Serving Temperature: Serve at room temp or slightly warmed in the microwave (about 7-10 seconds—just enough to soften the marshmallow and chocolate).
- Pairings: Enjoy with a cold glass of milk, a mug of hot cocoa, or even a cup of coffee for a grown-up treat.
- Storage: Store cupcakes in an airtight container at room temp for up to 2 days. For longer storage, refrigerate up to 4 days—just let them come to room temp before eating.
- Freezing: Freeze unfrosted cupcakes for up to 2 months, thaw overnight, then top with marshmallows and toast before serving.
- Flavor Development: The chocolate flavor deepens after a day, so if you can resist, they’re even better on day two.
Reheating Tip: Pop in the microwave for just a few seconds—watch the marshmallow puff up!
Nutritional Information & Benefits
Each s’more cupcake has about 250-300 calories, 14g fat, 35g carbs, and 3g protein (based on standard ingredients). The real star here is the flavor, but you also get a nice dose of calcium from the marshmallows and a little iron from the cocoa powder.
- Healthier Swaps: Use whole wheat flour for extra fiber, or coconut sugar for a lower glycemic option. Dairy-free and gluten-free versions are easy with the right substitutions.
- Allergens: Contains wheat, dairy, eggs, and may contain soy (check your chocolate chips). There are easy swaps for most dietary needs.
- Personal Wellness Note: I love that you can make these fit your lifestyle—sometimes a little chocolate indulgence is just what the week needs!
Conclusion: Why You Need to Try These S’more Cupcakes
If you’re still on the fence, let me just say—these s’more cupcakes are pure joy in a wrapper. They’re the perfect mix of childhood nostalgia and grown-up chocolate decadence, and honestly, they never fail to make me smile. Whether you’re baking for a crowd or just treating yourself, you’ll love how easy and impressive they are.
Don’t be afraid to put your own spin on this s’more cupcakes recipe—try a new topping, play with the crust, or make them mini for a party. It’s a recipe that’s meant to be shared, tweaked, and enjoyed, no matter how you like your s’mores.
If you give these s’more cupcakes a try, I’d love to hear how they turned out for you! Drop a comment below with your favorite variation, or share your creation on Pinterest or Instagram and tag me so I can see your masterpiece. Happy baking, and may all your cupcakes be gooey, chocolatey, and delicious!
Frequently Asked Questions about S’more Cupcakes
Can I make s’more cupcakes ahead of time?
Yes! Bake the cupcakes and store them (unfrosted) in an airtight container for up to 2 days. Add the marshmallow topping and toast just before serving for the best texture.
How do I toast marshmallows without a kitchen torch?
Use your oven’s broiler. Place the cupcakes on a baking sheet and broil on high for 1-2 minutes, watching closely so the marshmallows don’t burn.
Can I make these cupcakes gluten-free?
Absolutely! Just use gluten-free graham crackers and swap in a 1:1 gluten-free flour blend for the cupcake batter.
What’s the best way to store leftover s’more cupcakes?
Store in an airtight container at room temp for up to 2 days, or in the fridge for up to 4 days. Reheat in the microwave for a few seconds to refresh the marshmallow.
Can I freeze s’more cupcakes?
Yes, but freeze them without the marshmallow topping. Thaw, then add and toast the marshmallows just before serving for the best results.
Pin This Recipe!
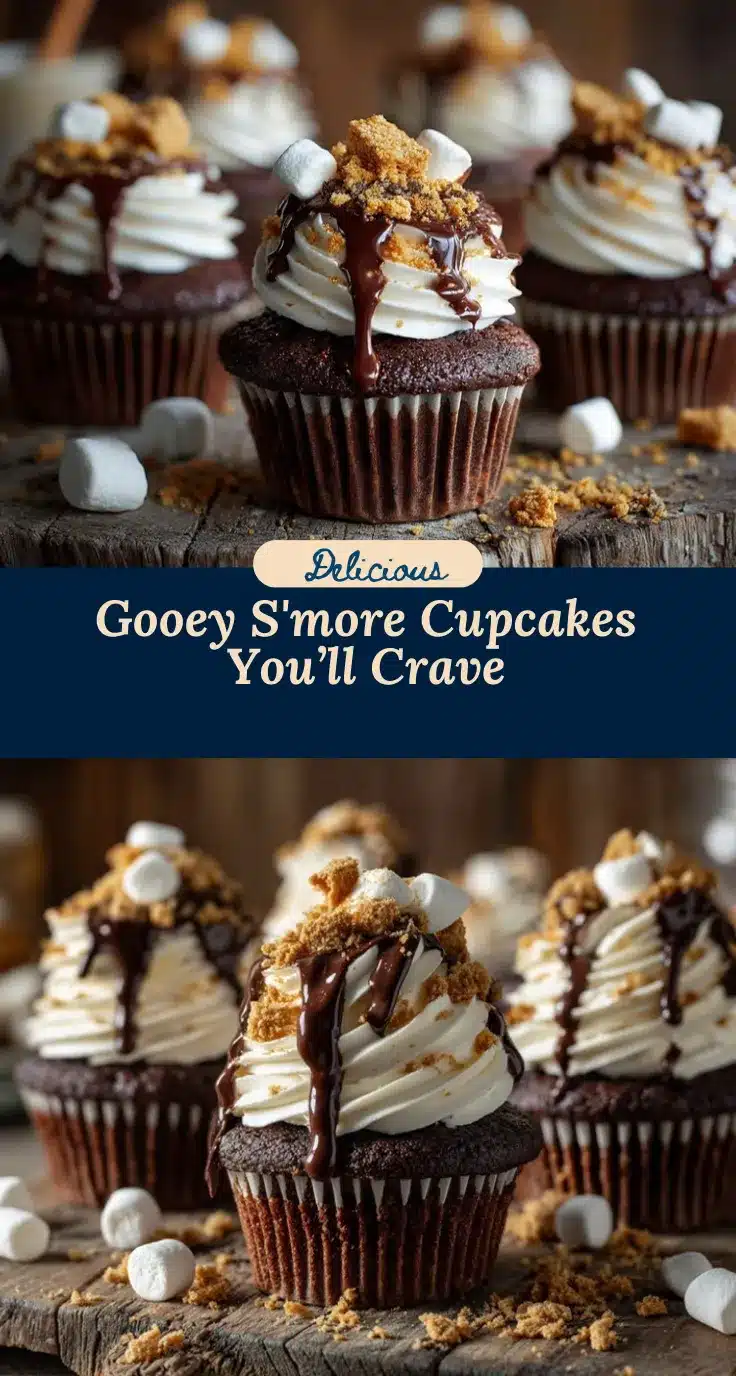
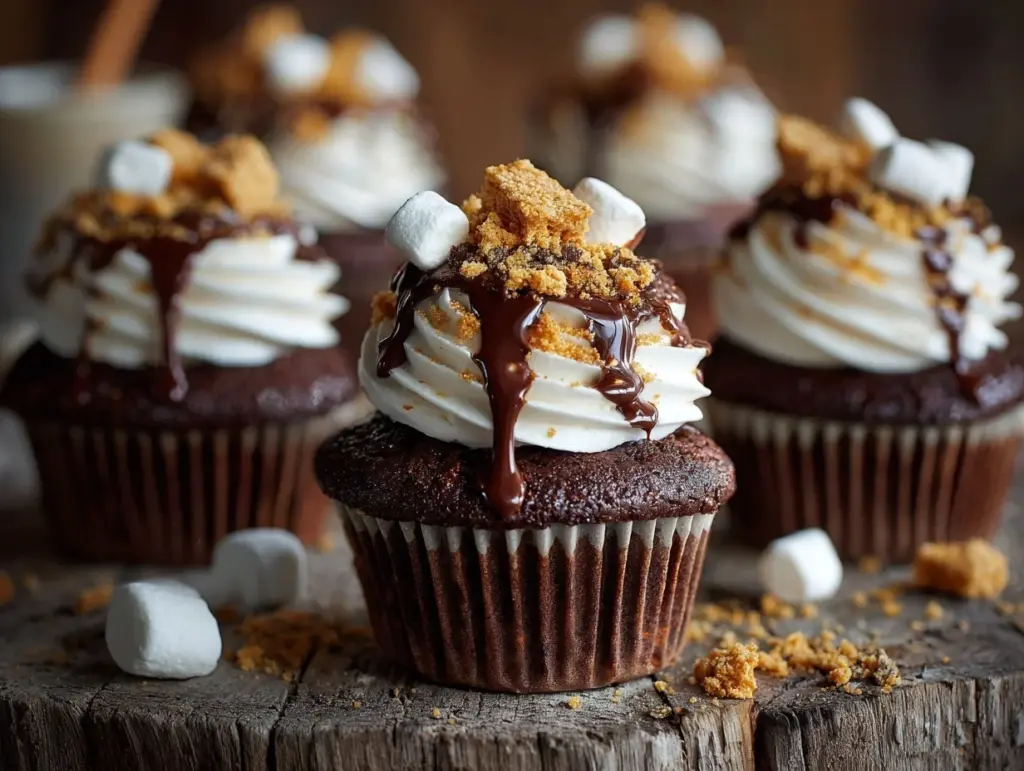
S’more Cupcakes

These irresistible s’more cupcakes combine a buttery graham cracker crust, ultra-moist chocolate cake, and gooey toasted marshmallow topping for a decadent, nostalgic treat. Perfect for parties or whenever you crave classic campfire flavors—no campfire required!
- Prep Time: 20 minutes
- Cook Time: 22 minutes
- Total Time: 1 hour
- Yield: 12 cupcakes 1x
- Category: Dessert
- Cuisine: American
Ingredients
- 1 1/4 cups graham cracker crumbs (about 10 full sheets, finely crushed)
- 2 tablespoons granulated sugar
- 5 tablespoons unsalted butter, melted
- Pinch of salt
- 3/4 cup all-purpose flour
- 1/2 cup unsweetened cocoa powder (Dutch-processed preferred)
- 1 cup granulated sugar
- 1/2 teaspoon baking soda
- 1/4 teaspoon baking powder
- 1/4 teaspoon salt
- 2 large eggs, room temperature
- 1/2 cup buttermilk (or 1/2 cup milk + 1/2 tablespoon vinegar, let sit 5 min)
- 1/2 cup vegetable oil
- 1 teaspoon vanilla extract
- 1/2 cup hot water or hot coffee
- 1/2 cup mini chocolate chips (optional)
- 1 1/2 cups mini marshmallows or 12 large marshmallows (for topping each cupcake)
- Optional: 1/2 cup marshmallow creme or fluff
- Extra graham cracker crumbs (for sprinkling, optional)
- Chocolate squares (for topping, optional)
- Mini chocolate chips or melted chocolate drizzle (optional)
Instructions
- Preheat your oven to 350°F (175°C). Line a 12-cup muffin pan with cupcake liners.
- Combine graham cracker crumbs, sugar, pinch of salt, and melted butter in a medium bowl. Mix until the crumbs are evenly coated and resemble wet sand.
- Spoon about 1 tablespoon of the graham mixture into each cupcake liner and press down firmly. Bake crusts for 5 minutes, then let cool.
- In a large bowl, sift together flour, cocoa powder, sugar, baking soda, baking powder, and salt.
- In a separate bowl, whisk eggs, buttermilk, oil, and vanilla extract.
- Pour wet ingredients into dry ingredients and stir until just combined.
- Slowly add hot water or coffee, stirring gently. Batter will be runny. Fold in mini chocolate chips if using.
- Divide batter evenly over the cooled graham crusts, filling each about 2/3 full.
- Bake for 18-22 minutes, or until a toothpick inserted in the center comes out clean. Let cupcakes cool in the pan for 5 minutes, then transfer to a wire rack to cool completely.
- Once cool, top each cupcake with mini marshmallows or one large marshmallow. For extra gooeyness, add a bit of marshmallow creme underneath.
- Toast marshmallows using a kitchen torch or under the oven broiler for 1-2 minutes, watching closely.
- Decorate with extra graham cracker crumbs, chocolate squares, or a drizzle of melted chocolate as desired. Let cool slightly before serving.
Notes
For best results, let cupcakes cool completely before adding marshmallow topping to prevent melting. Use coffee instead of water for deeper chocolate flavor. Watch marshmallows closely when toasting—they burn quickly! For gluten-free, use gluten-free graham crackers and flour. Store unfrosted cupcakes in an airtight container for up to 2 days; add and toast marshmallows just before serving.
Nutrition
- Serving Size: 1 cupcake
- Calories: 275
- Sugar: 22
- Sodium: 180
- Fat: 14
- Saturated Fat: 6
- Carbohydrates: 35
- Fiber: 2
- Protein: 3
Keywords: s'more cupcakes, chocolate cupcakes, marshmallow dessert, graham cracker crust, easy cupcake recipe, campfire dessert, homemade cupcakes, summer dessert, party dessert, kid-friendly dessert