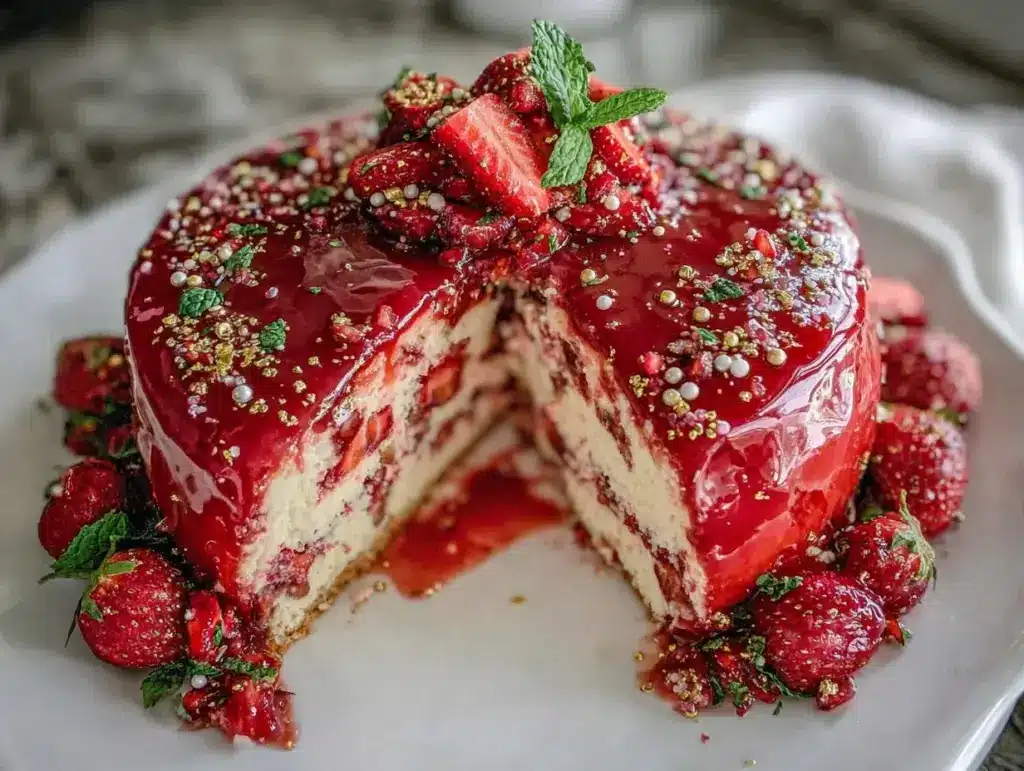
Picture this: the sweet fragrance of fresh strawberries swirling with creamy vanilla in the air, the glossy pink glaze gleaming under the kitchen lights, making you stop and stare for a moment. The first time I pulled my Strawberry Mirror Glaze Cake with Vanilla Sponge & Mousse from the fridge, I was completely enchanted. That mirror-like finish—so shiny you could almost see your reflection—felt like something straight out of a pastry chef’s window, but right there in my own cozy kitchen.
Back when I was knee-high to a grasshopper, birthdays meant two things: strawberry desserts and my grandma’s perfect vanilla sponge. So, years later, on a rainy Saturday (with the family begging for something special), I decided to combine those childhood favorites into one show-stopping treat: a Strawberry Mirror Glaze Cake that’s as fun to make as it is to eat. Honestly, the first slice was one of those “deep breath and smile” moments—you just know you’ve struck gold. The cake is light, creamy, and delightfully sweet, with a mousse that melts on your tongue and a glaze that’s almost too pretty to cut into.
My family couldn’t stop sneaking bites off the cooling rack (I caught my youngest with sticky pink fingers more than once). It’s become a staple for birthdays and even random Tuesdays when we need a pick-me-up. If you’re looking for a dessert that’s dangerously easy, pure nostalgic comfort, and truly Instagram-worthy, you’re going to want to bookmark this Strawberry Mirror Glaze Cake recipe. I’ve tested it more times than I should admit—in the name of research, of course—and each time, it feels like a sweet, edible hug. Perfect for potlucks, gifting, or just brightening up your Pinterest board!
Why You’ll Love This Recipe
- Quick & Easy: Comes together in under 2 hours (with chilling time), making it perfect for last-minute celebrations or spontaneous cravings.
- Simple Ingredients: You don’t need to hunt down fancy supplies—the essentials are likely already in your pantry or fridge.
- Perfect for Special Occasions: This cake is a guaranteed centerpiece for birthdays, brunches, baby showers, or those “just because” moments.
- Crowd-Pleaser: Kids love the bright colors and adults rave about the silky mousse and classic vanilla sponge. Even picky eaters keep coming back for seconds.
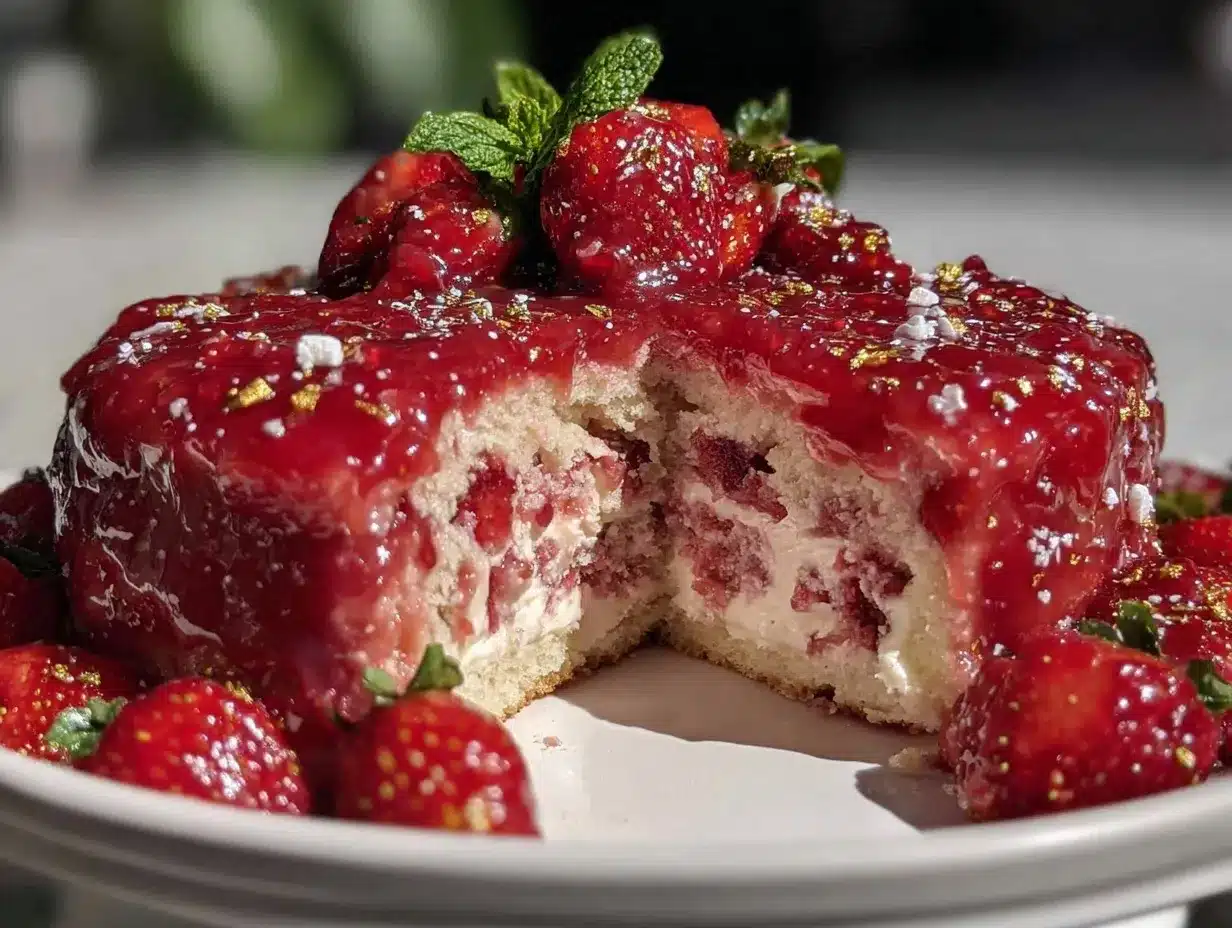
- Unbelievably Delicious: Each bite is a blend of airy vanilla cake, creamy mousse, and fresh strawberry flavor. The mirror glaze locks in moisture and adds that wow factor.
Here’s the thing: there are plenty of mirror glaze cakes out there, but most are either too complicated or end up tasting bland. What makes my Strawberry Mirror Glaze Cake recipe stand out is the combination of a feather-light vanilla sponge (think grandma’s secret touch), a mousse that’s creamy but not heavy, and a glaze that’s not just pretty—it’s packed with real strawberry flavor. The trick is pureed berries and a dash of lemon juice for brightness (trust me, it makes a world of difference).
This cake isn’t just good—it’s the kind of treat that makes you close your eyes with the first bite. It’s comfort food, but with a modern, Pinterest-worthy twist. No stress, no fuss, just pure joy. Friends and family are always impressed, but honestly, it’s so simple, you’ll feel like a pro every time. Whether you’re looking to impress guests or just want to turn a regular day into something extraordinary, this Strawberry Mirror Glaze Cake is your ticket.
What Ingredients You Will Need
This recipe uses simple, wholesome ingredients to deliver bold strawberry flavor and that melt-in-your-mouth texture. Most of these are pantry staples, and where possible, I’ll share easy swaps and tips for the best results.
For the Vanilla Sponge Cake:
- 1 cup (120g) cake flour (makes the sponge extra light)
- 3/4 cup (150g) granulated sugar
- 4 large eggs, room temperature
- 1/4 cup (60ml) whole milk, room temperature
- 1/4 cup (60g) unsalted butter, melted and cooled
- 1 tsp pure vanilla extract (I love Nielsen-Massey for the best flavor)
- 1/2 tsp baking powder
- 1/4 tsp salt
For the Vanilla Mousse:
- 1 cup (240ml) heavy cream, cold
- 1/2 cup (120g) cream cheese, softened
- 1/3 cup (35g) powdered sugar
- 2 tsp pure vanilla extract
- 1/2 tsp lemon zest (optional, adds a gentle tang)
For the Strawberry Mirror Glaze:
- 1 cup (200g) fresh strawberries, hulled and pureed (if out of season, frozen works—thaw first)
- 2/3 cup (130g) granulated sugar
- 1/2 cup (120ml) water
- 2 tbsp (30ml) lemon juice, freshly squeezed
- 1 tbsp (10g) powdered gelatin (about 2 envelopes)
- 1/4 cup (60ml) cold water (for blooming the gelatin)
- Optional: a drop or two of pink or red food coloring (for extra vibrancy, but honestly the strawberries do the job)
For Assembly:
- Fresh strawberries, sliced (for garnish)
- Mint leaves (optional, for a fresh pop of color)
Ingredient Tips: For the sponge, cake flour is key—don’t substitute all-purpose unless you must (the texture changes). Always use real vanilla extract, not imitation. For the mousse, I’ve tried swapping cream cheese for mascarpone and it’s equally dreamy. If you’re gluten-free, use a trusted gluten-free flour blend (like King Arthur or Bob’s Red Mill). For the glaze, fresh berries in summer are magical, but frozen work beautifully too.
Equipment Needed
- 9-inch (23cm) round cake pan (or springform for easy release)
- Mixing bowls (preferably glass or metal—they help keep things cool)
- Electric mixer (handheld works, but stand mixers make everything faster)
- Fine mesh sieve (for the strawberry puree and glaze)
- Rubber spatula (essential for folding and scraping every last bit)
- Offset spatula (for smooth mousse and glaze application)
- Whisk (for combining dry ingredients and whipping cream)
- Small saucepan (for the mirror glaze)
- Measuring cups and spoons (accuracy really matters here!)
- Wire cooling rack (for chilling the cake before glazing)
- Large plate or cake board (for serving and assembling)
If you don’t have a springform pan, you can use a regular pan lined with parchment for easy lifting. I’ve used plastic mixing bowls in a pinch, but glass keeps things cooler (especially for the mousse). For the glaze, a silicone spatula is easier to clean than wooden ones (learned the hard way). Budget-friendly tools work fine—just be sure your mixer can whip cream without overheating. Wash whisks and spatulas right away to keep them in good shape for next time.
Preparation Method
Step 1: Bake the Vanilla Sponge
- Preheat your oven to 350°F (175°C). Grease a 9-inch (23cm) cake pan and line the bottom with parchment paper.
- In a bowl, whisk together 1 cup (120g) cake flour, 1/2 tsp baking powder, and 1/4 tsp salt. Set aside.
- Using an electric mixer, beat 4 eggs and 3/4 cup (150g) sugar on high speed for 5-6 minutes until pale, thick, and fluffy. You want visible ribbons when you lift the whisk.
- Gently fold in the dry ingredients, a third at a time, using a spatula. Go slow—overmixing makes the cake chewy.
- Combine 1/4 cup (60ml) milk and 1/4 cup (60g) melted butter. Stir in 1 tsp vanilla extract. Pour into the batter and gently fold until just combined. Don’t worry if it’s a bit lumpy; it’ll smooth out in the oven.
- Pour batter into your prepared pan and smooth the top. Bake for 25-28 minutes, until golden and a toothpick comes out clean. Cool in the pan for 10 minutes before turning out onto a rack to cool completely.
Tip: If your cake sinks in the center, it’s likely underbaked. Test with a skewer in several spots just to be sure.
Step 2: Make the Vanilla Mousse
- Whip 1 cup (240ml) heavy cream until soft peaks form. Set aside.
- In a separate bowl, beat 1/2 cup (120g) cream cheese, 1/3 cup (35g) powdered sugar, 2 tsp vanilla, and 1/2 tsp lemon zest until smooth.
- Fold the whipped cream into the cream cheese mixture. Use a spatula and gentle, circular motions. Stop as soon as it’s blended—overmixing can deflate the mousse.
- Spread the mousse evenly over the cooled cake, smoothing the top with an offset spatula. Chill in the fridge for 1 hour to set.
If your mousse feels runny, chill it for 15-20 minutes before spreading. Sometimes, my kitchen gets warm and the cream needs a little extra time.
Step 3: Prepare the Strawberry Mirror Glaze
- Sprinkle 1 tbsp (10g) powdered gelatin over 1/4 cup (60ml) cold water in a small bowl. Let it sit for 5 minutes to bloom.
- Puree 1 cup (200g) strawberries in a blender. Strain through a fine mesh sieve to remove seeds. Add 2/3 cup (130g) sugar, 1/2 cup (120ml) water, and 2 tbsp (30ml) lemon juice.
- Heat the strawberry mixture in a saucepan over medium heat until it just starts to simmer. Remove from heat. Stir in the bloomed gelatin until fully dissolved. Add food coloring if desired.
- Let the glaze cool to about 90°F (32°C)—it should be pourable but not hot. (If it’s too warm, it’ll melt the mousse; too cool, it won’t spread smoothly.)
Test the glaze by dipping a spoon—it should coat with a glossy, even layer.
Step 4: Assemble & Glaze the Cake
- Place the mousse-topped cake on a wire rack set over a baking sheet (to catch excess glaze).
- Slowly pour the cooled strawberry glaze over the center, letting it flow naturally over the sides. Use an offset spatula to gently nudge it if needed.
- Chill the glazed cake for 30-45 minutes until the glaze is set and mirror-like.
- Transfer to a serving plate. Garnish with fresh strawberry slices and mint leaves.
Don’t rush the chilling—patience here pays off with a flawless finish!
Cooking Tips & Techniques
- Room Temperature Ingredients: Eggs, milk, and butter blend better when not cold. I set everything out about 30 minutes before starting. That extra step makes the sponge light and airy.
- Gentle Folding: For the mousse and sponge, folding is key. Use a spatula and lift from the bottom—don’t stir aggressively. (The first time I made this, I overmixed and ended up with a sad, dense cake. Lesson learned!)
- Glaze Temperature: The mirror glaze needs to be just warm enough to flow but not hot. I use a cheap instant thermometer, but if you don’t have one, aim for it to feel just barely warm to the touch.
- Multi-tasking: While the cake bakes, prep your mousse ingredients and puree the strawberries. Saves time and keeps things moving—especially handy if kids are impatiently waiting for dessert.
- Chilling: Don’t skip the chilling steps. The mousse sets better and the glaze stays shiny. If you’re pressed for time, pop the cake in the freezer for 15 minutes before glazing (just don’t forget it in there!).
- Troubleshooting: If your glaze starts to set before pouring, gently reheat over very low heat while stirring. If it’s lumpy, strain again.
Consistency matters. I learned after a few wobbly glazes that patience and precision make all the difference. Don’t stress if it’s not perfect—the cake tastes amazing regardless. And honestly, the little drips and swirls just add character!
Variations & Adaptations
- Gluten-Free: Swap cake flour for your favorite gluten-free blend. I’ve tried Bob’s Red Mill 1-to-1 and it works perfectly (texture is a bit more crumbly but still delicious).
- Dairy-Free: Use coconut cream for the mousse and vegan butter for the sponge. Almond milk works for the cake if needed. For the glaze, skip the cream cheese entirely.
- Berry Swap: In summer, swap strawberries for raspberries or blueberries. Each brings its own color and flavor twist—raspberries make a beautiful ruby-red glaze!
- Chocolate Mousse Layer: For a richer cake, add a thin layer of chocolate mousse under the vanilla. My kids love the contrast of strawberry and chocolate.
- Nut-Free Option: This recipe is naturally nut-free, but always check ingredient labels if you’re baking for allergies.
One personal favorite: I sometimes add a splash of elderflower syrup to the mousse for a floral note (not traditional, but so good). The recipe is forgiving—don’t be afraid to make it your own. If you prefer less sweetness, halve the sugar in the glaze (I did this once and the fresh berry flavor really popped).
Serving & Storage Suggestions
This Strawberry Mirror Glaze Cake is best served chilled. Slice with a sharp, thin knife for clean layers, and wipe the blade between cuts for that Pinterest-perfect look.
- Presentation: Arrange fresh strawberries and mint leaves around the base. Dust with powdered sugar for a snowy effect (looks stunning on a white cake board).
- Pairings: Serve with a glass of sparkling lemonade or a cup of black tea. Light salads or fruit bowls make excellent sides for brunch.
- Storage: Cover leftovers tightly with plastic wrap and refrigerate for up to 3 days. The glaze stays shiny, and the mousse keeps its texture. For longer storage, freeze slices individually (wrap in parchment and place in airtight containers). Thaw overnight in the fridge.
- Reheating: No need! This cake is meant to be enjoyed cold. If you must, let it sit at room temperature for 15 minutes to soften slightly.
Honestly, the flavors deepen after a day in the fridge—the vanilla and strawberry blend even better. It’s perfect for making ahead and enjoying over a long weekend.
Nutritional Information & Benefits
| Per Serving | Approx. 320 calories |
|---|---|
| Protein | 6g |
| Fat | 15g |
| Carbs | 38g |
Fresh strawberries are packed with Vitamin C and antioxidants—great for immune support and skin health. The cake uses real dairy, which adds calcium and a bit of protein. You can easily make this gluten-free or dairy-free, depending on your needs, and there are no nuts in the base recipe (just check labels for cross-contamination).
I love that this dessert feels indulgent but isn’t heavy. The light mousse and fruit glaze keep it from being overly rich, making it perfect for spring and summer. Just remember, eggs and dairy are present, so be mindful of common allergens.
Conclusion
If you’re searching for a show-stopping dessert that’s easy, crowd-pleasing, and absolutely delicious, this Strawberry Mirror Glaze Cake with Vanilla Sponge & Mousse is the one. It’s more than just a pretty cake—it’s a celebration of flavor and texture, with layers that melt in your mouth and a glaze that sparkles like a gem.
Don’t be afraid to tweak it to your liking—swap berries, adjust sweetness, or play with the mousse flavors. That’s the beauty of this recipe: it’s forgiving, fun, and always impressive. I make it for birthdays, brunches, and sometimes just because I want to see my family’s faces light up.
Give it a try, share your results, and let me know your favorite twists in the comments below! Pin this recipe for later, and enjoy every slice. Here’s to sweet moments, pretty cakes, and happy baking!
Frequently Asked Questions
Can I make the Strawberry Mirror Glaze Cake ahead of time?
Absolutely! You can make the cake a day ahead. Just store it in the fridge, covered, and add fresh garnishes before serving.
What if I don’t have cake flour?
You can substitute with all-purpose flour and cornstarch: use 3/4 cup all-purpose flour plus 2 tbsp cornstarch for every cup of cake flour. The texture might be slightly denser, but still tasty.
Can I use frozen strawberries for the glaze?
Yes! Thaw them completely and strain well to remove extra liquid. The flavor is just as good, and the color stays vibrant.
How do I get the mirror glaze super shiny?
Let the glaze cool to about 90°F (32°C) before pouring, and chill the mousse layer well. Strain the glaze if you see lumps, and pour in one smooth motion for best results.
Is the cake freezer-friendly?
Definitely. Slice and wrap individual pieces in parchment, then store in airtight containers. Thaw overnight in the fridge for best texture.
Pin This Recipe!
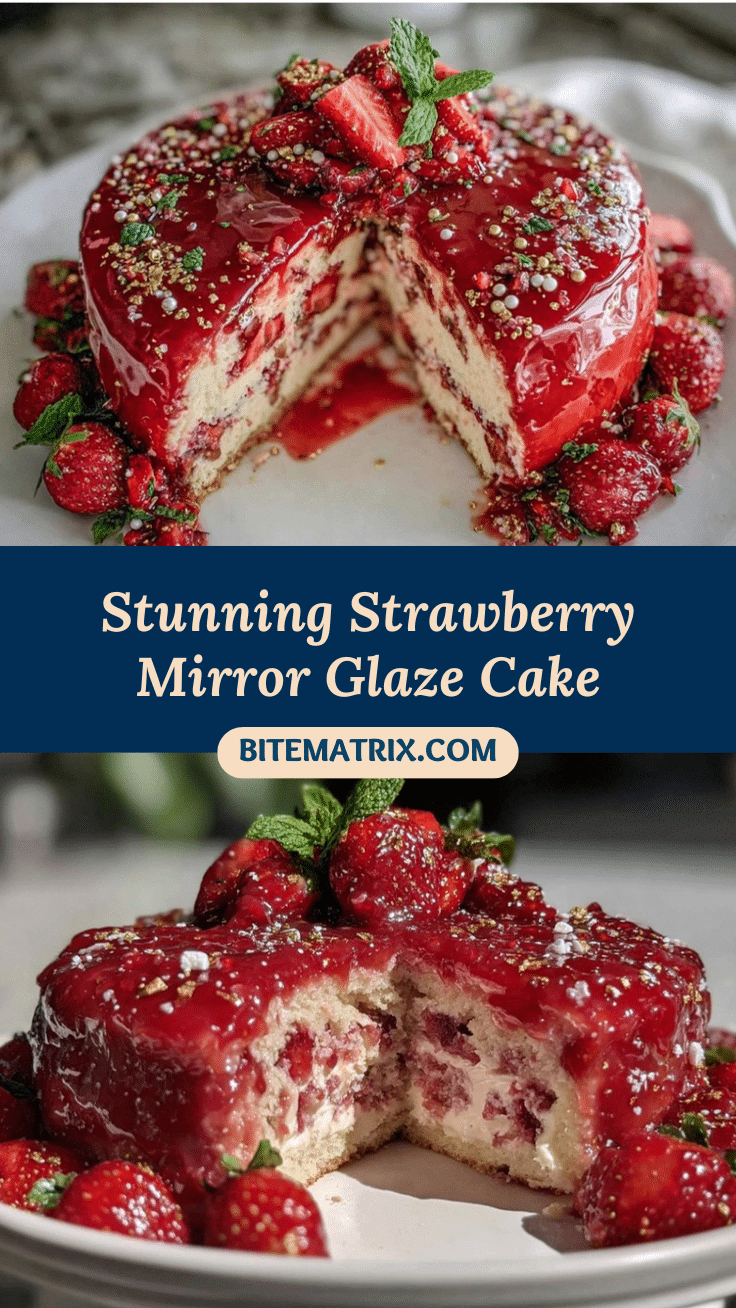
Strawberry Mirror Glaze Cake Recipe Easy Vanilla Mousse Delight

A show-stopping cake featuring a feather-light vanilla sponge, creamy vanilla mousse, and a glossy strawberry mirror glaze. Perfect for birthdays, brunches, or any special occasion, this dessert is easy to make and guaranteed to impress.
- Prep Time: 35 minutes
- Cook Time: 28 minutes
- Total Time: 2 hours
- Yield: 10 servings 1x
- Category: Dessert
- Cuisine: American
Ingredients
- 1 cup (120g) cake flour
- 3/4 cup (150g) granulated sugar
- 4 large eggs, room temperature
- 1/4 cup (60ml) whole milk, room temperature
- 1/4 cup (60g) unsalted butter, melted and cooled
- 1 tsp pure vanilla extract
- 1/2 tsp baking powder
- 1/4 tsp salt
- 1 cup (240ml) heavy cream, cold
- 1/2 cup (120g) cream cheese, softened
- 1/3 cup (35g) powdered sugar
- 2 tsp pure vanilla extract
- 1/2 tsp lemon zest (optional)
- 1 cup (200g) fresh strawberries, hulled and pureed (or thawed frozen strawberries)
- 2/3 cup (130g) granulated sugar
- 1/2 cup (120ml) water
- 2 tbsp (30ml) lemon juice, freshly squeezed
- 1 tbsp (10g) powdered gelatin (about 2 envelopes)
- 1/4 cup (60ml) cold water (for blooming the gelatin)
- Optional: a drop or two of pink or red food coloring
- Fresh strawberries, sliced (for garnish)
- Mint leaves (optional, for garnish)
Instructions
- Preheat oven to 350°F (175°C). Grease a 9-inch (23cm) cake pan and line the bottom with parchment paper.
- Whisk together cake flour, baking powder, and salt in a bowl. Set aside.
- Using an electric mixer, beat eggs and sugar on high speed for 5-6 minutes until pale, thick, and fluffy.
- Gently fold in the dry ingredients, a third at a time, using a spatula.
- Combine milk, melted butter, and vanilla extract. Pour into the batter and gently fold until just combined.
- Pour batter into prepared pan and smooth the top. Bake for 25-28 minutes, until golden and a toothpick comes out clean. Cool in pan for 10 minutes, then turn out onto a rack to cool completely.
- Whip heavy cream until soft peaks form. Set aside.
- In a separate bowl, beat cream cheese, powdered sugar, vanilla, and lemon zest until smooth.
- Fold whipped cream into the cream cheese mixture gently until blended.
- Spread mousse evenly over cooled cake, smoothing the top. Chill in the fridge for 1 hour to set.
- Sprinkle powdered gelatin over cold water in a small bowl. Let sit for 5 minutes to bloom.
- Puree strawberries and strain through a fine mesh sieve. Add sugar, water, and lemon juice.
- Heat strawberry mixture in a saucepan over medium heat until it just starts to simmer. Remove from heat and stir in bloomed gelatin until dissolved. Add food coloring if desired.
- Let glaze cool to about 90°F (32°C), pourable but not hot.
- Place mousse-topped cake on a wire rack over a baking sheet. Slowly pour cooled glaze over the center, letting it flow over the sides. Use an offset spatula to nudge if needed.
- Chill glazed cake for 30-45 minutes until glaze is set and mirror-like.
- Transfer to serving plate. Garnish with fresh strawberry slices and mint leaves.
- Slice with a sharp, thin knife for clean layers, wiping the blade between cuts.
Notes
For best results, use room temperature ingredients for the sponge. Cake flour yields a lighter texture. Chill mousse and glaze thoroughly for a flawless finish. Gluten-free and dairy-free adaptations are possible. The cake is nut-free but check ingredient labels for allergies. The glaze can be made with other berries for variety.
Nutrition
- Serving Size: 1 slice (1/10 of cak
- Calories: 320
- Sugar: 28
- Sodium: 180
- Fat: 15
- Saturated Fat: 9
- Carbohydrates: 38
- Fiber: 1
- Protein: 6
Keywords: strawberry mirror glaze cake, vanilla mousse cake, birthday cake, easy dessert, spring cake, summer cake, strawberry dessert, mirror glaze, vanilla sponge, mousse cake


