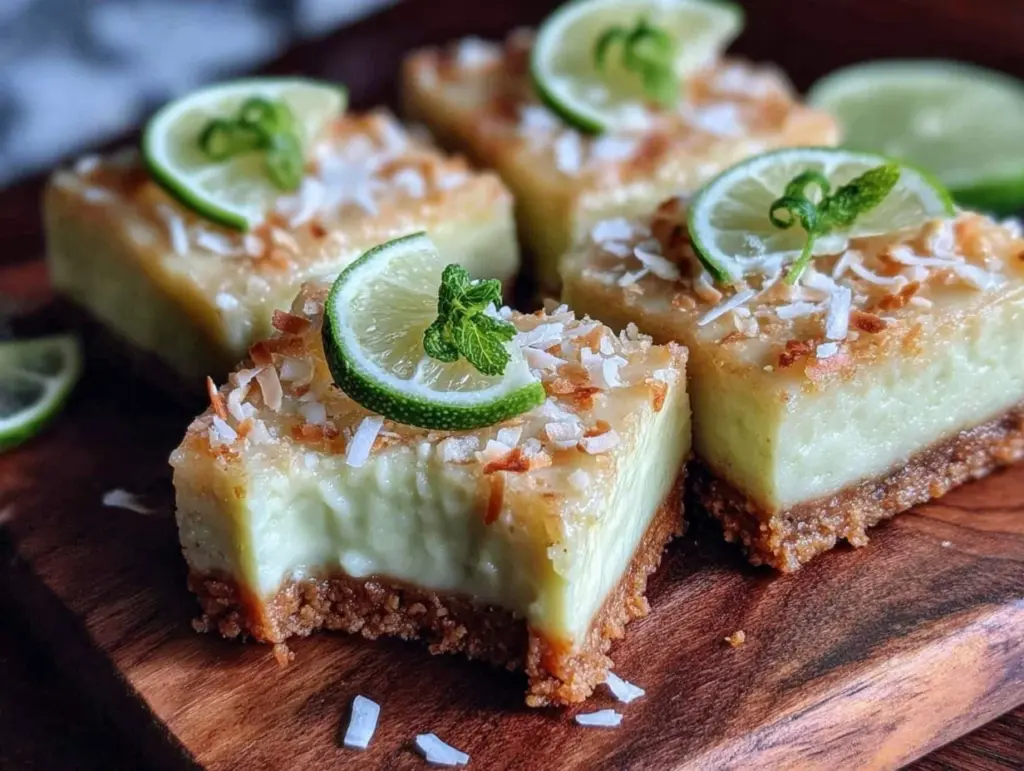
“You have to try these bars,” my dry-cleaner said one humid Thursday afternoon as I dropped off a wrinkled shirt. Honestly, I wasn’t expecting much—she’s a pro with fabrics, not flavors. But there I was, a week later, sneaking a second piece of her tangy key lime pie bars with that crispy coconut crust she swore by. The balance of tart and sweet, with that lightly toasted coconut crunch? It caught me off guard in the best way.
It all started with a minor kitchen mishap. I was aiming for a classic key lime pie but forgot to buy graham crackers for the crust. Panicked, I rummaged through my pantry and found a bag of shredded coconut. A quick toss with some butter and sugar, and I baked it up. The result? A crisp, golden crust that gave the filling a totally new vibe. You know that moment when something unplanned turns out better than the original plan? Yeah, this was it.
Maybe you’ve been there—scrambling to whip up a dessert last minute or trying to please a crowd with something fresh. These bars stuck with me because they’re simple, yet they pack a punch. The tangy key lime filling wakes up your taste buds, while the coconut crust adds that satisfying snap and a hint of nuttiness. It’s like summer wrapped in a dessert, but honestly, I make these year-round. They’ve become my go-to when I want something bright, sweet, and just a little unexpected.
One time, I forgot to add the sugar to the filling (classic me), but it was surprisingly good—just a bit more tart than usual. This recipe’s forgiving spirit is part of why I keep coming back. It’s a little twist on a classic that feels personal, approachable, and always a crowd-pleaser.
Why You’ll Love This Tangy Key Lime Pie Bars Recipe
Trust me, after testing this recipe more times than I can count, these key lime pie bars with a crispy coconut crust have won over skeptics and dessert lovers alike. Here’s why this recipe stands out:
- Quick & Easy: Ready in under an hour, it’s perfect when you want a dessert fast but still crave something homemade.
- Simple Ingredients: No need for fancy shopping trips. You probably have most of these in your pantry already.
- Perfect for Summer & Beyond: Whether you’re hosting a backyard BBQ or just craving a bright snack, these bars fit the bill.
- Crowd-Pleaser: Kids and adults alike rave about the tangy, creamy filling paired with the crunchy coconut base.
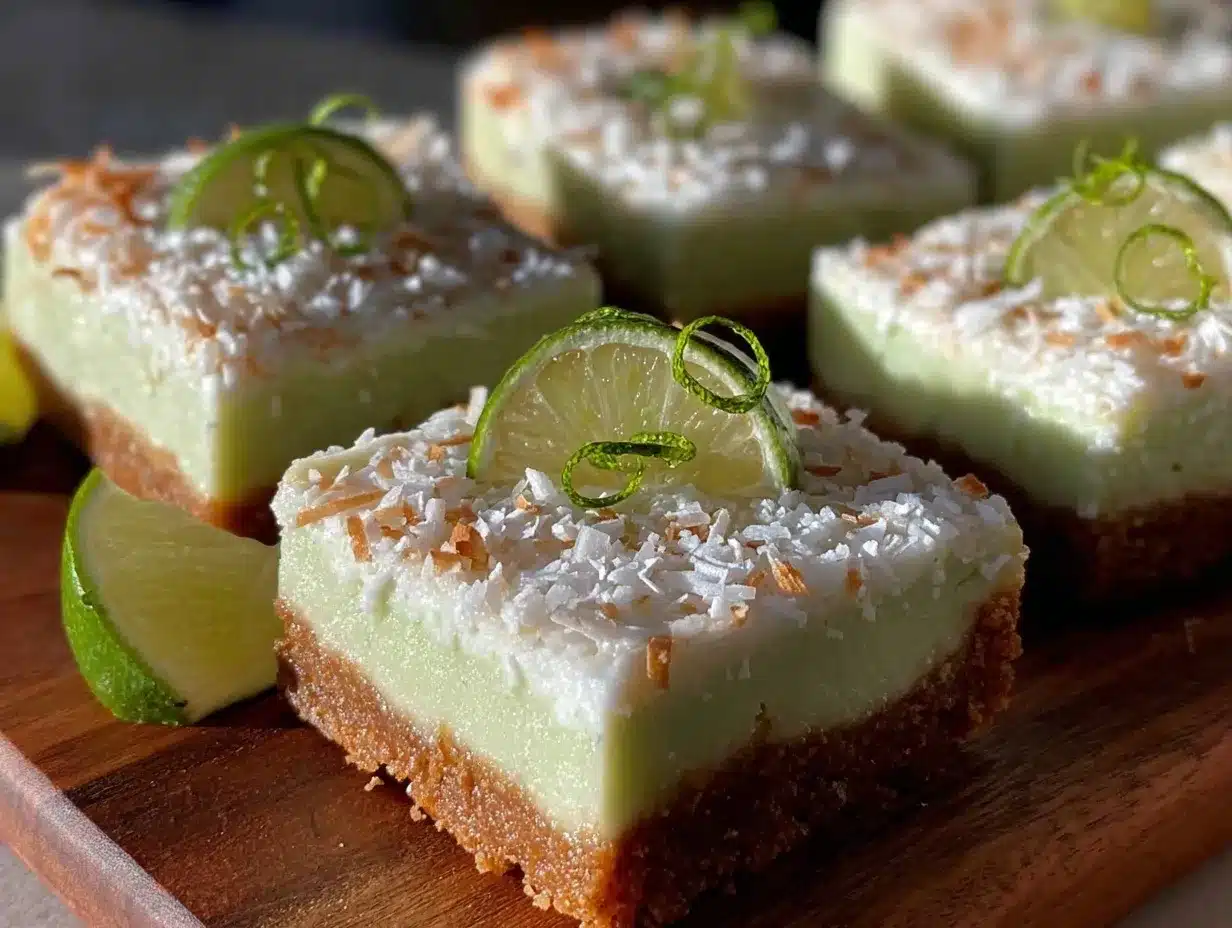
- Unbelievably Delicious: The creamy, tart lime layer contrasts beautifully with the toasted coconut crust’s texture and flavor.
What makes this recipe different? The crispy coconut crust isn’t your typical graham cracker base. It adds a delightful chew and subtle sweetness that pairs perfectly with the zesty lime filling. Plus, blending the filling just right gives it a smooth, velvety finish that tastes almost like a slice of sunshine.
Honestly, this is the kind of dessert that makes you pause after the first bite and close your eyes—just to savor that perfect balance. It’s the kind of comfort food that feels fresh and light, not heavy or overly sweet. Plus, it’s stress-free to make, so you get all the flavor without the fuss.
What Ingredients You Will Need
This recipe uses simple, wholesome ingredients to deliver bold flavor and satisfying texture without the fuss. Most are pantry staples, and the coconut adds a seasonal touch that feels like a mini-vacation.
- For the Crispy Coconut Crust:
- 1 1/2 cups shredded sweetened coconut (preferably unsulfured; I like Bob’s Red Mill for its texture)
- 1 cup all-purpose flour (can substitute with almond flour for gluten-free option)
- 1/2 cup granulated sugar
- 1/4 teaspoon salt
- 1/2 cup unsalted butter, melted (use dairy-free butter if needed)
- For the Tangy Key Lime Filling:
- 4 large eggs (room temperature helps with smooth texture)
- 1 1/4 cups granulated sugar
- 1/2 cup fresh key lime juice (about 10-12 key limes; substitute with regular limes if needed)
- 1 tablespoon finely grated lime zest
- 1/2 cup sweetened condensed milk (for creamy richness)
Tip: When selecting key limes, look for small, firm ones with bright green skin. If you can’t find fresh key limes, bottled key lime juice works but fresh zest is a must for that punch of flavor.
Equipment Needed
- 9×13 inch (23×33 cm) baking pan – you can use a glass or metal pan; metal tends to brown the crust a bit more.
- Mixing bowls – one large and one medium for crust and filling.
- Electric mixer or whisk – an electric hand mixer makes beating the eggs and sugar easier, but a sturdy whisk will do.
- Zester or microplane – for zesting the limes finely.
- Citrus juicer – handy for squeezing out fresh key lime juice without seeds.
- Rubber spatula – perfect for scraping down the sides and folding ingredients gently.
- Measuring cups and spoons – precise measurements keep the texture just right.
If you don’t have a citrus juicer, a fork and some patience work just fine (been there!). Also, a parchment paper liner for the baking pan can help with easy removal of the bars.
Preparation Method
- Preheat your oven to 350°F (175°C). Line your 9×13 inch baking pan with parchment paper, leaving some overhang on the sides for easy lifting later.
- Make the crust: In a large bowl, combine the shredded coconut, flour, sugar, and salt. Pour in the melted butter and stir until the mixture resembles wet sand, with all the coconut coated. Don’t worry if it looks crumbly—that’s perfect.
- Press the crust mixture firmly and evenly into the prepared pan, making sure to get into the corners. I usually use my hands for this, pressing down hard to create a compact layer. Bake for about 12-15 minutes, or until the edges turn golden and the coconut smells toasty. Watch it carefully—coconut can go from perfect to burnt fast.
- Prepare the filling while the crust bakes: In a medium bowl, whisk together the eggs and sugar until smooth and slightly frothy—about 2-3 minutes.
- Add the key lime juice, lime zest, and sweetened condensed milk to the egg mixture. Whisk gently until everything’s combined and smooth. The mixture should have a glossy, slightly thick consistency.
- Remove the crust from the oven and pour the filling evenly over the warm crust. The heat helps set the filling as it bakes.
- Bake for 18-22 minutes at 350°F (175°C), or until the filling is set but still slightly jiggly in the center. It will firm up as it cools. Avoid overbaking to keep that creamy texture.
- Cool the bars in the pan on a wire rack for at least 1 hour. Then chill in the refrigerator for 2-3 hours or overnight for the best slicing experience.
- Slice into squares using a sharp knife (warm the blade under hot water and dry it for clean cuts). Serve chilled or at room temperature.
Pro tip: If any coconut sticks to your knife, wipe it clean between cuts to keep edges neat.
Cooking Tips & Techniques
Getting the crust and filling just right can be a little tricky, but here are some tips that I’ve learned the hard way:
- Don’t skimp on the butter in the crust. It binds the coconut and flour together, creating that perfect crispness.
- Use fresh key limes when possible. The bottled juice lacks the bright aroma and subtle complexity fresh juice brings.
- Watch your oven closely. Toasting coconut can quickly go from golden to burnt, so keep an eye especially in the last few minutes.
- Mix the filling gently after adding the lime juice and condensed milk. Too much whisking can incorporate air and cause cracks.
- Let the bars chill thoroughly before slicing. This helps the filling set fully and stops the crust from crumbling.
- Warm your knife before cutting for cleaner slices, especially if the filling is chilled.
- Don’t overbake the filling. It should still have a slight wobble in the center when you take it out.
Personally, I once tried to speed up chilling by slicing right away. Let’s just say I ended up with a crumbly mess and sad lime juice drips. Patience really pays off here (though I’m still impatient sometimes!).
Variations & Adaptations
Feeling adventurous or need to adapt? These bars are versatile and welcome a few twists.
- Gluten-Free Version: Swap the all-purpose flour for almond flour or gluten-free baking blend. The crust stays crispy and nutty.
- Dairy-Free Option: Use coconut oil or vegan butter instead of butter, and substitute sweetened condensed milk with coconut condensed milk or a blend of coconut cream and maple syrup.
- Flavor Twists: Add a tablespoon of finely chopped fresh mint or basil to the filling for a bright herbal note. Or swirl in some passion fruit puree for extra tropical flair.
- Crust Variations: Mix in chopped macadamia nuts or chopped pecans with the coconut for extra crunch and flavor.
- Cooking Method: Tried baking the crust in a cast-iron skillet for a rustic look and it worked beautifully—just adjust baking time slightly.
I once made a batch with half coconut, half crushed pistachios for the crust—unexpectedly delicious and a hit at my cousin’s picnic!
Serving & Storage Suggestions
These tangy key lime pie bars are best served chilled or at room temperature. I usually pop them out of the fridge about 15 minutes before serving to soften slightly and let the flavors open up.
- Garnish with a dollop of whipped cream or coconut cream and a sprinkle of toasted coconut flakes for that extra wow factor.
- Pair with a light, fruity white wine or iced tea with a splash of lime for a refreshing combo.
- Store leftovers covered tightly in the refrigerator for up to 4 days. The crust remains crispy for the first day but softens slightly with time—still delicious!
- For longer storage, freeze the bars in a single layer on a baking sheet, then transfer to an airtight container for up to 2 months. Thaw overnight in the fridge.
- Reheat frozen bars briefly in a low oven (about 300°F / 150°C) for 5-7 minutes to bring back some crispness.
Interestingly, the flavors deepen after a day or two in the fridge. The lime tang mellows just enough, and the crust keeps a satisfying texture. Honestly, sometimes I make these a day ahead just to let everything marry perfectly.
Nutritional Information & Benefits
Each serving of these tangy key lime pie bars (based on 12 servings) roughly contains:
| Calories | Fat | Carbohydrates | Protein | Sugar |
|---|---|---|---|---|
| 230 kcal | 14g | 25g | 3g | 18g |
Key limes are rich in vitamin C, which supports immune health and skin vitality. Coconut provides healthy fats and fiber, aiding digestion and giving sustained energy. Using fresh ingredients means no preservatives or artificial flavors.
This recipe can be adapted for gluten-free and dairy-free diets, making it accessible for many. Just keep in mind the sweetened condensed milk is dense in sugars, so enjoy these bars as an occasional treat that’s both refreshing and satisfying.
Conclusion
These tangy key lime pie bars with a crispy coconut crust are more than just a dessert—they’re a little burst of sunshine you can make any day of the year. The marriage of tart lime filling with the crunchy, nutty crust is a combo that keeps me coming back, whether I’m feeding a crowd or just sneaking a piece after dinner.
Feel free to tweak the crust or filling to suit your taste, whether that means going dairy-free, adding nuts, or boosting the zest. I love how this recipe feels both familiar and new, with just enough personality to stand out.
If you try making these bars, I’d love to hear how you made them your own—drop a comment or share your twist! Here’s to many delicious moments ahead, one tangy bite at a time.
FAQs About Tangy Key Lime Pie Bars with Crispy Coconut Crust
Can I use regular lime juice instead of key lime juice?
Yes, regular lime juice works fine, though key limes have a slightly sweeter, more floral flavor. Adding fresh lime zest helps boost the citrus aroma.
How do I keep the crust from getting soggy?
Make sure to bake the crust until golden and allow it to cool slightly before adding the filling. Chilling the bars well before slicing also helps maintain crunch.
Can I make these bars ahead of time?
Absolutely! They actually taste better after chilling overnight as the flavors meld and the filling firms up for easier slicing.
What’s the best way to cut these bars cleanly?
Use a sharp knife warmed under hot water and dried before slicing. Wipe the blade between cuts for neat edges.
Are these bars suitable for vegan diets?
Not as written, but you can make them vegan by swapping butter with coconut oil or vegan butter and using a plant-based condensed milk alternative.
Pin This Recipe!
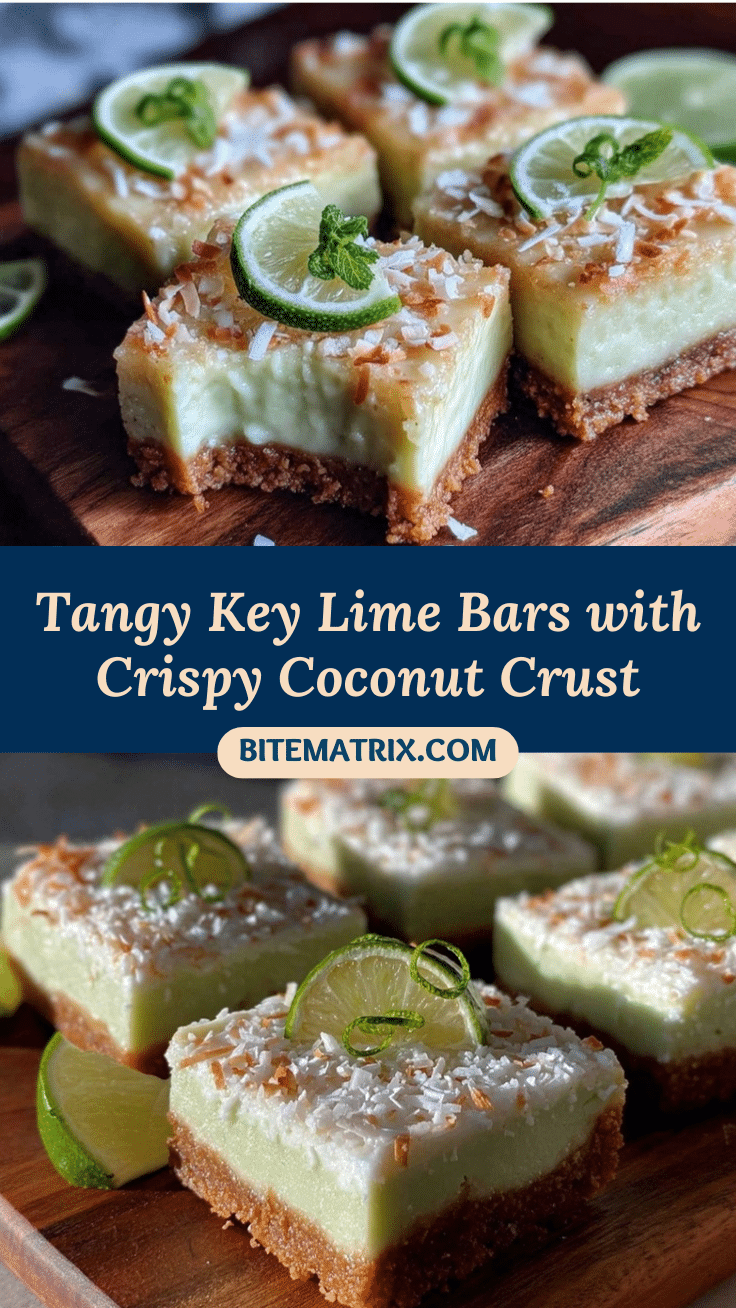
Tangy Key Lime Pie Bars Recipe with Easy Crispy Coconut Crust
These tangy key lime pie bars feature a crispy coconut crust and a creamy, tart lime filling. Perfect for a quick, refreshing dessert that balances sweet and tangy flavors.
- Prep Time: 15 minutes
- Cook Time: 35 minutes
- Total Time: 1 hour 50 minutes
- Yield: 12 servings 1x
- Category: Dessert
- Cuisine: American
Ingredients
- 1 1/2 cups shredded sweetened coconut
- 1 cup all-purpose flour (can substitute with almond flour for gluten-free option)
- 1/2 cup granulated sugar
- 1/4 teaspoon salt
- 1/2 cup unsalted butter, melted (use dairy-free butter if needed)
- 4 large eggs (room temperature)
- 1 1/4 cups granulated sugar
- 1/2 cup fresh key lime juice (about 10–12 key limes; substitute with regular limes if needed)
- 1 tablespoon finely grated lime zest
- 1/2 cup sweetened condensed milk
Instructions
- Preheat your oven to 350°F (175°C). Line a 9×13 inch baking pan with parchment paper, leaving some overhang on the sides for easy lifting later.
- In a large bowl, combine the shredded coconut, flour, sugar, and salt. Pour in the melted butter and stir until the mixture resembles wet sand, with all the coconut coated.
- Press the crust mixture firmly and evenly into the prepared pan, making sure to get into the corners. Bake for about 12-15 minutes, or until the edges turn golden and the coconut smells toasty.
- While the crust bakes, whisk together the eggs and sugar in a medium bowl until smooth and slightly frothy, about 2-3 minutes.
- Add the key lime juice, lime zest, and sweetened condensed milk to the egg mixture. Whisk gently until combined and smooth.
- Remove the crust from the oven and pour the filling evenly over the warm crust.
- Bake for 18-22 minutes at 350°F (175°C), or until the filling is set but still slightly jiggly in the center.
- Cool the bars in the pan on a wire rack for at least 1 hour. Then chill in the refrigerator for 2-3 hours or overnight.
- Slice into squares using a sharp knife warmed under hot water and dried for clean cuts. Serve chilled or at room temperature.
Notes
Do not skimp on the butter in the crust for perfect crispness. Use fresh key limes if possible for best flavor. Watch the crust closely while baking to avoid burning the coconut. Mix the filling gently after adding lime juice and condensed milk to avoid cracks. Chill bars thoroughly before slicing for clean cuts. Warm the knife before slicing to keep edges neat. Avoid overbaking the filling; it should be slightly jiggly when done.
Nutrition
- Serving Size: 1 bar (1/12th of the
- Calories: 230
- Sugar: 18
- Fat: 14
- Carbohydrates: 25
- Protein: 3
Keywords: key lime pie bars, coconut crust, tangy dessert, easy dessert, summer dessert, gluten-free option, dairy-free option


