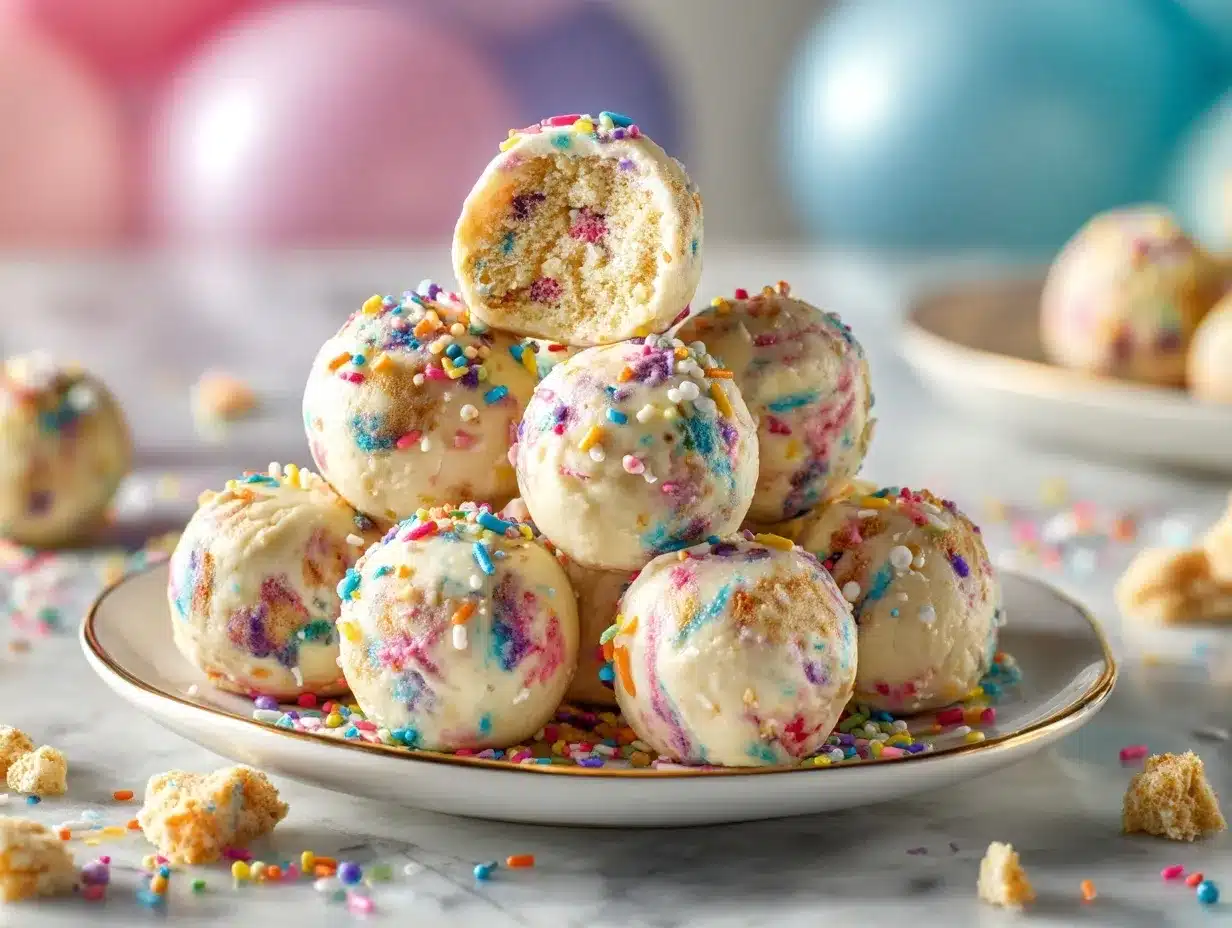
Sweet, creamy, and studded with rainbow sprinkles—just the thought of my irresistible birthday cake cheesecake protein balls makes me smile. Honestly, if you’d told me a few years ago that I’d be skipping store-bought protein bars for a batch of cake-flavored bites I could whip up in my own kitchen, I’d have laughed. But here we are! These little gems have become my go-to for everything from post-workout snacks to late-night cravings, and let’s face it, they’ve rescued me from “hangry” moments more than once.
The idea for these birthday cake cheesecake protein balls popped up during one of those weeks when my sweet tooth and my need for a protein boost collided—hard. I wanted something that felt like a treat (hello, funfetti sprinkles!) but delivered on nutrition. After a few rounds of experimenting, I hit the jackpot: a recipe that’s part birthday cake, part creamy cheesecake, and all about packing in that healthy protein punch.
I’ve made these protein balls for family road trips, packed them for my kids’ lunches, and even served them at a birthday brunch (they disappeared before the coffee finished brewing). They’re perfect for anyone who wants a high-protein snack that feels like dessert. Whether you’re chasing after kids, crushing it at the gym, or just craving something sweet without the sugar crash, these birthday cake cheesecake protein balls are about to become your new obsession.
You don’t need fancy ingredients or complicated equipment. If you have a bowl, a spoon, and the urge for something delicious, you’re good to go. I’ve tested, tweaked, and devoured these protein balls more times than I can count—so trust me, you’re in for something special.
Why You’ll Love This Recipe
I’ve made a lot of protein snacks over the years, but these birthday cake cheesecake protein balls are the ones everyone keeps asking for. Here’s what makes them so darn irresistible:
- Quick & Easy: You can have these ready in under 15 minutes—no baking, no fuss. Perfect for busy mornings, after-school snacks, or when that sweet craving hits at midnight.
- Simple Ingredients: No rare superfoods or endless shopping lists. I usually have everything on hand—protein powder, oats, cream cheese, honey, and a splash of vanilla. It’s pantry magic.
- Party-Perfect: With those colorful sprinkles, they look like mini birthday cakes! I’ve served these at birthday parties, baby showers, and even as lunchbox surprises.
- Crowd-Pleaser: Kids, adults, even my picky-eater nephew—everyone loves them. I always double the batch because they vanish fast.
- Unbelievably Delicious: The flavor is spot-on: sweet, lightly tangy from the cheesecake, and that classic birthday cake taste. They’re soft, chewy, and just the right amount of indulgent.
What sets my birthday cake cheesecake protein balls apart? I blend the cream cheese fully into the mix, so every bite has that smooth, cheesecake-like texture. The sprinkles aren’t just for show—they add a tiny crunch and pure joy. Plus, I use a carefully balanced ratio of vanilla protein powder and oat flour, so the flavor isn’t chalky or overpowering.
Let’s be real: most protein snacks either taste too healthy (read: bland) or go overboard on the sugar. These protein balls hit the sweet spot—literally. They’ve even become my “happy snack” on tough days, and I love seeing friends’ faces light up when they try them. It’s comfort food, made healthier, and there’s something so satisfying about grabbing a snack that feels like a celebration.
If you want a snack that’s as fun as it is nourishing, these birthday cake cheesecake protein balls are your answer. They’re proof that healthy snacks don’t have to be boring—and honestly, who can resist something with rainbow sprinkles?
What Ingredients You Will Need
This birthday cake cheesecake protein balls recipe is all about simple ingredients coming together for a crave-worthy snack. Most of these are pantry staples, but don’t worry if you’re missing one—I’ve got substitution ideas, too!
- Vanilla Protein Powder (whey or plant-based, about 1 cup or 100g) – Brings the protein punch and that classic cake flavor. I like using Orgain Vanilla Bean or Optimum Nutrition Gold Standard for a super smooth texture.
- Oat Flour (1 cup or 110g) – Gives the protein balls structure and chewiness. You can blitz rolled oats in a blender for an easy homemade version.
- Low-Fat Cream Cheese (4 oz or 113g, softened) – For that creamy cheesecake vibe. Use dairy-free cream cheese if needed.
- Natural Almond Butter (1/4 cup or 60g) – Adds richness and helps everything stick together. Peanut butter works, but almond keeps the birthday cake flavor front and center.
- Honey or Maple Syrup (3 tbsp or 45ml) – Naturally sweetens the mix. I use honey for a slightly floral note, but maple syrup is great for a vegan version.
- Vanilla Extract (2 tsp or 10ml) – Rounds out the birthday cake flavor. Don’t skip it!
- Pinch of Salt – Just a touch makes the sweet flavors pop.
- Rainbow Sprinkles (3 tbsp or 30g, plus extra for rolling) – For the funfetti effect! I get naturally colored ones when I can.
- Optional: Almond Extract (1/4 tsp or 1ml) – For that extra bakery cake flavor. Use sparingly!
Ingredient Tips:
- For a gluten-free option, use certified gluten-free oats or oat flour.
- If you’re dairy-free, swap in vegan protein powder and dairy-free cream cheese. I’ve tried it with Violife cream cheese and it works great.
- Not a fan of almond butter? Sunflower seed butter works well for nut-free households.
- Want a lower carb version? Use monk fruit sweetener or stevia syrup instead of honey/maple, and almond flour instead of oat flour (texture will change a bit, but still tasty).
I keep most of these on hand for quick snack emergencies. The only “specialty” ingredient is the protein powder, but honestly, any vanilla-flavored kind will do—just make sure you like the taste!
Equipment Needed
No fancy gadgets required for these birthday cake cheesecake protein balls, which is one of the reasons I love making them anytime.
- Mixing Bowl – A medium or large bowl works best so you have room to really combine everything. I’ve used a glass salad bowl in a pinch!
- Sturdy Spoon or Silicone Spatula – For mixing. I prefer a silicone spatula since it scrapes down the sides so easily (less waste!).
- Measuring Cups and Spoons – Accuracy matters for protein balls, especially with protein powder and sweetener.
- Cookie Scoop or Tablespoon – Helps portion out even balls. If you don’t have one, just use your hands and eyeball it.
- Baking Sheet or Plate – To set the formed balls on before chilling. A large plate covered with parchment paper is perfect.
- Optional: Blender or Food Processor – If you need to make oat flour from rolled oats, a quick blitz does the trick. Otherwise, you won’t need any electric tools.
I’ve made these with nothing but a bowl and a wooden spoon on camping trips—so don’t stress if you’re missing something “perfect.” Just keep your mixing bowl clean, and a quick rinse of your scoop between batches helps keep things tidy (sticky dough can build up fast). If you use a food processor, wash it right away—protein powder and nut butter are tough once they dry!
Budget tip: Check thrift stores for sturdy mixing bowls and cookie scoops—they last forever and make snack prep a breeze.
How to Make Birthday Cake Cheesecake Protein Balls
- Soften the Cream Cheese: Let 4 oz (113g) low-fat cream cheese sit at room temperature for about 10-15 minutes. It should be easily spreadable, which helps it blend into the mix without lumps. If you’re in a hurry, microwave it in a bowl for 10 seconds—just don’t overdo it!
- Combine the Wet Ingredients: In your mixing bowl, add the softened cream cheese, 1/4 cup (60g) almond butter, 3 tbsp (45ml) honey or maple syrup, and 2 tsp (10ml) vanilla extract (plus 1/4 tsp almond extract if using). Mix well until smooth and creamy. It should look like a thick frosting.
- Add the Dry Ingredients: Sprinkle in 1 cup (100g) vanilla protein powder, 1 cup (110g) oat flour, and a pinch of salt. Stir until a stiff dough forms. If the mixture seems too dry, add 1-2 tsp milk (dairy or non-dairy) as needed. If it’s too sticky, add a spoonful of oat flour. The dough should be pliable, not crumbly.
- Stir in the Sprinkles: Gently fold in 3 tbsp (30g) rainbow sprinkles, trying not to overmix (so the colors don’t bleed). The dough will look like funfetti cake batter at this point!
- Shape the Protein Balls: Using a cookie scoop or tablespoon, portion out the dough and roll between your hands to form balls, about 1 inch (2.5cm) in diameter. You should get 14-16 balls.
- Optional – Extra Sprinkles: Pour extra sprinkles on a plate and gently roll each ball to coat the outside for extra color and crunch. This step is messy but totally worth it.
- Chill: Place the balls on a parchment-lined plate or baking sheet. Refrigerate for at least 30 minutes to firm up. (If you can wait that long!) They’ll be soft at first but get that perfect chewy texture once chilled.
- Serve & Store: Enjoy straight from the fridge, or pack into a lunchbox or snack container for later! Store leftovers in an airtight container in the fridge for up to 5 days, or freeze for up to 3 months.
Troubleshooting: If your dough is too sticky, add a bit more oat flour. If it’s dry or crumbly, add a splash of milk or a touch more almond butter. The mixture should hold together when pressed but not stick to your hands.
Sensory Cues: The dough is ready when it smells like birthday cake batter and feels soft but not mushy. Sprinkles should be visible throughout. If the mix is too cold, let it sit for a few minutes before shaping.
Personal Tip: I like to make a double batch and freeze half for “emergencies.” They’re even better after a night in the fridge—the flavors really develop, and the texture is spot on.
Cooking Tips & Techniques
I’ve learned a few handy tricks for getting perfect birthday cake cheesecake protein balls every time:
- Don’t Overmix the Sprinkles: Stir them in gently, or the colors can bleed and turn your protein balls grayish (not so festive!). I usually use a spatula and stop as soon as they’re just combined.
- Use Fresh Cream Cheese: Old or too-cold cream cheese can make the mixture lumpy. If you ever get little chunks, just mash them with the back of your spoon before adding the dry ingredients.
- Adjust Consistency as Needed: Protein powders vary a lot. Some are really absorbent, while others make a wetter dough. Add oat flour or a little milk, a teaspoon at a time, until the dough is just right.
- Batch Prep: If you’re making a large batch, keep half the dough in the fridge while you roll the first half. This keeps it from drying out and makes rolling easier.
- Keep Hands Clean: Rolling with slightly damp hands prevents sticking, but too much water can make the balls mushy. I often keep a damp paper towel nearby to wipe my hands between balls.
- Flavor Boost: For a stronger “birthday cake” flavor, a tiny splash of almond extract makes all the difference. Just don’t go overboard—it’s potent!
- Storage: Let the balls chill before packing them in containers. If you stack them too soon, they’ll stick together.
One time, I added too much honey and ended up with a sticky mess. Lesson learned—measure carefully and don’t be afraid to tweak as you go. If your dough ever feels off, adjust until it feels like cookie dough (soft but not gooey).
And don’t stress about perfection—these are protein balls, not wedding cakes! Each one is a little celebration in itself.
Variations & Adaptations
Birthday cake cheesecake protein balls are super flexible, and I’ve played around with all sorts of twists. Here are a few of my favorites:
- Gluten-Free Version: Use certified gluten-free oat flour or swap in almond flour (about 1 cup/96g) for a lower-carb, gluten-free option. The texture will be a bit softer, but just as tasty.
- Vegan Adaptation: Use vegan protein powder, dairy-free cream cheese (like Tofutti or Violife), maple syrup instead of honey, and plant-based sprinkles. I’ve made this for my vegan friends, and it’s a hit!
- Chocolate Chip Funfetti: Swap half the sprinkles for mini chocolate chips or white chocolate chips. I do this when I want an extra dessert-y vibe.
- Seasonal Flavors: Add a pinch of cinnamon and nutmeg for a fall version, or toss in freeze-dried strawberries for a springtime twist.
- Nut-Free Option: Use sunflower seed butter instead of almond butter. It changes the taste a bit, but still pairs nicely with the birthday cake cheesecake flavor.
I once added a handful of chopped dried cherries for a cherry cheesecake vibe—it was amazing! Don’t be afraid to play around. Whether you need to avoid allergens or just want to change up the flavor, these protein balls are your blank canvas.
Serving & Storage Suggestions
These birthday cake cheesecake protein balls are best served chilled, straight from the fridge. They’re firm, chewy, and the flavors really pop when cold.
- Serving Ideas: Pile them high on a cute cake stand for parties, pack a few in snack containers for lunchboxes, or wrap them in parchment and tie with a ribbon for a sweet homemade gift.
- Pairings: Serve with a tall glass of almond milk, a hot cup of coffee, or even as a topping for Greek yogurt (seriously, so good!).
- Storage: Keep in an airtight container in the fridge for up to 5 days. For longer storage, freeze in a single layer until solid, then transfer to a zip-top bag or freezer container for up to 3 months.
- Reheating: No need! But if you want them a little softer, let sit at room temperature for 5-10 minutes. They taste great both ways.
- Flavor Over Time: The cake flavor deepens after a night in the fridge. I actually like them best the next day—the cheesecake tang gets even better!
If you freeze them, just let them thaw in the fridge overnight or on the counter for an hour. They’re a lifesaver for busy weeks!
Nutritional Information & Benefits
Each birthday cake cheesecake protein ball (based on a batch of 14) packs about:
- Calories: 90
- Protein: 5g
- Carbs: 9g
- Fat: 4g
- Fiber: 1g
- Sugar: 4g (mostly from honey/maple and sprinkles)
The real star here is the protein—thanks to the protein powder, almond butter, and cream cheese, you get a steady energy boost, not a sugar crash. Oat flour adds fiber, while almond butter brings healthy fats for satiety.
These protein balls are naturally gluten-free (if you use GF oats) and can be made dairy-free or nut-free with easy swaps. They do contain dairy (cream cheese) and nuts (almond butter) in the original, so always check those if you have allergies.
Honestly, these have helped me curb my sweet cravings while sticking to my healthy eating goals. They’re proof that you can have your cake and eat it, too—without all the guilt.
Conclusion
Birthday cake cheesecake protein balls are more than just a snack—they’re a little bite of celebration, any day of the week. With their cake-batter flavor, creamy texture, and rainbow sprinkles, they make healthy eating actually fun.
I hope you give these a try and make them your own. Whether you tweak the flavors, swap out the nut butter, or double the sprinkles (no judgment here!), you’ll end up with a snack that fits your cravings and your routine.
Personally, I love these because they remind me that eating well doesn’t have to mean missing out. If you try them, leave a comment or share your favorite variation—I’d love to hear how you make these birthday cake cheesecake protein balls your own! Here’s to more healthy snacks that make you smile.
Go on, grab your bowl and get rolling—your next favorite snack is just minutes away.
Frequently Asked Questions
Can I make birthday cake cheesecake protein balls without protein powder?
Yes! Just swap the protein powder for more oat flour (about 1/2 cup extra), and add a little extra vanilla extract for flavor. The protein content will be lower, but they’ll still taste great.
How long do these protein balls last in the fridge?
They’ll stay fresh for up to 5 days in an airtight container. For longer storage, freeze them and thaw as you need.
Are these safe for kids?
Absolutely! As long as your kids don’t have allergies to nuts or dairy, these are a fun, healthy treat. You can even use nut-free butter if needed.
Can I use peanut butter instead of almond butter?
Yes, but the flavor will be a bit more like peanut butter cookie dough. Still delicious—just different! Almond butter keeps the classic “birthday cake” vibe.
What’s the best protein powder for this recipe?
Any vanilla-flavored protein powder you enjoy works. I like whey-based for creaminess, but plant-based powders are great for a dairy-free version. Always taste your powder first—if you’d drink it as a shake, you’ll love it here.
Pin This Recipe!
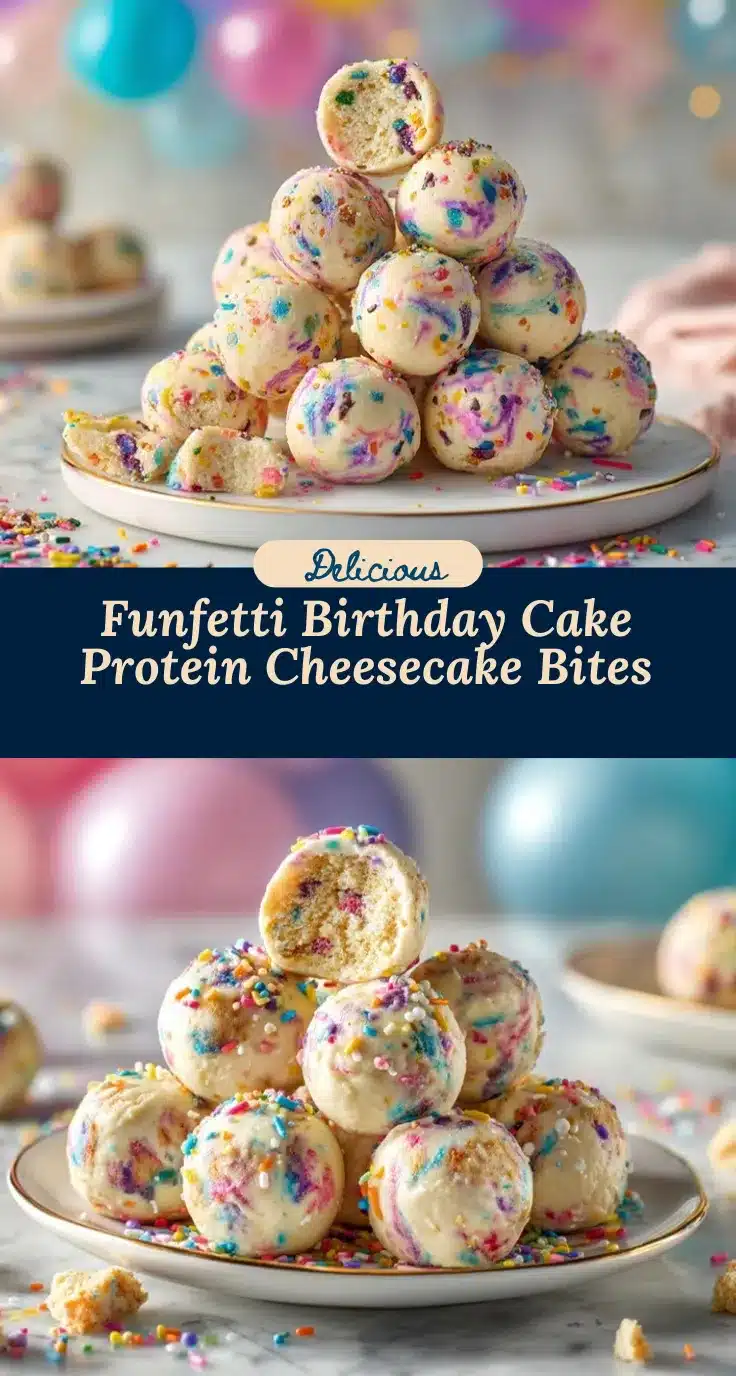
Birthday Cake Cheesecake Protein Balls

Sweet, creamy, and studded with rainbow sprinkles, these birthday cake cheesecake protein balls are a quick, high-protein snack that tastes like dessert. Perfect for post-workout fuel, lunchboxes, or a healthy treat any time of day.
- Prep Time: 15 minutes
- Cook Time: 0 minutes
- Total Time: 45 minutes (includes chilling)
- Yield: 14-16 balls (about 14 servings) 1x
- Category: Snack
- Cuisine: American
Ingredients
- 1 cup (100g) vanilla protein powder (whey or plant-based)
- 1 cup (110g) oat flour (or blitz rolled oats in a blender)
- 4 oz (113g) low-fat cream cheese, softened
- 1/4 cup (60g) natural almond butter
- 3 tbsp (45ml) honey or maple syrup
- 2 tsp (10ml) vanilla extract
- Pinch of salt
- 3 tbsp (30g) rainbow sprinkles, plus extra for rolling
- Optional: 1/4 tsp (1ml) almond extract
Instructions
- Let the cream cheese sit at room temperature for 10-15 minutes to soften, or microwave for 10 seconds until easily spreadable.
- In a mixing bowl, combine softened cream cheese, almond butter, honey or maple syrup, vanilla extract, and almond extract (if using). Mix until smooth and creamy.
- Add vanilla protein powder, oat flour, and a pinch of salt. Stir until a stiff dough forms. If too dry, add 1-2 teaspoons milk (dairy or non-dairy) as needed. If too sticky, add a spoonful of oat flour.
- Gently fold in rainbow sprinkles, being careful not to overmix.
- Using a cookie scoop or tablespoon, portion and roll the dough into balls about 1 inch in diameter. You should get 14-16 balls.
- Optional: Roll each ball in extra sprinkles for more color and crunch.
- Place balls on a parchment-lined plate or baking sheet and refrigerate for at least 30 minutes to firm up.
- Serve chilled. Store leftovers in an airtight container in the fridge for up to 5 days, or freeze for up to 3 months.
Notes
For gluten-free, use certified gluten-free oats or oat flour. For vegan, use dairy-free cream cheese, vegan protein powder, and maple syrup. Adjust dough consistency with oat flour or milk as needed. Stir in sprinkles gently to avoid color bleeding. Store chilled for best texture and flavor.
Nutrition
- Serving Size: 1 protein ball
- Calories: 90
- Sugar: 4
- Sodium: 60
- Fat: 4
- Saturated Fat: 1
- Carbohydrates: 9
- Fiber: 1
- Protein: 5
Keywords: protein balls, birthday cake, cheesecake, healthy snack, high protein, no bake, funfetti, gluten free, meal prep, easy snack, dessert, post workout, kid friendly