“You won’t believe it,” my neighbor chuckled one afternoon while tossing a handful of sharp cheddar into a bowl, “but this cheese ball recipe started as a total kitchen mishap.” Honestly, I was skeptical—cheese balls seemed like an old-school party snack, the kind you forgot until someone dusted off the old recipe box. But, you know that feeling when you bite into something unexpectedly creamy and flavorful? That happened right there in her tiny kitchen, with a cracked mixing bowl and a few frantic phone calls to the grocery store. I mean, let’s face it, entertaining can get messy fast, and having a reliable, crowd-pleasing recipe is like a secret weapon.
That moment stuck with me. It wasn’t just about the cheese ball itself but the way it brought everyone closer—friends laughing over chips, swapping stories, and sneaking extra spoonfuls when no one was watching. Maybe you’ve been there, trying to juggle a million things before guests arrive, only to realize you forgot the dip. This creamy irresistible cheese ball recipe isn’t just comfort food; it’s a little party starter that makes entertaining easier and more fun. Plus, it’s simple enough that even if you forget an ingredient or get interrupted mid-prep (guilty as charged), you can still pull off something delicious.
Over time, I tweaked and tested it in my own kitchen, perfecting just the right balance of rich cream cheese, tangy shredded cheddar, and a hint of spice that wakes up your taste buds without stealing the show. So, whether you’re a seasoned host or just grabbing last-minute snacks for friends, this cheese ball recipe has earned a permanent spot in my entertaining playbook.
Why You’ll Love This Recipe
- Quick & Easy: Comes together in under 20 minutes, perfect for busy weeknights or last-minute gatherings.
- Simple Ingredients: No fancy grocery trips needed; you probably have everything in your fridge or pantry already.
- Perfect for Entertaining: Ideal for parties, potlucks, or casual get-togethers where everyone loves finger food.
- Crowd-Pleaser: Always gets rave reviews from kids and adults alike—no one can resist that creamy texture.
- Unbelievably Delicious: The blend of sharp cheddar, cream cheese, and subtle spices creates a rich, comforting flavor that feels fancy but is totally approachable.
This isn’t just another cheese ball. The magic lies in the velvety cream cheese base whipped until smooth, combined with real shredded cheddar for that authentic tang. Plus, I like to add a touch of Worcestershire sauce and garlic powder—not too much, just enough to make your taste buds sit up and pay attention. It’s the kind of recipe that makes you close your eyes after the first bite, savoring the perfect balance of flavors and textures.
Honestly, this recipe has saved me more than once when I had to whip up something fast but still wanted to impress. It’s comfort food that feels special without the stress, and I bet you’ll find yourself making it again and again, whether for a crowd or just because.
What Ingredients You Will Need
This recipe uses simple, wholesome ingredients to deliver bold flavor and that satisfyingly creamy texture without any fuss. Most are pantry staples, and if you don’t have something, there’s usually a straightforward substitute.
- Cream cheese, 8 oz (225 g), softened – the creamy base that makes this cheese ball irresistibly smooth.
- Sharp cheddar cheese, 1 cup (100 g), shredded – provides that classic tang and texture. I prefer Cabot for its sharpness.
- Worcestershire sauce, 1 tablespoon – adds subtle depth and umami (don’t skip this one!).
- Garlic powder, 1 teaspoon – for a hint of savory warmth.
- Onion powder, 1/2 teaspoon – balances the garlic with a gentle sweetness.
- Green onions, 2 tablespoons, finely chopped – gives freshness and a little crunch.
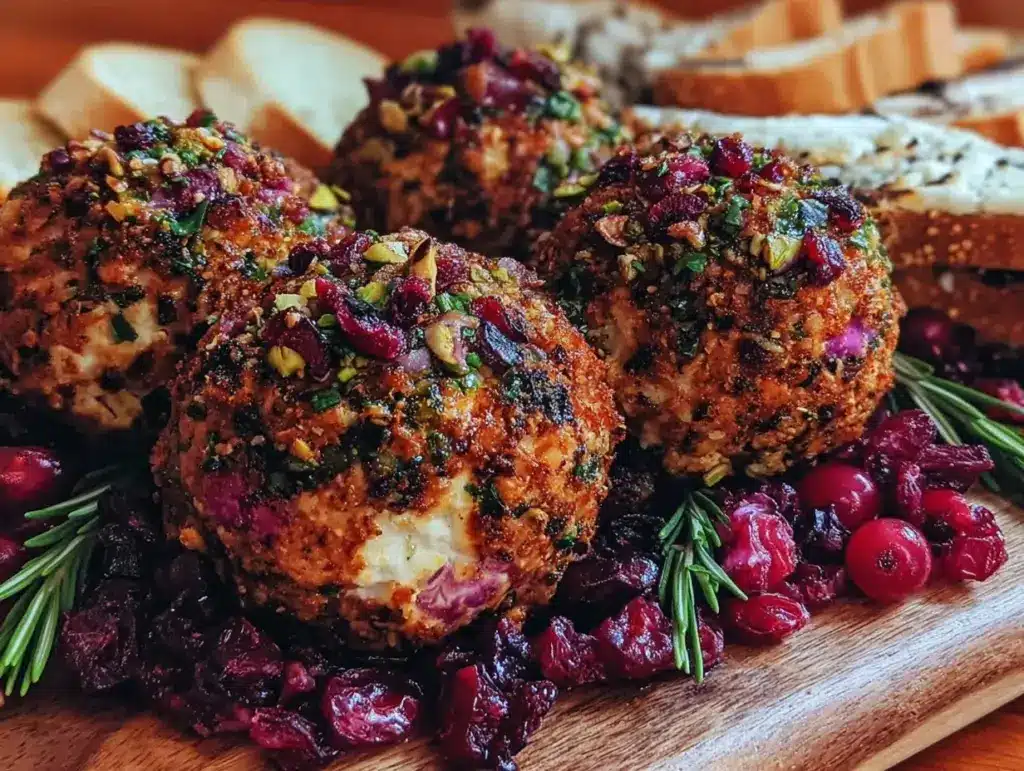
- Chopped pecans or walnuts, 1/2 cup (50 g) – for rolling the cheese ball and adding a nutty coating.
- Smoked paprika, 1/2 teaspoon – optional, but it adds a smoky kick that’s so good.
- Salt and black pepper, to taste – always adjust to your liking.
Substitution tips: If you want to keep it dairy-free, swap cream cheese with a plant-based cream cheese and cheddar with a vegan shredded cheese. For a gluten-free option, this recipe is naturally safe, but double-check the Worcestershire sauce ingredients.
Seasonal twist: In spring or summer, try rolling the cheese ball in finely chopped fresh herbs like parsley or chives instead of nuts for a vibrant green coat.
Equipment Needed
- Mixing bowl (medium-sized) – I like one with a wide mouth for easy mixing.
- Electric hand mixer or stand mixer – helps get the cream cheese perfectly smooth, but a sturdy spoon and elbow grease work too.
- Measuring cups and spoons – for precise ingredient amounts.
- Spatula – essential for scraping down the sides of the bowl and shaping the cheese ball.
- Plate or small board – to chill and serve the cheese ball.
- Optional: food processor – if you want finely chopped nuts quickly (just pulse a few times, no need to overdo it).
If you don’t have a mixer, no worries. It takes a bit more time, but mixing the cream cheese and cheddar by hand with a wooden spoon works just fine. Just make sure your cream cheese is truly softened to room temperature for easier mixing. Also, a silicone spatula is my go-to for clean edges and less mess.
Preparation Method

- Soften the cream cheese: Remove 8 oz (225 g) of cream cheese from the fridge about 30 minutes before starting. It should be soft enough to blend easily but not melting. This step is key for that creamy texture.
- Mix the base: In your medium mixing bowl, beat the softened cream cheese with 1 tablespoon Worcestershire sauce, 1 teaspoon garlic powder, 1/2 teaspoon onion powder, and a pinch of salt and pepper. Use an electric mixer on medium speed for about 2-3 minutes until smooth and fluffy. If you’re mixing by hand, stir vigorously with a wooden spoon until well combined.
- Add cheddar and green onions: Gently fold in 1 cup (100 g) shredded sharp cheddar and 2 tablespoons finely chopped green onions. Mix just enough to distribute evenly—don’t overmix or the cheddar will break down too much.
- Shape the cheese ball: Using your hands or a spatula, form the mixture into a tight ball. Place it onto a plate or small board.
- Coat the cheese ball: Spread 1/2 cup (50 g) chopped pecans or walnuts on a flat surface or plate. Roll the cheese ball in the nuts until fully coated. For a smoky twist, sprinkle a little smoked paprika on the nuts before rolling. Wrap the cheese ball in plastic wrap and refrigerate for at least 1 hour (or up to 24 hours) to let the flavors meld and firm up.
Pro tip: If your cream cheese still feels a bit stiff, place it in the microwave for 10 seconds at a time (watch closely!) to soften. Also, chilling the cheese ball overnight results in a firmer texture that’s easier to slice or spread.
When ready to serve, remove from fridge 10 minutes prior to soften slightly—it makes spreading on crackers a dream.
Cooking Tips & Techniques
Even though this cheese ball doesn’t require cooking, there are a few techniques that’ll help you nail it every time. First, patience with softening the cream cheese is everything. I’ve rushed this step and ended up with lumpy mixtures that were hard to shape—so don’t skip it.
When mixing, don’t overdo it once you add the cheddar cheese. Overmixing breaks down the shredded cheese, losing that delightful texture contrast. Fold gently instead, like you’re tucking in a blanket.
Rolling the cheese ball in nuts adds more than crunch – it creates a barrier that helps keep the cheese firm longer, especially if you’re serving outdoors. If you have nut allergies, chopped fresh herbs or crushed pretzels make excellent alternatives.
I’ve learned that making this cheese ball a day ahead is a game changer. The flavors deepen, and it’s less stress on the day of your party. Just remember to let it sit out a little before serving for the best spreadability.
Also, multitask by prepping any dipping accompaniments, like crackers or sliced veggies, while the cheese ball chills. That way, everything comes together smoothly, and you avoid last-minute scrambling.
Variations & Adaptations
- Herb & Garlic: Add 1 tablespoon finely chopped fresh herbs (parsley, chives, dill) and 1 minced garlic clove for a garden-fresh twist. Roll in a mix of herbs and crushed pistachios instead of nuts.
- Bacon & Jalapeño: Mix in 1/4 cup cooked, crumbled bacon and 1 finely chopped jalapeño (remove seeds for less heat). Coat with crushed BBQ-flavored chips for a smoky, spicy edge.
- Sun-Dried Tomato & Basil: Stir in 1/3 cup chopped sun-dried tomatoes and 2 tablespoons chopped fresh basil. Roll in grated Parmesan cheese mixed with toasted pine nuts for an Italian flair.
For a dairy-free version, substitute the cream cheese with a plant-based cream cheese and shredded cheddar with your favorite vegan cheese. If you want to make this faster, shape smaller individual cheese balls or use mini muffin tins lined with plastic wrap.
Personally, I once tried adding a splash of hot sauce to the base mix—just a teaspoon—to wake up the flavor profile. It was unexpectedly good and got a lot of compliments at the next party.
Serving & Storage Suggestions
Serve this cheese ball chilled or slightly softened at room temperature for easier spreading. Arrange it on a nice platter surrounded by an assortment of crackers, toasted baguette slices, and fresh vegetable sticks like celery, cucumber, and bell peppers.
It pairs beautifully with a crisp white wine or a light, fruity beer if you’re offering drinks. For a non-alcoholic option, sparkling water with a twist of lemon complements the richness well.
Store leftover cheese ball wrapped tightly in plastic wrap or in an airtight container in the fridge for up to 5 days. You can also freeze it for up to 3 months; thaw overnight in the refrigerator before serving.
Reheat is not recommended, but letting it sit out for 10-15 minutes before serving helps soften the texture and bring out the flavors. Over time, the flavors meld and deepen, making it even more flavorful the next day.
Nutritional Information & Benefits
This creamy irresistible cheese ball recipe provides a good source of protein and calcium, thanks to the cream cheese and cheddar. While it’s a richer appetizer, the portion-controlled serving size helps keep things balanced.
The nuts add healthy fats and a nice crunch, making this snack a bit more filling. Worcestershire sauce and spices contribute negligible calories but enhance flavor without extra salt.
For those watching carbs, this recipe is naturally low-carb and gluten-free (check your Worcestershire sauce to be sure). It’s great for keto-friendly entertaining or anyone looking to enjoy indulgent flavors without complicated ingredients.
From my wellness perspective, having a reliable, tasty recipe like this helps me stay social and enjoy treats without the stress of complicated prep or heavy processed foods.
Conclusion
If you’ve never made a cheese ball before, this creamy irresistible cheese ball recipe is a fantastic place to start. It balances simplicity and flavor in a way that’s approachable for any level of cook and guaranteed to impress your guests. Plus, you can personalize it with your favorite add-ins or coatings to keep things fresh.
I love this recipe because it’s one of those rare dishes that feels special but doesn’t require hours or fancy ingredients. It’s my go-to when I want to bring a little joy and comfort to the table without fuss.
Give it a try, and let me know how you customize yours—sharing your twists is half the fun! Don’t forget to comment below or share this recipe with friends who need an easy, delicious crowd-pleaser for their next get-together. Happy entertaining!
Frequently Asked Questions
Can I make the cheese ball ahead of time?
Absolutely. It actually tastes better after chilling for several hours or overnight. Just wrap it tightly and refrigerate until ready to serve.
What can I use if I don’t have nuts for the coating?
Try rolling the cheese ball in fresh chopped herbs, crushed pretzels, or even finely chopped crispy bacon for a different texture and flavor.
Is this recipe gluten-free?
Yes, the basic recipe is gluten-free. Just double-check that your Worcestershire sauce and any coating ingredients don’t contain gluten.
Can I add other cheeses to the mix?
Definitely! Mixing in a little mozzarella or pepper jack can add interesting flavors and textures. Just keep the total cheese volume the same.
How long does the cheese ball last in the fridge?
Stored properly in an airtight container or wrapped well, it stays fresh for up to 5 days. For longer storage, freezing is an option.
Pin This Recipe!

Creamy Cheese Ball Recipe Easy 5-Step Guide for Perfect Entertaining

A quick and easy creamy cheese ball recipe combining sharp cheddar, cream cheese, and subtle spices, perfect for entertaining and crowd-pleasing at any gathering.
- Prep Time: 10 minutes
- Cook Time: 0 minutes
- Total Time: 1 hour 10 minutes
- Yield: 8 servings 1x
- Category: Appetizer
- Cuisine: American
Ingredients
- 8 oz (225 g) cream cheese, softened
- 1 cup (100 g) sharp cheddar cheese, shredded
- 1 tablespoon Worcestershire sauce
- 1 teaspoon garlic powder
- 1/2 teaspoon onion powder
- 2 tablespoons green onions, finely chopped
- 1/2 cup (50 g) chopped pecans or walnuts
- 1/2 teaspoon smoked paprika (optional)
- Salt and black pepper, to taste
Instructions
- Soften the cream cheese by removing it from the fridge about 30 minutes before starting.
- In a medium mixing bowl, beat the softened cream cheese with Worcestershire sauce, garlic powder, onion powder, salt, and pepper using an electric mixer on medium speed for 2-3 minutes until smooth and fluffy. Alternatively, stir vigorously by hand.
- Gently fold in shredded sharp cheddar and finely chopped green onions, mixing just enough to distribute evenly.
- Form the mixture into a tight ball using your hands or a spatula and place it onto a plate or small board.
- Spread chopped pecans or walnuts on a flat surface and roll the cheese ball in the nuts until fully coated. Optionally, sprinkle smoked paprika on the nuts before rolling. Wrap in plastic wrap and refrigerate for at least 1 hour or up to 24 hours before serving.
Notes
Soften cream cheese well before mixing to avoid lumps. Do not overmix after adding cheddar to maintain texture. Rolling in nuts helps keep the cheese ball firm longer. Chilling overnight improves flavor and texture. Let sit at room temperature 10 minutes before serving for easier spreading. For nut allergies, roll in fresh herbs or crushed pretzels.
Nutrition
- Serving Size: Approximately 2 tabl
- Calories: 180
- Sugar: 1
- Sodium: 210
- Fat: 15
- Saturated Fat: 6
- Carbohydrates: 3
- Fiber: 1
- Protein: 6
Keywords: cheese ball, creamy cheese ball, party appetizer, easy cheese ball recipe, crowd-pleaser, sharp cheddar, cream cheese, entertaining snack


