
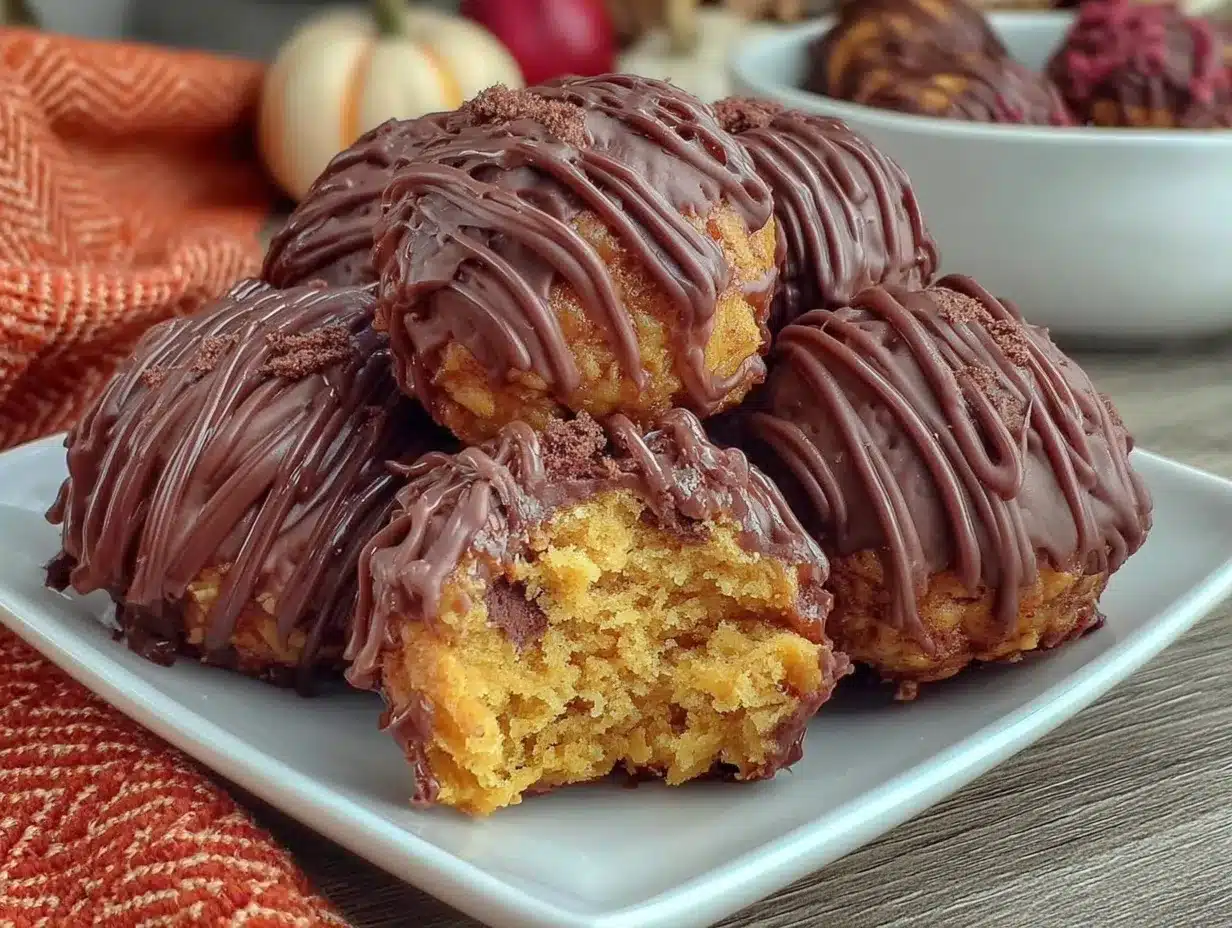
Let me tell you, the moment the scent of cinnamon-spiced pumpkin and melting chocolate started swirling through my kitchen, I knew these creamy pumpkin truffles were about to become legendary. You know that cozy, sweet aroma that instantly makes you think of autumn sweaters and crackling leaves? That’s exactly how my house felt the first time I whipped up a batch of these decadent chocolate-coated treats. The glossy chocolate shells, each hiding a velvety pumpkin center, are pure magic—honestly, they’re dangerously easy to make and even easier to eat.
I still remember my first taste: it was after a rainy Saturday spent inside, searching for something special to bring to a family get-together. I’d stumbled on the idea of pumpkin truffles while trying to recreate a treat my grandma used to make every Thanksgiving—hers were more rustic, but always packed with nostalgic comfort. The first bite? It was one of those pause-and-smile moments, where you’re instantly hooked and realize you’ll want to make it again (and again). These little truffles have since become a staple for gifting, potlucks, and, let’s face it, sneaky midnight snacks.
My family couldn’t stop sneaking them off the cooling rack—my kids actually tried hiding a few for later, which I can’t really blame them for. Even my husband, who’s not usually a pumpkin fan, declared them “unbelievably good.” Honestly, I wish I’d discovered this creamy pumpkin truffles recipe years ago. It’s perfect for brightening up your Pinterest board, impressing friends at the office, or just treating yourself on a cozy night in. After countless rounds of testing (in the name of research, of course), I’m convinced these are the kind of sweet bites that feel like a warm hug. Bookmark this one—you’re going to want it for every fall season and beyond.
Why You’ll Love This Creamy Pumpkin Truffles Recipe
Having tested, tweaked, and gifted these creamy pumpkin truffles more times than I can count, I can say with confidence that they’re a total crowd-pleaser. There’s a lot to love here, and if you’re like me—always hunting for easy pumpkin desserts that actually deliver—you’ll appreciate what makes these stand out.
- Quick & Easy: You can whip up a batch in under 45 minutes, start to finish. Perfect for busy weekdays or last-minute cravings.
- Simple Ingredients: No fancy grocery runs required—just pumpkin puree, cream cheese, graham crackers, chocolate chips, and basic pantry spices. You probably have everything already.
- Perfect for Any Occasion: These truffles are a hit at autumn potlucks, holiday gatherings, or just as a sweet treat for movie night. I even bring them to bake sales and they disappear fast!
- Crowd-Pleaser: Kid-approved, adult-approved, even picky eaters have asked for seconds. Creamy pumpkin meets rich chocolate—honestly, what’s not to love?
- Unbelievably Delicious: The filling is silky smooth, with just the right amount of spice. The chocolate shell adds that snap and richness that makes you close your eyes after the first bite.
What makes this creamy pumpkin truffles recipe different? I started blending the pumpkin filling with a touch of cream cheese and graham cracker crumbs, which gives the truffles a cheesecake-like creaminess and a hint of pie crust flavor (I learned this trick from a friend who’s obsessed with texture). The chocolate coating isn’t just for looks—it locks in moisture, so every bite stays perfectly creamy.
Honestly, these truffles are comfort food reimagined—healthier than a slice of pumpkin pie, but with every bit of soul-soothing satisfaction. You can impress guests without the stress, or turn a simple night into something memorable. I’ve tested them for gluten-free friends using almond flour and dairy-free chocolate, and they came out just as tasty. Try them once, and you’ll see why this recipe has a permanent spot in my fall favorites.
What Ingredients You Will Need
This creamy pumpkin truffles recipe uses simple, wholesome ingredients to deliver bold flavor and a melt-in-your-mouth texture you’ll crave. Most of these are regular pantry staples, and you can easily swap them out if needed. Here’s what you’ll need:
- For the Pumpkin Filling:
- Pumpkin puree (not pie filling) – 1/2 cup (120g)
- Cream cheese, softened – 4 oz (115g)
- Graham cracker crumbs – 1/2 cup (60g) (or use digestive biscuits, or gluten-free alternatives)
- Powdered sugar – 3/4 cup (90g) (adds smoothness and sweetness)
- Vanilla extract – 1 tsp (5ml)
- Ground cinnamon – 1/2 tsp (1g)
- Ground ginger – 1/4 tsp (0.5g)
- Ground nutmeg – 1/8 tsp (0.25g)
- Pinch of salt – just a dash to balance the sweetness
- For the Chocolate Coating:
- Semi-sweet chocolate chips – 1 1/2 cups (270g) (I like Ghirardelli or Enjoy Life for dairy-free)
- Coconut oil or vegetable shortening – 2 tbsp (30ml) (makes the coating smooth and glossy)
- Optional for Topping:
- Crushed graham crackers, chopped pecans, or festive sprinkles (for extra crunch and visual appeal)
Ingredient Tips & Substitutions:
- If you need a dairy-free version, swap the cream cheese for a plant-based alternative and use dairy-free chocolate chips.
- Almond flour can be subbed for graham cracker crumbs for a gluten-free option. It creates a slightly nuttier flavor (which I actually love).
- Want to switch up the spices? Try pumpkin pie spice instead of individual spices for simplicity.
- If you’re out of coconut oil, any neutral oil will work—just steer clear of olive oil, which can overpower the chocolate.
I always reach for Libby’s pumpkin puree, but homemade works beautifully if you have fresh pumpkin on hand. For the chocolate coating, a good-quality chocolate makes a difference (the cheaper stuff can taste waxy, you know?). And don’t skip the pinch of salt—it brings everything together.
Equipment Needed
You really don’t need much to make these creamy pumpkin truffles—just a few basic kitchen tools. Here’s what I use:
- Mixing bowls (at least two—one for the filling, one for chocolate)
- Electric hand mixer or stand mixer (makes blending the filling a breeze; a sturdy whisk works in a pinch, but your arm might get tired!)
- Measuring cups and spoons (accuracy is key for the perfect texture)
- Baking sheet lined with parchment paper (keeps cleanup easy and truffles from sticking)
- Small scoop or tablespoon (for uniform truffle sizes; I use a 1-inch cookie scoop)
- Microwave-safe bowl or double boiler (for melting chocolate; I prefer the microwave for speed, but double boiler gives more control)
- Forks or dipping tools (for dunking truffles in chocolate; two forks work if you don’t have a fancy truffle dipper)
- Refrigerator space (for chilling; trust me, don’t try to skip this step!)
If you don’t own an electric mixer, a sturdy spatula and some elbow grease will do the job—just be patient and mix until everything’s smooth. I’ve tried using silicone mats instead of parchment, and both work well, though parchment makes cleanup even faster. For melting chocolate, a glass bowl is my go-to; it holds heat nicely and is easy to handle. And if you’re on a budget, no need for specialty tools—just use what you have and enjoy the process!
Preparation Method
- Blend the Pumpkin Filling: In a large mixing bowl, combine 1/2 cup (120g) pumpkin puree, 4 oz (115g) softened cream cheese, and 3/4 cup (90g) powdered sugar. Beat with an electric mixer on medium speed for about 2 minutes, until smooth and creamy. Scrape down the sides to make sure everything is incorporated. (If you notice lumps, don’t panic—keep mixing and they’ll smooth out.)
- Add Flavor: Sprinkle in 1/2 cup (60g) graham cracker crumbs, 1 tsp (5ml) vanilla extract, 1/2 tsp (1g) ground cinnamon, 1/4 tsp (0.5g) ground ginger, 1/8 tsp (0.25g) ground nutmeg, and a pinch of salt. Mix until combined—about 1 minute. The filling should be thick, creamy, and slightly sticky. If it seems too soft to roll, chill it for 10-15 minutes to firm up.
- Form the Truffles: Use a small cookie scoop or tablespoon to portion the filling into 1-inch balls (roughly 20g each). Roll each between your palms to smooth. Place on a parchment-lined baking sheet. If the mixture sticks to your hands, lightly dust them with powdered sugar or graham crumbs.
- Chill: Refrigerate the pumpkin balls for at least 30 minutes, or until firm. This step is crucial—if you skip it, the truffles may fall apart when coated with chocolate. (I’ve tried to rush it before, and learned the hard way!)
- Melt the Chocolate: In a microwave-safe bowl, combine 1 1/2 cups (270g) semi-sweet chocolate chips and 2 tbsp (30ml) coconut oil. Microwave in 30-second bursts, stirring after each, until smooth and glossy. (Alternatively, use a double boiler for gentler melting.) If the chocolate seizes, add a bit more oil and stir vigorously.
- Coat the Truffles: Using two forks, dip each chilled pumpkin ball into the melted chocolate, letting excess chocolate drip off. Place coated truffles back on the parchment-lined sheet. Work quickly—the chocolate starts to firm up if your kitchen is cool.
- Add Toppings (Optional): While the chocolate is still wet, sprinkle crushed graham crackers, nuts, or festive sprinkles over the top. (I do half with graham, half with pecans—everyone has a favorite.)
- Set and Serve: Return the truffles to the fridge for 15-20 minutes, or until the chocolate is fully set. The finished truffles should have a shiny shell and creamy center. Store in an airtight container until ready to serve.
Preparation Notes:
- If your filling is too soft, chill longer or add a tablespoon more graham crumbs.
- If you notice cracks or uneven chocolate, gently re-dip or patch with a spoon.
These truffles keep well for up to a week in the fridge, and the process gets easier every time. The sensory cues—smooth, creamy filling, glossy chocolate—are your sign that you’ve nailed it.
Cooking Tips & Techniques
Honestly, I’ve had my fair share of truffle disasters over the years—melted filling, lumpy chocolate, you name it. Here’s what I’ve learned to make sure your creamy pumpkin truffles turn out just right:
- Chill Is Key: Never skip chilling the filling. If you try to coat warm pumpkin balls, they’ll fall apart and make a mess. I sometimes chill mine overnight if I’m prepping ahead.
- Use Good Chocolate: Cheap chocolate chips can taste waxy and don’t melt smoothly. I stick with Ghirardelli or Enjoy Life (for dairy-free) for a silky finish.
- Don’t Overheat Chocolate: Melt slowly in short bursts—if it gets too hot, it seizes up. Add coconut oil to keep it smooth and glossy.
- Uniform Size: Use a cookie scoop for even truffles. It looks prettier and helps them set evenly, too.
- Multi-tasking: While the pumpkin balls chill, prep your toppings and melt the chocolate. It saves time and keeps you organized.
- Quick Dipping: Work fast when coating—chocolate firms up quickly. If it thickens, zap it in the microwave for 10 seconds to loosen.
- Patching Imperfections: If a truffle cracks, just spoon a little extra chocolate on top. Nobody will notice once it’s decorated!
My biggest truffle fail was using warm filling—everything slumped into puddles. Now I always check by gently pressing a chilled ball—if it holds shape, it’s ready for dipping. If you’re new to truffles, don’t stress about perfection. The chocolate shell hides a lot of flaws, and honestly, homemade truffles are supposed to look a little rustic!
Variations & Adaptations
One of my favorite things about this creamy pumpkin truffles recipe is how easy it is to adapt. Whether you’re making them for dietary needs or just changing up the flavors, here are some options:
- Gluten-Free: Use almond flour or gluten-free graham crackers in place of regular crumbs. I’ve served these to gluten-sensitive friends and they always ask for the recipe!
- Dairy-Free: Swap cream cheese for a plant-based alternative and use dairy-free chocolate chips. Coconut cream can add even more richness.
- Seasonal Flavors: Mix in a tablespoon of maple syrup for a fall-inspired twist, or swap the spices for pumpkin pie spice. In winter, add a pinch of cardamom for warmth.
- Different Coatings: Try white chocolate or dark chocolate instead of semi-sweet. Sprinkle with sea salt flakes for a fancy finish, or roll in toasted coconut.
- Alternative Cooking Methods: If you don’t want to use chocolate, dust the chilled truffles in cocoa powder or cinnamon-sugar for a lighter treat.
Personally, I love adding chopped pecans to the filling for crunch, or a dash of espresso powder for depth. The possibilities are endless—feel free to experiment and make these truffles your own.
Serving & Storage Suggestions
These creamy pumpkin truffles are best served chilled, straight from the fridge. The chocolate shell is crisp, and the filling stays perfectly creamy.
- Presentation: Arrange truffles on a decorative plate, sprinkle with extra graham crumbs or nuts, and serve with coffee or hot cider. They look gorgeous in mini cupcake liners for parties.
- Pairings: I love these with chai tea, spiced lattes, or alongside fruit platters. They also make a sweet finish to heavier meals.
- Storage: Store in an airtight container in the refrigerator for up to 7 days. For longer storage, freeze in a single layer and transfer to a freezer bag—just thaw in the fridge before serving.
- Reheating: No need to reheat, but if the chocolate shell gets too hard, let truffles sit at room temperature for 10 minutes to soften.
- Flavor Development: The pumpkin and spices get even better after a day or two—so these are great for making ahead!
They make perfect edible gifts and are easy to transport. Just be sure to keep them cool if you’re bringing them to a party or event.
Nutritional Information & Benefits
Each creamy pumpkin truffle (about 25g) contains roughly:
- Calories: 80
- Fat: 4g
- Carbs: 11g
- Protein: 1g
- Sugar: 8g
Pumpkin puree is packed with beta-carotene, which supports eye health and immunity. Cream cheese adds a bit of protein, while the chocolate provides antioxidants. These truffles are naturally nut-free (unless you add nuts) and can be made gluten-free and dairy-free with simple swaps.
As someone who tries to balance sweets with nutrition, I appreciate that these are portion-controlled, satisfying, and not overly indulgent. Just keep an eye out for potential allergens like dairy, gluten, or nuts depending on your adaptations.
Conclusion
If you’re looking for an easy, crowd-pleasing fall treat, this creamy pumpkin truffles recipe is absolutely worth a try. The rich chocolate shell and creamy pumpkin filling are a match made in dessert heaven, and honestly, making them is almost as fun as eating them. Don’t be afraid to customize—add your favorite spices, try different toppings, or go gluten-free if you need to.
I love these truffles because they capture all the best parts of autumn baking, but without the fuss of pies or cakes. They’re my go-to for gifting, sharing, and those days when you just need a little pick-me-up. If you give them a try, I’d love to hear your tweaks and tips—leave a comment below, share with friends, or pin to your favorite Pinterest board!
Here’s to sweet, simple moments—may your kitchen always smell like pumpkin and chocolate!
Frequently Asked Questions
Can I use fresh pumpkin instead of canned pumpkin puree?
Yes, just make sure to cook and mash your pumpkin until smooth. Homemade puree can be a bit wetter—so drain excess liquid for best results.
How do I prevent the truffles from falling apart when dipping in chocolate?
Chilling the pumpkin balls thoroughly is key. If they’re too soft, add more graham crumbs or chill longer before coating.
Can I freeze creamy pumpkin truffles?
Absolutely! Freeze in a single layer on a baking sheet, then transfer to a freezer bag. Thaw in the refrigerator before serving for best texture.
What’s the best way to melt chocolate for coating?
I prefer the microwave in short bursts, stirring often. You can use a double boiler if you want more control and less risk of burning.
Are these truffles gluten-free or dairy-free?
They can be! Use gluten-free graham crackers and dairy-free cream cheese and chocolate chips. The recipe is very adaptable for different dietary needs.
Pin This Recipe!
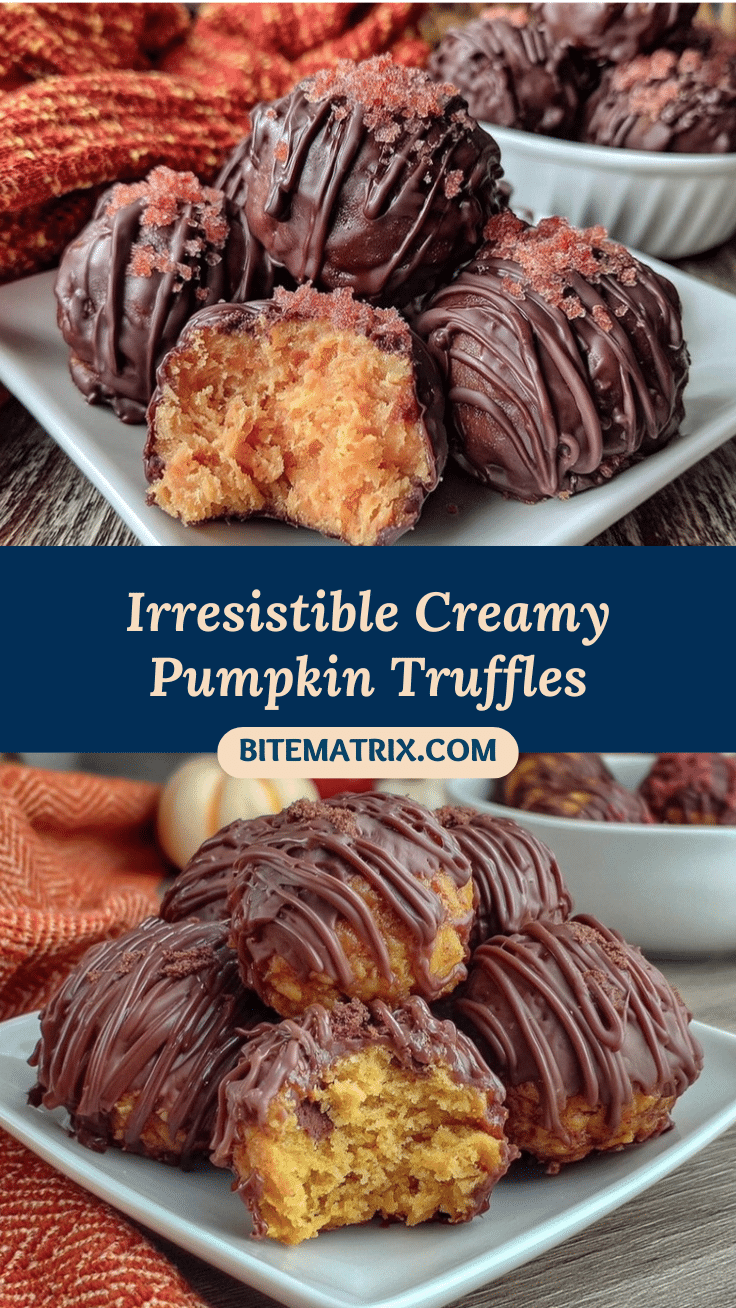
Creamy Pumpkin Truffles

These easy homemade pumpkin truffles feature a creamy, spiced pumpkin filling coated in glossy chocolate. Perfect for fall gatherings, gifting, or a cozy treat, they’re quick to make and irresistibly delicious.
- Prep Time: 15 minutes
- Cook Time: 0 minutes
- Total Time: 45 minutes
- Yield: 20 truffles 1x
- Category: Dessert
- Cuisine: American
Ingredients
- 1/2 cup pumpkin puree (not pie filling)
- 4 oz cream cheese, softened
- 1/2 cup graham cracker crumbs (or digestive biscuits, or gluten-free alternatives)
- 3/4 cup powdered sugar
- 1 tsp vanilla extract
- 1/2 tsp ground cinnamon
- 1/4 tsp ground ginger
- 1/8 tsp ground nutmeg
- Pinch of salt
- 1 1/2 cups semi-sweet chocolate chips
- 2 tbsp coconut oil or vegetable shortening
- Optional: crushed graham crackers, chopped pecans, or festive sprinkles for topping
Instructions
- In a large mixing bowl, combine pumpkin puree, softened cream cheese, and powdered sugar. Beat with an electric mixer on medium speed for about 2 minutes until smooth and creamy.
- Add graham cracker crumbs, vanilla extract, cinnamon, ginger, nutmeg, and a pinch of salt. Mix until combined, about 1 minute. If the filling is too soft, chill for 10-15 minutes.
- Use a small cookie scoop or tablespoon to portion the filling into 1-inch balls. Roll each between your palms to smooth and place on a parchment-lined baking sheet.
- Refrigerate the pumpkin balls for at least 30 minutes, or until firm.
- In a microwave-safe bowl, combine chocolate chips and coconut oil. Microwave in 30-second bursts, stirring after each, until smooth and glossy. Alternatively, melt using a double boiler.
- Using two forks, dip each chilled pumpkin ball into the melted chocolate, letting excess drip off. Place coated truffles back on the parchment-lined sheet.
- While the chocolate is still wet, sprinkle with crushed graham crackers, nuts, or festive sprinkles if desired.
- Return the truffles to the fridge for 15-20 minutes, or until the chocolate is fully set.
- Store in an airtight container in the refrigerator until ready to serve.
Notes
Chilling the filling is crucial for easy dipping. For gluten-free, use almond flour or gluten-free graham crackers. For dairy-free, use plant-based cream cheese and dairy-free chocolate chips. Truffles keep up to a week in the fridge and can be frozen for longer storage.
Nutrition
- Serving Size: 1 truffle (about 25g
- Calories: 80
- Sugar: 8
- Sodium: 40
- Fat: 4
- Saturated Fat: 2
- Carbohydrates: 11
- Fiber: 1
- Protein: 1
Keywords: pumpkin truffles, chocolate truffles, fall dessert, easy pumpkin recipe, homemade truffles, gluten-free option, dairy-free option, autumn treats


