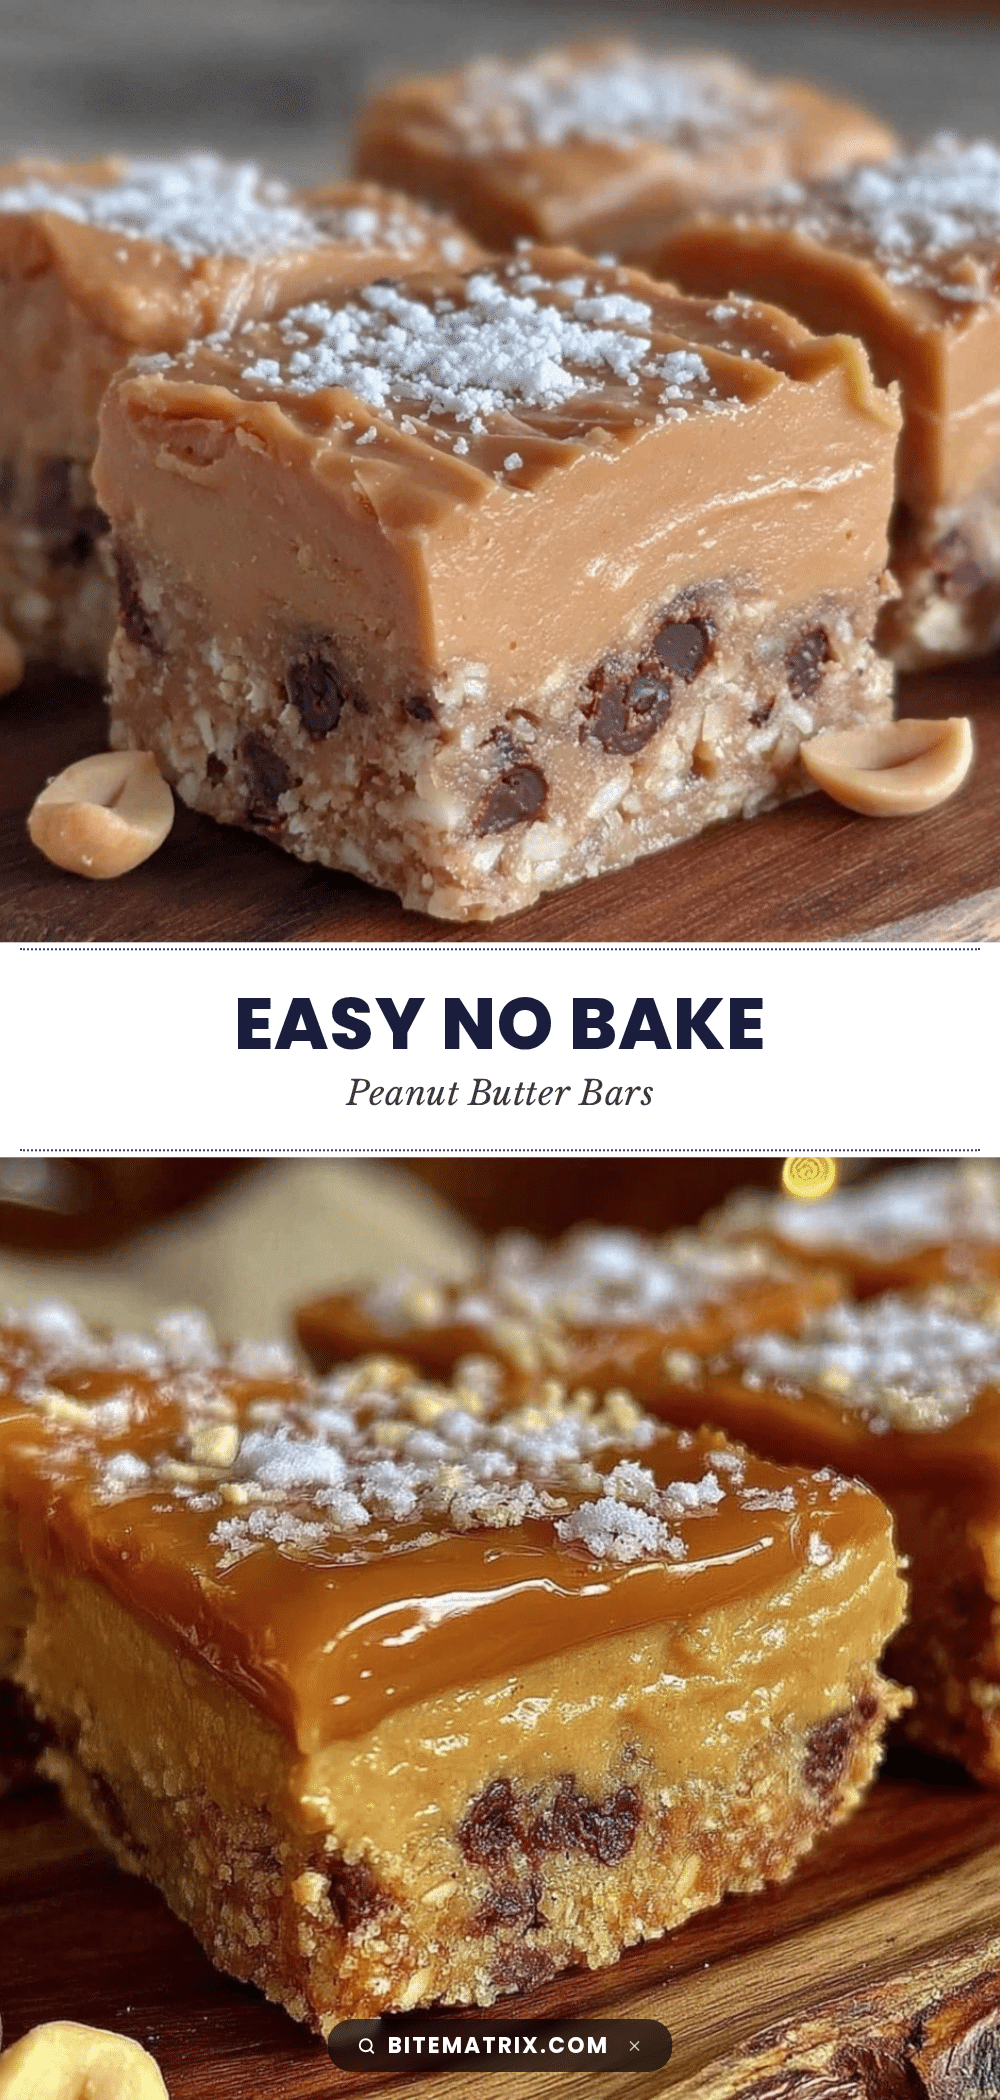
“Hey, you got any quick snacks?” That text popped up on my phone just as I was about to call it a night. Honestly, I was tired, worn out from the day’s chaos, and definitely not in the mood to fuss over complicated recipes. But I wanted to send something back, something that felt like a hug in snack form. That’s when the idea of easy no bake peanut butter bars struck me—the kind of treat that doesn’t ask for much but delivers big on comfort and satisfaction.
It wasn’t some grand culinary plan, just a mix of scraping peanut butter from the jar and improvising with pantry staples. I remember wondering if the bars would even hold together, or if the texture would be too weird. Turns out, skepticism gave way to sweet surprise. The bars were creamy, a little crunchy, and perfectly peanut-buttery. I ended up making the batch twice that week, sharing them with friends who kept asking, “Where did you get this recipe?”
What really sold me was how effortless the process was—no oven, no long waits, just quick mixing and chilling. It quickly became my go-to treat when the day felt too hectic or when I needed something to share without the stress. Plus, the smell of peanut butter and chocolate mingling in the kitchen had this quiet way of making everything feel a little better.
So here you have it: a recipe that stuck around not because it’s fancy or complicated, but because it’s honest, simple, and downright satisfying. This easy no bake peanut butter bars recipe is honest-to-goodness comfort food that feels like a treat you can trust to whip up anytime. And trust me, once you try it, you might find yourself reaching for it just as often as I do.
Why You’ll Love This Recipe
After making these easy no bake peanut butter bars more times than I can count, I’ve come to appreciate exactly what makes them a standout quick treat. This recipe is genuinely designed for busy days when you want something tasty but don’t have the time or energy to bake or fuss. Here’s why it’s one of my favorite go-to snacks:
- Quick & Easy: Ready in under 20 minutes, making it perfect for last-minute cravings or when you need a fast dessert for a gathering.
- Simple Ingredients: No fancy shopping required. You likely have peanut butter, oats, and a few pantry staples hanging around.
- Perfect for Everyday Snacking: Whether it’s an afternoon pick-me-up or a sweet bite after dinner, these bars fit the bill.
- Crowd-Pleaser: I’ve shared these at casual get-togethers and family game nights, and they disappear fast—kids and adults alike are fans.
- Unbelievably Delicious: The balance of creamy peanut butter and just enough chocolate is pure magic. The texture hits that perfect chewy-crunchy note.
This isn’t just another peanut butter bar recipe. The trick is in the mix of old-fashioned oats and a touch of honey to bring natural sweetness without overpowering the peanut butter flavor. Plus, chilling the bars just right gives them that satisfying firmness without being rock hard. Honestly, it’s like a little secret weapon for when you want comfort food without the oven heat or long wait.
And (not to brag), but this recipe often gets requests when I bring it along to parties or potlucks. It’s like my quick treat signature now, alongside dishes like my easy Italian sub sandwich skewers that also come together fast but impress every time.
What Ingredients You Will Need
This recipe relies on a handful of simple, wholesome ingredients that come together to create a rich, satisfying snack. Most are pantry staples, and it’s super adaptable if you want to swap or upgrade based on what you have. Here’s the rundown:
- Peanut Butter (creamy, natural preferred) – The star of the show. Look for one with minimal added sugar or oil for a cleaner taste.
- Old-Fashioned Rolled Oats – Adds chewiness and body. Quick oats can work but might affect texture slightly.
- Honey (or maple syrup) – For natural sweetness and helping the bars bind together.
- Unsalted Butter (melted) – Adds richness and helps the bars set firmly.
- Vanilla Extract – Just a splash to brighten the flavors and give subtle warmth.
- Powdered Sugar – Helps with sweetness and texture, but if you want a less sweet option, you can reduce or omit.
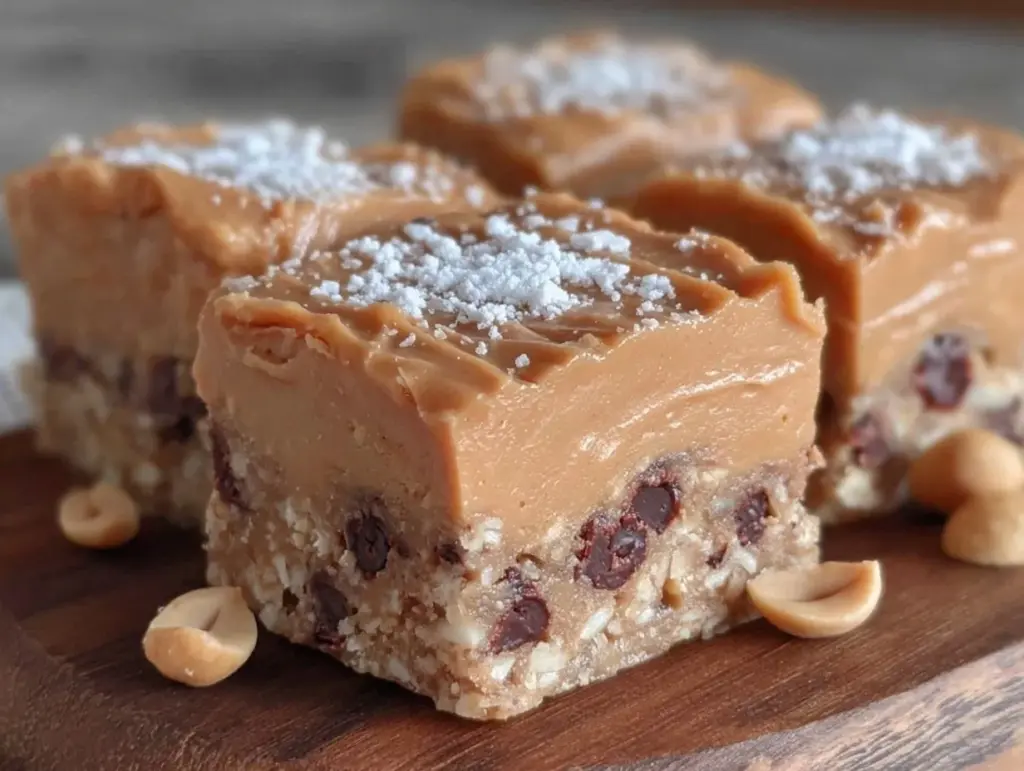
- Chocolate Chips (semi-sweet or dark) – For that classic peanut butter and chocolate combo. I recommend Ghirardelli for melting smoothness, but any quality chip works.
- Salt (a pinch) – Balances the sweetness and enhances the peanut butter flavor.
Optional swaps and tips:
- Use almond or cashew butter if peanut allergies are a concern, but note the flavor will change.
- For gluten-free, ensure oats are certified gluten-free.
- Try coconut oil in place of butter for a dairy-free version.
- If you want a little crunch, toss in chopped peanuts or nuts of choice.
These ingredients come together quickly, and you don’t need anything exotic. The simplicity is part of the charm—like my easy no bake strawberry cheesecake cups, it’s all about quick preparation and big flavor with minimal fuss.
Equipment Needed
- Mixing Bowl: A medium to large bowl for combining all the ingredients. Glass or stainless steel works well.
- Measuring Cups and Spoons: For accurate measurements, especially with sticky ingredients like peanut butter and honey.
- Spatula or Wooden Spoon: To mix everything without scraping up too much from the sides.
- 8×8-inch Baking Pan (or similar): To press and shape the bars. Lining it with parchment paper or foil makes removing the bars easier.
- Microwave or Small Saucepan: To melt butter and chocolate chips if making a chocolate topping.
If you don’t have a baking pan of that exact size, any similar sized dish will work fine. Just adjust thickness accordingly. For a budget-friendly option, I often use a glass Pyrex dish that’s multipurpose and dishwasher safe, so cleanup is a breeze.
And if you’re like me and don’t own fancy silicone spatulas, a sturdy wooden spoon or even a clean wooden chopstick can help with mixing sticky batter.
Preparation Method
- Prepare Your Pan: Line an 8×8-inch (20×20 cm) baking pan with parchment paper or aluminum foil, leaving some overhang for easy removal. Set aside.
- Melt Butter and Sweeteners: In a microwave-safe bowl, gently melt 1/2 cup (115 g) unsalted butter until just melted, about 30-45 seconds. Stir in 1/2 cup (170 g) peanut butter and 1/4 cup (85 g) honey until smooth. This should take about 2 minutes mixing by hand.
- Add Vanilla and Sugar: Stir in 1 teaspoon vanilla extract and 1 cup (120 g) powdered sugar. Mix until fully combined with no lumps.
- Combine Dry Ingredients: Add 2 cups (180 g) old-fashioned rolled oats and a pinch of salt to the wet mixture. Use a spatula or wooden spoon to fold everything together. The mixture should be thick but still malleable. If too dry, add a splash of milk (dairy or non-dairy) one teaspoon at a time.
- Press Into Pan: Transfer the mixture into the prepared pan. Use the back of a spatula or your hands (lightly sprayed with cooking spray) to firmly press the mixture evenly into the pan. This helps the bars hold together well.
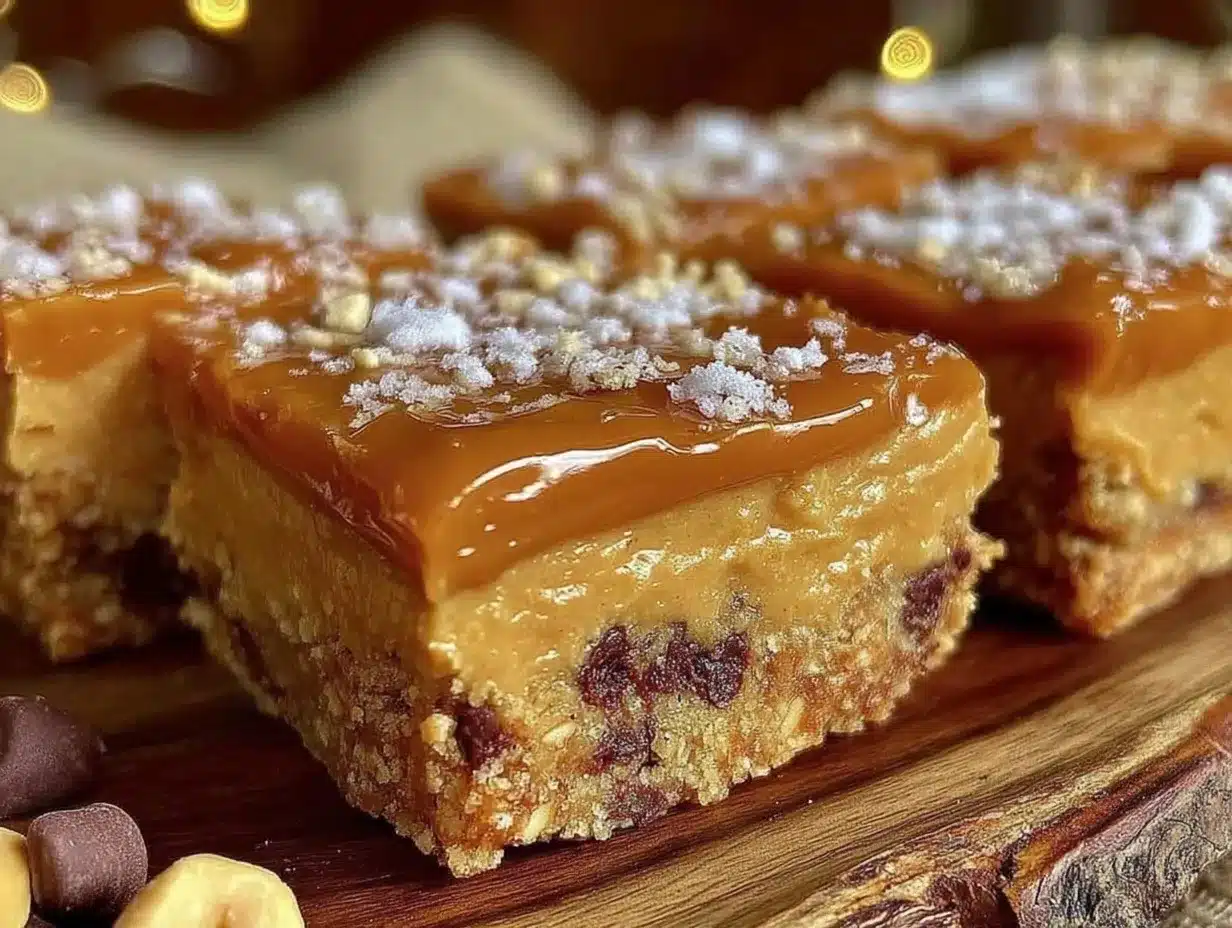
- Make Chocolate Topping (Optional): Melt 1/2 cup (90 g) chocolate chips in a microwave-safe bowl in 20-second intervals, stirring in between until smooth. Pour over the pressed peanut butter layer and spread evenly.
- Chill: Refrigerate the pan for at least 2 hours, or until the bars are firm enough to cut cleanly.
- Cut and Serve: Using the parchment overhang, lift the bars out of the pan. Cut into 12 squares or rectangles. Store extras in an airtight container in the fridge.
Tip: If your bars crumble easily, try pressing them more firmly next time or chilling longer. The oats and powdered sugar help bind, but firm pressing is key.
Cooking Tips & Techniques
When making easy no bake peanut butter bars, a few tricks make a noticeable difference:
- Use natural peanut butter: The flavor is richer and less sweet than processed varieties, giving the bars a great balance. I prefer brands without added hydrogenated oils.
- Press firmly: Don’t be shy about packing the mixture down in the pan. This helps prevent crumbly bars.
- Don’t skip chilling: Let the bars chill for the full time or longer. It really helps them set and makes cutting cleaner.
- Melting chocolate carefully: When making the chocolate topping, use short microwave bursts and stir often to avoid burning. Or melt it gently over a double boiler.
- Room temperature ingredients: Using peanut butter and butter at room temp helps them mix better and results in a smoother texture.
- Make-ahead friendly: These bars keep well in the fridge for up to a week or freeze nicely for longer storage.
Honestly, I’ve had batches turn out a bit dry or crumbly when I rushed the pressing step or used quick oats instead of rolled oats. Learning from those little slip-ups helped me nail the recipe’s reliable texture.
Variations & Adaptations
This recipe is a fantastic base for playing around with flavors and dietary tweaks. Here are a few versions I’ve tried or suggest:
- Chocolate-Peanut Butter Swirl: Before pressing the base mixture, swirl in softened cream cheese mixed with a bit of melted chocolate for a creamy surprise.
- Gluten-Free: Swap rolled oats with certified gluten-free oats or crushed gluten-free cereal for a safe alternative.
- Vegan & Dairy-Free: Use coconut oil instead of butter and maple syrup in place of honey. Make sure to use dairy-free chocolate chips.
- Add Crunch: Toss in chopped nuts, toasted coconut flakes, or even mini pretzels for texture contrast.
- Flavor Boost: Add a pinch of cinnamon or a dash of espresso powder to deepen the flavor profile.
One personal favorite is mixing in a handful of freeze-dried raspberries for a tangy pop that cuts through the richness. It’s like a quick twist on my no bake strawberry cheesecake cups, but in bar form.
Serving & Storage Suggestions
These peanut butter bars are best served chilled or at room temperature. The chocolate topping (if added) is nicely firm but soft enough to bite through easily.
For a quick snack, pair them with a glass of cold milk, coffee, or even a fresh lemonade. They also work great alongside lighter treats like a fresh cucumber dill salad if you’re serving a spread for a casual gathering.
Storage is straightforward:
- Refrigerator: Store bars in an airtight container for up to one week. Chilling keeps them firm and fresh.
- Freezer: Freeze bars individually wrapped in plastic wrap and placed in a freezer-safe container for up to three months. Thaw in the fridge before serving.
- Reheating: Let frozen bars thaw fully; they’re best cold or at room temp rather than warmed.
Over time, the flavors meld even more, making the bars taste richer after a day or two in the fridge. So if you can wait, they get better with a little patience.
Nutritional Information & Benefits
Each bar (assuming 12 servings) roughly contains:
| Calories | 190-220 kcal |
|---|---|
| Protein | 5-6 grams |
| Fat | 12-14 grams (mostly from healthy peanut fats) |
| Carbohydrates | 15-18 grams |
| Fiber | 2-3 grams |
Peanut butter is a great source of plant-based protein and healthy fats, which help keep you full and energized. The oats add fiber and slow-digesting carbs for sustained energy, making these bars a satisfying snack choice.
For those watching allergens, peanuts and dairy (butter, chocolate chips) are present, so substitutions like almond butter and coconut oil are advised if needed.
From a wellness point of view, I appreciate how this recipe offers a treat that feels indulgent but uses real ingredients with minimal processing—perfect when you want a little sweetness without the guilt.
Conclusion
Easy no bake peanut butter bars are a simple, satisfying answer when you want a quick treat that hits the spot without fuss. The recipe’s charm lies in its no-fail method and wholesome ingredients that come together beautifully every time.
Feel free to tweak it based on your pantry or taste buds—whether swapping in different nut butters, adding a sprinkle of sea salt on top, or mixing in some crunchy extras. This recipe has been a quiet favorite for me because it blends comfort and convenience in a way that feels honest and approachable.
If you give it a try, I’d love to hear how you make it yours or what little changes worked best. Sharing recipes and stories like this one is what makes cooking fun and personal.
So go ahead, whip up a batch, and enjoy a treat that’s ready when you are—no oven required.
FAQs About Easy No Bake Peanut Butter Bars
How long do these peanut butter bars last in the fridge?
Stored in an airtight container, they keep fresh for about one week in the refrigerator.
Can I use crunchy peanut butter instead of creamy?
Yes, crunchy peanut butter works too and adds a nice texture, but the bars might be a bit chunkier.
Is it possible to make these bars vegan?
Absolutely! Use coconut oil instead of butter, maple syrup instead of honey, and dairy-free chocolate chips to keep it vegan-friendly.
Can I freeze these bars?
Yes, wrap them individually and freeze in an airtight container for up to three months. Thaw in the fridge before serving.
What’s the best way to cut the bars without them crumbling?
Make sure the bars are fully chilled before cutting. Use a sharp knife and wipe it clean between cuts for neat edges.
Pin This Recipe!
Easy No Bake Peanut Butter Bars

A quick and simple no bake peanut butter bars recipe perfect for last-minute snacks or gatherings, combining creamy peanut butter, oats, and a touch of honey for natural sweetness.
- Prep Time: 10 minutes
- Cook Time: 0 minutes
- Total Time: 2 hours 10 minutes
- Yield: 12 bars 1x
- Category: Dessert
- Cuisine: American
Ingredients
- 1/2 cup unsalted butter, melted
- 1/2 cup creamy natural peanut butter
- 1/4 cup honey (or maple syrup)
- 1 teaspoon vanilla extract
- 1 cup powdered sugar
- 2 cups old-fashioned rolled oats
- Pinch of salt
- 1/2 cup semi-sweet or dark chocolate chips (optional)
Instructions
- Line an 8×8-inch baking pan with parchment paper or aluminum foil, leaving some overhang for easy removal.
- Melt the unsalted butter in a microwave-safe bowl for 30-45 seconds until just melted.
- Stir in peanut butter and honey until smooth, about 2 minutes mixing by hand.
- Add vanilla extract and powdered sugar, mixing until fully combined with no lumps.
- Fold in rolled oats and a pinch of salt using a spatula or wooden spoon until thick but malleable. If too dry, add milk one teaspoon at a time.
- Press the mixture firmly and evenly into the prepared pan using the back of a spatula or lightly sprayed hands.
- Optional: Melt chocolate chips in 20-second microwave intervals, stirring until smooth, then pour over the pressed peanut butter layer and spread evenly.
- Refrigerate for at least 2 hours until firm enough to cut cleanly.
- Lift bars out using parchment overhang and cut into 12 squares or rectangles.
- Store extras in an airtight container in the refrigerator.
Notes
Use natural peanut butter without added hydrogenated oils for best flavor. Press mixture firmly to prevent crumbling. Chill bars fully before cutting for clean edges. For vegan version, substitute butter with coconut oil, honey with maple syrup, and use dairy-free chocolate chips.
Nutrition
- Serving Size: 1 bar (1/12th of rec
- Calories: 205
- Sugar: 10
- Sodium: 90
- Fat: 13
- Saturated Fat: 4
- Carbohydrates: 17
- Fiber: 2.5
- Protein: 5.5
Keywords: no bake peanut butter bars, quick snacks, easy dessert, peanut butter treats, no oven dessert, healthy snacks


