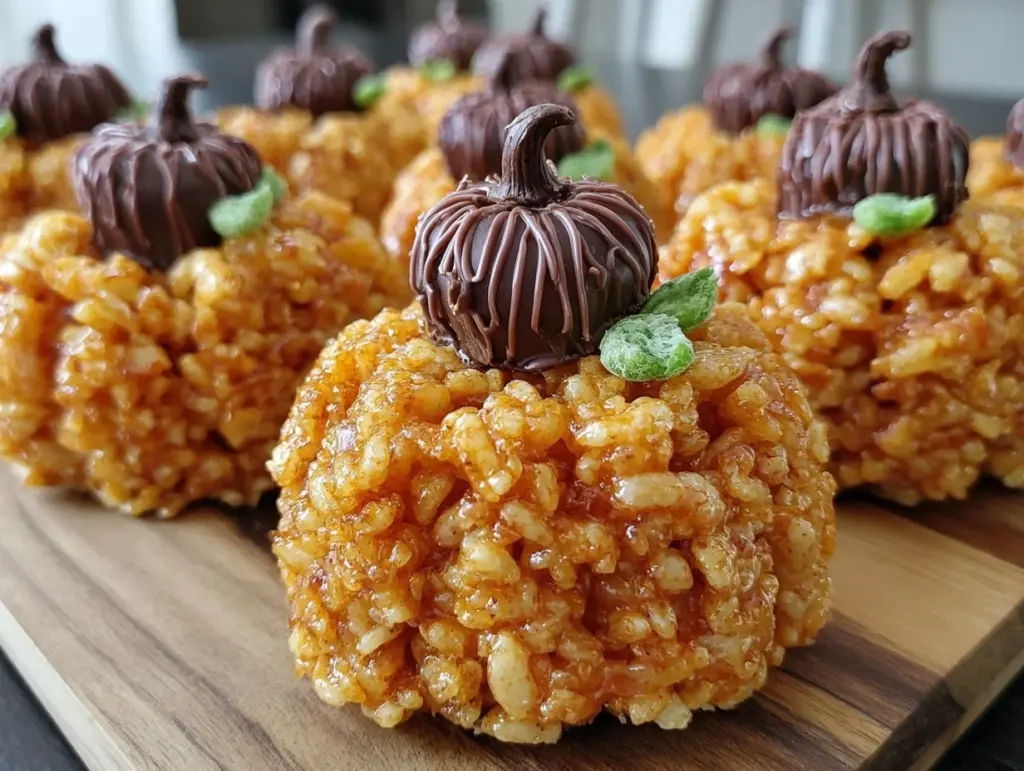
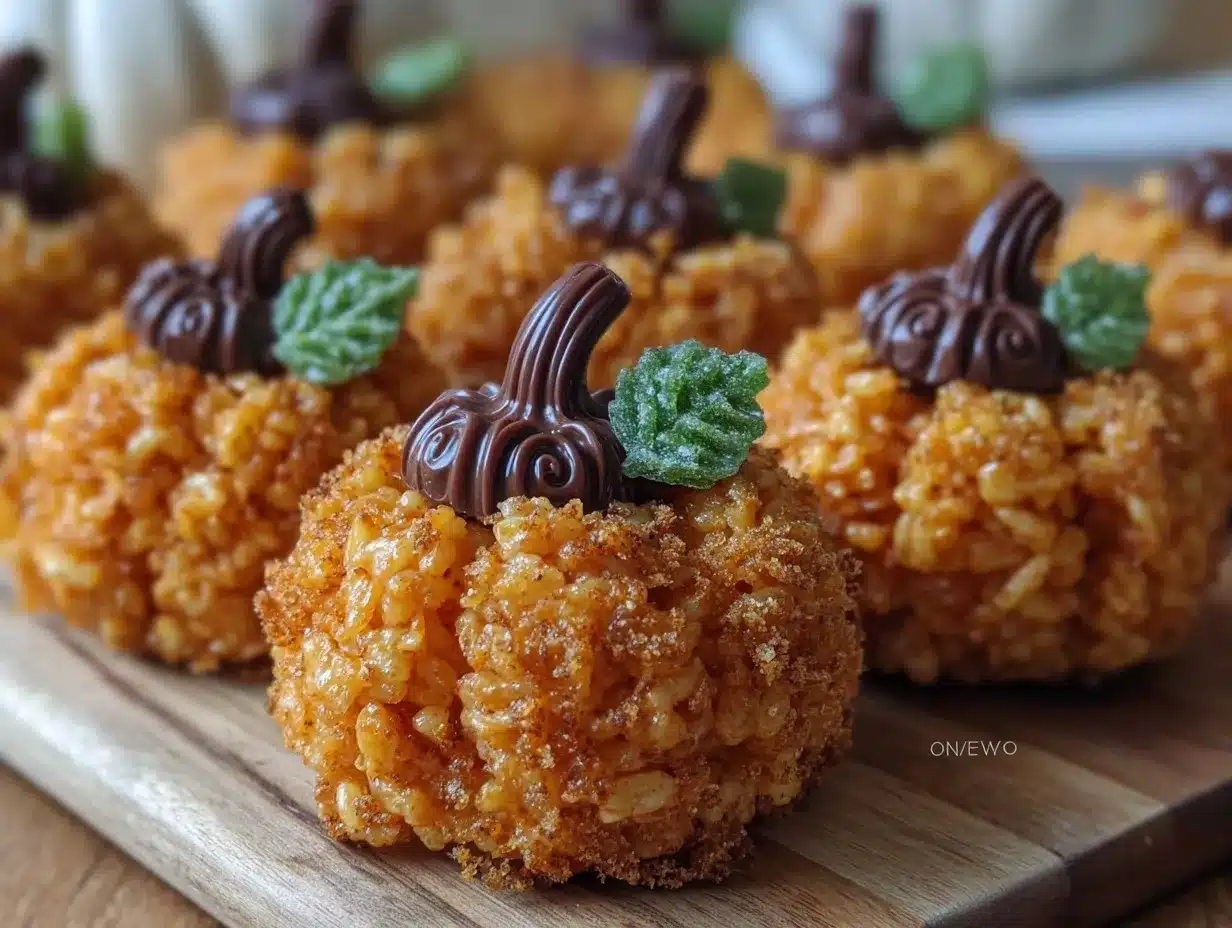
The crunch of sweet, gooey Rice Krispies paired with the rich hues of autumn—it’s a match made in fall dessert heaven! I still remember the first time I made these adorable Rice Krispie Treat Pumpkins for a Halloween party. They were the star of the dessert table, and everyone was asking for the recipe. These little pumpkin-shaped treats are as fun to make as they are to eat, and they bring a festive, creative twist to the classic Rice Krispie treat we all know and love.
Whether you’re hosting a fall-themed gathering, preparing for Halloween, or simply craving a little seasonal sweetness to brighten your day, these treats are the perfect choice. They’re quick to make, require only a handful of simple ingredients, and are guaranteed to put a smile on everyone’s face. Plus, decorating them can be a fun activity for kids and adults alike—what’s not to love?
Why You’ll Love This Recipe
These Rice Krispie Treat Pumpkins are not your average autumn snack—they’re an absolute must-try! Let me tell you why:
- Festive and adorable: Shaped like pumpkins, these treats are the ultimate fall dessert that doubles as edible decor.
- Quick and easy: Ready in under 30 minutes, they’re perfect for last-minute party prep or a spontaneous treat-making session.
- Simple ingredients: You likely have most of these items in your pantry already—no need for a special grocery store run.
- Kid-approved: A fun and creative recipe that kids will love making (and eating). Trust me, I’ve seen the excitement on little faces!
- Customizable: Add candy eyes, sprinkles, or experiment with colors to make them uniquely yours.
- Crowd-pleaser: These treats are a hit at parties, potlucks, and school events—they disappear in minutes!
Honestly, these treats bring so much joy, not just because they taste amazing, but because they’re packed with the spirit of fall. They’re like a little bite of autumn, wrapped up in crunchy, marshmallow-y goodness.
What Ingredients You Will Need
This recipe uses simple, everyday ingredients to create festive Rice Krispie Treat Pumpkins everyone will adore. Here’s what you’ll need:
- Butter: Unsalted, about 6 tablespoons (adds richness).
- Mini marshmallows: 10 ounces (these are the key to that ooey-gooey texture).
- Orange food coloring: Liquid or gel, depending on your preference (for that perfect pumpkin hue).
- Rice Krispies cereal: 6 cups (the star of the show—use your favorite brand).
- Green Tootsie Rolls: For the pumpkin stems (you can also use green candy melts or pretzel sticks if preferred).
- Mini candy decorations: Optional, but great for adding personality to your pumpkins.
- Cooking spray: To prevent sticking during shaping.
If you don’t have orange food coloring, feel free to mix red and yellow food coloring to achieve the perfect shade of pumpkin orange. You can also swap Tootsie Rolls for colorful licorice or small pieces of fondant for the stems—whatever you have on hand works!
Equipment Needed
You don’t need anything fancy to create these fun treats—just a few kitchen basics:
- Large saucepan: For melting butter and marshmallows.
- Wooden spoon: Perfect for stirring the sticky mixture.
- Mixing bowl: To combine the cereal with the melted marshmallow mixture.
- Cooking spray: To keep your hands from sticking while shaping the pumpkins.
- Wax paper or parchment paper: Great for setting your pumpkins and preventing a sticky mess.
If you don’t have cooking spray, you can coat your hands lightly with butter or oil to prevent sticking while shaping the pumpkins. Trust me, it makes all the difference!
Preparation Method
- Start by melting the butter in a large saucepan over low heat. Keep stirring gently to avoid burning.
- Once the butter is melted, add the mini marshmallows. Stir constantly until the marshmallows are fully melted and incorporated into the butter. This will take about 5 minutes.
- Remove the pan from heat and add a few drops of orange food coloring. Stir quickly to evenly distribute the color. Add more drops if necessary until you achieve your desired pumpkin shade.
- Pour the melted marshmallow mixture over the Rice Krispies cereal in a large mixing bowl. Use a wooden spoon or spatula to combine until the cereal is fully coated. Work quickly, as the mixture will start to cool and become harder to mix.
- Let the mixture cool slightly until it’s safe to handle, but not completely hard. Spray your hands with cooking spray to prevent sticking.
- Take a handful of the mixture and gently shape it into a ball, about the size of a small orange. Place each ball on wax paper or parchment paper to set.
- Once the pumpkins are shaped, take the green Tootsie Rolls and shape them into small stems. Insert one stem into the top of each pumpkin.
- Optional: Add mini candy decorations or use a toothpick to create ridges on the pumpkins for a more realistic look.
- Allow the pumpkins to set for about 20 minutes before serving—and then enjoy!
Cooking Tips & Techniques
Making Rice Krispie Treat Pumpkins is simple, but a few tips can make all the difference:
- Keep it low and slow: When melting the butter and marshmallows, use low heat to avoid burning and ensure a smooth, creamy mixture.
- Work quickly: Once the melted marshmallow mixture is combined with the cereal, it will start to cool and harden. Have everything ready so you can shape the pumpkins without delay.
- Use cooking spray: Don’t skip this step! Lightly grease your hands to make shaping the pumpkins much easier and less sticky.
- Get creative: Experiment with different decorations like candy eyes, sprinkles, or even colored icing to give your pumpkins personality.
- Size matters: For small hands, make mini pumpkins instead of larger ones. They’re easier to hold and nibble.
And here’s a little secret: if your pumpkins start to fall apart while shaping, don’t panic! Just reheat the mixture for a few seconds in the microwave to soften it up again.
Variations & Adaptations
One of the best things about these Rice Krispie Treat Pumpkins is how versatile they are. Here are some fun ways to mix things up:
- Healthy twist: Swap regular marshmallows with a low-sugar or vegan option, and use a whole-grain puffed rice cereal for added nutrition.
- Flavor boost: Add a sprinkle of pumpkin spice or a dash of cinnamon to the melted marshmallow mixture for a warm, seasonal flavor.
- Chocolate lovers: Drizzle melted chocolate over the pumpkins or mix mini chocolate chips into the Rice Krispie mixture before shaping.
You can also try making different shapes—like leaves, ghosts, or bats—using cookie cutters for a fun Halloween twist. One time, I added green candy melts to create little vines on my pumpkins, and they were a huge hit!
Serving & Storage Suggestions
Now that you’ve crafted your adorable Rice Krispie Treat Pumpkins, here’s how to serve and store them:
- Serve these treats at room temperature—they’re perfect for fall picnics, Halloween parties, or even as lunchbox surprises.
- Pair them with warm apple cider, hot cocoa, or a spiced latte for an unbeatable seasonal combo.
- Store leftovers in an airtight container at room temperature for up to 3 days. For longer storage, you can freeze them for up to 6 weeks—just let them thaw at room temperature before serving.
- If you plan to reheat them, a quick zap in the microwave for 10 seconds will refresh their gooey texture.
Pro tip: These treats are best enjoyed fresh, as their crunch is at its peak right after they’re made!
Nutritional Information & Benefits
Here’s a quick look at the nutritional profile of these festive treats:
- Calories: Approximately 130 per pumpkin.
- Carbs: Rice Krispies and marshmallows provide a quick energy boost.
- Fats: A small amount from butter for that rich, satisfying taste.
- Dietary benefits: This recipe is naturally nut-free and can be made gluten-free by using certified gluten-free puffed rice cereal.
While these treats are definitely indulgent, they’re a great way to satisfy your sweet tooth during the fall season. Plus, you can make mindful ingredient swaps to suit your dietary needs!
Conclusion
Rice Krispie Treat Pumpkins aren’t just a dessert—they’re a celebration of fall, creativity, and fun! With their delightful crunch, sugary sweetness, and festive design, they’re the perfect addition to any autumn gathering. Whether you’re hosting a Halloween party or just looking for a fun activity with your kids, these treats are guaranteed to bring smiles to everyone’s faces.
I love this recipe because it’s a reminder that sometimes, the simplest ideas can have the biggest impact. The joy of shaping these little pumpkins and watching everyone’s reaction when they see them—it’s priceless.
Try them out, and let me know how your Rice Krispie Treat Pumpkins turn out! Don’t forget to share your creative variations in the comments below—I’d love to see your fall-inspired creations!
FAQs
Can I make these ahead of time?
Yes! You can make these Rice Krispie Treat Pumpkins up to 3 days in advance. Store them in an airtight container at room temperature.
What can I use instead of Tootsie Rolls for the stems?
If you don’t have Tootsie Rolls, try using pretzel sticks, green licorice, or even homemade fondant for the stems.
Can I make these gluten-free?
Absolutely! Just use a certified gluten-free puffed rice cereal and double-check your marshmallows for gluten-free labeling.
How can I make these vegan?
Swap the marshmallows for a vegan alternative and use a plant-based butter. You’ll still get that same delicious flavor!
Can I use regular-sized marshmallows instead of mini marshmallows?
Yes, regular marshmallows will work just fine! Just be sure to stir them well to ensure they melt evenly.
Pin This Recipe!
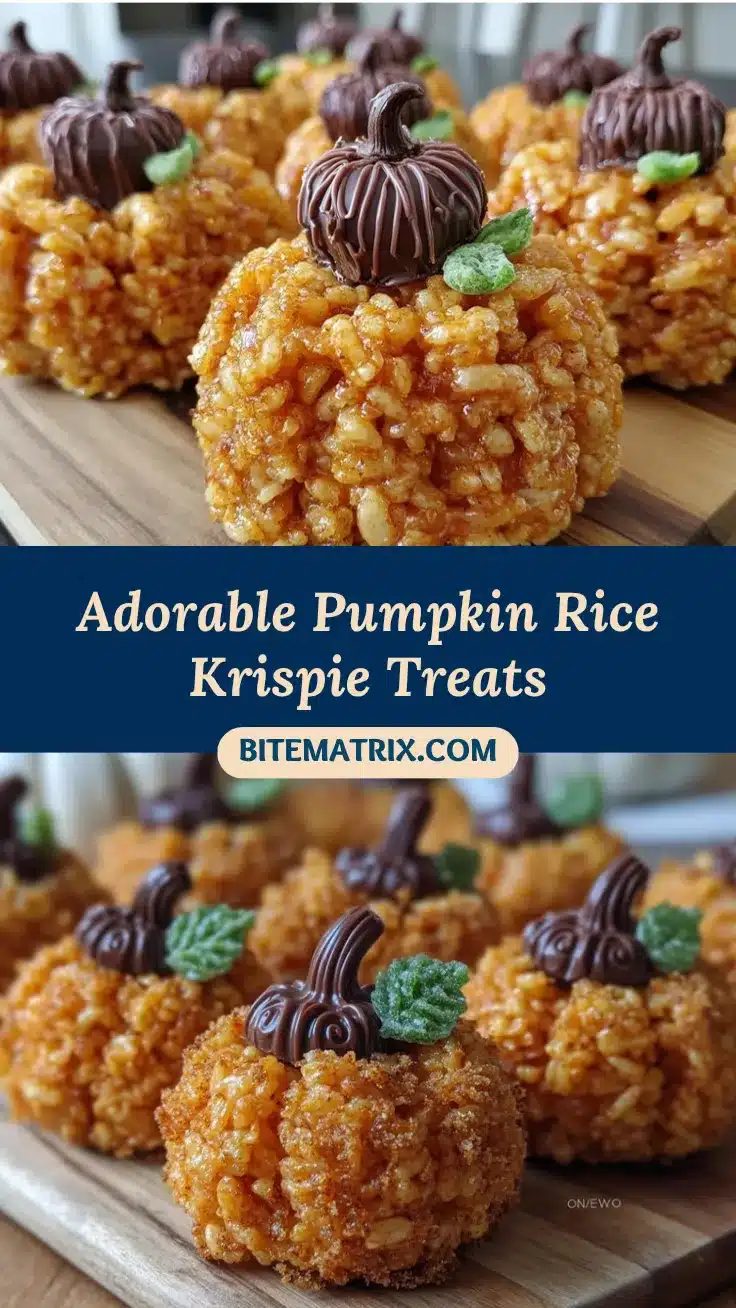
Irresistible Rice Krispie Treat Pumpkins Recipe for Fall Fun

Festive pumpkin-shaped Rice Krispie treats that are quick to make, fun to decorate, and perfect for fall gatherings or Halloween parties.
- Prep Time: 10 minutes
- Cook Time: 5 minutes
- Total Time: 30 minutes
- Yield: 12 pumpkins 1x
- Category: Dessert
- Cuisine: American
Ingredients
- 6 tablespoons unsalted butter
- 10 ounces mini marshmallows
- Orange food coloring (liquid or gel)
- 6 cups Rice Krispies cereal
- Green Tootsie Rolls (or green candy melts/pretzel sticks)
- Mini candy decorations (optional)
- Cooking spray
Instructions
- Melt butter in a large saucepan over low heat, stirring gently to avoid burning.
- Add mini marshmallows to the melted butter and stir constantly until fully melted and incorporated, about 5 minutes.
- Remove the pan from heat and add orange food coloring. Stir quickly to evenly distribute the color, adding more drops if necessary.
- Pour the melted marshmallow mixture over the Rice Krispies cereal in a large mixing bowl. Combine until the cereal is fully coated.
- Let the mixture cool slightly until safe to handle, but not completely hard. Spray your hands with cooking spray to prevent sticking.
- Shape handfuls of the mixture into balls, about the size of a small orange, and place them on wax paper or parchment paper to set.
- Shape green Tootsie Rolls into small stems and insert one into the top of each pumpkin.
- Optional: Add mini candy decorations or use a toothpick to create ridges on the pumpkins for a realistic look.
- Allow the pumpkins to set for about 20 minutes before serving.
Notes
[‘Use low heat to melt butter and marshmallows to avoid burning.’, ‘Work quickly when shaping the pumpkins as the mixture cools and hardens.’, ‘Lightly grease your hands with cooking spray or butter to prevent sticking.’, ‘Experiment with decorations like candy eyes, sprinkles, or colored icing for added personality.’]
Nutrition
- Serving Size: 1 pumpkin
- Calories: 130
- Sugar: 12
- Sodium: 60
- Fat: 5
- Saturated Fat: 3
- Carbohydrates: 22
- Protein: 1
Keywords: Rice Krispie Treats, Fall Desserts, Halloween Treats, Pumpkin Desserts, Kid-Friendly Recipes