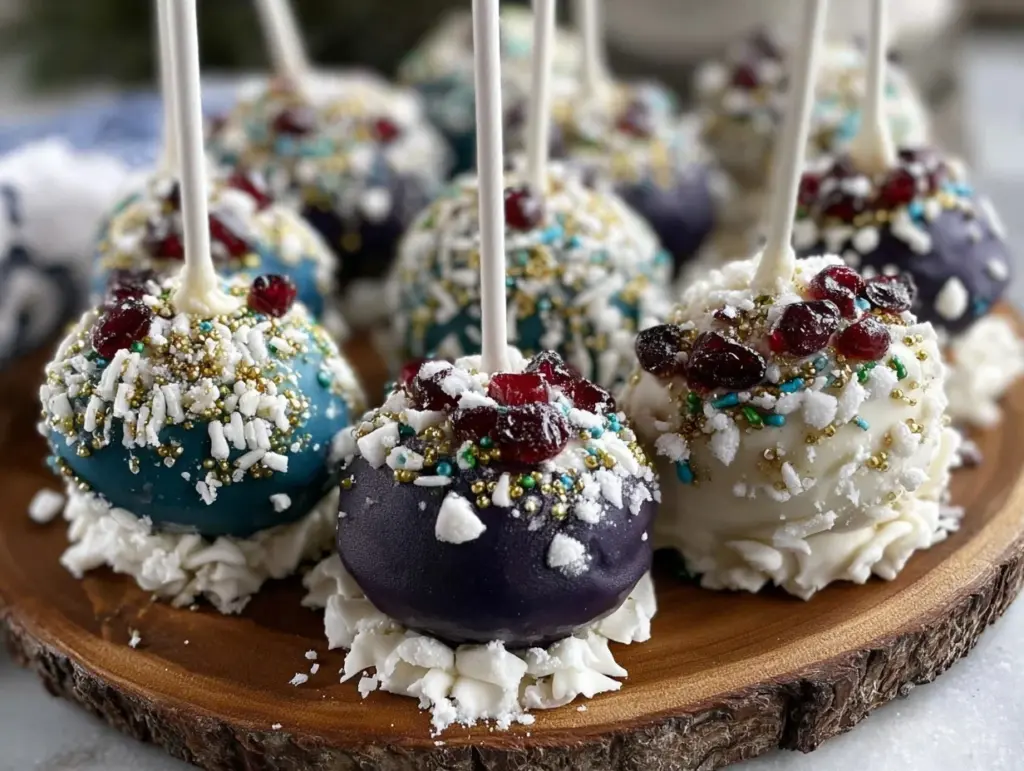
“You know, I never thought cake pops could be this much fun until that chaotic Saturday when I was frantically preparing for my niece’s graduation party. The power flickered as I was melting the chocolate, and honestly, I thought the whole thing was going to be a disaster. But somehow, those little cake pops turned out to be the star of the show—each one perfectly wrapped in the school’s colors, bright and cheerful. Maybe you’ve been there, rushing around, trying to whip up something sweet that also looks impressive. Well, these individual graduation cake pops are just that—simple, colorful, and packed with enough personality to make any grad feel special. Let me tell you, watching my niece’s eyes light up as she saw her school colors on tiny, delicious bites made the mess and the stress totally worth it.”
That afternoon, I learned that cake pops aren’t just cute party treats; they’re a way to celebrate milestones with a personal touch. With a little patience (and a few chocolate drips later), you can create these bite-sized gems that bring in all the festive vibes without a fuss. And the best part? You don’t need a fancy bakery or tons of experience to nail it. I mean, if I can make these while juggling a phone call and a barking dog, you’re definitely set.
The secret to these perfect individual graduation cake pops lies in the balance of moist cake and creamy frosting, all coated in vibrant candy melts and sprinkled with school colors. It’s a small gesture that packs a big punch of joy and pride. So, whether you’re throwing a last-minute party or just love a sweet treat with a story, this recipe is your new go-to. Stick around, because this is one recipe you’ll want to keep on hand for all those celebrations ahead.
Why You’ll Love This Recipe
This recipe for perfect individual graduation cake pops isn’t just another dessert idea—it’s a tested, foolproof way to bring smiles and school spirit into any celebration. From personal trials (and a few chocolate-coated fingers) to rave reviews from family and friends, here’s why these cake pops stand out:
- Quick & Easy: You can whip these up in under 90 minutes from start to finish, which means less stress and more party time.
- Simple Ingredients: No need to hunt down specialty items—most of the ingredients are pantry staples or easy to find at your local store.
- Perfect for Graduation Parties: These pops scream celebration with customizable school colors that make every bite a tribute to the graduate.
- Crowd-Pleaser: Kids, adults, even picky eaters love these. Honestly, they vanish faster than you can say “congratulations.”
- Unbelievably Delicious: The moist cake center paired with the sweet, crisp candy coating is a match made in dessert heaven.
What really sets this cake pop recipe apart is the way you can tailor it with your grad’s specific school colors. Plus, the cake-frosting ratio is dialed in for perfect bite-sized texture—never dry or crumbly, just pure fun. It’s comfort food with a celebratory twist, and the kind of treat that makes you close your eyes after the first bite, savoring the moment. Whether you’re impressing guests or just sneaking a few for yourself, this recipe delivers every time.
What Ingredients You Will Need
This recipe uses simple, wholesome ingredients to deliver bold flavor and satisfying texture without the fuss. Most are pantry staples, and swapping out a few items to suit your preferences is totally doable.
- For the Cake:
- 1 box of yellow or white cake mix (about 15.25 oz/432 g) – I prefer Betty Crocker for consistent results
- Ingredients called for on the cake mix box (usually eggs, oil, and water; approximately 3 large eggs, 1/3 cup vegetable oil, and 1 cup water)
- For the Frosting:
- 1/2 cup (115 g) unsalted butter, softened (adds creaminess and moisture)
- 1 1/2 cups (180 g) powdered sugar, sifted
- 1 teaspoon vanilla extract
- 1-2 tablespoons milk or cream (use dairy-free milk if needed)
- For Decoration:
- 12 oz (340 g) candy melts in school colors (I recommend Wilton brand for vibrant colors and smooth melting)
- Sprinkles or edible glitter in matching colors
- Cake pop sticks (about 12-15 sticks)
- Optional: Melting chocolate for drizzle or accents
Ingredient tips: For the freshest cake texture, bake the cake the day before or at least a few hours ahead and cool completely. If you want a gluten-free option, use a gluten-free cake mix and confirm your candy melts are free of gluten. For a dairy-free version, swap butter for coconut oil and use plant-based milk in the frosting.
Equipment Needed
- Mixing bowls: One large for cake batter, one medium for frosting, and one for mixing cake crumbs.
- Baking pan: A standard 9×13-inch (23×33 cm) rectangular pan—perfect for even baking.
- Electric mixer: Hand or stand mixer to make frosting smooth and fluffy.
- Food processor or fork: To crumble the baked cake finely.
- Cake pop sticks: Essential for shaping and dipping.
- Microwave-safe bowls: For melting candy melts safely.
- Styrofoam block or cake pop stand: To hold the pops upright while drying (alternatively, a clean foam tray or even a cardboard box with holes works).
- Optional: Toothpicks for detailed decorating or fixing drips.
Honestly, you can get by without fancy gadgets—my first batch was made with just a fork and a microwave. But having a stand or block to dry the pops makes a world of difference in the final presentation. Also, keep your candy melts in a dry place, as humidity can make them grainy.
Preparation Method
- Prepare the Cake: Preheat your oven to 350°F (175°C). Grease or line the 9×13 pan with parchment paper. Mix the cake batter according to the box instructions, then pour it evenly into the pan. Bake for 30-35 minutes, or until a toothpick inserted in the center comes out clean. Let the cake cool completely on a wire rack—this can take about 1 hour.
- Make the Frosting: While the cake cools, beat the softened butter in a medium bowl until creamy, about 2 minutes. Gradually add the powdered sugar, mixing on low speed to avoid a sugar cloud. Add vanilla extract and milk, adjusting until the frosting is smooth and spreadable. Set aside.
- Crumble the Cake: Once the cake is completely cool, crumble it into a large bowl using your hands or a fork. The crumbs should be fine but not powdery.
- Combine Cake and Frosting: Add about 1/2 cup (120 g) of frosting to the cake crumbs. Mix gently with a spoon or your hands until the mixture holds together when pressed. You might need a little more or less frosting depending on your cake’s moisture. The goal is a moldable dough-like consistency.
- Shape the Cake Pops: Scoop about 2 tablespoons (30 g) of the mixture and roll into a smooth ball. Place each ball on a baking sheet lined with parchment. Repeat until all mixture is used. Chill the balls in the refrigerator for at least 30 minutes to firm up.
- Insert Sticks: Melt a small amount of candy melts. Dip the tip of each cake pop stick into the melted candy, then insert it about halfway into each cake ball. This acts like glue, securing the stick inside. Place the pops back in the fridge for 15 minutes before coating.
- Melt Candy Coating: In a microwave-safe bowl, melt the candy melts according to package instructions, stirring every 30 seconds until smooth. Be careful not to overheat; a grainy or burnt coating is hard to work with.
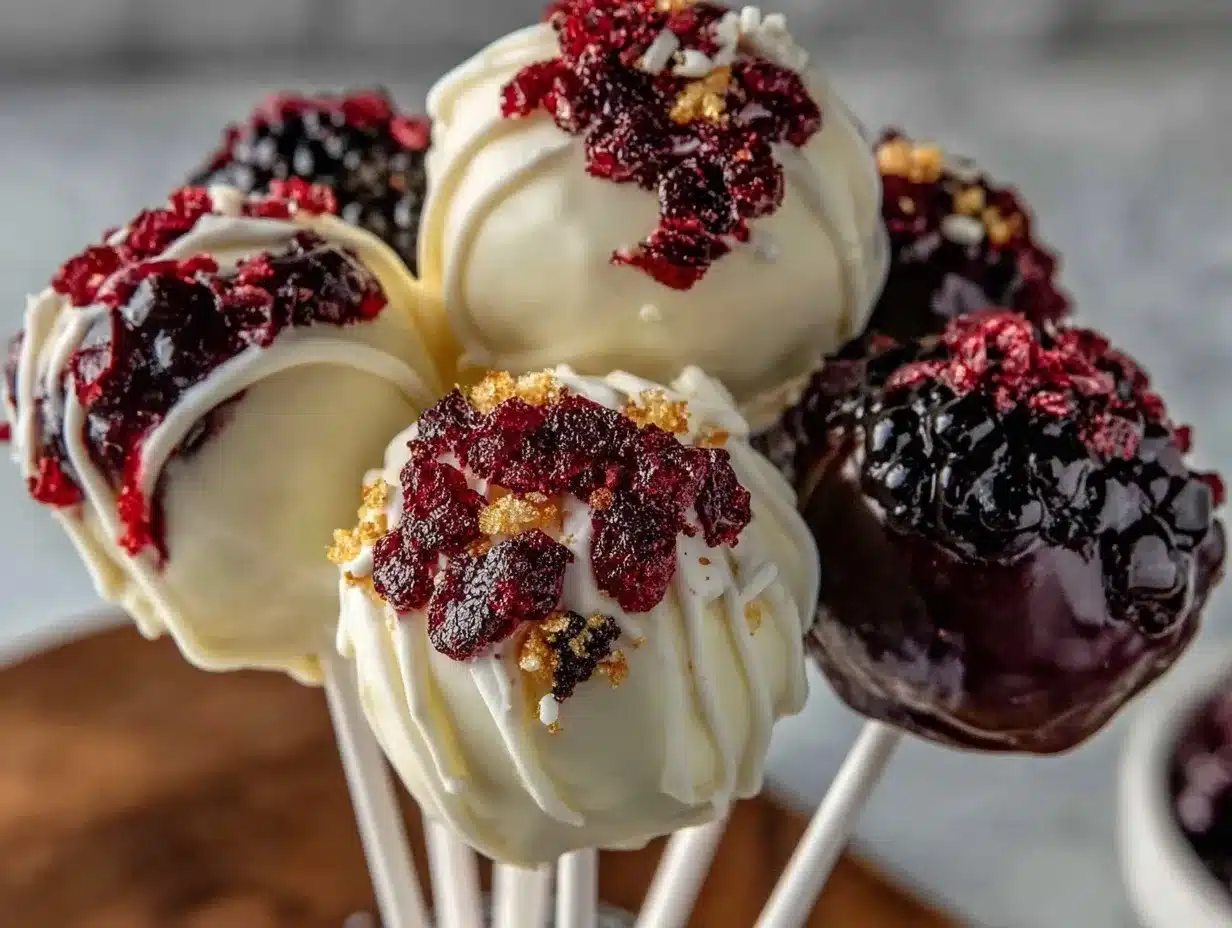
- Dip the Cake Pops: Holding a cake pop by the stick, dip it into the melted candy coating, twisting gently to cover completely. Allow excess coating to drip off. Immediately decorate with sprinkles or edible glitter before the coating sets.
- Dry the Pops: Stick the cake pops upright into a styrofoam block or cake pop stand. Let them set at room temperature for about 1 hour, or refrigerate for 20 minutes to speed up hardening.
- Serve and Enjoy: Once the coating is firm, your perfect individual graduation cake pops are ready to dazzle any celebration!
Pro tip: If the candy coating thickens while dipping, reheat gently in the microwave in 10-second bursts with stirring. Also, avoid dipping too fast—slow and steady gives a smoother finish.
Cooking Tips & Techniques
Making perfect cake pops can feel tricky, but a few insights learned the hard way can make all the difference. First, chill the cake balls well before dipping. I once skipped this step, and the balls fell off the sticks—total mess! Cold cake balls hold their shape better and stick to the chocolate coating.
Another thing: use a high-quality candy melt or chocolate. I’ve tried cheaper brands, and the texture was either too thick or not shiny enough. Wilton candy melts offer a good balance of flavor, color, and melting ease.
When dipping, avoid twirling too much or shaking vigorously, or you’ll end up with uneven coating or air bubbles. Gently dip and slowly lift, letting the excess drip off naturally.
Timing is key—plan your work in stages. Bake the cake first thing, then prepare the frosting and shape the pops while it cools. Use chilling times to prep other party details or clean up. Multitasking helps the process feel less overwhelming.
Finally, don’t stress about small imperfections. Little drips or uneven sprinkles add character. Remember, these are homemade celebration treats, not museum pieces!
Variations & Adaptations
- Flavor Twists: Add cocoa powder to the cake mix for a chocolate base or fold in a teaspoon of cinnamon for a warm spice kick.
- Dietary Options: Use almond or coconut flour cake mixes for gluten-free versions. Swap the butter for vegan margarine and use dairy-free candy melts for vegan-friendly cake pops.
- Seasonal Themes: Instead of school colors, choose candy melts and sprinkles that match holidays or birthdays, like red and green for Christmas or pastels for spring celebrations.
- Texture Variations: Mix in mini chocolate chips or crushed nuts into the cake-frosting mixture for added crunch.
- Personalized Decorations: Use edible markers or piped royal icing to add initials or graduation year on the dried cake pops for a custom touch.
I once experimented with swapping the frosting for cream cheese frosting, which added a tangy note and kept the pops moist longer—definitely a winner for those who like a little zing!
Serving & Storage Suggestions
Serve these cake pops at room temperature for the best flavor and texture. Arrange them upright on a decorated board or place them in themed cups for a festive display. They pair beautifully with cold lemonade or sparkling cider at graduation parties.
To store, keep the cake pops in an airtight container in the refrigerator for up to 5 days. Make sure they’re not touching to avoid sticky spots. For longer storage, freeze them wrapped individually in plastic wrap and placed in a sealed container for up to one month.
Reheat frozen cake pops by letting them thaw in the fridge overnight and then bringing them to room temperature before serving. Avoid microwaving, as this can melt the candy coating unevenly.
Flavors actually develop a bit after resting—if you can wait, letting them sit overnight wrapped will intensify the taste and give a more cohesive texture.
Nutritional Information & Benefits
Each individual graduation cake pop is roughly 150-180 calories, depending on the size and ingredients used. They provide a sweet treat without being overwhelmingly large, perfect for portion control at parties.
Key ingredients like butter and eggs contribute protein and fat, which help keep you full and satisfied. Using high-quality cake mix and candy melts reduces artificial additives.
This recipe can be adapted for gluten-free and vegan diets, making it inclusive for various guests. Just be mindful of common allergens like dairy, eggs, and gluten, and adjust accordingly.
From a wellness perspective, these cake pops offer a joyful way to celebrate milestones without going overboard—enjoying a small, flavorful bite that lifts the spirit and brings people together.
Conclusion
Perfect individual graduation cake pops are a delightful, fun way to celebrate your graduate’s big day with a personal touch. They’re simple enough for busy hosts, yet impressive enough to make guests say “Wow!” Customize them with school colors and decorations to make every bite meaningful.
I love this recipe because it blends the joy of baking with the excitement of celebration, and honestly, seeing those colorful pops lined up never fails to make me smile. Give it a try, tweak it to your liking, and don’t be shy about sharing your creations!
Got questions or special twists you tried? Drop a comment below, share your photos, or tell me how you made these cake pops your own. Here’s to sweet celebrations and happy baking!
FAQs
How long do cake pops keep fresh?
Stored in an airtight container in the fridge, cake pops stay fresh for about 5 days. For longer storage, freeze them wrapped individually for up to a month.
Can I make cake pops ahead of time?
Yes! You can prepare and decorate them a day or two before your event. Just store them in the fridge to keep them firm and fresh.
What if my cake balls fall off the sticks?
This usually happens if the cake balls aren’t chilled enough or if you skip dipping the stick tips in melted candy before inserting. Make sure to chill the balls well and use the “glue” step for secure sticks.
Can I use homemade cake instead of box mix?
Absolutely! Just bake your favorite cake recipe and follow the same steps for crumbling and mixing with frosting.
How do I prevent the candy coating from cracking?
Don’t overheat the candy melts, and avoid rapid temperature changes. Also, let the pops set at room temperature or in the fridge gently—don’t freeze them too quickly.
Pin This Recipe!
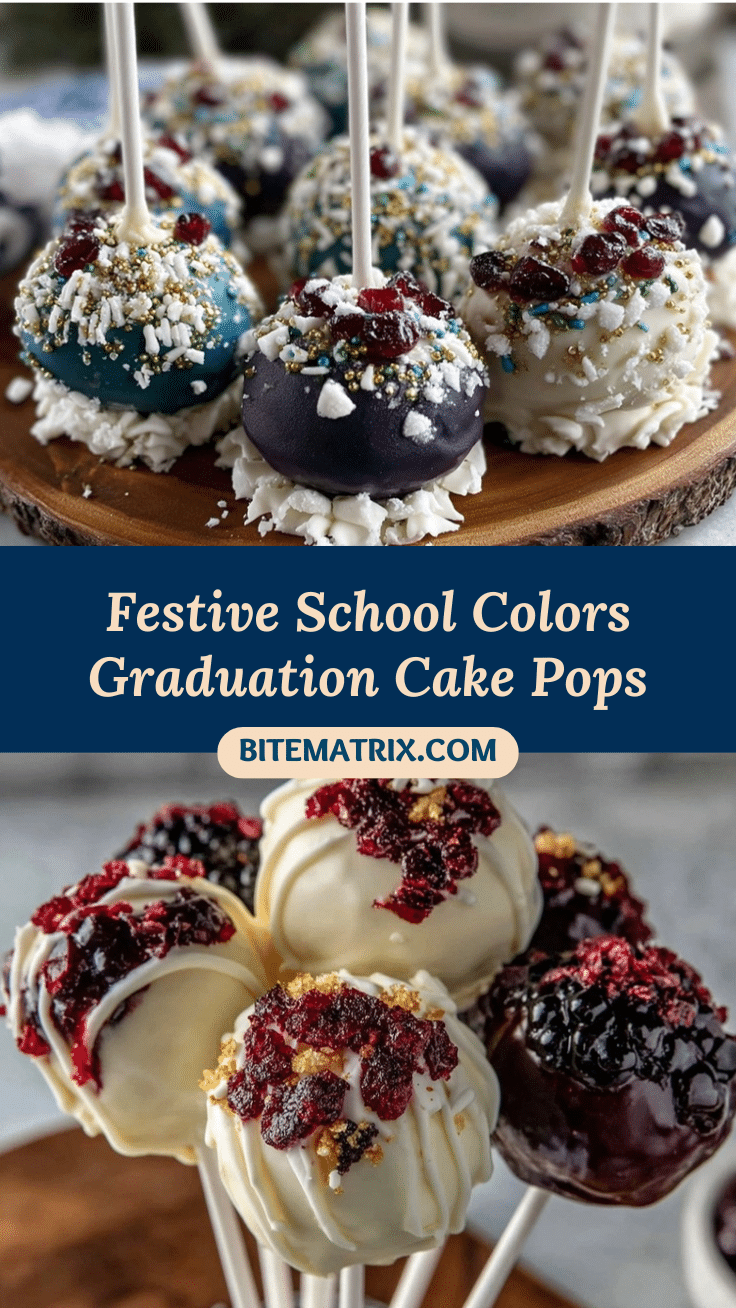
Perfect Individual Graduation Cake Pops Easy School Colors Recipe

These individual graduation cake pops are simple, colorful, and packed with personality, perfect for celebrating milestones with a personal touch. They feature a moist cake center with creamy frosting, coated in vibrant candy melts and decorated with school colors.
- Prep Time: 20 minutes
- Cook Time: 35 minutes
- Total Time: 1 hour 55 minutes
- Yield: 12-15 cake pops 1x
- Category: Dessert
- Cuisine: American
Ingredients
- 1 box yellow or white cake mix (about 15.25 oz / 432 g)
- Ingredients called for on the cake mix box (usually 3 large eggs, 1/3 cup vegetable oil, and 1 cup water)
- 1/2 cup (115 g) unsalted butter, softened
- 1 1/2 cups (180 g) powdered sugar, sifted
- 1 teaspoon vanilla extract
- 1–2 tablespoons milk or cream (dairy-free milk optional)
- 12 oz (340 g) candy melts in school colors
- Sprinkles or edible glitter in matching colors
- Cake pop sticks (about 12-15 sticks)
- Optional: Melting chocolate for drizzle or accents
Instructions
- Preheat oven to 350°F (175°C). Grease or line a 9×13-inch pan with parchment paper.
- Mix cake batter according to box instructions, pour into pan, and bake for 30-35 minutes until a toothpick comes out clean.
- Cool cake completely on a wire rack (about 1 hour).
- Beat softened butter in a medium bowl until creamy (about 2 minutes).
- Gradually add powdered sugar on low speed, then add vanilla extract and milk until smooth and spreadable. Set aside.
- Crumble cooled cake into a large bowl using hands or fork until fine but not powdery.
- Add about 1/2 cup (120 g) frosting to cake crumbs and mix gently until mixture holds together when pressed, adjusting frosting amount as needed.
- Scoop about 2 tablespoons (30 g) of mixture and roll into smooth balls. Place on parchment-lined baking sheet and chill for at least 30 minutes.
- Melt a small amount of candy melts. Dip tip of each cake pop stick into melted candy, then insert halfway into each cake ball. Refrigerate pops for 15 minutes.
- Melt remaining candy melts in microwave-safe bowl, stirring every 30 seconds until smooth.
- Dip each cake pop into melted candy coating, twisting gently to cover completely. Let excess drip off.
- Decorate immediately with sprinkles or edible glitter before coating sets.
- Place cake pops upright in styrofoam block or cake pop stand and let set at room temperature for about 1 hour or refrigerate for 20 minutes.
- Once coating is firm, serve and enjoy.
Notes
Chill cake balls well before dipping to prevent falling off sticks. Use high-quality candy melts like Wilton for best texture and color. Avoid overheating candy melts to prevent grainy or burnt coating. Dip slowly and gently to avoid air bubbles. Cake pops can be stored in an airtight container in the fridge for up to 5 days or frozen for up to 1 month. Let frozen pops thaw overnight in the fridge before serving.
Nutrition
- Serving Size: 1 cake pop
- Calories: 150180
- Sugar: 20
- Sodium: 120
- Fat: 7
- Saturated Fat: 4
- Carbohydrates: 25
- Fiber: 0.5
- Protein: 2
Keywords: cake pops, graduation, school colors, party treats, easy dessert, candy melts, celebration, bite-sized dessert


