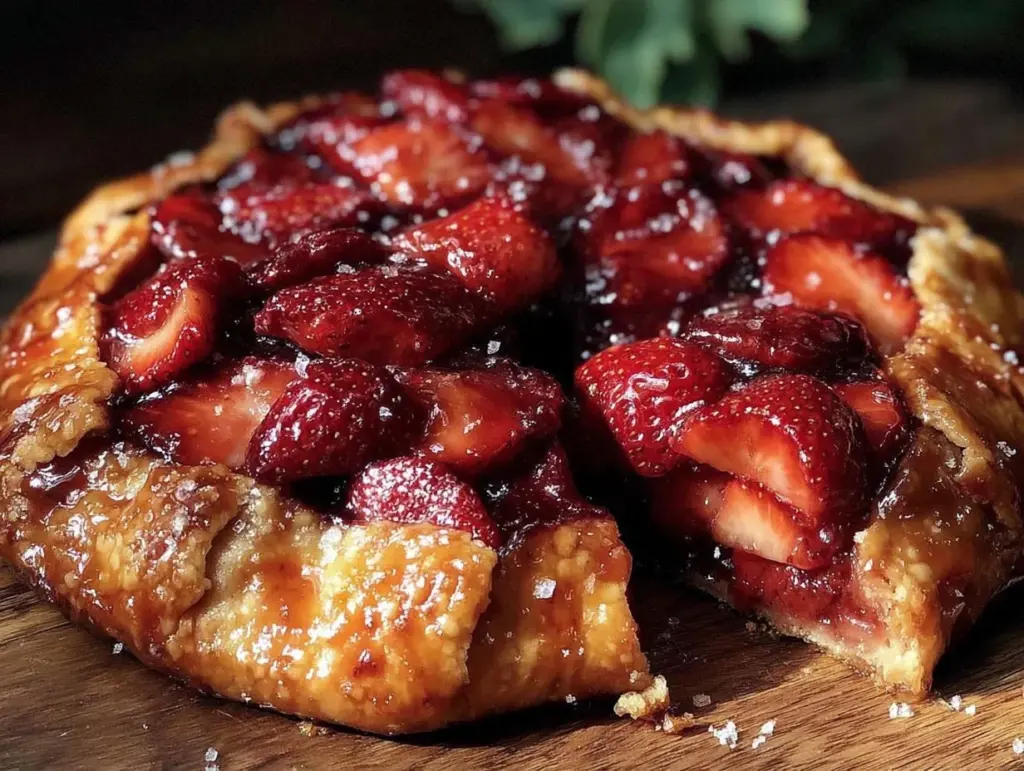
“Are you sure this’ll turn out okay?” my friend asked, eyeing the messy pile of dough and strawberries on my kitchen counter. Honestly, I wasn’t fully convinced myself. I’d been fiddling with pie crusts all afternoon, trying to perfect this flaky free-form crust for a rustic strawberry galette. It was one of those moments where the recipe started as a casual experiment — a low-pressure weekend project after a hectic week — but turned out to be something unexpectedly satisfying. The kitchen smelled like summer strawberries and butter, and that smell alone was enough to pull me out of my funk. The edges of the crust were uneven, the filling a bit juicy, but when I pulled that galette out of the oven, golden and crispy, I knew I had stumbled onto a winner.
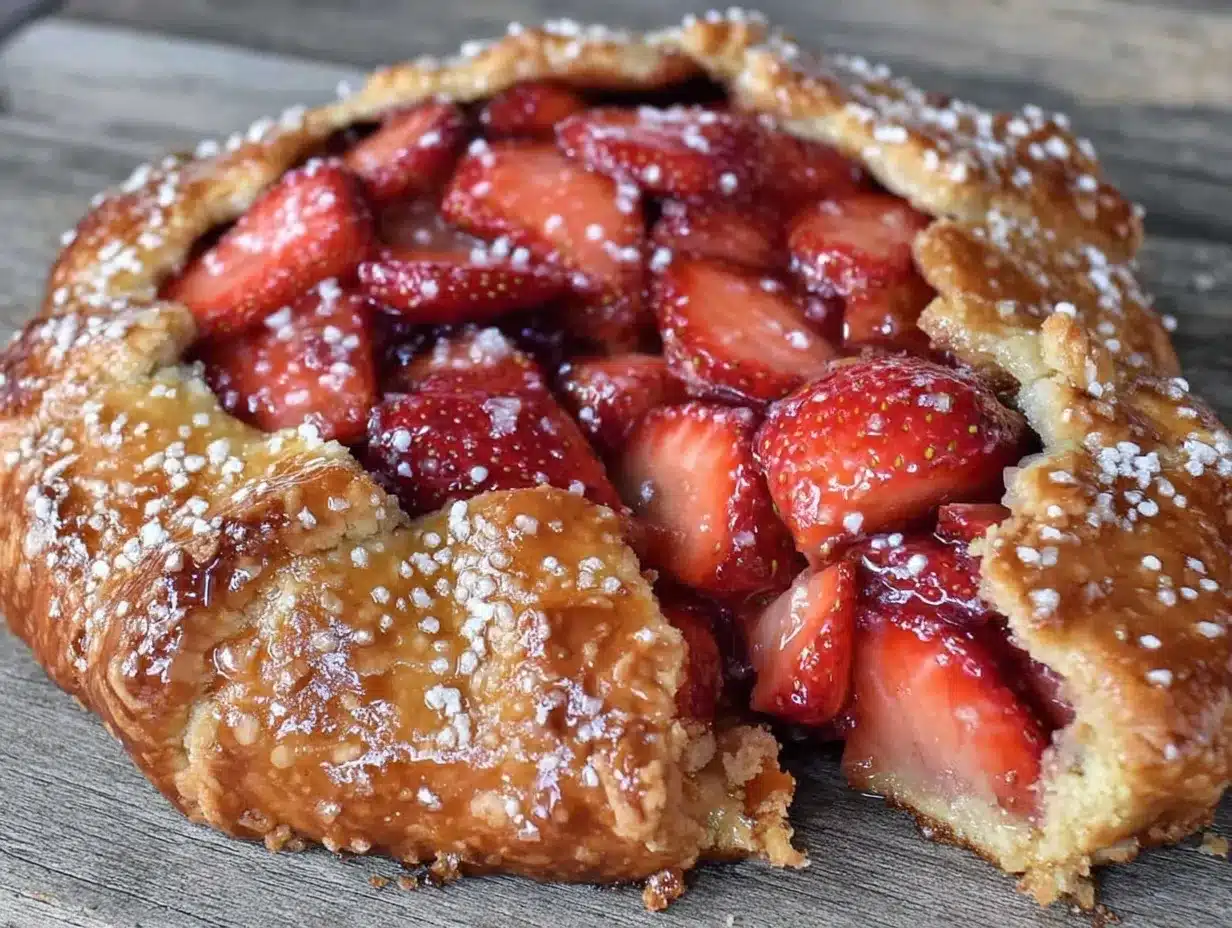
This crispy rustic strawberry galette isn’t your typical pie. It’s that easygoing, “come as you are” dessert that doesn’t stress about perfection but nails flavor and texture every single time. The flaky free-form crust cracks under your fork, revealing juicy berries that sing with a hint of vanilla and lemon zest. I’ve made this galette so many times now — sometimes twice in a week — and each time it feels like a little summer celebration in my mouth. It’s the kind of recipe that makes you want to pause and savor the moment, maybe with a cup of coffee or a scoop of vanilla ice cream, and quietly appreciate something simple done well.
What really makes this galette stick with me is how approachable it feels. No rolling pins or pie plates needed — just a sheet pan and a little patience. It’s flexible, too; perfect for a casual brunch, a potluck, or even an unplanned gathering when you want to bring something homemade but don’t have hours to fuss. And frankly, the flaky free-form crust is just plain fun to make — you get to pinch and fold the dough any which way, and every galette looks a bit different, like edible art. If you’re like me and like to keep things simple but delicious, this is your recipe.
Why You’ll Love This Recipe
Having made this crispy rustic strawberry galette more times than I can count, I can say it’s a recipe that hits all the right notes without demanding a ton of work. Here’s why this strawberry galette with flaky free-form crust might just become your new go-to dessert:
- Quick & Easy: From mixing the dough to pulling it out of the oven, it takes less than 90 minutes — perfect for busy afternoons or last-minute dessert emergencies.
- Simple Ingredients: No need for fancy or hard-to-find items. Most are pantry staples like flour, butter, sugar, and fresh strawberries (which you can swap for frozen if needed).
- Perfect for Casual Gatherings: Its rustic look makes it ideal for potlucks, brunches, or even a quiet weekend treat with family or friends.
- Crowd-Pleaser: Kids and adults alike rave about the sweet-tart strawberry filling paired with the buttery, flaky crust.
- Unbelievably Delicious: The contrast between the crispy edges and the juicy berries creates a texture and flavor combo that’s just pure comfort food.
What sets this galette apart from other strawberry desserts is the flaky free-form crust. Unlike rigid pies, this crust is forgiving and fun — no rolling pin precision required. I recommend using cold, unsalted butter from brands like Kerrygold for the best flaky layers. Plus, a little lemon zest brightens the whole thing up, making the strawberries pop even more. Whether you’re after a simple summer dessert or a way to impress guests without the stress, this recipe fits the bill perfectly. Honestly, it’s the kind of treat that makes you close your eyes after the first bite and smile.
What Ingredients You Will Need
This crispy rustic strawberry galette comes together from straightforward, wholesome ingredients that work together to create bold flavor and that flaky texture you want. Most of these are pantry staples, and the fresh strawberries really shine in this recipe — though frozen can work if you’re in a pinch.
- For the crust:
- 2 ½ cups (320g) all-purpose flour (I prefer King Arthur Flour for consistent texture)
- 1 teaspoon granulated sugar (adds a touch of sweetness to the crust)
- 1 teaspoon kosher salt
- 1 cup (227g) unsalted butter, cold and cut into cubes (Kerrygold is my go-to for rich flavor)
- ½ cup (120ml) ice water, plus a splash more if needed
- For the filling:
- 4 cups (about 600g) fresh strawberries, hulled and halved (use ripe, firm berries for best results)
- ½ cup (100g) granulated sugar
- 1 tablespoon cornstarch (helps thicken the juicy filling)
- 1 teaspoon vanilla extract (adds warmth and depth)
- 1 tablespoon lemon zest (brightens the flavor and balances sweetness)
- 1 tablespoon fresh lemon juice
- For finishing:
- 1 egg, beaten (for egg wash to get that golden crust)
- 1 tablespoon coarse sugar (like turbinado, for sprinkling on the crust)
If you want a gluten-free option, swapping the all-purpose flour with a gluten-free blend like Bob’s Red Mill 1-to-1 works well, though the texture will be slightly different. You can also swap out the butter for a dairy-free alternative if needed, just make sure it’s cold and firm to keep the crust flaky.
Equipment Needed
- Baking sheet (a rimmed half-sheet pan works best to catch any juices)
- Mixing bowls (one large for dough, one medium for filling)
- Pastry blender or food processor (to cut butter into flour; I use a food processor for speed but a pastry blender works just fine)
- Rolling pin (optional — you can press the dough out with your hands if you prefer a more rustic look)
- Parchment paper or silicone baking mat (helps prevent sticking and makes cleanup easier)
- Pastry brush (for egg wash)
- Measuring cups and spoons
If you don’t have a food processor, no worries — you can easily use two knives or a pastry cutter to work the butter into the flour. Also, a bench scraper is handy for folding the dough and transferring it to the baking sheet. For a budget-friendly tip, you can use your hands to gently press and shape the dough directly on the parchment paper, which adds to the galette’s rustic charm.
Preparation Method
- Make the crust: In a large bowl or food processor, combine the flour, sugar, and salt. Add the cold cubed butter. Pulse (or use a pastry blender) until the mixture resembles coarse crumbs with pea-sized bits of butter remaining. This is key for that flaky texture.
Tip: Keep everything cold — I even chill my flour sometimes to help. - Slowly add the ice water, one tablespoon at a time, mixing gently until the dough just holds together when pinched. Avoid overmixing — you want it shaggy but cohesive.
Note: If the dough feels too dry, add a splash more water; too wet, add a pinch of flour. - Turn the dough onto a lightly floured surface and press it into a rough disk about 8 inches (20 cm) in diameter. Wrap in plastic and refrigerate for at least 30 minutes — this resting step helps hydrate the flour and relax the gluten.
- Prepare the filling: In a medium bowl, combine the halved strawberries, sugar, cornstarch, vanilla extract, lemon zest, and lemon juice. Toss gently to coat and set aside to macerate while the dough chills. This draws out the juices and thickens the filling.
- Preheat the oven to 400°F (200°C). Line a baking sheet with parchment paper.
- On a lightly floured surface, roll out the dough into a 12-inch (30 cm) circle. Don’t worry about perfect edges — rustic is the point here! Transfer the dough to the prepared baking sheet.
- Pour the strawberry filling into the center of the dough, leaving a 2-inch (5 cm) border around the edges free.
Tip: Don’t overload or the crust may get soggy. - Fold the edges of the dough up and over the filling, pleating as you go to create a rustic border. The center will be open, showcasing those juicy berries.
- Brush the crust with beaten egg and sprinkle the coarse sugar over the top for that irresistible golden crunch.
- Bake for 35-40 minutes, or until the crust is golden and the filling is bubbly.
Watch: If the edges brown too quickly, tent with foil halfway through baking. - Let the galette cool on the baking sheet for at least 15 minutes before slicing — this resting time helps the filling set enough to slice cleanly.
During my first few tries, I learned that chilling the dough well and keeping the butter cold made all the difference. Also, don’t skip the maceration step — it really brings out the strawberry flavor and stops the filling from being watery. If you want to get creative, you can add a sprinkle of fresh herbs like basil or thyme to the filling — it adds a surprising twist!
Cooking Tips & Techniques
Making a flaky free-form crust might sound intimidating, but with a few tips, you’ll get it down in no time.
- Keep everything cold: Butter and water should be ice-cold. Warm butter melts too quickly, resulting in a dense crust.
- Don’t overwork the dough: Mixing just until the dough holds together means less gluten development, which keeps the crust tender.
- Use a light hand when folding the crust edges: Pleating the dough creates structure but doesn’t need to be perfect — rustic charm is the goal.
- Watch the baking time: Ovens vary, so start checking at 30 minutes. If the crust browns too fast, tent with foil to prevent burning.
- Rest before slicing: The strawberry juices are hot and bubbly right out of the oven — cooling allows them to thicken and prevents a messy galette.
- Pro tip: For extra crispness, you can sprinkle a thin layer of ground almonds or almond meal on the dough before adding the filling. It soaks up excess moisture and adds a lovely nutty flavor.
I once rushed the chilling step and ended up with a crust that shrank and lost its flakiness — lesson learned the hard way! Also, if you’re juggling dinner and dessert (been there), prep the dough the night before and keep it chilled until you’re ready to bake.
Variations & Adaptations
This galette is a wonderfully flexible recipe, lending itself to various twists depending on your mood or dietary needs.
- Berry Medley: Swap half the strawberries for fresh blueberries or raspberries for a mixed berry galette. In summer, fresh berries bring vibrant flavor and color.
- Gluten-Free: Use a 1-to-1 gluten-free flour blend instead of all-purpose flour. Just be sure to chill the dough well and handle gently.
- Vegan: Replace butter with cold coconut oil or a vegan butter substitute, and swap the egg wash for a plant-based milk brush (like almond milk) mixed with a bit of maple syrup for shine.
- Herb Infusion: Add fresh chopped basil or mint to the strawberry filling for an herbal twist that brightens the flavor.
- Sweet & Nutty: Try sprinkling chopped toasted pistachios or slivered almonds over the filling before folding the crust for extra crunch and flavor.
I once made this galette with a friend who added a splash of balsamic vinegar to the filling — surprisingly delicious! If you want to try a dairy-free version, you might also enjoy the texture of the crust in my dairy-free lemon coconut cream bars, which use a similar flaky crust technique.
Serving & Storage Suggestions
This crispy rustic strawberry galette is best served warm or at room temperature, ideally with a scoop of vanilla ice cream or a dollop of freshly whipped cream to balance the tartness of the berries.
For a casual brunch, pairing it with a fresh beverage like my fresh strawberry basil lemonade makes for a refreshing combo that guests adore.
Store leftovers covered loosely with foil or plastic wrap in the refrigerator for up to 3 days. You can also freeze the baked galette wrapped tightly in plastic and foil for up to a month. To reheat, pop it in a 350°F (175°C) oven for 10-15 minutes to refresh the crispiness.
Over time, the flavors deepen and the crust softens slightly — still delicious but best enjoyed fresh for that signature crispness. If you want to make it ahead for a party, bake it the day before and warm right before serving for that fresh-baked feel.
Nutritional Information & Benefits
Each serving of this crispy rustic strawberry galette provides a satisfying balance of carbs, fat, and natural sugars — roughly 280 calories per slice, depending on size.
Strawberries are packed with vitamin C, antioxidants, and fiber, making this dessert a lighter, fruit-forward option compared to heavy cream-filled pastries. The use of real butter adds richness but also healthy fats that help keep you full.
This recipe can be adapted to gluten-free or vegan diets, making it a versatile choice for various dietary needs. Just keep in mind the butter and flour swaps impact texture and flavor slightly but still deliver a tasty treat.
Personally, I appreciate that this galette feels indulgent but doesn’t weigh me down — a perfect balance of comfort and freshness that fits right into a health-conscious but realistic lifestyle.
Conclusion
This crispy rustic strawberry galette with flaky free-form crust is one of those recipes that’s as fun to make as it is to eat. It’s approachable, forgiving, and full of fresh, bright flavors that celebrate the strawberries without fuss. I love how the flaky crust shatters beneath a fork, letting the juicy, slightly tangy filling take center stage. Whether you’re baking for yourself on a quiet weekend or bringing something homemade to a casual gathering, this galette delivers both texture and taste with minimal stress.
Feel free to tweak the filling, try different berries, or experiment with herbs — it’s your creation after all. I hope this recipe brings you the same quiet joy and little moments of satisfaction it’s given me.
When you give it a try, I’d love to hear how it turns out or any personal twists you add. There’s just something special about sharing these rustic, homemade desserts that connect us — one flaky bite at a time.
FAQs About Crispy Rustic Strawberry Galette
How do I prevent the crust from getting soggy?
Make sure to chill the dough before baking, use a thickening agent like cornstarch in the filling, and avoid overloading with berries. You can also sprinkle a thin layer of ground almonds on the crust before adding the filling to absorb excess moisture.
Can I use frozen strawberries for this galette?
Yes, but thaw and drain them well to reduce extra liquid. You might want to reduce the sugar slightly since frozen berries can be sweeter.
How do I store leftover galette?
Cover it loosely with foil or plastic wrap and refrigerate for up to 3 days. Reheat in a 350°F (175°C) oven for 10-15 minutes to refresh the crust’s crispness.
Can I make the dough ahead of time?
Absolutely. The dough can be made and refrigerated for up to 2 days or frozen for up to a month. Just thaw in the fridge before rolling out.
What can I serve with this strawberry galette?
It’s fantastic with vanilla ice cream, whipped cream, or alongside a refreshing drink like strawberry basil lemonade. For brunch, pair it with fresh fruit salad or light egg dishes.
Pin This Recipe!
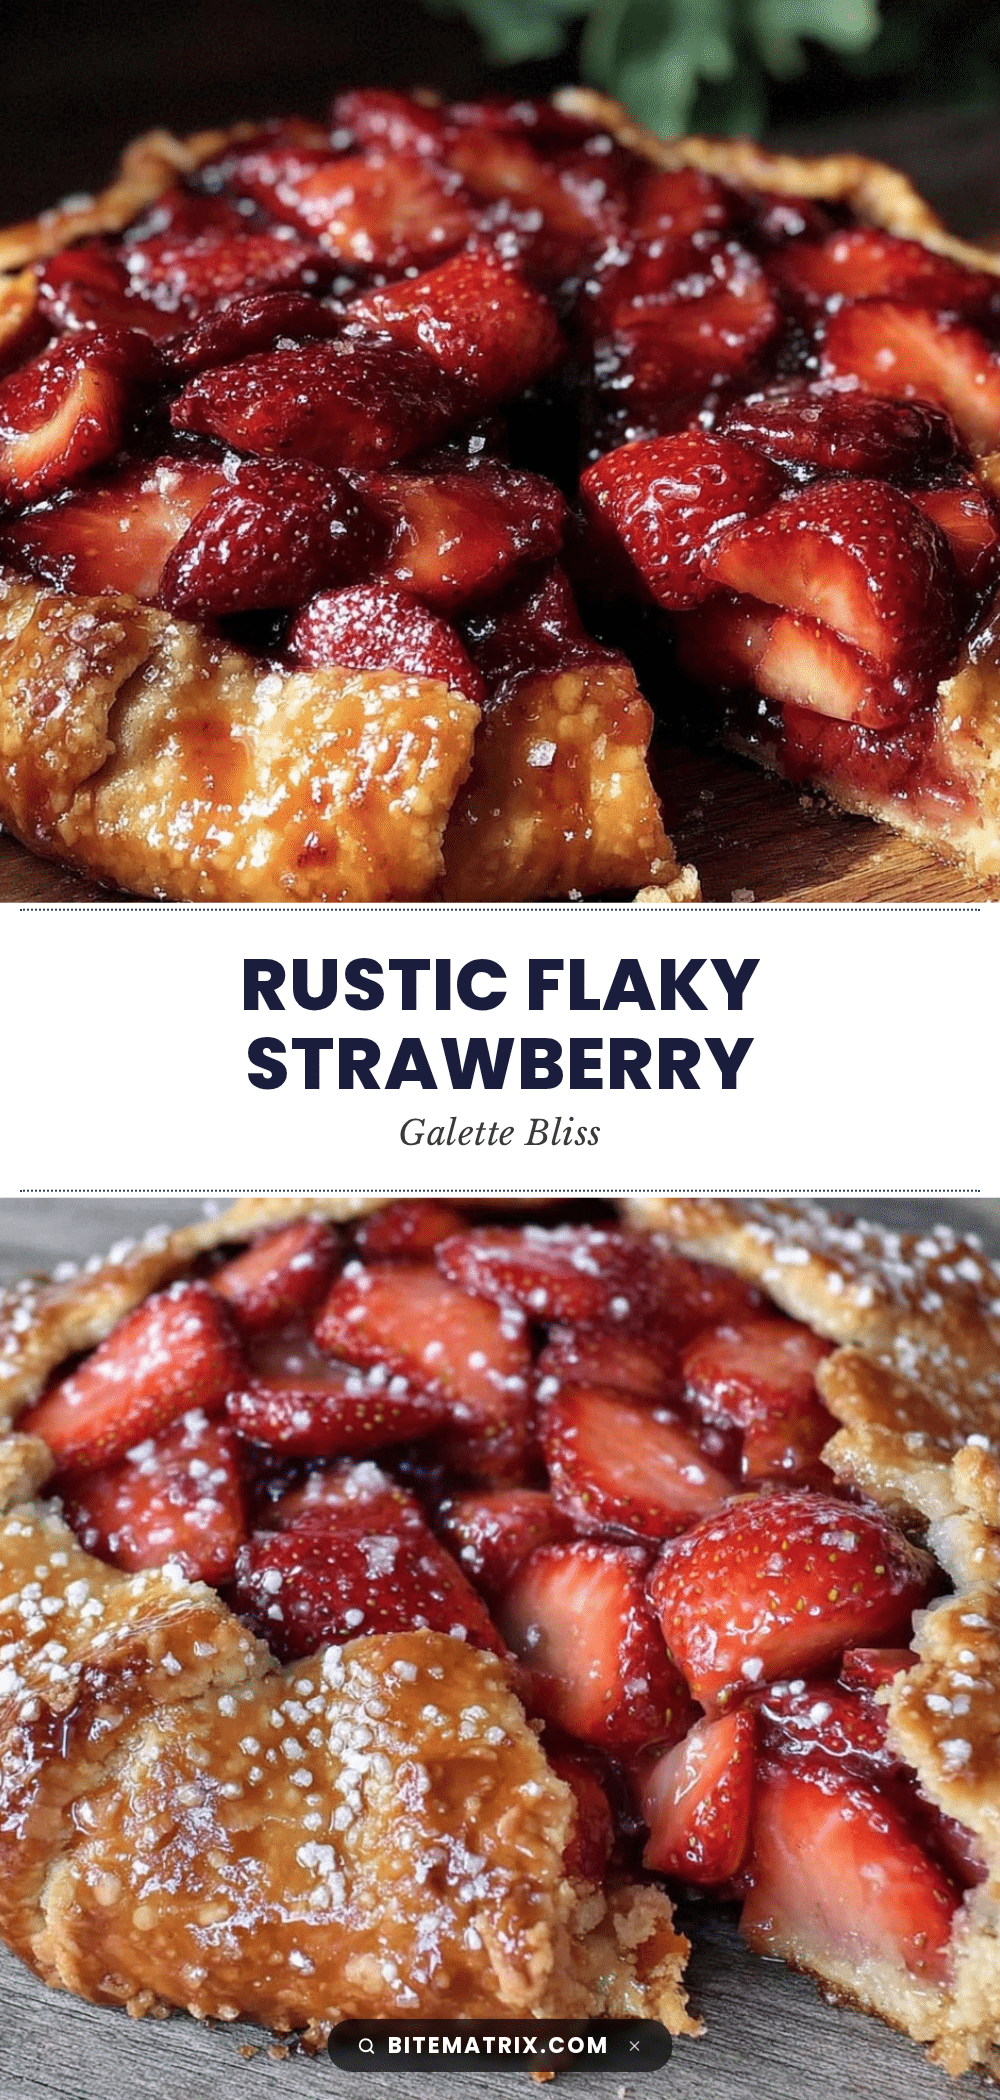
Crispy Rustic Strawberry Galette

A flaky free-form crust galette filled with juicy strawberries, vanilla, and lemon zest, perfect for a casual dessert or brunch. This easy recipe delivers a crispy crust and a sweet-tart filling that celebrates summer flavors.
- Prep Time: 30 minutes
- Cook Time: 35-40 minutes
- Total Time: 65-70 minutes
- Yield: 8 servings 1x
- Category: Dessert
- Cuisine: American
Ingredients
- 2 ½ cups (320g) all-purpose flour
- 1 teaspoon granulated sugar
- 1 teaspoon kosher salt
- 1 cup (227g) unsalted butter, cold and cut into cubes
- ½ cup (120ml) ice water, plus a splash more if needed
- 4 cups (about 600g) fresh strawberries, hulled and halved
- ½ cup (100g) granulated sugar
- 1 tablespoon cornstarch
- 1 teaspoon vanilla extract
- 1 tablespoon lemon zest
- 1 tablespoon fresh lemon juice
- 1 egg, beaten (for egg wash)
- 1 tablespoon coarse sugar (like turbinado) for sprinkling
Instructions
- In a large bowl or food processor, combine the flour, sugar, and salt. Add the cold cubed butter and pulse or use a pastry blender until the mixture resembles coarse crumbs with pea-sized bits of butter remaining.
- Slowly add the ice water, one tablespoon at a time, mixing gently until the dough just holds together when pinched. Add more water or flour as needed to achieve the right consistency.
- Turn the dough onto a lightly floured surface and press it into a rough 8-inch disk. Wrap in plastic and refrigerate for at least 30 minutes.
- In a medium bowl, combine the halved strawberries, sugar, cornstarch, vanilla extract, lemon zest, and lemon juice. Toss gently and set aside to macerate while the dough chills.
- Preheat the oven to 400°F (200°C). Line a baking sheet with parchment paper.
- Roll out the dough on a lightly floured surface into a 12-inch circle. Transfer to the prepared baking sheet.
- Pour the strawberry filling into the center of the dough, leaving a 2-inch border around the edges.
- Fold the edges of the dough up and over the filling, pleating as you go to create a rustic border.
- Brush the crust with beaten egg and sprinkle coarse sugar over the top.
- Bake for 35-40 minutes until the crust is golden and the filling is bubbly. Tent with foil if edges brown too quickly.
- Let the galette cool on the baking sheet for at least 15 minutes before slicing.
Notes
Keep all ingredients cold to ensure a flaky crust. Chill dough for at least 30 minutes before rolling. Macerate strawberries to draw out juices and thicken filling. Tent with foil if crust edges brown too quickly. For extra crispness, sprinkle ground almonds on dough before adding filling. Dough can be made ahead and refrigerated or frozen.
Nutrition
- Serving Size: 1 slice (1/8 of gale
- Calories: 280
- Sugar: 18
- Sodium: 220
- Fat: 15
- Saturated Fat: 9
- Carbohydrates: 34
- Fiber: 3
- Protein: 3
Keywords: strawberry galette, rustic galette, flaky crust, summer dessert, easy strawberry dessert, free-form pie, homemade galette