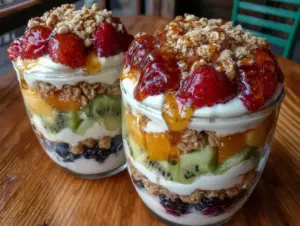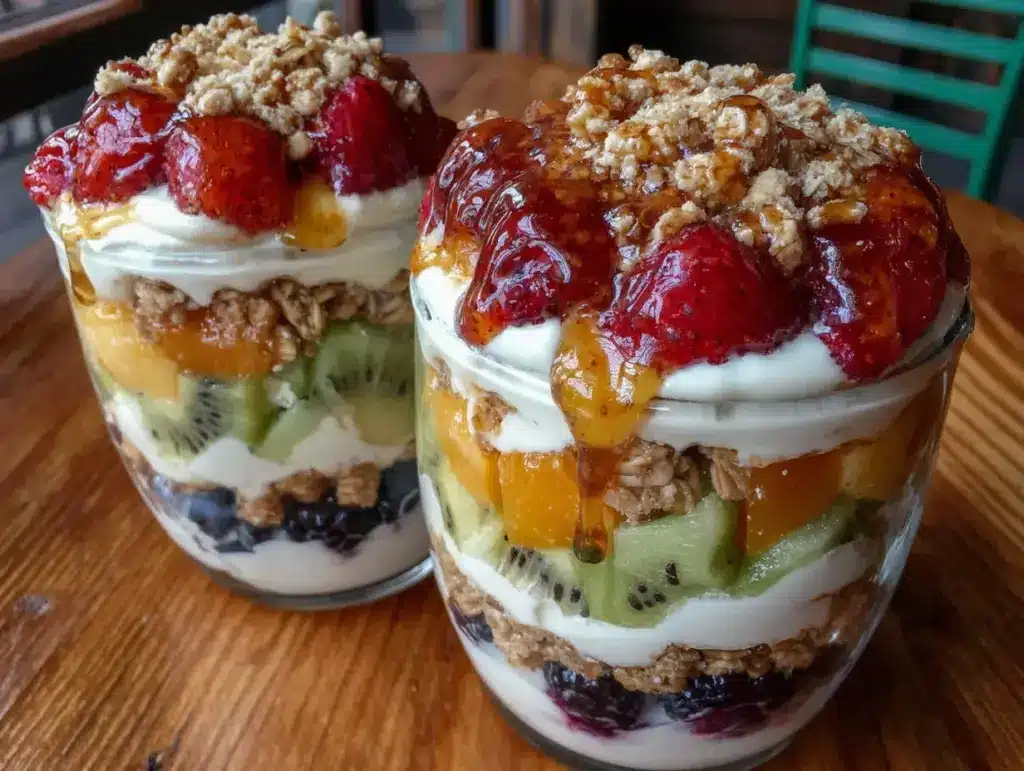
I did not trust make-ahead breakfasts. Not really. The idea of yogurt sitting in a cup overnight felt like a gamble I wasn’t willing to take—soggy granola, watery fruit, a sad, separated mess by morning. For years, I was a morning-of person, standing at the counter slicing strawberries while my coffee got cold, convinced that fresh was the only way.
Then came the week from hell. Three early meetings, a kid with a science project due, and a fridge full of beautiful, ripe fruit I was too tired to touch. I had a container of Greek yogurt, some mango, and a bag of granola staring at me from the pantry. Desperate, I layered them in a glass cup at 10 PM, sealed it, and told myself it was an experiment I was prepared to throw away.
The next morning, I pulled that cup out, expecting disappointment. Instead, I saw perfect, defined layers of color—golden mango, creamy white yogurt, a sprinkle of toasted oats. It looked like something from a café menu. I took a bite. The granola was still crunchy—not soft, not stale. The fruit was bright and cold. The yogurt was thick and tangy. I actually stood there in the kitchen, spoon in hand, genuinely confused about why I had been making breakfast so hard for myself all these years.
These rainbow fruit and yogurt parfait cups are that recipe. They are the breakfast that finally made me stop being stubborn about meal prep. And honestly, they taste better than any last-minute bowl I ever threw together.
Why You’ll Love This Recipe
This is one of those recipes that does the heavy lifting for you. You spend fifteen minutes one evening, and you wake up to a breakfast that looks like you tried way harder than you actually did. Here is why these rainbow fruit and yogurt parfait cups work so well:
- Make-Ahead Magic : Assemble them the night before (or up to three days ahead) and grab one on your way out the door. No morning prep, no mess, no excuses.
- Simple Ingredients : You need yogurt, fruit, and granola. That is it. No fancy syrups, no obscure superfood powders—just real food you can find at any grocery store.
- Perfect for Busy Mornings : Whether you are rushing to work, packing school lunches, or feeding a crowd at a brunch gathering, these cups are portion-controlled and ready to serve.
- Crowd-Pleaser : Kids love the bright colors and sweet fruit. Adults appreciate the protein and the fact that it actually keeps them full until lunch. I have brought these to potlucks and watched them disappear before the savory dishes.
- Unbelievably Delicious : The trick is in the layering. The fruit stays separate from the granola, so nothing gets soggy. Every spoonful gives you a perfect bite of creamy, crunchy, and sweet.
This is not just another yogurt bowl recipe. It is the version that finally makes meal prep feel worth it. The first time I made these for a friend, she texted me at 10 AM saying she had already eaten two. That is the kind of energy we are going for here.
What Ingredients You Will Need
The beauty of this recipe is its flexibility. You can use whatever fruit is in season, whatever yogurt you love, and whatever granola you have on hand. But here is what I use for the most reliable, rainbow-bright results every single time.
- Plain Greek Yogurt (2 cups) — I prefer full-fat Greek yogurt for its thick, creamy texture and higher protein content. It holds up better in the fridge than thinner yogurts. If you want a dairy-free option, unsweetened coconut yogurt works beautifully, though it is a bit thinner. I have tested this with Fage and Chobani, and both work great.
- Honey or Maple Syrup (2 tablespoons) — This adds just enough sweetness to balance the tang of the yogurt. Maple syrup gives a slightly warmer flavor, while honey stays neutral. Use agave if you are vegan.
- Vanilla Extract (1 teaspoon) — A tiny splash rounds out the flavor and makes the yogurt taste almost like a dessert. Trust me on this one—it is worth the extra step.
- Strawberries (1 cup, diced) — Choose ripe, red berries for the best color and sweetness. I like to dice them small so they distribute evenly through the layers.
- Mango (1 cup, diced) — Fresh mango is ideal, but frozen (thawed and drained) works in a pinch. Look for mango that is firm but gives slightly when pressed.
- Pineapple (1 cup, diced) — Canned pineapple chunks (drained well) are actually my secret weapon here. They are consistently sweet and tender. If using fresh, make sure it is ripe—underripe pineapple can be tart.
- Kiwi (2-3, peeled and diced) — Kiwi adds that bright green pop and a slightly tangy flavor that cuts through the sweetness. Peel them fully—the fuzzy skin is not pleasant in a parfait.
- Blueberries (1 cup) — These hold their shape beautifully and do not release too much juice, which means they won’t bleed into the yogurt layers overnight.
- Granola (1 cup) — Use a sturdy, cluster-style granola. Avoid finely ground or flaky granola, which gets soft too quickly. I love Bear Naked’s Fruit and Nut mix or a simple homemade oat granola. If you are gluten-sensitive, check the label—many granolas contain oats that are not certified gluten-free.
- Optional Toppings — A sprinkle of chia seeds, shredded coconut, or a drizzle of nut butter adds extra texture and nutrition. I often add a pinch of flaky sea salt on top because sweet-and-salty breakfasts are my thing.
Equipment Needed
You do not need anything fancy here—just a few basics you probably already have in your kitchen.
- 4-6 Small Jars or Cups — Mason jars (8-ounce or 12-ounce) are perfect because they seal tightly and show off the layers. But any small glass or plastic cup with a lid works. I have used Weck jars, repurposed jam jars, even small takeout containers in a pinch.
- Cutting Board and Sharp Knife — A good chef’s knife makes dicing fruit quick and safe. Dull knives are actually more dangerous—they slip. Keep yours sharp.
- Mixing Bowl and Whisk — For combining the yogurt, honey, and vanilla. A fork works if you do not have a whisk, but a whisk gives you a smoother, fluffier texture.
- Measuring Cups and Spoons — Exact measurements matter less here than in baking, but using the right proportions helps the layers look clean and balanced.
- Spoon or Small Ladle — For layering the yogurt and fruit without making a mess. I use a small cookie scoop for the fruit—it keeps the layers even.
If you are making these for a party or brunch, clear glass jars are non-negotiable. The whole point is seeing those rainbow stripes through the sides. Plastic cups work for storage, but they hide the beauty of the layers.
Preparation Method
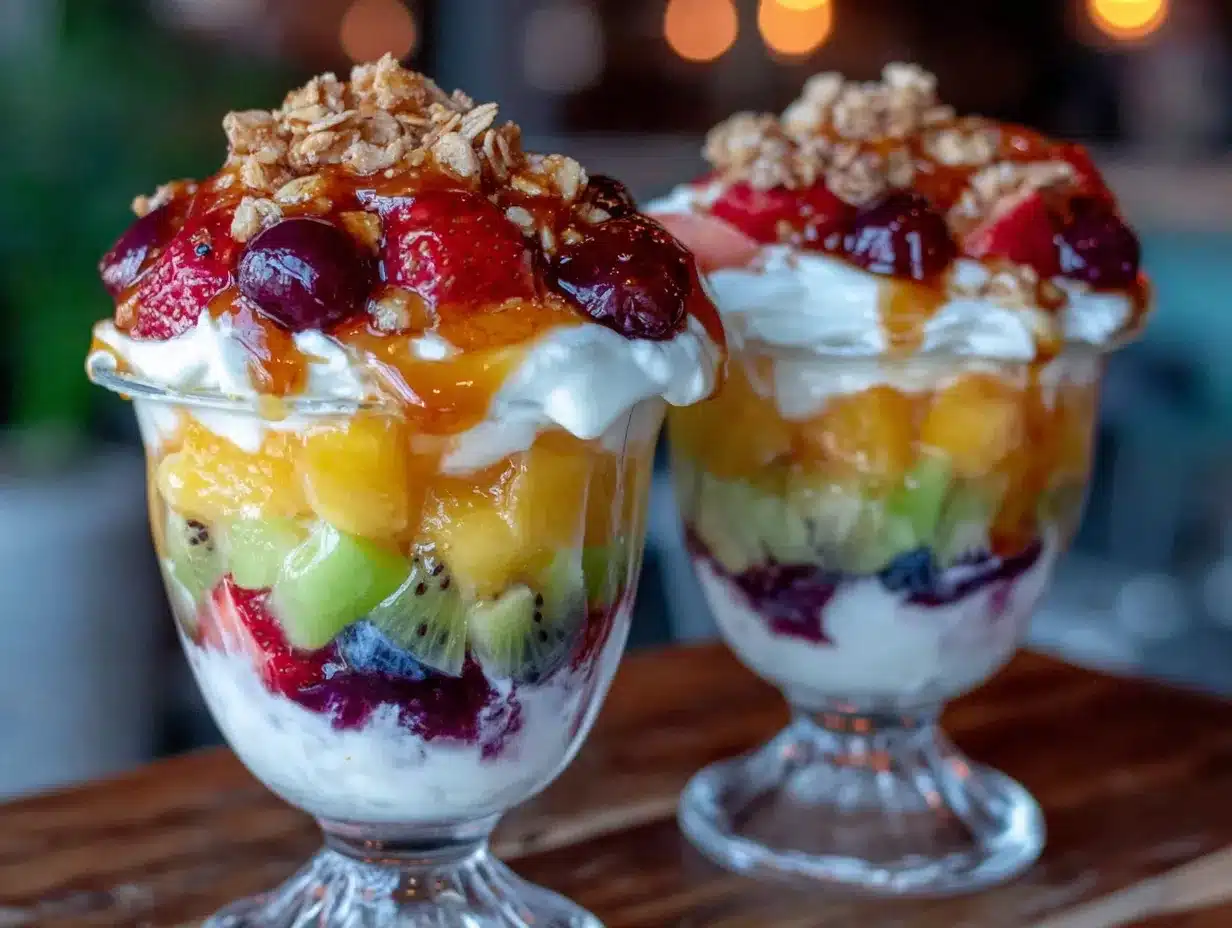
This is the part where everything comes together. The process is simple, but a few small choices make the difference between a pretty parfait and a truly great one.
- Prep the Yogurt Base — In a medium mixing bowl, combine 2 cups of plain Greek yogurt, 2 tablespoons of honey (or maple syrup), and 1 teaspoon of vanilla extract. Whisk until smooth and completely combined. Taste it. It should be slightly sweet but still tangy. If it is not sweet enough for your preference, add another half-tablespoon of honey. Set aside.
- Prep the Fruit — Wash and dry all your fruit thoroughly. Wet fruit releases more juice and can make the parfait watery. Dice the strawberries, mango, pineapple, and kiwi into small, uniform pieces—about ½-inch cubes. Keep the blueberries whole. If you are using frozen fruit, thaw it completely and pat it dry with a paper towel. This step is tedious, I know, but skipping it leads to sad, soggy layers.
- Choose Your Layering Order — This is the fun part. I like to arrange my fruit in rainbow order: red (strawberries), orange (mango), yellow (pineapple), green (kiwi), blue (blueberries). But you can do any order you like. The key is to start and end with fruit so the yogurt is sandwiched in between.
- Layer the First Row of Fruit — Spoon about 2 tablespoons of the first fruit (strawberries) into the bottom of each jar. Press it down lightly so it forms an even layer. Do not overpack it—you want room for the yogurt to settle around it.
- Add the First Yogurt Layer — Spoon about 3 tablespoons of the sweetened yogurt over the strawberries. Use the back of the spoon to spread it gently to the edges of the jar. You want the yogurt to touch the glass so the fruit layer is visible through the sides. Tap the jar lightly on the counter to settle the yogurt and remove any air pockets.
- Continue Layering — Repeat the process with the remaining fruit in your chosen color order. Add mango, then yogurt. Add pineapple, then yogurt. Add kiwi, then yogurt. End with a final layer of blueberries on top. Each yogurt layer should be about 2-3 tablespoons, depending on the size of your jars. You should have about 4-5 total layers of fruit and 4 layers of yogurt.
- Top with Granola (Optional) — If you are serving the parfaits immediately, sprinkle granola on top right before serving. If you are making them ahead, keep the granola separate and add it just before eating. I learned this the hard way after a batch of perfectly layered parfaits turned into a mushy mess overnight. Granola does not forgive moisture.
- Seal and Refrigerate — Screw the lids on tightly and place the jars in the refrigerator. They need at least 2 hours to set, but overnight is best. The flavors meld together, and the yogurt thickens slightly as it chills. These will keep well for up to 3 days.
Pro Tip : If you are making these for a party or meal prep, write the date on the lid with a dry-erase marker. It sounds silly, but after two days, all the jars start looking the same, and you will forget which ones are oldest.
Cooking Tips & Techniques
I have made these parfaits about thirty times now, and I have made every mistake you can imagine. Here is what I learned so you do not have to repeat my errors.
Keep the Granola Separate — I cannot stress this enough. If you are making these ahead, store the granola in a small bag or container and add it right before serving. Even the sturdiest granola will soften after a few hours in the fridge. The texture contrast is the whole point of a parfait—do not sacrifice it for convenience.
Dry Your Fruit Thoroughly — After washing your berries and dicing your mango, lay the pieces out on a clean kitchen towel or paper towel and pat them dry. Excess moisture is the enemy of a good parfait. It thins out the yogurt and makes the layers run together. I once skipped this step with frozen blueberries, and my “rainbow” looked like a muddy puddle by morning.
Use Room Temperature Yogurt for Mixing — Cold yogurt straight from the fridge is stiff and difficult to whisk smoothly. Let it sit on the counter for 10 minutes before you mix in the honey and vanilla. It blends more evenly and gives you a creamier texture.
Layer with Intention — When you spoon the yogurt over the fruit, do not just dump it in the center. Spread it gently toward the edges so it touches the glass. This creates those clean, visible stripes that make the parfait look professional. If you are in a rush, use a piping bag or a zip-top bag with the corner snipped off to pipe the yogurt in neat layers.
Do Not Skip the Vanilla — I know it seems like a small detail, but that teaspoon of vanilla extract transforms plain yogurt from boring to something you actually want to eat for breakfast. It adds a warmth and depth that honey alone cannot provide.
Variations & Adaptations
This recipe is endlessly flexible. Here are some of my favorite ways to change it up depending on the season, my mood, or what is in my fridge.
Dairy-Free Version — Swap the Greek yogurt for a thick coconut yogurt or a soy-based yogurt. I like Cocojune’s plain coconut yogurt—it is rich and tangy, almost like the real thing. Just note that dairy-free yogurts are often thinner, so your layers might not be as defined. Add a tablespoon of chia seeds to the yogurt to help it thicken.
Lower Sugar Option — Skip the honey or maple syrup entirely. Use very ripe fruit—bananas, mango, and peaches are naturally sweet enough to carry the parfait. You can also add a sprinkle of cinnamon or a drop of stevia if you need a little sweetness.
Seasonal Fruit Swap — In summer, use peaches, nectarines, and raspberries. In fall, try diced apples, pears, and pomegranate arils. In winter, go with citrus segments—blood oranges, grapefruit, and mandarins. The rainbow concept works with any colorful fruit combination. I made a fall version last October with roasted cinnamon apples and cranberries, and it was incredible.
Protein Boost — Stir a scoop of unflavored or vanilla protein powder into the yogurt before layering. You can also add a tablespoon of hemp seeds or collagen peptides. This turns the parfait into a proper post-workout breakfast that keeps you full for hours.
Dessert Version — Use vanilla yogurt instead of plain, add a layer of crushed graham crackers or crushed shortbread cookies in place of granola, and top with a drizzle of melted dark chocolate. It is basically a healthy-ish dessert masquerading as breakfast. I have served these at brunch parties, and nobody complained.
Serving & Storage Suggestions
These rainbow fruit and yogurt parfait cups are best served cold, straight from the fridge. The contrast between the chilled yogurt and the room-temperature granola (if you add it right before eating) is part of the magic.
Serving Temperature — Pull the jar out of the fridge, add your granola, and eat immediately. If you let it sit out for more than 15 minutes, the yogurt will start to warm up and thin out, and the fruit will release more juice. It is still good, but it loses that fresh, crisp quality.
Presentation Ideas — For brunches or parties, arrange the jars on a tray with a small bowl of extra granola and a pitcher of cold brew or fresh strawberry basil lemonade. The colors alone will draw people in. I like to tie a small wooden spoon to each jar with a piece of twine for a rustic, grab-and-go look.
Storage — Keep the jars sealed in the refrigerator for up to 3 days. After that, the fruit starts to break down and release liquid, and the yogurt can become watery. I do not recommend freezing these—the texture of the fruit and yogurt will be compromised upon thawing.
Reheating — Do not microwave these. The yogurt will separate and become grainy. If you prefer a warmer breakfast, let the jar sit on the counter for 10 minutes to take the chill off, or serve it alongside a warm beverage.
Flavor Development — Interestingly, these parfaits taste better on day two. The fruit releases just a little bit of juice into the yogurt overnight, infusing it with subtle flavor. The layers stay distinct, but the overall taste becomes more cohesive. I actually prefer making these a full day ahead for that reason.
Nutritional Information & Benefits
These parfaits are as good for you as they are beautiful. Here is a rough estimate per serving (using full-fat Greek yogurt, honey, and a mix of fresh fruit):
| Nutrient | Amount Per Serving |
|---|---|
| Calories | 280-320 |
| Protein | 18-22g |
| Carbohydrates | 35-40g |
| Fiber | 5-7g |
| Sugar | 22-28g (natural, from fruit and honey) |
| Fat | 8-12g |
Health Benefits — Greek yogurt is packed with probiotics and protein, which support gut health and keep you full. The variety of fruits provides a wide range of vitamins, antioxidants, and fiber—each color in the rainbow represents different phytonutrients. Blueberries are great for brain health, mango is rich in vitamin C, and kiwi supports digestion. This is a breakfast that actually fuels your morning without weighing you down.
Dietary Considerations — This recipe is naturally vegetarian and can be made gluten-free by using certified gluten-free granola and dairy-free by swapping the yogurt. It is also low in added sugar if you skip the honey. If you have nut allergies, check your granola label—many contain almonds or cashews.
Conclusion
These rainbow fruit and yogurt parfait cups are the breakfast I never knew I needed. They turned me from a skeptical, last-minute scrambler into someone who actually looks forward to opening the fridge in the morning. The layers are beautiful, the flavors are bright, and the fact that they are ready to go when I am rushing out the door feels like a small miracle every single time.
I hope you give them a try—and I hope you make them your own. Swap in your favorite fruits, use whatever yogurt you love, and do not be afraid to get creative with the toppings. If you make a version with roasted pears and cardamom in the fall, or a tropical version with coconut and passion fruit, please tell me about it. That is the best part of cooking, honestly—seeing how other people take a simple idea and make it theirs.
Drop a comment below and let me know which fruit combination you tried. And if you are looking for another easy make-ahead breakfast, you might love these no-bake strawberry cheesecake cups for a sweeter morning treat. Happy layering!
Frequently Asked Questions
Can I use frozen fruit for these parfaits?
Yes, but you need to thaw it completely and pat it dry with a paper towel before layering. Frozen fruit releases a lot of liquid as it thaws, which can make your yogurt watery and ruin the clean layers. If you are in a rush, use fresh fruit instead.
How far ahead can I make these parfaits?
You can assemble them up to 3 days in advance. They taste best on days 2 and 3, when the flavors have had time to meld. After 3 days, the fruit starts to break down and the texture becomes less appealing. Always keep the granola separate until you are ready to serve.
What is the best yogurt to use for layering?
Thick, full-fat Greek yogurt works best because it holds its shape and does not run into the fruit layers. Avoid thin, drinkable yogurts or those with added fruit puree—they will create a muddy mess. If you are using dairy-free yogurt, look for one that is thick and creamy, like coconut-based or soy-based varieties.
Can I make these parfaits sugar-free?
Absolutely. Skip the honey or maple syrup and rely on very ripe fruit for sweetness. Bananas, mangoes, and peaches are naturally sweet enough to carry the parfait. You can also add a sprinkle of cinnamon or a drop of liquid stevia if you need a little extra sweetness without the sugar.
Why did my granola get soggy overnight?
Because you added it to the parfait before refrigerating. Granola absorbs moisture from the yogurt and fruit, turning soft and chewy within a few hours. Always store granola separately and sprinkle it on top just before eating. This one change will transform your make-ahead parfait experience.
Pin This Recipe!
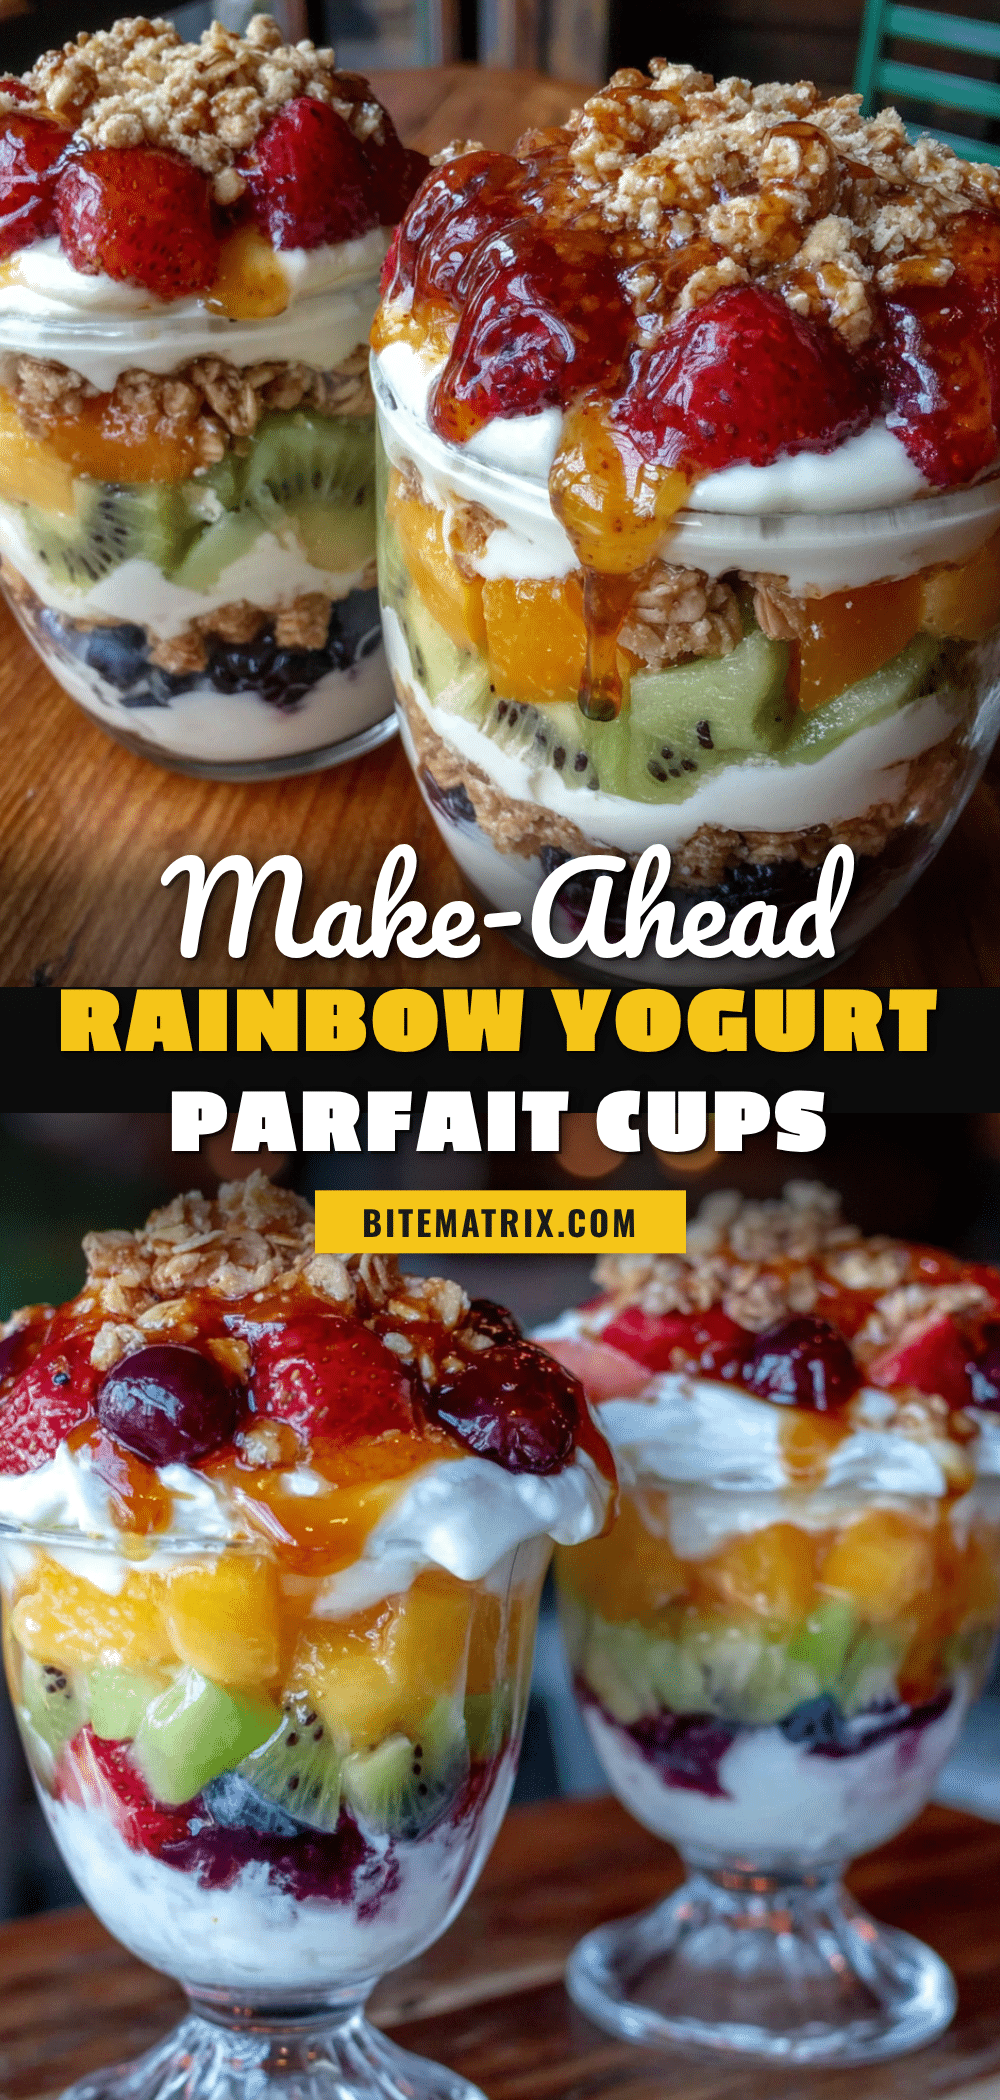
Easy Rainbow Fruit Yogurt Parfait Cups: Make Ahead Recipe

These rainbow fruit and yogurt parfait cups are a make-ahead breakfast that looks like a café creation. With layers of colorful fruit, creamy Greek yogurt, and crunchy granola, they are perfect for busy mornings, brunches, or meal prep.
- Prep Time: 15 minutes
- Cook Time: 0 minutes
- Total Time: 15 minutes (plus 2 hours chilling)
- Yield: 4-6 servings 1x
- Category: Breakfast
- Cuisine: American
Ingredients
- 2 cups plain Greek yogurt (full-fat recommended)
- 2 tablespoons honey or maple syrup
- 1 teaspoon vanilla extract
- 1 cup strawberries, diced
- 1 cup mango, diced
- 1 cup pineapple, diced
- 2–3 kiwi, peeled and diced
- 1 cup blueberries
- 1 cup granola (cluster-style, sturdy)
- Optional: chia seeds, shredded coconut, nut butter, flaky sea salt
Instructions
- In a medium mixing bowl, combine 2 cups plain Greek yogurt, 2 tablespoons honey (or maple syrup), and 1 teaspoon vanilla extract. Whisk until smooth and completely combined. Taste and adjust sweetness if needed.
- Wash and dry all fruit thoroughly. Dice strawberries, mango, pineapple, and kiwi into small, uniform pieces (about ½-inch cubes). Keep blueberries whole. If using frozen fruit, thaw completely and pat dry with a paper towel.
- Choose your layering order. Arrange fruit in rainbow order: red (strawberries), orange (mango), yellow (pineapple), green (kiwi), blue (blueberries). Start and end with fruit so yogurt is sandwiched in between.
- Spoon about 2 tablespoons of the first fruit (strawberries) into the bottom of each jar. Press down lightly to form an even layer.
- Spoon about 3 tablespoons of sweetened yogurt over the strawberries. Spread gently to the edges of the jar so the fruit layer is visible through the sides. Tap the jar lightly on the counter to settle the yogurt.
- Repeat layering with remaining fruit in color order: add mango, then yogurt; add pineapple, then yogurt; add kiwi, then yogurt. End with a final layer of blueberries on top. Each yogurt layer should be about 2-3 tablespoons.
- If serving immediately, sprinkle granola on top. If making ahead, keep granola separate and add just before eating.
- Screw lids on tightly and refrigerate for at least 2 hours, but overnight is best. These will keep well for up to 3 days.
Notes
Keep granola separate until serving to maintain crunch. Dry fruit thoroughly to prevent watery layers. Use room temperature yogurt for easier mixing. Parfaits taste better on day two as flavors meld. Do not microwave to reheat.
Nutrition
- Serving Size: 1 parfait cup
- Calories: 280320
- Sugar: 2228
- Sodium: 5080
- Fat: 812
- Saturated Fat: 35
- Carbohydrates: 3540
- Fiber: 57
- Protein: 1822
Keywords: rainbow fruit yogurt parfait, make-ahead breakfast, healthy breakfast, yogurt parfait cups, meal prep breakfast, easy breakfast recipe