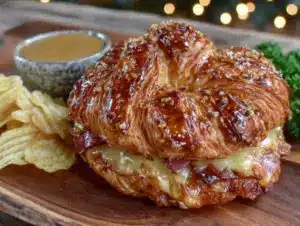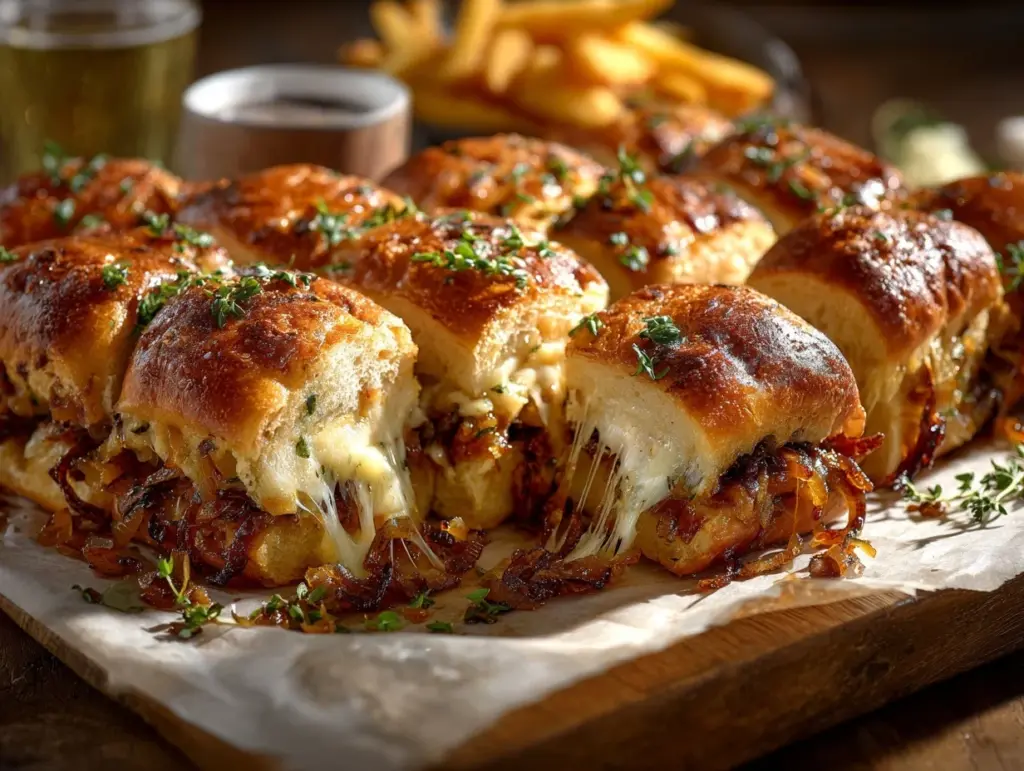
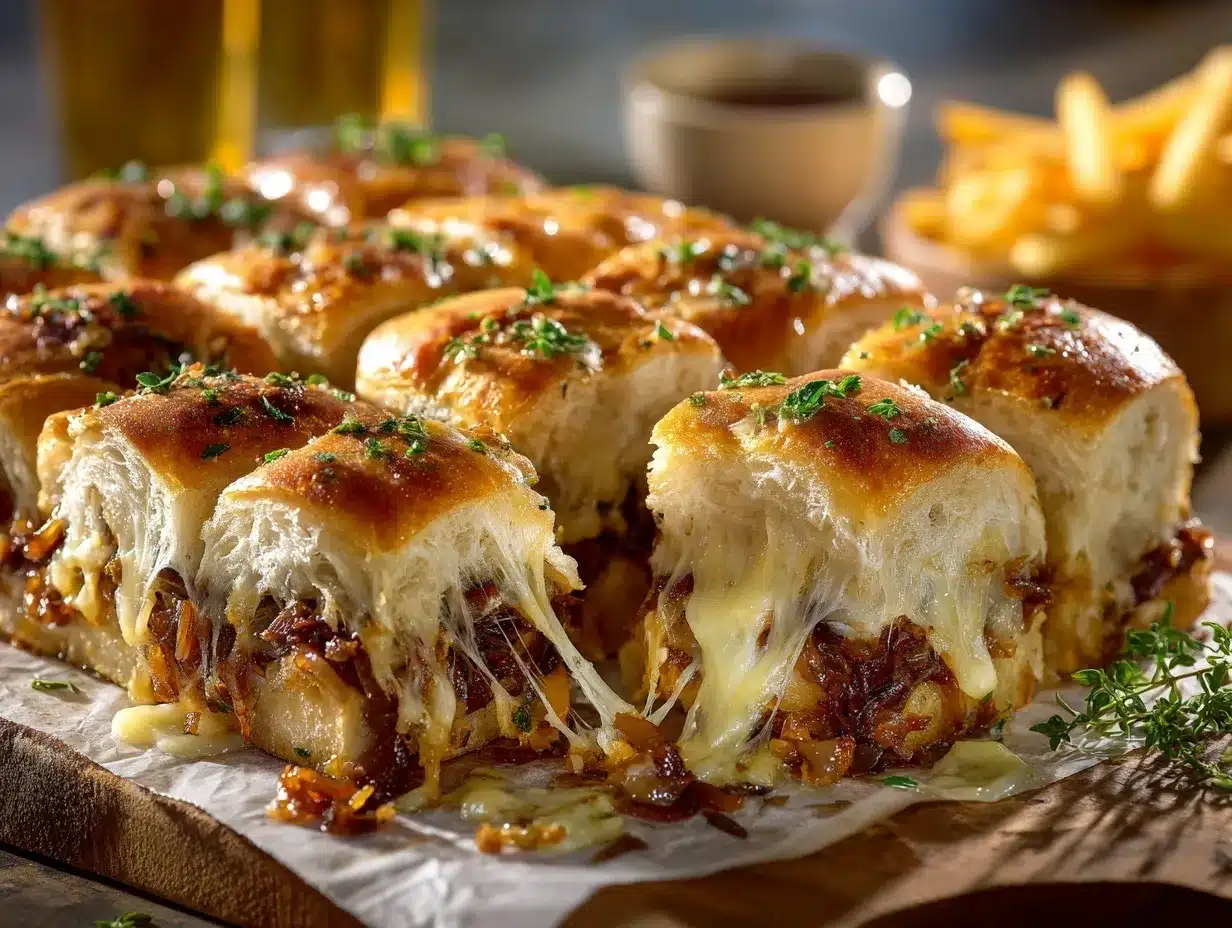
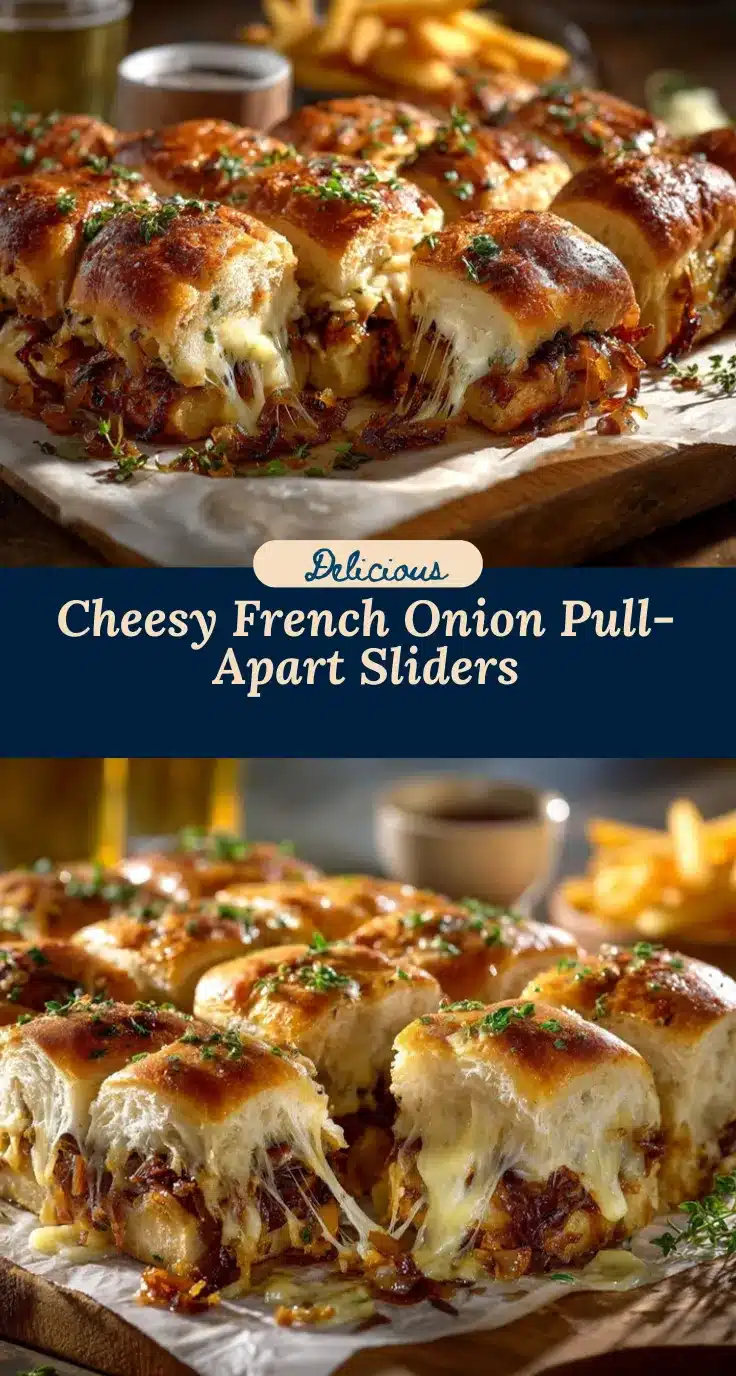
The scent of caramelized onions melting into gooey cheese, all tucked between golden, buttery buns—honestly, is there anything more tempting? French onion grilled cheese pull-apart sliders are my go-to when I want a snack that’s both comforting and crowd-pleasing. I still remember the first time I whipped up a batch for a family movie night. The tray vanished before the opening credits even finished! There’s just something magical about that rich, savory onion flavor combined with melty cheese. It tastes like a cozy bistro, but you can make it right in your own kitchen.
I stumbled upon this idea during a late-night fridge raid. I had leftover caramelized onions from a steak dinner and a pack of slider buns begging to be used. A little cheese, a smidge of butter, and a quick bake later—I’d found my new favorite party recipe. These French onion grilled cheese sliders have since become a staple at every potluck and football game in our house. They’re simple enough for a weeknight treat but feel special enough for holidays or birthdays. If you love the classic comfort of French onion soup and the nostalgic pull of grilled cheese, you’re going to be obsessed. I’ve tested this recipe more times than I can count, tweaking the onions, playing with different cheeses, and even sneaking in a splash of wine now and then. Trust me, they’re foolproof and totally crave-worthy.
Whether you’re feeding a hungry crew, looking for a new way to use up onions, or just in the mood for some honest-to-goodness cheesy goodness, these sliders will hit the spot. They come together with pantry staples, and the flavor payoff is unreal. Let’s jump into why you’ll want to make these French onion grilled cheese pull-apart sliders a regular part of your entertaining rotation.
Why You’ll Love This Recipe
I’ve made a lot of party snacks, but these French onion grilled cheese sliders always steal the show. Here’s why they’re a must-try—and a must-repeat!
- Quick & Easy: You can have these sliders ready in about 40 minutes, including caramelizing the onions. Perfect for those times when you need something impressive but don’t want to fuss in the kitchen all day.
- Simple Ingredients: No fancy shopping trips—everything you need is probably already in your fridge or pantry. Just onions, cheese, slider buns, and a few basics.
- Perfect for Parties: These pull-apart sliders are made for sharing. They look gorgeous on a platter and pull apart easily, making them ideal for game days, family gatherings, or casual get-togethers.
- Crowd-Pleaser: Seriously, I’ve never seen a batch last more than ten minutes. Kids, adults, picky eaters—everyone goes back for seconds (and thirds!).
- Cheesy, Gooey Goodness: The combo of sweet, rich onions and melty cheese is the stuff comfort food dreams are made of.
What sets these sliders apart from every other grilled cheese bite? It’s all about the onions. I slow-cook them until they’re deeply caramelized and almost jammy. That sweetness, layered with just the right amount of gooey cheese, is a total game-changer. Plus, brushing the tops with garlic butter before baking gives you that irresistible, glossy finish and a hint of crispiness.
These aren’t just your average party sliders. They’re the kind of recipe you save for when you need something extra special—but they’re so easy, you’ll find yourself making them on random Tuesday nights too. There’s a reason my friends text me for this recipe before every potluck. It’s comfort food with style, easy enough for beginners, and impressive enough for foodies. You’ll be hooked after the first bite (I always am!).
What Ingredients You Will Need
This recipe uses simple, wholesome ingredients to deliver that classic French onion flavor with a cheesy grilled cheese twist—no fuss, all flavor. Most of what you need is probably already in your kitchen. Here’s your shopping list:
- Slider buns (12-count, soft and pull-apart, like Hawaiian or potato rolls)
- Yellow onions (2 large, thinly sliced—these are the star for sweetness and flavor)
- Unsalted butter (6 tablespoons, divided—some for the onions, some for the tops)
- Olive oil (1 tablespoon, for sautéing the onions and balancing the richness)
- Salt and black pepper (to taste, for seasoning the onions)
- Fresh thyme (1 teaspoon, chopped, or 1/2 teaspoon dried—adds a hint of herbiness)
- Beef broth (1/4 cup, helps deglaze the pan and amps up the French onion soup vibe)
- Gruyère cheese (1 1/2 cups, shredded—classic for French onion flavor; Swiss or Emmental work too)
- Mozzarella cheese (1 cup, shredded—melts beautifully and adds that signature stretch)
- Worcestershire sauce (1 teaspoon, optional but highly recommended for depth)
- Garlic powder (1/2 teaspoon, mixed into the butter for brushing the tops)
- Fresh parsley (for garnish, optional—but looks and tastes great!)
Ingredient Tips:
- Onions: Use yellow or sweet onions for the best caramelization. Red onions work in a pinch but have a sharper taste.
- Cheese: Gruyère is the classic choice, but I’ve swapped in Swiss, provolone, or even sharp cheddar for tasty results. For a bolder taste, add a sprinkle of parmesan.
- Buns: Any soft, pull-apart roll works, but I love King’s Hawaiian for a slight sweetness.
- Broth: Beef broth gives that French onion soup flavor, but vegetable broth is fine for a vegetarian twist.
- Butter: Salted or unsalted both work—just taste and adjust your seasoning.
Substitutions:
- Gluten-free: Use gluten-free slider buns.
- Vegetarian: Use vegetable broth and skip the Worcestershire (or use a vegetarian version).
- Dairy-free: Swap in your favorite vegan butter and cheese (I’ve tried it with Violife and it melts nicely!).
Honestly, this is one of those recipes that’s forgiving and flexible. Don’t have thyme? Rosemary or a pinch of Italian seasoning will do the trick. Feel free to experiment with what’s in your fridge!
Equipment Needed
Good news: you don’t need any fancy gadgets for these French onion grilled cheese pull-apart sliders. Here’s what I use every time:
- Large skillet or sauté pan (for caramelizing onions—nonstick or stainless both work; cast iron is my personal favorite for even browning)
- Baking dish or sheet pan (9×13-inch works great for a dozen sliders; glass, ceramic, or metal all do the job)
- Sharp knife and cutting board (for slicing onions and prepping garnishes)
- Small mixing bowl (for mixing the garlic butter topping)
- Pasty brush (to brush the tops with butter—if you don’t have one, use the back of a spoon or even your fingers!)
- Cheese grater (for shredding Gruyère and mozzarella; pre-shredded works in a pinch, but freshly grated always melts better)
- Aluminum foil (to cover the sliders while baking—they stay soft and melty inside)
Budget-Friendly Tips:
- If you don’t have a pastry brush, I’ve used a folded paper towel dipped in butter. Messy but effective!
- Cast iron pans are a great investment for caramelizing onions—they last forever with a little TLC. Just make sure to dry and oil it after washing.
Honestly, as long as you’ve got a skillet and a baking dish, you’re golden. I’ve even made these in a toaster oven during a kitchen remodel—worked like a charm!
Preparation Method
- Caramelize the onions: Heat 2 tablespoons (28 grams) butter and 1 tablespoon (15 mL) olive oil in a large skillet over medium heat. Add 2 large sliced onions (about 600 grams). Sprinkle with a big pinch of salt and a few cracks of black pepper. Cook, stirring every 2-3 minutes, until onions are golden and soft—about 20-25 minutes. Don’t rush; deep caramelization makes all the difference. If they start to stick, add a splash of water or reduce the heat.
- Add flavor: Stir in 1 teaspoon chopped fresh thyme (or ½ teaspoon dried), ¼ cup (60 mL) beef broth, and 1 teaspoon Worcestershire sauce (if using). Simmer until most of the liquid evaporates—2-3 minutes. The onions should be jammy and fragrant. Remove from heat and let cool slightly.
- Prep the buns: While the onions cook, preheat your oven to 350°F (175°C). Grease a 9×13-inch (23×33 cm) baking dish. Slice the slider buns in half horizontally, keeping the tops and bottoms connected. Place the bottom halves in the baking dish.
- Layer the cheese: Sprinkle half of the shredded Gruyère (¾ cup/75 grams) and half of the mozzarella (½ cup/50 grams) evenly over the bun bottoms.
- Top with onions: Spoon the caramelized onions evenly over the cheese. Spread them out with the back of a spoon—it helps to get even flavor in every bite.
- Add more cheese: Sprinkle the remaining Gruyère and mozzarella over the onions. This double layer ensures maximum meltiness—trust me!
- Finish assembly: Place the top halves of the buns over the cheese and onions, gently pressing down so everything sticks together.
- Mix and brush the butter: Melt the remaining 4 tablespoons (56 grams) butter in a small bowl. Stir in ½ teaspoon garlic powder and a pinch of salt. Brush the tops of the buns generously with the garlic butter mixture. (If you love a crispier crust, sprinkle a little extra cheese or fresh thyme on top!)
- Bake covered: Cover the dish with aluminum foil and bake for 15 minutes. This helps the cheese get extra gooey and the buns stay soft.
- Bake uncovered: Remove foil and bake another 7-10 minutes, until the tops are golden and slightly crisp. Watch closely so the cheese doesn’t burn—the smell will let you know when it’s ready!
- Cool and serve: Let the sliders cool for 5 minutes before pulling apart. Garnish with chopped parsley if you like. Serve warm and watch them disappear!
Troubleshooting tips:
- If your onions are browning too fast, lower the heat and add a splash of broth or water.
- If the tops brown before the cheese melts, loosely tent with foil for the last few minutes.
- Sliders sticking to the pan? Use parchment paper or extra butter to grease.
These sliders come together quickly once the onions are done. I like to prep the onions in advance—they last in the fridge for several days. That way, you can assemble and bake in minutes!
Cooking Tips & Techniques
I’ve made these French onion grilled cheese sliders more times than I can count, and every batch has taught me a little something. Here’s how to get them just right:
- Low and slow for onions: Don’t rush caramelizing. If you turn up the heat, you’ll get burnt onions instead of sweet, jammy goodness. Stir every few minutes and keep it medium-low. Yes, it’s a bit of a waiting game, but it’s worth it.
- Cheese matters: Shred your own cheese if you can. Pre-shredded cheese has anti-caking agents that keep it from melting smoothly. I learned this the hard way—clumpy cheese is not what you want here!
- Keep the buns together: Don’t fully separate the slider buns when slicing. Keeping the bottoms and tops intact makes assembly (and serving) so much easier.
- Even layering: Spread the onions in a thin, even layer. If you pile them too thick, the sliders get messy and hard to pull apart. (I’ve definitely made that mistake on a rushed day.)
- Don’t skimp on butter: That garlic butter on top is key for flavor and texture. Make sure every bun gets a good brush so you get those golden edges.
- Let them rest: Waiting 5 minutes after baking makes pulling them apart a breeze. They’ll stay together better, and you won’t burn your fingers—ask me how I know!
Timing and multitasking: While the onions caramelize, shred your cheese and prep the buns. That way, the rest comes together super fast.
If you’re making a big batch for a party, assemble the sliders up to a day ahead, refrigerate, and bake just before serving. They’re even good at room temp, but nothing beats them hot and melty!
Variations & Adaptations
One of the best things about these French onion grilled cheese sliders? You can make them your own with just a few tweaks. Here are my favorite ways to switch it up:
- Vegetarian sliders: Swap beef broth for vegetable broth and use a vegetarian Worcestershire sauce. You can even toss in a handful of sautéed mushrooms for extra “umami” flavor—my sister loves this version!
- Low-carb or gluten-free: Use gluten-free slider buns or, for a fun twist, hollow out portobello mushroom caps and use them as the base. It’s not the same as bread, but it’s surprisingly tasty (and great for folks watching their carbs).
- Flavor boosters: Add a layer of thinly sliced roast beef or ham for a heartier slider—makes it almost like a French dip. Or, swap the thyme for rosemary or Italian herbs for a new flavor profile.
- Dairy-free/vegan: Use plant-based butter and vegan cheeses. The onions bring so much flavor that even non-dairy cheese tastes awesome here. (I’ve tested this with Daiya and it worked well.)
- Change up the cheese: Sharp white cheddar, fontina, or smoked gouda are all delicious swaps. My favorite “fancy” version uses a blend of Gruyère and smoked provolone—so good!
I’ve even tried adding a thin layer of Dijon mustard to the buns for a little tang. It’s subtle but adds a hint of brightness that balances the rich onions and cheese. Don’t be afraid to experiment—these sliders love a personal touch!
Serving & Storage Suggestions
These French onion grilled cheese sliders are best enjoyed hot and fresh, straight from the oven. I usually serve them right in the baking dish—makes for easy pull-apart action and fewer dishes! If you want to get a little fancy, sprinkle some fresh parsley or chives on top for color.
Serving ideas:
- Serve alongside a crisp green salad or a simple tomato soup for a cozy lunch or dinner.
- Pair with sparkling lemonade, iced tea, or even a French 75 cocktail for parties.
- Set out with other finger foods (think mini quiches or meatballs) for an irresistible snack spread.
Storage: If you somehow have leftovers (not likely!), let them cool, then refrigerate in an airtight container for up to 3 days.
Reheating: For best results, reheat in a 300°F (150°C) oven for about 10 minutes, covered with foil to keep them moist. Microwave works in a pinch, but the buns can get a little chewy. The flavor actually deepens as the onions and cheese meld—so don’t be afraid to make extras!
Nutritional Information & Benefits
Here’s an estimate for each French onion grilled cheese slider (assuming 12 per batch):
- Calories: ~230
- Protein: 8g
- Fat: 11g
- Carbs: 22g
- Fiber: 1g
- Sugar: 3g
These sliders pack a good amount of protein and calcium, thanks to the cheese. Onions bring antioxidants and vitamins, plus they’re great for your gut. If you use whole-grain buns, you’ll get even more fiber.
For anyone with allergies, note that these contain dairy and gluten (unless adapted). As always, check ingredient labels for hidden allergens.
I love that you get the cozy, nostalgic comfort of grilled cheese but with a little more nutrition and big flavor. If you’re looking for hearty, satisfying party food that won’t weigh you down, these sliders are a solid choice.
Conclusion
If you’re craving a recipe that’ll wow a crowd and bring all the comfort of French onion soup and grilled cheese in one cheesy, golden bite, these French onion grilled cheese pull-apart sliders are it. I’ve made them for birthdays, lazy Sundays, and busy weeknights—each time, they disappear in record time. The secret’s in those caramelized onions and the double layer of melty cheese, all wrapped up in soft, buttery buns.
Don’t be afraid to riff on this recipe—switch up the cheese, add herbs, or try a vegetarian spin. Trust your taste buds! I love how forgiving (and fun) these sliders are to make.
So, what are you waiting for? Bake up a batch, share them with friends, and let me know how they turned out in the comments! If you try a new twist, I’d love to hear about it. Here’s to warm kitchens, full bellies, and recipes that bring everyone to the table. Happy snacking!
Frequently Asked Questions
How do you keep the French onion grilled cheese sliders from getting soggy?
Don’t overfill with onions, and make sure to bake them uncovered for the last 10 minutes. This helps the tops get crispy and the bottoms stay soft—not soggy.
Can I make these sliders ahead of time?
Yes! Assemble up to a day in advance, cover, and refrigerate. Bake just before serving for best results. You can also caramelize the onions ahead of time—they keep well for several days.
What’s the best cheese for French onion grilled cheese sliders?
Gruyère is classic for flavor, but Swiss, mozzarella, or even sharp cheddar work great. Freshly shredded cheese melts best.
How do I make these gluten-free?
Just swap in your favorite gluten-free slider buns. Everything else in the recipe is naturally gluten-free, but always double-check your broth and Worcestershire sauce labels.
Can I freeze leftover sliders?
Yes, cool them completely, wrap tightly, and freeze for up to a month. Reheat from frozen in a 325°F (160°C) oven until hot and melty (about 20 minutes).
Pin This Recipe!
French Onion Grilled Cheese Sliders

These French onion grilled cheese pull-apart sliders combine deeply caramelized onions and gooey cheese between buttery slider buns for the ultimate party snack. Easy to make and always a crowd-pleaser, they’re perfect for gatherings, game days, or cozy nights in.
- Prep Time: 15 minutes
- Cook Time: 32 minutes
- Total Time: 47 minutes
- Yield: 12 sliders 1x
- Category: Appetizer
- Cuisine: American, French-inspired
Ingredients
- 12 slider buns (soft and pull-apart, like Hawaiian or potato rolls)
- 2 large yellow onions, thinly sliced
- 6 tablespoons unsalted butter, divided
- 1 tablespoon olive oil
- Salt and black pepper, to taste
- 1 teaspoon fresh thyme, chopped (or 1/2 teaspoon dried thyme)
- 1/4 cup beef broth
- 1 1/2 cups Gruyère cheese, shredded (Swiss or Emmental can substitute)
- 1 cup mozzarella cheese, shredded
- 1 teaspoon Worcestershire sauce (optional)
- 1/2 teaspoon garlic powder
- Fresh parsley, for garnish (optional)
Instructions
- Heat 2 tablespoons butter and 1 tablespoon olive oil in a large skillet over medium heat. Add sliced onions, season with salt and pepper, and cook, stirring every 2-3 minutes, until golden and soft (about 20-25 minutes).
- Stir in thyme, beef broth, and Worcestershire sauce (if using). Simmer until most liquid evaporates (2-3 minutes). Remove from heat and let cool slightly.
- Preheat oven to 350°F (175°C). Grease a 9×13-inch baking dish. Slice slider buns in half horizontally, keeping tops and bottoms connected. Place bottom halves in the baking dish.
- Sprinkle half of the Gruyère and half of the mozzarella evenly over the bun bottoms.
- Spoon caramelized onions evenly over the cheese layer.
- Sprinkle remaining Gruyère and mozzarella over the onions.
- Place top halves of buns over the cheese and onions, gently pressing down.
- Melt remaining 4 tablespoons butter. Stir in garlic powder and a pinch of salt. Brush tops of buns generously with garlic butter.
- Cover dish with aluminum foil and bake for 15 minutes.
- Remove foil and bake another 7-10 minutes, until tops are golden and slightly crisp.
- Let sliders cool for 5 minutes before pulling apart. Garnish with chopped parsley if desired. Serve warm.
Notes
For best results, caramelize onions slowly over medium-low heat. Shred your own cheese for optimal melt. Keep slider buns connected for easy assembly. Prep onions ahead to save time. For gluten-free, use GF buns; for vegetarian, use vegetable broth and vegetarian Worcestershire. Let sliders rest 5 minutes before serving for best texture.
Nutrition
- Serving Size: 1 slider
- Calories: 230
- Sugar: 3
- Sodium: 350
- Fat: 11
- Saturated Fat: 6
- Carbohydrates: 22
- Fiber: 1
- Protein: 8
Keywords: French onion, grilled cheese, sliders, party food, pull-apart, appetizer, caramelized onions, cheese, easy recipe, crowd-pleaser