
“Wait, you made this yourself?” That’s a question I’ve gotten more times than I can count since discovering how to whip up fresh homemade ricotta cheese in just 15 minutes. Honestly, I used to think making ricotta was some sort of magical, all-day kitchen marathon. But one lazy Sunday afternoon, with only a few basic ingredients in sight and zero fancy equipment, I decided to just try it out—mostly because I was craving that creamy, fresh cheese to top my pasta and sandwiches. The result? A quick, surprisingly simple method that became my go-to whenever I needed fresh ricotta without the store-bought preservatives or weird additives.
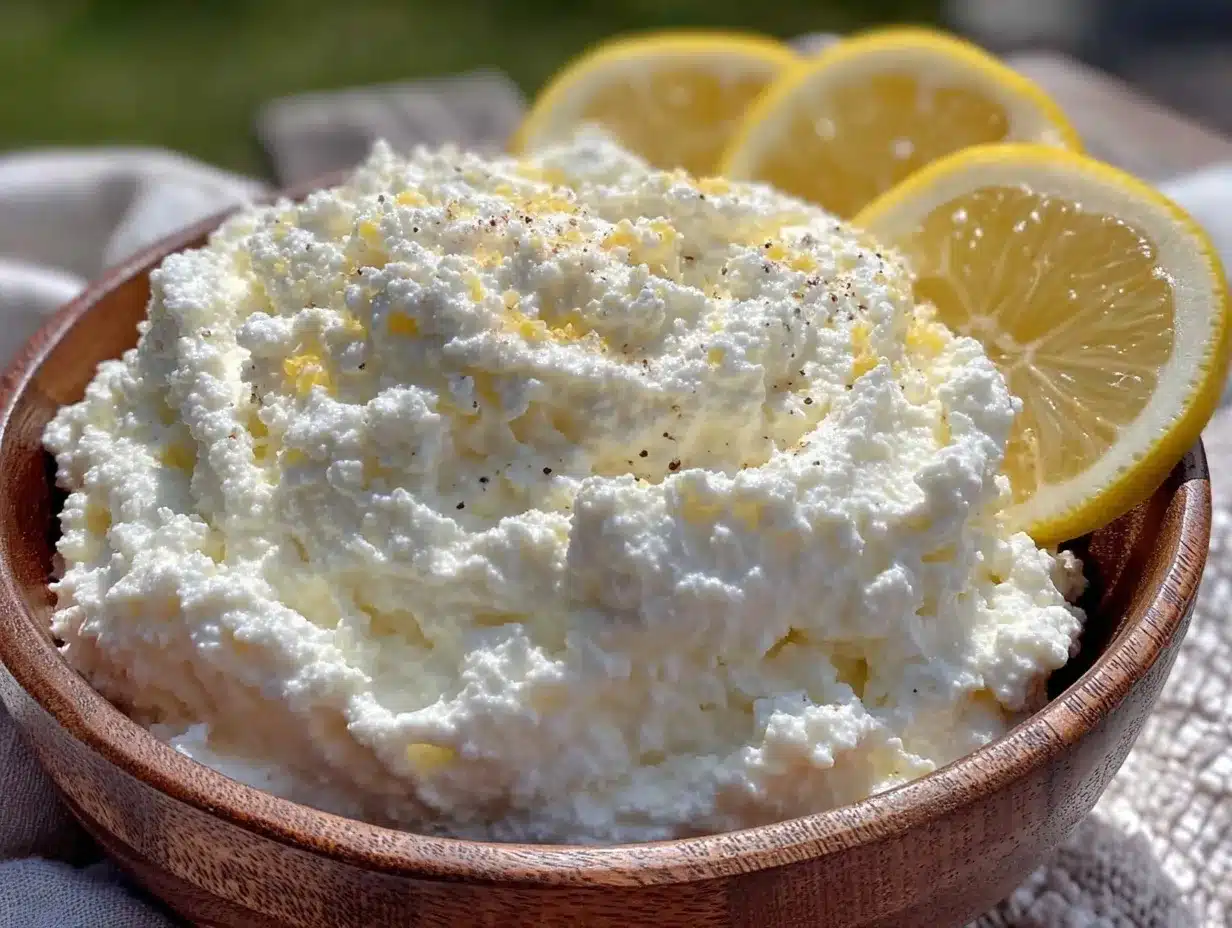
What really struck me about this recipe was the texture—light, fluffy, and just creamy enough to spread or crumble. It’s not like the dense ricotta you find in cartons. I remember that first bite, sitting quietly in my kitchen with some crusty bread, realizing that this homemade ricotta was way better than I expected. It stuck with me because it’s perfect for those moments when you want fresh, wholesome food without spending hours in the kitchen.
Since then, this easy ricotta recipe has popped up in my weekly cooking routine, whether I’m making a quick snack or layering it in dishes like Italian sub sandwich skewers for impromptu get-togethers. The best part? You don’t need fancy skills or tons of time. Just a couple of simple ingredients, a little patience, and you’re there. It’s become my little secret for homemade freshness that almost feels indulgent but is incredibly straightforward.
So, if you’ve been hesitant about making ricotta at home, this recipe is a gentle nudge. It’s creamy, fresh, and ready faster than you’d expect. And honestly, sometimes the simplest things, like fresh homemade ricotta, bring the most kitchen joy.
Why You’ll Love This Recipe
After testing this fresh homemade ricotta cheese recipe multiple times (sometimes more than once a week!), I can say with confidence it’s a keeper for any home cook. Here’s why it stands out:
- Quick & Easy: Ready in under 15 minutes, making it ideal for busy weeknights or spontaneous cooking sessions.
- Simple Ingredients: You probably already have everything in your pantry—just milk, lemon juice, and a pinch of salt.
- Perfect for Many Occasions: Whether it’s a cozy dinner, a last-minute appetizer, or a fresh addition to your brunch spread.
- Crowd-Pleaser: Kids and adults alike love the mild, creamy flavor that feels luxurious but approachable.
- Unbelievably Delicious: The texture is just right—light, fluffy, and smooth without any graininess.
- Distinctive Technique: This method uses gentle heat and a slow curdling process to create a soft, fresh cheese without complicated steps or equipment.
This isn’t just another ricotta recipe—you’re getting a version that tastes homemade because it literally is. Plus, it’s a brilliant way to impress friends without stress. I’ve found it’s a great companion to dishes like the fresh creamy cucumber dill salad, making a meal feel thoughtfully pulled together, even on a busy day.
What Ingredients You Will Need
This fresh homemade ricotta recipe relies on a handful of simple, accessible ingredients that work together to create that delicate balance of creaminess and lightness. These are kitchen staples, so no fancy shopping trip required!
- Whole Milk (4 cups / 1 liter): The base of your ricotta. Use fresh, high-quality milk for the best flavor. I prefer organic whole milk from trusted brands for its richness.
- Heavy Cream (1 cup / 240 ml): Adds extra creaminess and smooth texture. You can swap with whole milk if you want a lighter version, but cream makes it luxurious.
- Fresh Lemon Juice (3 tablespoons): The acid that gently curdles the milk. Freshly squeezed is best—bottled juice won’t give the same bright freshness.
- Sea Salt (1/2 teaspoon): Just enough to enhance flavor without overpowering the delicate cheese.
Optional:
- White Vinegar (as a lemon juice substitute): If you’re out of lemons, white vinegar works, but it changes the flavor slightly.
- Herbs or Garlic: For flavoring after the ricotta is made, like fresh basil or minced garlic.
These ingredients are straightforward, but each plays a crucial role. The acid causes the milk proteins to separate, forming curds that become your ricotta. I always recommend using full-fat dairy for that rich texture, but you can experiment with different milks if needed. Also, keep an eye out for local dairies that offer fresh milk—there’s nothing quite like that fresh taste!
Equipment Needed
One of the best things about this ricotta recipe is how little special equipment you need. Here’s what you’ll want on hand:
- Large Pot: A heavy-bottomed pot helps distribute heat evenly and prevents scorching. I like using my stainless steel pot for this.
- Thermometer: A kitchen thermometer is super helpful to monitor the milk temperature accurately. You want to hit about 190°F (88°C), so this tool saves guesswork.
- Slotted Spoon or Ladle: For gently scooping the delicate curds without breaking them.
- Fine Mesh Strainer or Cheesecloth: To drain the curds. A fine mesh strainer works great for most home kitchens—no need to buy cheesecloth if you don’t have it.
- Large Bowl: To catch the whey as it drains from the curds.
While cheesecloth is traditional, I’ve often just used a clean kitchen towel or a thin cotton cloth when I’m in a pinch. It’s all about gentle handling—the curds are fragile at this stage. If you don’t have a thermometer, just keep the heat low and watch for the milk to steam and almost simmer, not boil. That said, having a thermometer makes a big difference, especially when you’re aiming for consistent results.
Preparation Method
- Heat the Milk and Cream: Pour 4 cups (1 liter) of whole milk and 1 cup (240 ml) of heavy cream into your pot. Slowly heat over medium heat, stirring occasionally to prevent scorching. Use your thermometer to watch the temperature until it reaches 190°F (88°C). This should take about 8-10 minutes. You’ll notice the milk starting to steam and small bubbles forming around the edges—but don’t let it boil.
- Add Lemon Juice: Remove the pot from heat and immediately stir in 3 tablespoons of fresh lemon juice. Gently stir once or twice, then let the mixture sit undisturbed for 5-10 minutes. During this time, the milk will curdle, and you’ll see thick white curds forming with clear, yellowish whey separating. This is the magic moment—don’t stir too much or you’ll break the curds.
- Drain the Curds: Line a fine mesh strainer with cheesecloth or a clean kitchen towel and place it over a large bowl. Carefully ladle the curds into the strainer, allowing the whey to drain into the bowl below. Let it drain for 10-15 minutes, depending on how wet or dry you want your ricotta. For creamier ricotta, drain less; for firmer curds, let it drain longer.
- Season the Ricotta: Transfer the drained ricotta to a bowl and gently stir in 1/2 teaspoon of sea salt. Taste and adjust as needed. This is also the time to add any fresh herbs or flavorings if desired.
- Store or Serve: Use your fresh ricotta immediately or refrigerate in an airtight container for up to 3 days. It keeps well and tastes great spread on bread, dolloped on pasta, or layered in dishes.
Pro tip: If you want your ricotta even creamier, you can whisk it gently before serving. And if the whey isn’t too cloudy, save it for soups or smoothies—it’s packed with nutrients!
Cooking Tips & Techniques
Making ricotta cheese at home for the first time can feel a bit daunting, but a few tips can make the process foolproof:
- Don’t rush the curdling: Once you add the lemon juice, give the milk time to separate naturally. Stirring too much can break curds and affect texture.
- Use fresh ingredients: Fresh lemon juice and high-quality milk make a noticeable difference in flavor and creaminess.
- Temperature control is key: Keep your milk just below boiling (190°F/88°C). Too hot and you risk a grainy texture; too cool and curdling won’t happen properly.
- Drain to your liking: For softer ricotta, drain less; for spoonable, firmer cheese, drain longer. Experiment to find what you prefer.
- Straining alternatives: If you don’t have cheesecloth, a clean cotton dish towel works just fine—just be gentle while pouring the curds.
- Don’t toss the whey: It’s great for baking breads, adding to smoothies, or cooking grains. I often use it when making loaded baked potato salad for an extra nutrient boost.
I once hurried the process and stirred the milk-curd mixture too vigorously, ending up with ricotta that was too crumbly rather than fluffy. Lesson learned: patience is your friend here. Also, multitasking works well—while the ricotta is draining, you can prep a quick salad or set the table, making efficient use of your time.
Variations & Adaptations
This basic ricotta recipe is a fantastic canvas for all sorts of adaptations. Here are a few I’ve tried and loved:
- Herbed Ricotta: Stir in finely chopped fresh herbs like basil, thyme, or chives after draining. It’s perfect for spreading on crusty bread or mixing into pasta dishes.
- Vegan Version: Try replacing dairy milk with a plant-based milk like cashew or almond milk combined with a thickener like agar or tapioca starch, though it’s a different texture and requires more experimentation.
- Low-Fat Option: Use skim or 1% milk, but note the ricotta won’t be as rich or creamy.
- Flavored Sweet Ricotta: Add a touch of honey and vanilla extract after draining for a sweet spread that pairs beautifully with fresh fruit or no-bake strawberry cheesecake cups.
- Different Acids: Swap lemon juice for white vinegar or apple cider vinegar if needed, though fresh lemon adds the brightest flavor.
One personal favorite is adding a pinch of smoked paprika and garlic powder for a smoky twist that complements grilled dishes like savory beer can chicken. It’s a simple way to customize the ricotta and impress guests.
Serving & Storage Suggestions
Fresh homemade ricotta is versatile—here’s how I like to enjoy and store it:
- Serving Temperature: Serve chilled or at room temperature for the best flavor and creaminess. Cold ricotta can feel a bit firmer, so let it sit out for 10 minutes before using.
- Presentation: Spoon it onto toasted bread with a drizzle of olive oil and cracked pepper, or dollop it on warm pasta just before serving.
- Pairing Ideas: It’s fantastic alongside fresh tomatoes, basil, and a balsamic drizzle or as a creamy layer in layered dishes. It also complements fresh salads like my favorite watermelon feta mint salad.
- Storage: Store ricotta in an airtight container in the refrigerator for up to 3 days. Avoid freezing, as it changes texture and becomes grainy.
- Reheating: Ricotta is best served fresh or cold. If you want it warm, gently fold it into hot dishes at the end of cooking rather than reheating on its own.
Flavors actually mellow and deepen after a day or so, so sometimes I make ricotta a day ahead and find it tastes even better on the second day. Just give it a quick stir before serving to refresh the texture.
Nutritional Information & Benefits
This fresh homemade ricotta is not only tasty but also offers some neat nutritional perks. Here’s a rough estimate per 1/4 cup (60g) serving:
| Nutrient | Amount |
|---|---|
| Calories | 90 |
| Protein | 7g |
| Fat | 6g |
| Calcium | 150mg (about 15% DV) |
| Carbohydrates | 1g |
Ricotta is a good source of protein and calcium, important for bone health. Using whole milk and cream means it’s richer in fat, so it’s a satisfying addition to meals that keeps you full longer. If you need to watch fat intake, consider using lower-fat milk, but it won’t be quite as creamy.
Be aware this recipe contains dairy and is not suitable for those with lactose intolerance or dairy allergies. However, the simplicity and freshness make it a wholesome choice for anyone looking to avoid processed cheese products.
Conclusion
Making fresh homemade ricotta cheese in 15 minutes might sound ambitious, but it’s genuinely doable and deeply rewarding. This recipe has become a staple in my kitchen because it’s straightforward, uses ingredients I trust, and delivers that creamy texture that feels so much better than store-bought. Whether you’re spreading it over bread, folding it into pasta, or experimenting with flavor variations, homemade ricotta adds a fresh touch that makes meals feel special.
Feel free to tweak the acidity, drain time, or add herbs to make it your own. I love how this cheese fits into so many dishes—from quick snacks to elegant meals—and it’s a reminder that sometimes the best things come from the simplest processes. If you give this recipe a try, I’d love to hear how you use your ricotta—drop a comment below or share your favorite pairings!
FAQs About Fresh Homemade Ricotta Cheese
How long does homemade ricotta last in the fridge?
Store it in an airtight container for up to 3 days. Beyond that, it may start to lose freshness and develop off-flavors.
Can I use low-fat or skim milk instead of whole milk?
Yes, but the ricotta will be less creamy and rich. Whole milk and cream give the best texture and flavor.
What if I don’t have lemon juice—can I use vinegar?
White vinegar works as a substitute, though lemon juice provides a fresher flavor. Avoid flavored or malt vinegar.
Can I freeze fresh ricotta cheese?
It’s not recommended because freezing changes the texture, making it grainy and watery after thawing.
What can I do with leftover whey?
Don’t toss it! Use whey in smoothies, soups, or baking bread for added nutrition and moisture.
Pin This Recipe!

Fresh Homemade Ricotta Cheese Recipe Easy 15 Minute Method for Beginners

A quick and easy homemade ricotta cheese recipe that yields light, fluffy, and creamy cheese in just 15 minutes using simple ingredients and minimal equipment.
- Prep Time: 5 minutes
- Cook Time: 10 minutes
- Total Time: 15 minutes
- Yield: About 1 1/2 cups ricotta (approximately 6 servings) 1x
- Category: Dairy, Cheese
- Cuisine: Italian
Ingredients
- 4 cups (1 liter) whole milk
- 1 cup (240 ml) heavy cream
- 3 tablespoons fresh lemon juice
- 1/2 teaspoon sea salt
- Optional: white vinegar (as lemon juice substitute)
- Optional: fresh herbs or garlic for flavoring
Instructions
- Pour 4 cups whole milk and 1 cup heavy cream into a large pot. Slowly heat over medium heat, stirring occasionally to prevent scorching, until the temperature reaches 190°F (88°C), about 8-10 minutes. Do not let it boil.
- Remove the pot from heat and immediately stir in 3 tablespoons fresh lemon juice. Stir gently once or twice, then let the mixture sit undisturbed for 5-10 minutes until curds form and whey separates.
- Line a fine mesh strainer with cheesecloth or a clean kitchen towel and place it over a large bowl. Carefully ladle the curds into the strainer and let drain for 10-15 minutes depending on desired consistency.
- Transfer the drained ricotta to a bowl and gently stir in 1/2 teaspoon sea salt. Add any optional herbs or flavorings if desired.
- Use immediately or store in an airtight container in the refrigerator for up to 3 days.
Notes
Use fresh lemon juice for best flavor; white vinegar can be used as a substitute but changes flavor slightly. Do not stir curds too much to avoid breaking them. Drain longer for firmer ricotta or less for creamier texture. Save whey for smoothies or baking. Ricotta keeps up to 3 days refrigerated; avoid freezing.
Nutrition
- Serving Size: 1/4 cup (60g)
- Calories: 90
- Fat: 6
- Carbohydrates: 1
- Protein: 7
Keywords: homemade ricotta, fresh ricotta cheese, easy ricotta recipe, quick cheese recipe, beginner cheese making, creamy ricotta, ricotta cheese from scratch