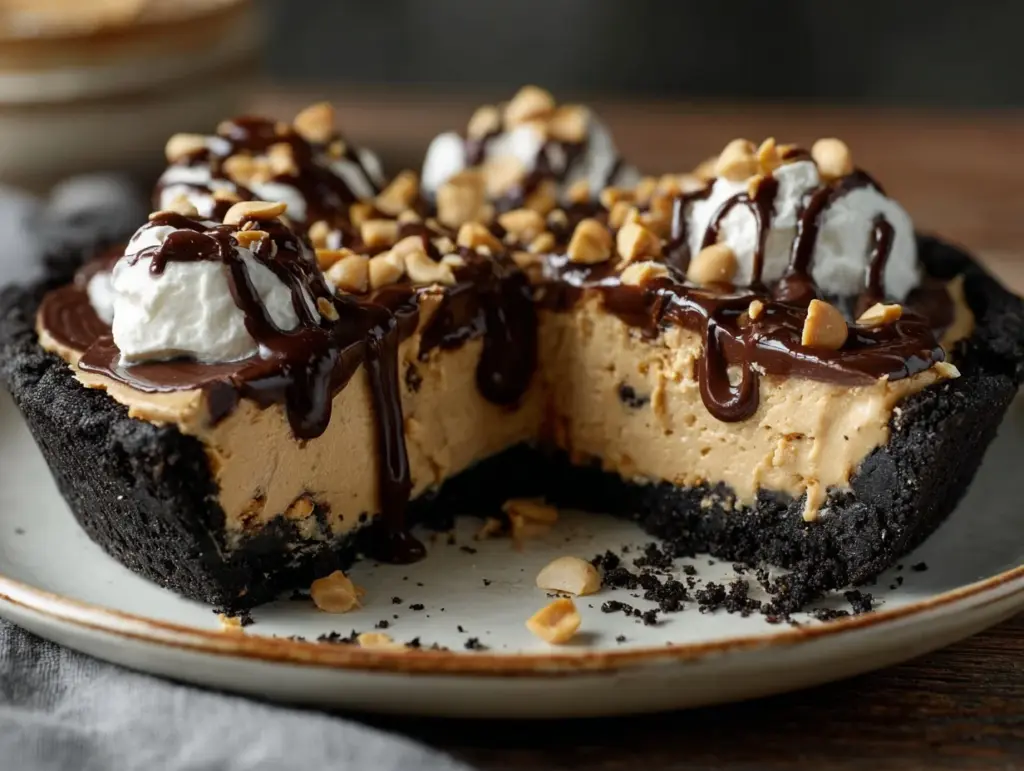
The first time I ever tasted a slice of Reese’s Peanut Butter Cup Pie, it actually stopped me mid-bite. Imagine the silky, nutty filling, decadent chocolate, and that unmistakable Oreo cookie crunch all wrapped up in a dessert that takes zero oven time. Honestly, I thought I’d discovered a magic trick the first time I made this—especially because it’s so easy, yet feels like you went all out. If you’re the type of person who always sneaks a peanut butter cup from the candy jar, or you can’t resist licking the spoon after making a chocolate-peanut butter treat, this Reese’s Peanut Butter Cup Pie with Oreo crust is about to become your new favorite dessert.
What I love most is how this recipe brings together the best of both worlds: the rich, creamy goodness of peanut butter and the bittersweet crunch of Oreos. It’s a no-bake wonder, which means you don’t have to worry about turning on the oven—perfect for those hot summer days or when you need a last-minute dessert for a party. I started making this pie during a particularly busy holiday season when oven space was at a premium (you know how it goes, pies and roasts fighting for time!). Over the years, I’ve tweaked and tested, making sure every slice is as dreamy as the last.
This Reese’s Peanut Butter Cup Pie recipe isn’t just a treat for the taste buds—it’s a lifesaver for busy families, college students, or anyone who wants to whip up something impressive without breaking a sweat. If you’re after a showstopping dessert that tastes like a candy aisle dream come true (with bonus points for minimal cleanup), you’ve landed in the right spot. Trust me, I’ve made this pie for birthdays, potlucks, and even those “just because” nights—and it’s always a hit. Let’s dive in and make some no-bake magic together with this irresistible pie!
Why You’ll Love This Reese’s Peanut Butter Cup Pie Recipe
- Quick & Easy: No oven needed—just a few simple steps, and you’ve got a decadent pie. Perfect for when you’re short on time or energy.
- Simple Ingredients: Everything in this recipe is easy to find at your local grocery store, and you probably already have most of it on hand (hello, peanut butter and Oreos!).
- Perfect for All Occasions: Whether it’s a birthday bash, holiday feast, or just an average Tuesday night, this pie fits right in. I’ve brought it to potlucks and watched it disappear in minutes.
- Crowd-Pleaser: Kids, teens, and adults all love it. There’s something about the creamy peanut butter and crunchy Oreo combo that gets rave reviews every time.
- Unbelievably Delicious: Smooth, fluffy peanut butter filling, rich Oreo crust, and chunks of Reese’s Peanut Butter Cups—it’s an explosion of flavor and texture in every bite.
I’ve made a lot of no-bake pies, but this Reese’s Peanut Butter Cup Pie recipe stands out for a few reasons. First, blending the peanut butter with cream cheese and whipped topping creates a luscious, mousse-like texture that’s light but still indulgent. The Oreo crust isn’t just a base—it’s a major flavor player, adding that bittersweet note that balances the sweetness of the filling. And let’s not forget the chopped Reese’s cups on top. They aren’t just for looks—they pack a punch of chocolate-peanut butter goodness with every forkful.
What really sets this pie apart is how customizable it is. I’ve swapped in crunchy peanut butter for extra texture, or added a drizzle of chocolate ganache when I was feeling fancy. It’s the kind of recipe that’s forgiving and flexible, which means you can make it your own. But above all, it’s pure comfort food—the kind that makes people close their eyes and sigh after the first bite. If you’re looking for a dessert that’s as easy as it is impressive, you’re going to fall in love with this Reese’s Peanut Butter Cup Pie.
What Ingredients You Will Need
This Reese’s Peanut Butter Cup Pie recipe uses a handful of familiar ingredients that come together for a showstopper dessert. Most of these are pantry staples—and if you’re a peanut butter lover, you probably have everything you need already. Here’s what you’ll need:
- For the Oreo Crust:
- Oreo cookies (about 24 whole cookies, regular or double-stuff work fine)
- Unsalted butter, melted (1/2 cup / 113g; helps the crust hold together and adds richness)
- For the Peanut Butter Filling:
- Cream cheese, softened (8 oz / 226g; full-fat works best for creaminess)
- Creamy peanut butter (3/4 cup / 180g; I use Skippy or Jif for the classic flavor, but natural peanut butter works in a pinch—just stir it well!)
- Powdered sugar (1 cup / 120g; for sweetness and a smooth texture)
- Vanilla extract (1 teaspoon; adds warmth and rounds out the flavors)
- Whipped topping (like Cool Whip, 8 oz / 226g, thawed; gives the filling its fluffy, light texture)
- For the Topping:
- Reese’s Peanut Butter Cups (about 8 mini cups, chopped; you can use regular-size cups too, just chop them into bite-sized pieces)
- Extra whipped topping (optional, for piping or dolloping on top)
- Chocolate syrup or ganache (optional, for drizzling if you want to go all-out)
Ingredient Tips: For the best Oreo crust, I recommend using a food processor to get fine crumbs (or smash them in a zip-top bag with a rolling pin—no shame, I’ve done both). If you’re making this for a gluten-free friend, swap in gluten-free sandwich cookies for the crust. For a dairy-free version, use dairy-free cream cheese and whipped topping; they work surprisingly well here.
Feel free to get creative with the toppings—sometimes I throw on a handful of mini chocolate chips or drizzle with warm peanut butter. In the summer, I’ve even added sliced bananas under the filling for a fun twist. The base recipe is a blank canvas, so don’t hesitate to make it your own!
Equipment Needed
- 9-inch pie dish (metal, glass, or ceramic all work—I’ve even used a tart pan in a pinch)
- Food processor or blender (for the Oreo crumbs; a sturdy zip-top bag and rolling pin work too)
- Mixing bowls (one large for the filling, one medium for the crust)
- Electric mixer or stand mixer (for the smoothest filling, but you can use a strong whisk and some elbow grease if needed)
- Rubber spatula (for scraping down the bowl and smoothing the filling)
- Measuring cups and spoons (for precision—especially with peanut butter and sugar)
- Knife and cutting board (for chopping Reese’s cups)
If you don’t have a food processor, don’t worry—the zip-top bag and rolling pin method for crushing Oreos has saved me many times. I’ve made this pie using a hand mixer, and even just a wooden spoon for the filling. For the pie dish, dollar store pans work fine if you’re bringing this to a party and don’t want to worry about getting your dish back. Just be sure to let the pie chill well before slicing for the cleanest cuts. If you use a springform pan, you’ll get tall, dramatic slices (and a little extra wow factor at the table!).
Clean-up tip: If you make the crust first, you can usually use the same bowl and beaters for the filling—saves on dishes and time!
Preparation Method
-
Make the Oreo Crust:
- Place 24 Oreo cookies (about 275g) in a food processor or blender. Pulse until you have fine crumbs. (If you don’t have a processor, put cookies in a zip-top bag and crush with a rolling pin.)
- Transfer Oreo crumbs to a medium bowl. Pour in 1/2 cup (113g) melted unsalted butter. Stir until evenly combined—the mixture should look like wet sand.
- Press the mixture firmly into the bottom and up the sides of a 9-inch (23cm) pie dish. Use the bottom of a measuring cup or glass to compact the crust tightly for best results. (If the crust feels loose, pop it in the freezer for 10 minutes to set.)
-
Prepare the Peanut Butter Filling:
- In a large mixing bowl, beat 8 oz (226g) softened cream cheese with 3/4 cup (180g) creamy peanut butter until smooth and creamy. (Use an electric mixer for the silkiest texture—about 2 minutes on medium speed.)
- Add 1 cup (120g) powdered sugar and 1 teaspoon vanilla extract. Beat again until well combined and slightly fluffy, scraping down the bowl as needed.
- Gently fold in 8 oz (226g) thawed whipped topping with a rubber spatula. Take your time—fold, don’t beat, to keep the filling light and airy. The finished mixture should be smooth, fluffy, and mousse-like.
-
Assemble the Pie:
- Spoon the peanut butter filling into the prepared Oreo crust. Smooth the top with a spatula or the back of a spoon. Try to get the filling evenly distributed to the edges.
- Scatter about 8 mini Reese’s Peanut Butter Cups (chopped) evenly over the top. If you want to get fancy, arrange some halves around the edge for a “bakery” look.
- Optional: Dollop or pipe extra whipped topping along the edges, and drizzle with chocolate syrup or ganache if you’re feeling indulgent.
-
Chill and Serve:
- Cover the pie with plastic wrap or foil and refrigerate for at least 4 hours, or overnight for best results. (The chilling time is key for clean slices and melded flavors!)
- To serve, use a sharp knife dipped in warm water for the neatest slices. Wipe the knife between cuts for picture-perfect pieces.
Troubleshooting: If your crust feels crumbly, add an extra tablespoon of melted butter until it presses together. If the filling is too soft, let the pie chill longer. Don’t skimp on the chilling time—trust me, I’ve been impatient before and ended up with a gooey mess! If you’re making this on a hot day, a quick 20-minute freeze before serving makes it extra refreshing.
Personal Tip: I always make the pie a day ahead to let the flavors meld. Plus, it makes dessert time totally stress-free!
Cooking Tips & Techniques
Over the years, I’ve picked up a few tricks for making this Reese’s Peanut Butter Cup Pie recipe foolproof. Here’s what I’ve learned—sometimes the hard way!
- Chill the crust before filling: Even if you’re in a hurry, popping the crust in the freezer for 10-15 minutes helps it firm up, making it easier to spread the filling and slice later.
- Use room temperature cream cheese: Cold cream cheese can make your filling lumpy. Let it soften on the counter for about 30 minutes. If you forget, cut it into cubes and microwave on low in short bursts (just don’t melt it!).
- Fold, don’t whip, the whipped topping: Over-mixing will deflate the filling and make it dense. I learned this the hard way during my third attempt—my pie tasted fine, but the mousse texture was missing.
- Don’t skip the chill time: Four hours is the minimum for a sliceable pie, but overnight is even better. The filling sets perfectly, and the flavors blend into pure peanut butter bliss.
- Get creative with presentation: Use a piping bag for extra whipped topping or arrange Reese’s cups in a fun pattern. It’s a small touch, but it really wows guests.
- Slice with a warm knife: For the cleanest slices, dip your knife in hot water and wipe it dry before each cut. It sounds fussy, but it makes a big difference—especially for Pinterest-worthy photos!
Common mistakes? Not chilling long enough, using runny peanut butter (always stir the natural stuff!), or skipping the scraping of the bowl (pockets of unblended cream cheese are a bummer). Multitask by making the crust while the cream cheese softens. If you’re short on time, chill the assembled pie in the freezer for an hour, but don’t let it freeze solid unless you want an ice cream pie (which honestly isn’t a bad thing!). Consistency is all about patience and gentle folding—take it slow, and you’ll end up with a pie that looks and tastes like bakery magic.
Variations & Adaptations
This Reese’s Peanut Butter Cup Pie recipe is super flexible. Here are some of my favorite ways to switch things up:
- Gluten-Free Version: Swap regular Oreos for gluten-free chocolate sandwich cookies. The crust comes out just as delicious, and you’ll make everyone at the table happy.
- Dairy-Free Option: Use dairy-free cream cheese and a plant-based whipped topping (like So Delicious CocoWhip). I did this for a friend with dairy allergies, and she was thrilled!
- Crunchy Peanut Butter Swap: For extra texture, use crunchy peanut butter instead of creamy. Little peanut bits add a fun surprise in every bite.
- Chocolate Ganache Topping: Melt 1/2 cup (85g) chocolate chips with 1/4 cup (60ml) heavy cream, then cool and drizzle over the top before chilling.
- Seasonal Add-Ins: Add sliced bananas under the filling for a “chunky monkey” twist, or sprinkle in some mini marshmallows for a s’mores vibe.
- Allergen Swap: Sunflower seed butter or almond butter can replace peanut butter if there’s a peanut allergy in the house. I’ve tried it with SunButter, and it’s delicious—just a bit milder in flavor.
One of my favorite personal twists: I’ll add a layer of sliced strawberries on top before serving in the spring. The fresh fruit cuts through the richness, and it’s always a conversation starter. Don’t be afraid to make this pie your own—it’s forgiving and just as tasty, no matter how you tweak it.
Serving & Storage Suggestions
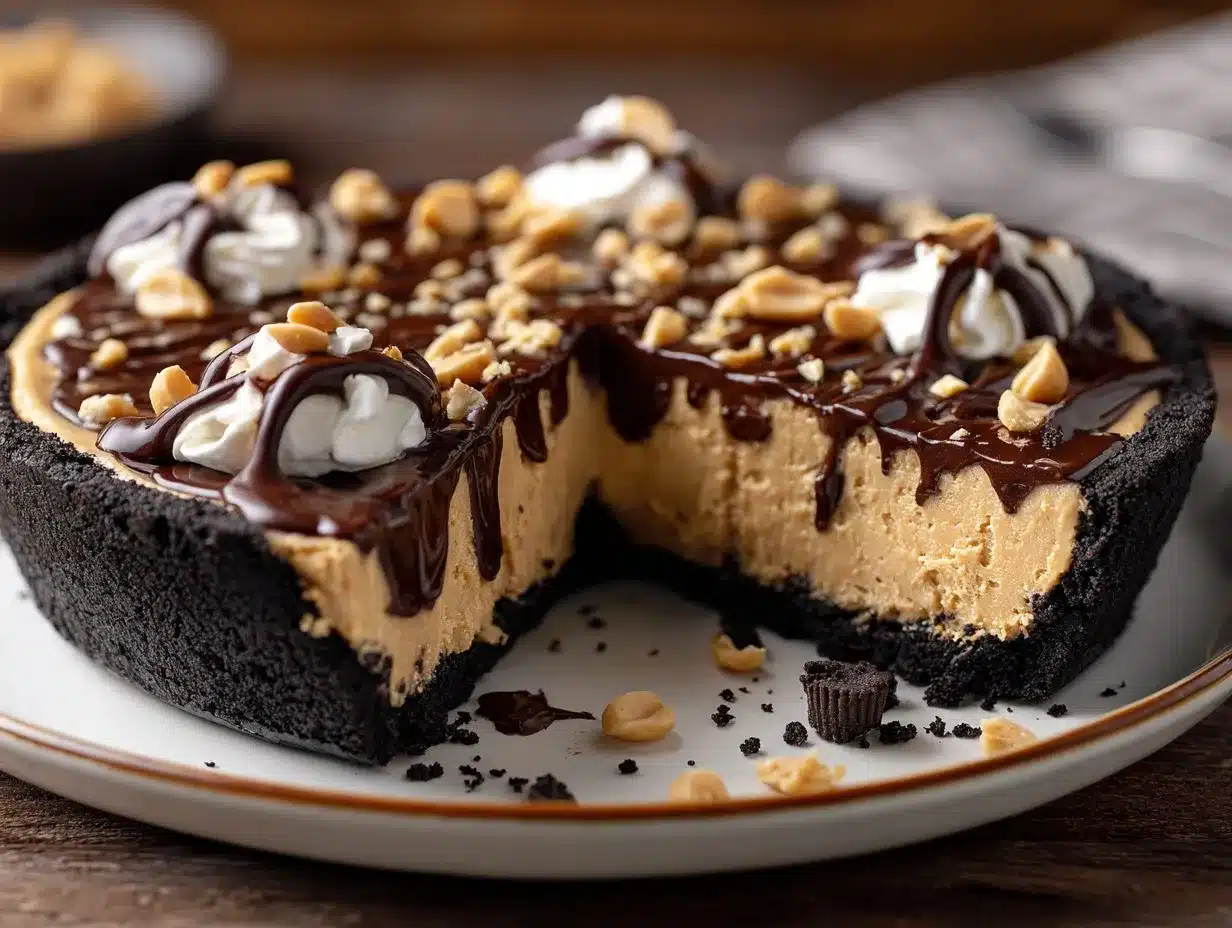
This Reese’s Peanut Butter Cup Pie is best served chilled, straight from the fridge. The filling stays creamy but slices cleanly—so satisfying! For presentation, I like to pipe or dollop extra whipped topping around the edges and sprinkle with more chopped Reese’s cups. If you’re feeling playful, add a drizzle of chocolate syrup or a few mini chocolate chips on top.
This pie pairs well with a cup of hot coffee, a cold glass of milk, or even a scoop of vanilla ice cream for true dessert lovers. If you’re serving a crowd, cut smaller slices—this pie is rich, so a little goes a long way.
To store, cover the pie tightly with plastic wrap or foil and refrigerate for up to 5 days. The flavors actually get better after a day or two as everything melds together. For longer storage, freeze individual slices wrapped in plastic and foil. Thaw overnight in the fridge before serving—this is my go-to trick for prepping ahead for special occasions. To freshen up frozen slices, add a fresh dollop of whipped topping and a new sprinkle of Reese’s cups.
Reheating isn’t needed—this pie is made to be enjoyed cold. If you’re transporting it, keep it in a cooler with ice packs. It holds up well, but on a hot day, it’s best to keep it chilled right until serving time.
Nutritional Information & Benefits
Estimated per slice (1/10th of pie): Calories: 460, Fat: 30g, Carbohydrates: 45g, Protein: 7g, Sugar: 32g. (These numbers are a ballpark—actual values may vary based on brands and substitutions.)
The main nutritional highlight here is the protein and healthy fats from the peanut butter. Peanut butter also gives you a boost of magnesium and vitamin E. Oreos and Reese’s cups are, well, more about the treat factor than nutrition—but hey, balance is key, right?
This Reese’s Peanut Butter Cup Pie can be adapted for gluten-free or dairy-free diets easily. If you need to watch out for allergens, remember this recipe contains peanuts, dairy, and wheat (unless adapted). Personally, I love that a small slice is super satisfying—it curbs my sweet tooth for the whole day! Dessert should be joyful, and this one fits the bill perfectly.
Conclusion
If you’re searching for a dessert that wows with minimal effort, this Reese’s Peanut Butter Cup Pie recipe is the answer. It’s rich, creamy, chocolatey, and packed with the peanut butter flavor we all crave. Whether you’re a no-bake newbie or a seasoned home baker, this pie is practically foolproof—and guaranteed to impress.
I love how adaptable it is: you can tweak the crust, the filling, or the toppings to suit any crowd or dietary need. For me, this pie always brings back memories of family movie nights and spontaneous celebrations. It’s comfort food at its finest, with a playful twist that never gets old.
Give it a try, and don’t be shy—add your own spin! If you make this Reese’s Peanut Butter Cup Pie with Oreo crust, leave a comment, share your photos, or let me know your favorite variation. I can’t wait to hear how it turns out for you. Happy no-baking, friends!
FAQs About Reese’s Peanut Butter Cup Pie
Can I make this Reese’s Peanut Butter Cup Pie ahead of time?
Absolutely! In fact, it’s even better if you make it a day in advance. The flavors blend beautifully, and the filling sets up for perfect slices.
Can I use homemade whipped cream instead of whipped topping?
Yes! Just whip 1 cup (240ml) of heavy cream with 2 tablespoons powdered sugar until stiff peaks form. Gently fold it into the filling as you would with store-bought whipped topping.
What if I don’t have a food processor for the Oreo crust?
No worries—you can crush Oreos in a zip-top bag using a rolling pin or even a heavy can. The texture might be a bit chunkier, but it will still taste great!
Can I freeze this pie?
Yes! Freeze whole or sliced, wrapped well, for up to 2 months. Thaw overnight in the fridge before serving, and add fresh toppings after thawing if you like.
What’s the best way to get clean slices?
Use a sharp knife dipped in hot water and wiped dry before each cut. Chill the pie thoroughly for the best results—patience pays off!
Pin This Recipe!

Reese’s Peanut Butter Cup Pie – Easy No-Bake Dessert with Oreo Crust

This no-bake Reese’s Peanut Butter Cup Pie features a creamy peanut butter filling, a crunchy Oreo crust, and plenty of chopped Reese’s cups on top. It’s a decadent, crowd-pleasing dessert that comes together quickly and requires zero oven time.
- Prep Time: 20 minutes
- Cook Time: 0 minutes
- Total Time: 4 hours 20 minutes (includes chilling time)
- Yield: 10 servings 1x
- Category: Dessert
- Cuisine: American
Ingredients
- 24 Oreo cookies (regular or double-stuff)
- 1/2 cup (1 stick) unsalted butter, melted
- 8 oz cream cheese, softened
- 3/4 cup creamy peanut butter
- 1 cup powdered sugar
- 1 teaspoon vanilla extract
- 8 oz whipped topping (like Cool Whip), thawed
- 8 mini Reese’s Peanut Butter Cups, chopped
- Extra whipped topping (optional, for garnish)
- Chocolate syrup or ganache (optional, for drizzling)
Instructions
- Place 24 Oreo cookies in a food processor or blender and pulse until fine crumbs form. (Alternatively, crush cookies in a zip-top bag with a rolling pin.)
- Transfer Oreo crumbs to a medium bowl and stir in 1/2 cup melted unsalted butter until the mixture resembles wet sand.
- Press the mixture firmly into the bottom and up the sides of a 9-inch pie dish. Use the bottom of a measuring cup or glass to compact the crust tightly. Freeze for 10 minutes to set.
- In a large mixing bowl, beat softened cream cheese with creamy peanut butter until smooth and creamy (about 2 minutes on medium speed).
- Add powdered sugar and vanilla extract. Beat again until well combined and slightly fluffy, scraping down the bowl as needed.
- Gently fold in thawed whipped topping with a rubber spatula until the mixture is smooth, fluffy, and mousse-like.
- Spoon the peanut butter filling into the prepared Oreo crust and smooth the top with a spatula.
- Scatter chopped Reese’s Peanut Butter Cups evenly over the top. Optionally, arrange some halves around the edge for decoration.
- Dollop or pipe extra whipped topping along the edges and drizzle with chocolate syrup or ganache if desired.
- Cover the pie with plastic wrap or foil and refrigerate for at least 4 hours, or overnight for best results.
- To serve, use a sharp knife dipped in warm water for clean slices, wiping the knife between cuts.
Notes
For best results, chill the pie overnight before serving. Use room temperature cream cheese for a smooth filling. If making gluten-free, substitute gluten-free sandwich cookies for the crust. For dairy-free, use dairy-free cream cheese and whipped topping. Slice with a warm knife for clean cuts. Pie can be made ahead and freezes well.
Nutrition
- Serving Size: 1 slice (1/10th of pie)
- Calories: 460
- Sugar: 32
- Sodium: 320
- Fat: 30
- Saturated Fat: 13
- Carbohydrates: 45
- Fiber: 2
- Protein: 7
Keywords: Reese's Pie, Peanut Butter Cup Pie, No-Bake Dessert, Oreo Crust, Easy Pie, Chocolate Peanut Butter, Potluck Dessert, Cream Cheese Pie, Summer Dessert, Kid-Friendly