My sister called me a liar. Not to my face, at first. She took a bite of these No-Bake Peanut Butter Dream Bars, chewed slowly, and then texted me from the other room: “These are too good to be that easy. You’re hiding something.” I had to send her a video of me making a second batch just to prove there was no oven involved, no complicated steps, no secret ingredient I was gatekeeping. She still didn’t fully believe me until she made them herself. That’s the thing about this recipe—it sounds like a cheat code, and honestly, it kind of is.
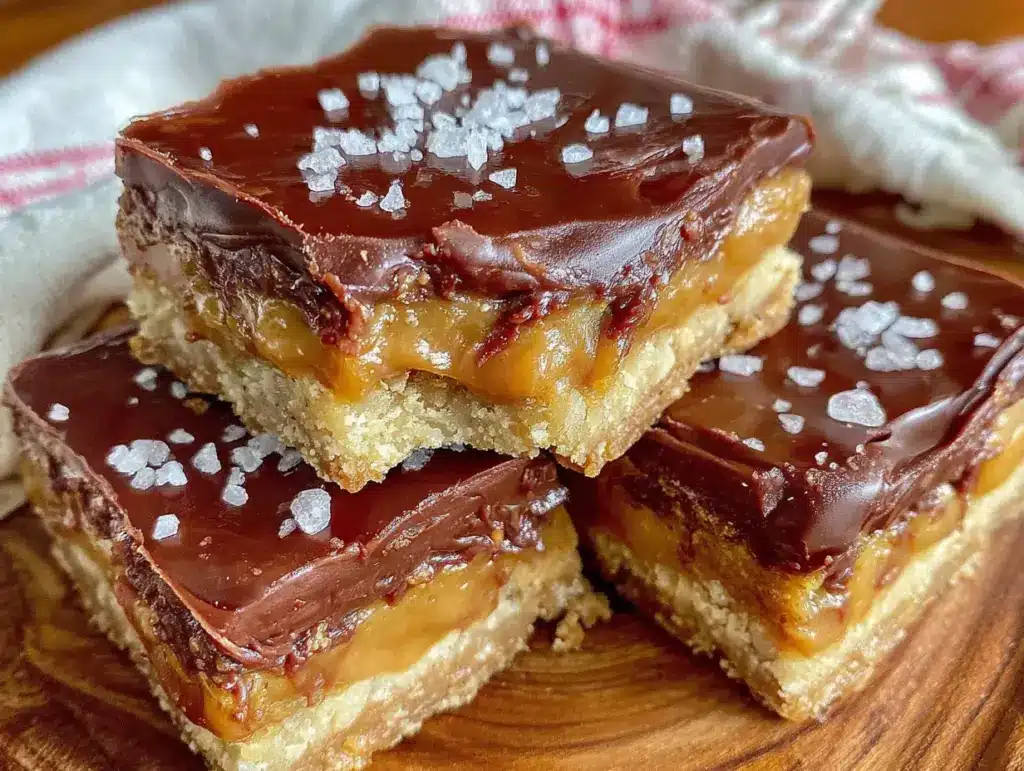
I stumbled into this combination on a Tuesday night when I needed dessert but had zero energy. The pantry was bare, the kids were cranky, and I was this close to just eating peanut butter straight from the jar with a spoon. But then I spotted a box of graham crackers hiding behind the oatmeal, and something clicked. Fifteen minutes later, I was sitting on the couch with a pan of these bars, wondering why I’d ever bothered with complicated baking. The texture is ridiculous—a buttery, crumbly crust that somehow stays together, topped with a layer of silky peanut butter filling that’s just firm enough to hold its shape but still melts on your tongue.
What got me, though, was how quiet everyone got. You know that silence? The one that means people are too busy eating to talk? That’s the sound of a recipe that works. These bars don’t need an oven, they don’t need patience, and they definitely don’t need any fancy equipment. They just need you to trust that sometimes the simplest things are the ones worth making again and again.
Why You’ll Love This Recipe
I’ve tested this recipe at least a dozen times across different kitchens, different weather conditions, and different levels of peanut butter desperation. Every single time, the result is the same: a dessert that tastes like you spent hours on it when you really didn’t. Here’s why these bars earn a permanent spot in your recipe rotation:
- Ready in 5 Minutes of Active Time : I’m not exaggerating. The hardest part is waiting for them to chill. Mix the crust, press it down, stir the filling, spread it over, and you’re done. No stand mixer required, no sifting flour, no creaming butter.
- Pantry-Friendly Ingredients : You probably have everything already. Graham crackers, peanut butter, powdered sugar, butter, and vanilla. That’s it. No trips to a specialty store, no hunting for obscure extracts.
- Perfect for Hot Days : When summer hits and turning on the oven feels like a personal attack, these bars save the day. They’re my go-to for pool parties, barbecues, and those evenings when the kitchen is already too warm.
- Crowd-Pleasing Texture : The crust stays crunchy, the filling stays creamy, and somehow neither gets soggy or falls apart. It’s the kind of dessert that disappears fast at gatherings.
- Foolproof for Beginners : If you’ve never made a no-bake dessert before, start here. There’s no risk of overmixing, no worrying about setting times, and no tricky techniques. Anyone can nail this on the first try.
What sets these bars apart from other no-bake recipes is the texture balance. Most no-bake peanut butter desserts end up either too dense or too crumbly. I spent time getting the ratio right so the crust holds together without being rock hard, and the filling stays creamy without being greasy. It’s the kind of recipe that makes you wonder why you ever bothered with complicated baking in the first place.
What Ingredients You Will Need
This recipe uses simple ingredients that work together to create something greater than the sum of their parts. Each component plays a specific role in the texture and flavor, so here’s what to grab and why it matters.
For the Crust
- 2 cups graham cracker crumbs (about 14-16 full sheets, crushed finely) — The base of the crust. I prefer Honey Maid brand for consistent texture, but any brand works. You can crush them in a food processor or seal them in a bag and go at them with a rolling pin. The finer the crumbs, the better the crust holds together.
- 1/2 cup unsalted butter, melted — This binds the crumbs and adds richness. Salted butter works too, just reduce any added salt. Let it cool slightly before mixing so it doesn’t steam the crumbs.
- 1/4 cup granulated sugar — Adds a bit of sweetness and helps the crust set. You can substitute coconut sugar for a less refined option, but the texture will be slightly grainier.
- Pinch of salt — Balances the sweetness and makes the peanut butter flavor pop. Skip this if using salted butter.
For the Peanut Butter Filling
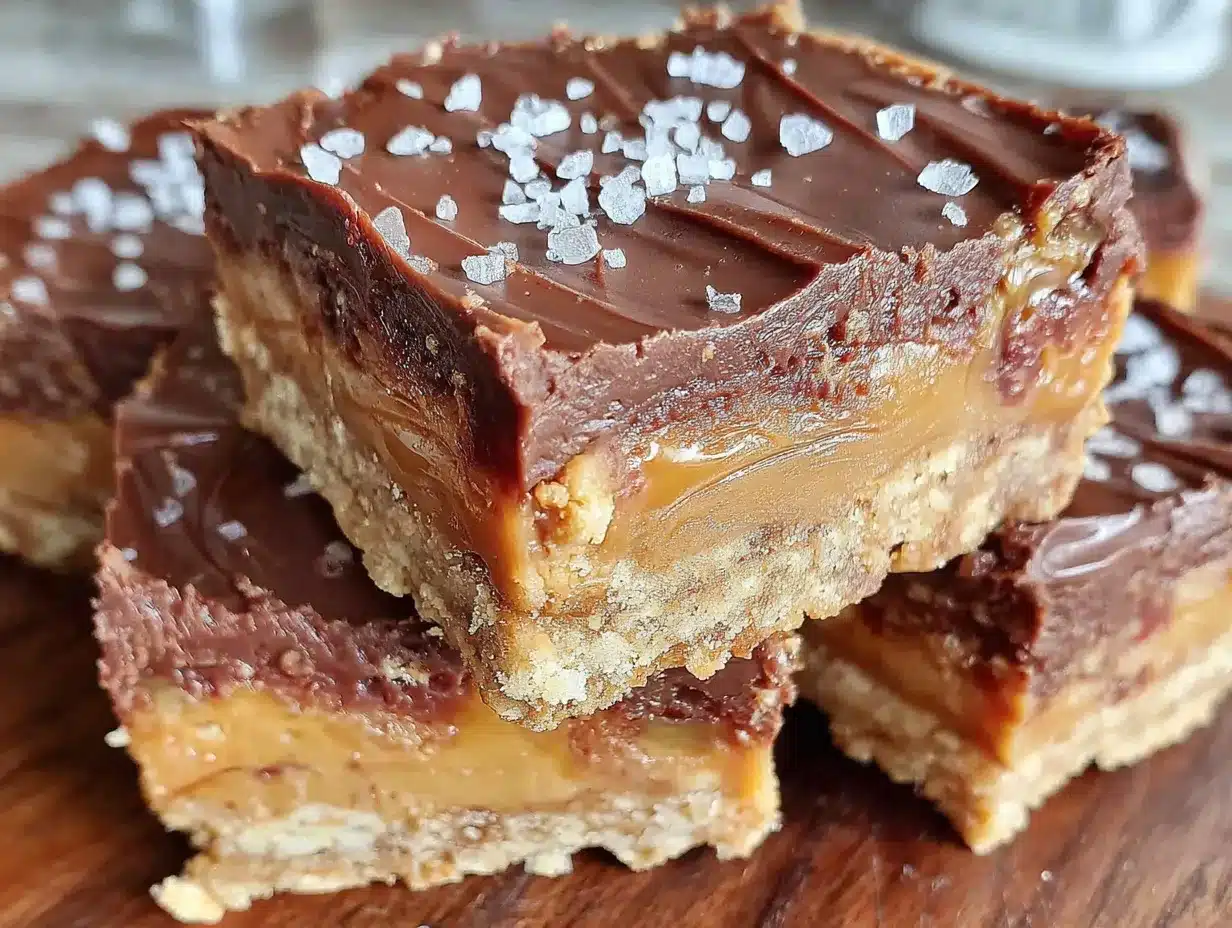
- 1 cup creamy peanut butter — The star of the show. I use Skippy Natural because it has a good balance of oil and stabilizers without being too runny. Avoid natural peanut butter that separates easily unless you stir it very well and don’t mind a slightly softer filling. Crunchy peanut butter works if you want texture, but the smooth version gives that dreamy, silky consistency.
- 8 ounces cream cheese, softened — This is the secret to the filling’s structure. It adds tanginess and helps the bars set firmly without being heavy. Let it sit on the counter for 30 minutes before starting, or microwave it in 10-second bursts until soft.
- 1 cup powdered sugar — Sweetens the filling without making it grainy. Sift it if it’s lumpy, but honestly, I’ve skipped that step plenty of times and it still worked fine.
- 1 teaspoon vanilla extract — Enhances the peanut butter flavor. Pure vanilla is better, but imitation works in a pinch.
- 2 tablespoons heavy cream or milk — Loosens the filling to a spreadable consistency. Use heavy cream for a richer result, or whole milk if that’s what you have. Even oat milk works in a pinch.
For the Topping (Optional but Recommended)
- 1/2 cup semi-sweet chocolate chips — For drizzling or melting on top. Dark chocolate is great too, it balances the sweet filling.
- 1 teaspoon coconut oil or vegetable oil — Helps the chocolate melt smoothly and sets with a nice shine.
- Flaky sea salt — A light sprinkle on top takes these from good to unforgettable. Trust me on this one.
Equipment Needed
One of the best things about this recipe is how little equipment it requires. You don’t need a stand mixer, a springform pan, or any of those specialty tools that take up cabinet space and get used once a year.
- 8×8 inch baking pan — The perfect size for these bars. A 9×9 works too, but the bars will be slightly thinner. Line it with parchment paper so you can lift the whole block out easily.
- Mixing bowls — One medium bowl for the crust, one larger bowl for the filling. Glass or stainless steel works best.
- Food processor or zip-top bag and rolling pin — For crushing graham crackers. I’ve used both methods, and honestly, the bag-and-rolling-pin approach is oddly satisfying. Just make sure the bag is well sealed or you’ll have crumbs everywhere.
- Electric hand mixer or sturdy spatula — The cream cheese and peanut butter mixture needs some muscle to get smooth. A hand mixer makes it effortless, but a strong arm and a good spatula work too.
- Rubber spatula — For spreading the filling evenly. A small offset spatula is even better if you have one.
- Measuring cups and spoons — Standard set. Nothing fancy needed.
I’ve made these bars in a rental kitchen with a flimsy spatula and a butter knife, and they turned out just fine. Don’t let missing equipment stop you. If you don’t have an 8×8 pan, use a loaf pan or even a pie dish. The shape changes, but the taste doesn’t.
Preparation Method
This is where the magic happens. Follow these steps, and you’ll have a pan of bars that looks like you spent hours on it. I’ve included all the little details I wish someone had told me the first time.
Step 1: Prepare the Pan
Line your 8×8 inch baking pan with parchment paper. Leave some overhang on two opposite sides — this creates handles that let you lift the whole block out later. If you don’t have parchment, lightly grease the pan with butter or non-stick spray. The bars will still come out, just with slightly more effort.
Step 2: Make the Crust
In a medium bowl, combine the graham cracker crumbs, granulated sugar, and salt. Pour the melted butter over the mixture and stir with a fork until every crumb is coated. It should look like wet sand that holds together when you squeeze it. If it seems dry, add another tablespoon of melted butter. If it seems greasy, add a few more crumbs. Trust your instincts here.
Press the mixture firmly into the prepared pan. Use the bottom of a measuring cup or a flat glass to really pack it down. The firmer you press, the cleaner your bars will cut later. I learned this the hard way after making a batch that crumbled everywhere because I was too gentle. Don’t be gentle. Get in there and press hard. Place the pan in the refrigerator while you make the filling.
Step 3: Make the Filling
In a large bowl, beat the softened cream cheese with an electric hand mixer until smooth and fluffy, about 1 minute. Scrape down the sides of the bowl. Add the peanut butter and beat again until fully combined. The mixture should be thick and cohesive.
Add the powdered sugar one cupful at a time, mixing on low speed to avoid a sugar cloud. Once it’s incorporated, add the vanilla extract and heavy cream. Beat on medium speed for about 30 seconds until the filling is smooth, creamy, and spreadable. If it seems too thick to spread, add another tablespoon of cream. If it seems too thin, add a little more powdered sugar.
Taste the filling. I dare you not to. This is the moment where you realize why these bars are called dream bars.
Step 4: Assemble the Bars
Remove the crust from the refrigerator. Spoon the peanut butter filling over the crust and spread it evenly with a rubber spatula. Go slowly and work from the center outward. The filling should reach all four corners without pulling up the crust. If the filling starts to stick to the spatula, lightly spray it with non-stick cooking spray.
Smooth the top as best you can. It doesn’t need to be perfect — the chocolate drizzle will hide any imperfections. But a smooth surface makes for prettier slices.
Step 5: Add the Chocolate Drizzle
In a small microwave-safe bowl, combine the chocolate chips and coconut oil. Microwave in 20-second bursts, stirring between each, until the chocolate is fully melted and smooth. This usually takes about 60 seconds total. Be careful not to overheat it, or the chocolate will seize up and turn grainy.
Using a spoon or a small piping bag, drizzle the melted chocolate over the filling. I like to do zigzag patterns across the whole pan. If you want a more polished look, spread the chocolate into a thin even layer instead. Sprinkle with flaky sea salt if using.
Step 6: Chill and Set
Place the pan in the refrigerator for at least 2 hours, but 3 is better. The bars need time to set properly. If you’re in a hurry, you can pop them in the freezer for 45 minutes, but watch them closely — they can get too hard and develop ice crystals.
Once set, use the parchment handles to lift the block out of the pan. Place it on a cutting board and use a sharp knife to slice into squares. Wipe the knife clean between cuts for neat edges. I usually get 16 small squares or 9 generous bars.
Cooking Tips & Techniques
After making these bars more times than I can count, I’ve picked up a few tricks that make the process smoother and the results better. Here’s what I wish I’d known from the start.
Room temperature cream cheese is non-negotiable. I know, I know, it’s annoying to wait. But cold cream cheese creates lumps that no amount of mixing can fix. Leave it on the counter for 30 minutes, or if you’re impatient like me, cut it into small cubes and microwave it in 10-second bursts until soft but not warm.
Don’t overmix the filling. Once the ingredients are combined, stop. Overmixing incorporates too much air, which can make the filling puffy instead of dense and creamy. You want it smooth, not fluffy.
Press the crust with a flat-bottomed glass. Your fingers work, but a glass or measuring cup gives you even pressure and a perfectly flat surface. I use the bottom of a Pyrex measuring cup, and it works like a charm.
Chill the bars before cutting. I made the mistake of cutting too early once, and the filling squished out the sides like a peanut butter explosion. Patience pays off. If the knife drags, run it under hot water, wipe it dry, then slice.
Use good quality peanut butter. This matters more than you think. Cheap peanut butter can have an oily, artificial taste that ruins the whole thing. Splurge on a brand you actually enjoy eating straight from the jar.
Variations & Adaptations
One of the reasons I keep coming back to this recipe is how versatile it is. You can change almost everything and still end up with something delicious. Here are some variations I’ve tried and loved.
Chocolate Peanut Butter Dream Bars : Swap 1/4 cup of the graham cracker crumbs with cocoa powder for a chocolate crust. The chocolate-peanut butter combination is classic for a reason. I made this version for a friend’s birthday, and she asked for the recipe before she finished her first bar.
Vegan Version : Use vegan cream cheese, dairy-free butter, and a plant-based milk in the filling. The texture is slightly softer, so chill them for an extra hour. I’ve tested this with Kite Hill cream cheese and Earth Balance butter, and it works beautifully. The filling won’t be as firm, but the taste is still incredible.
Gluten-Free Option : Use gluten-free graham crackers or crushed gluten-free cookies. I’ve used Schar brand graham-style crackers, and honestly, I couldn’t tell the difference. Just make sure to check all your labels if cross-contamination is a concern.
Nut-Free Alternative : Substitute the peanut butter with sunflower seed butter or WowButter. The flavor changes, obviously, but the texture stays the same. If using sunflower seed butter, add an extra tablespoon of powdered sugar to balance the natural bitterness.
Add-In Ideas : Fold in 1/2 cup of mini chocolate chips, crushed pretzels, or chopped peanuts before spreading the filling. I once added crushed freeze-dried strawberries for a PB&J twist, and it was a hit at a summer picnic.
Serving & Storage Suggestions
These bars are forgiving when it comes to serving, but a few details make the experience even better.
Serve chilled, not frozen. Take the bars out of the refrigerator about 10 minutes before serving. This softens them just enough to make the filling creamy without losing structure. If they’re too cold, the filling will be firm and less indulgent. If they’re too warm, they’ll fall apart.
Pair with a cold glass of milk. I know it sounds cliché, but the combination is perfect. The creamy, salty-sweet bars and the cold milk create a balance that’s hard to beat. For a grown-up version, serve with a cup of black coffee or a cold brew.
Storage in the Refrigerator : Place the bars in an airtight container with parchment paper between layers. They’ll stay fresh for up to 5 days, though they rarely last that long in my house. The crust stays crunchy, and the filling stays creamy the whole time.
Freezer Instructions : These bars freeze beautifully. Wrap individual squares tightly in plastic wrap, then place them in a freezer-safe bag. They’ll keep for up to 3 months. Thaw in the refrigerator overnight or at room temperature for about 20 minutes. I keep a stash in the freezer for unexpected guests or late-night cravings.
Flavor Development : Honestly, these bars taste even better the next day. The flavors meld together, the crust absorbs a tiny bit of moisture from the filling, and everything becomes more cohesive. If you can wait overnight, do it.
Nutritional Information & Benefits
Let’s be real — these are a treat, not a health food. But they’re made with real ingredients, and there are a few redeeming qualities worth mentioning.
| Nutrient | Per Bar (1/16 of recipe) |
|---|---|
| Calories | 245 |
| Total Fat | 16g |
| Saturated Fat | 7g |
| Carbohydrates | 22g |
| Sugar | 14g |
| Protein | 6g |
| Sodium | 185mg |
Peanut butter provides protein and healthy monounsaturated fats. It also contains vitamin E, magnesium, and potassium. Graham crackers offer quick energy from carbohydrates. The cream cheese adds calcium and a small amount of protein.
These bars are vegetarian and can easily be made gluten-free or vegan with the substitutions mentioned above. They contain peanuts, dairy, and gluten in their standard form, so keep that in mind for allergies.
I’m not here to pretend these are health food. But if you’re going to have dessert, having one that’s made with real ingredients and provides a bit of protein isn’t the worst choice. Plus, they’re portion-controlled — at least if you have the willpower to stop at one.
Conclusion
These No-Bake Peanut Butter Dream Bars are the kind of recipe that makes you look like a hero with almost no effort. They’re the dessert you bring to a potluck when you forgot you were supposed to bring something. They’re the treat you make on a Tuesday night just because you deserve it. They’re the recipe you text to your friends with the caption “You need this in your life.”
What I love most about them is how reliable they are. No matter how chaotic my day has been, I know I can throw these together and end up with something that makes people happy. The crust is always crunchy, the filling is always creamy, and the chocolate drizzle always makes it look like I tried harder than I did.
I’d love to hear how these turn out for you. Did you add anything fun to the filling? Did you try a different crust? Drop a comment below and let me know. And if you’re looking for other easy desserts that don’t require an oven, check out these no-bake strawberry cheesecake cups or these no-bake Oreo cheesecake jars — they’re just as simple and just as satisfying.
Go ahead, make a batch. Your future self will thank you.
Frequently Asked Questions
Can I use natural peanut butter for this recipe?
You can, but the texture will be softer and slightly oilier. Natural peanut butter that separates tends to make the filling less stable. If you use it, stir it very well before measuring, and expect the bars to be a bit softer. Chill them for an extra hour to help them set.
How long do these bars need to chill?
At least 2 hours in the refrigerator, but 3 is better for clean slices. If you’re in a hurry, 45 minutes in the freezer works, but watch them closely so they don’t freeze solid. The longer they chill, the cleaner the cuts.
Can I double this recipe?
Absolutely. Use a 9×13 inch pan and double all the ingredients. The chilling time stays the same. This is perfect for parties or when you know a single batch won’t last long. I’ve made a double batch for family gatherings, and it disappears just as fast.
Why did my crust fall apart?
Two common reasons: not enough butter, or not pressing firmly enough. The mixture should look like wet sand and hold together when squeezed. Press it down with a flat-bottomed glass until it’s compact and even. If it still falls apart, add another tablespoon of melted butter next time.
Can I skip the chocolate drizzle?
You can, but you’ll miss out on the best part. The chocolate adds a counterbalance to the sweet, salty peanut butter filling. If you don’t have chocolate chips, try drizzling with melted caramel or just sprinkle extra flaky salt on top. Something on top makes the bars look finished.
Pin This Recipe!
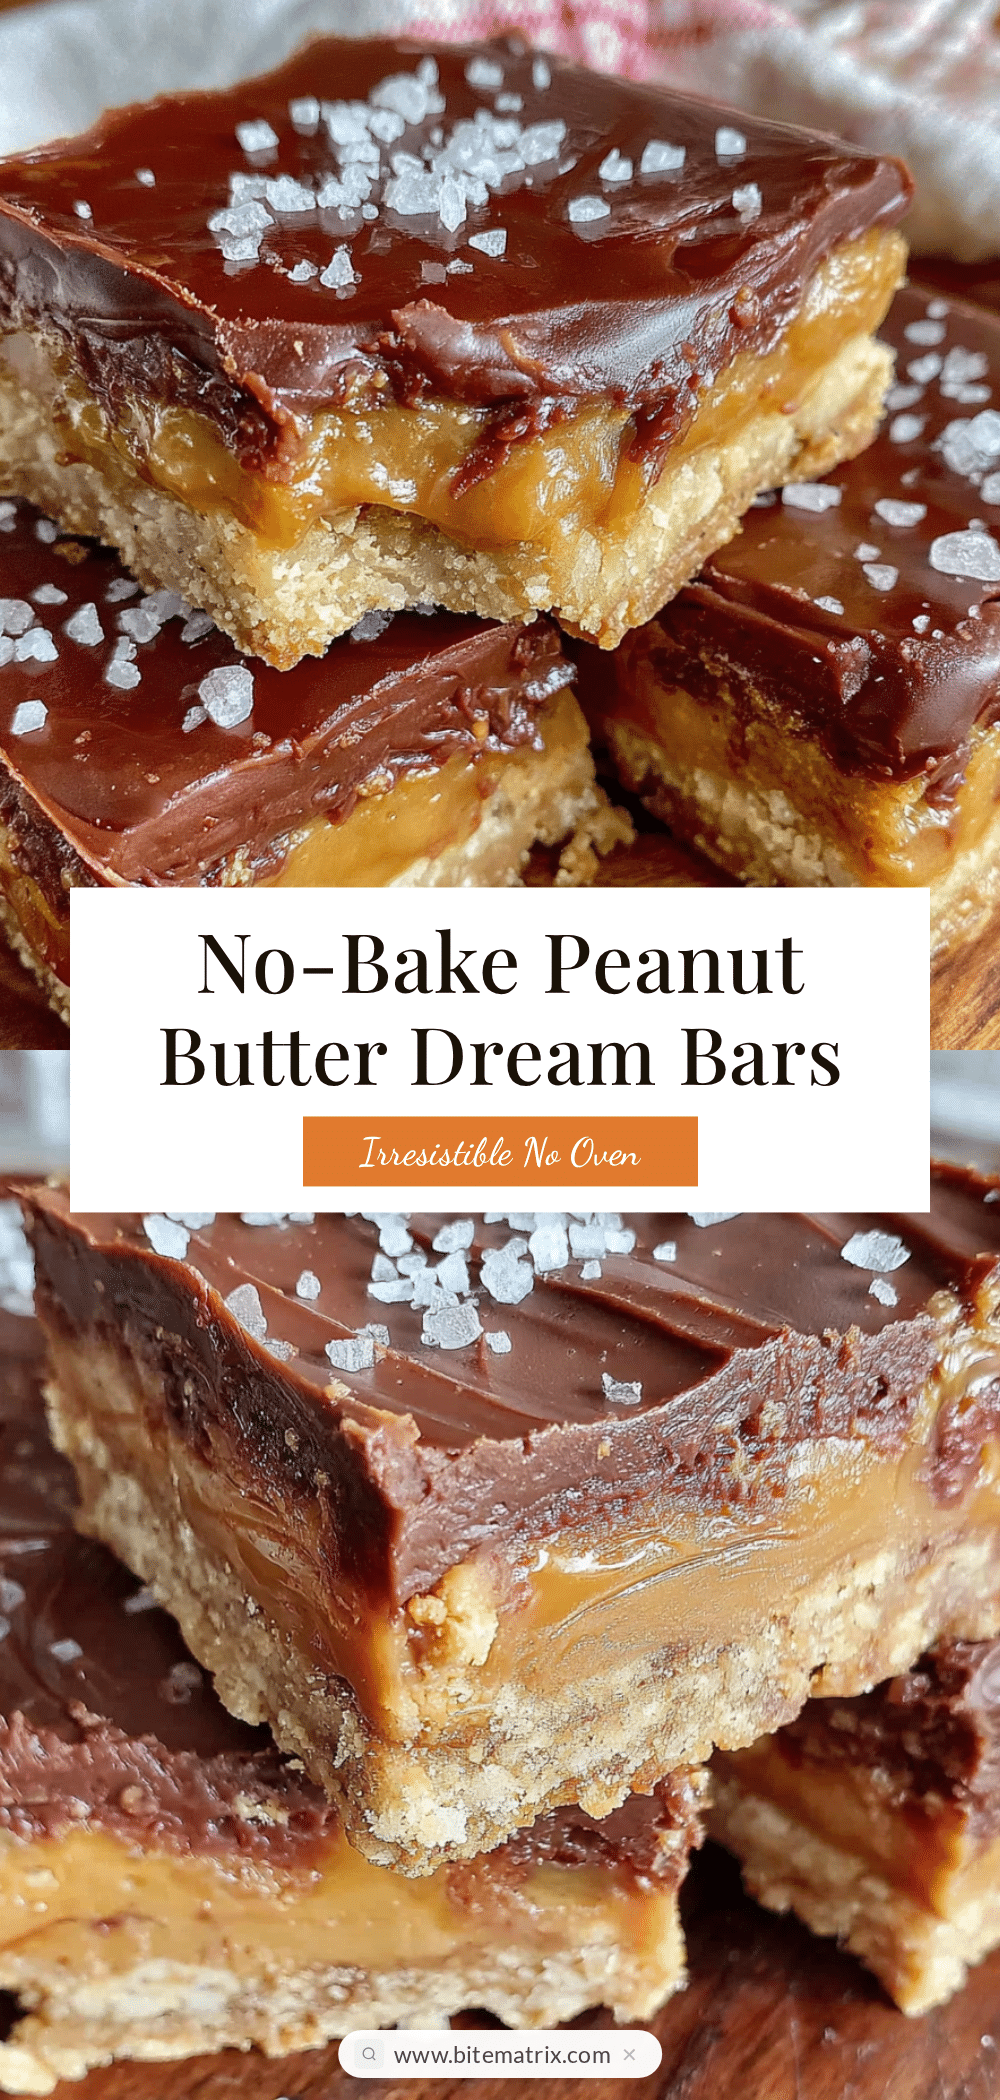
Easy No-Bake Peanut Butter Dream Bars: Best 5-Minute Dessert

These no-bake peanut butter dream bars are a quick and easy dessert with a buttery graham cracker crust, creamy peanut butter filling, and a chocolate drizzle. Ready in just 5 minutes of active time, they’re perfect for hot days, potlucks, or any time you need a crowd-pleasing treat.
- Prep Time: 5 minutes
- Cook Time: 0 minutes
- Total Time: 2 hours 5 minutes (includes chilling)
- Yield: 16 bars 1x
- Category: Dessert
- Cuisine: American
Ingredients
- 2 cups graham cracker crumbs (about 14–16 full sheets, crushed finely)
- 1/2 cup unsalted butter, melted
- 1/4 cup granulated sugar
- Pinch of salt
- 1 cup creamy peanut butter
- 8 ounces cream cheese, softened
- 1 cup powdered sugar
- 1 teaspoon vanilla extract
- 2 tablespoons heavy cream or milk
- 1/2 cup semi-sweet chocolate chips
- 1 teaspoon coconut oil or vegetable oil
- Flaky sea salt (optional)
Instructions
- Line an 8×8 inch baking pan with parchment paper, leaving overhang on two opposite sides.
- In a medium bowl, combine graham cracker crumbs, granulated sugar, and salt. Pour in melted butter and stir until every crumb is coated and the mixture looks like wet sand.
- Press the crust mixture firmly into the prepared pan using the bottom of a measuring cup or flat glass. Refrigerate while making the filling.
- In a large bowl, beat softened cream cheese with an electric hand mixer until smooth and fluffy, about 1 minute. Add peanut butter and beat until fully combined.
- Add powdered sugar one cup at a time, mixing on low speed. Add vanilla extract and heavy cream, then beat on medium speed for about 30 seconds until smooth and spreadable.
- Remove crust from refrigerator. Spoon peanut butter filling over crust and spread evenly with a rubber spatula.
- In a small microwave-safe bowl, combine chocolate chips and coconut oil. Microwave in 20-second bursts, stirring between each, until melted and smooth.
- Drizzle melted chocolate over the filling in a zigzag pattern. Sprinkle with flaky sea salt if desired.
- Refrigerate for at least 2 hours (3 hours is better) until set. Use parchment handles to lift the block out, then slice into squares with a sharp knife.
Notes
Room temperature cream cheese is essential for a smooth filling. Press the crust firmly to prevent crumbling. Chill bars before cutting for clean slices. Bars taste even better the next day. For a vegan version, use vegan cream cheese, dairy-free butter, and plant-based milk. For gluten-free, use gluten-free graham crackers.
Nutrition
- Serving Size: 1 bar (1/16 of recip
- Calories: 245
- Sugar: 14
- Sodium: 185
- Fat: 16
- Saturated Fat: 7
- Carbohydrates: 22
- Fiber: 1
- Protein: 6
Keywords: no-bake, peanut butter, dream bars, easy dessert, 5-minute dessert, graham cracker crust, chocolate drizzle